
It’s no news that vinyl is a popular decorating choice. Why not? It’s sleek, has beautiful patterns, and it lasts long. But the problem is that it can be quite tricky to cut. Thankfully, this problem isn’t much of a problem today.
You can now cut vinyl with a vinyl cutter. With this machine, you can improve your decorating game and save money on hiring a pro. However, it’s important to first understand how this machine works. Hence, the reason for this guide.
Whether you’re an expert or a beginner, this article will teach you how to use a vinyl cutter machine to create amazing decorative patterns.
Learning how to use a vinyl cutter is pretty straightforward, but first, let’s see what vinyl cutting is all about.
Table of contents
What is Vinyl Cutting?
Vinyl cutting is a process that uses a computer-controlled machine to accurately cut out intricate designs from thin sheets of vinyl. Basically, the user gives a design to the computer, then the computer sends the same image to the vinyl cutter which then cuts out the image with precision.
With vinyl cutting, you can create amazing designs such as decals, custom designs for t-shirts, painting stencils, logos, and professional signposts. And thanks to the self-adhesive nature of vinyl, the cut-out pattern will be ready for immediate use.
Let’s see what you can create with a vinyl cutter.
What You Can You Make With a Vinyl Cutter
When you learn how to use a vinyl cutter, there’s really no limit to the amazing patterns you can create. With a vinyl cutter, it doesn’t matter if you’re an expert designer or just an enthusiastic beginner.
With vinyl cutting, you can create amazing beginner-friendly projects like car stickers, DIY wall decals, labels, and stencils. You can take things up a notch by creating heat-transfer vinyl designs, 3D vinyl art, multi-layered prints, window decals, and complex signages.
Once you know how to use a vinyl cutter, the only limit is your imagination. But to get started, you’ll need a few materials.
What You Need For Vinyl Cutting
Vinyl cutting needs a lot of tools and materials that include the following:
1. Vinyl Cutter: This machine is responsible for precisely cutting out digital designs on vinyl. There are pretty pricey vinyl cutters in the market, but with VEVOR vinyl cutters, you can’t go wrong.
2. Cutting Blades: Standard cutting blades work well for most materials, but if you’re working on something thicker, then you need stronger blades.
3. Vinyl: This is your primary material for creativity. Vinyl comes in different colors, textures, and finishes which you can explore either as a standalone or mixed.
4. Computer: You need a computer to install your vinyl cutter’s software, which you’ll use to send designs to the vinyl cutter for precision cutting.
5. Vector Design Software: This computer software allows you to create and edit designs specifically for vinyl cutting.
6. Cutting Mat/Space: This adhesive mat firmly holds your vinyl in place during cutting and also protects your machine’s blade.
7. Squeegees: These help to smoothen out vinyl onto your work surface. They help with vinyl adhesion and installation.
8. Weeding Tools: After cutting your design, you’ll need to remove the excess vinyl around the work surface. That’s where weeding tools, like tweezers, scalpels, spatulas, and hooks come in.
9. Application Tape: This is a temporary adhesive tape that allows you to easily transfer your cut vinyl design from its backing sheet to the final application surface.
There are other tools that can be used during vinyl cutting. But most of them are for advanced projects. For instance, a heat press will be useful for heat-transfer vinyl to t-shirts, while burnishing tools would help improve adhesion on troublesome surfaces.
Choosing the right vinyl cutter depends on your skill level, your budget, and your project. One great option that meets these parameters is the VEVOR vinyl cutter.
VEVOR offers a variety of high-quality and affordable vinyl cutters that can serve both the beginner and the expert. The cutters come with their own unique software that is easy to install and use. What’s more is that VEVOR vinyl cutters are designed to last long, and you can always get help when necessary.

Here’s a video that will show you how to install VEVOR Vinyl Cutter:
Now, let’s dive into how to use a vinyl cutter.
How To Use a Vinyl Cutting Machine In 5 Steps
Using a vinyl cutting machine is a straightforward process. Here’s what you need to know:
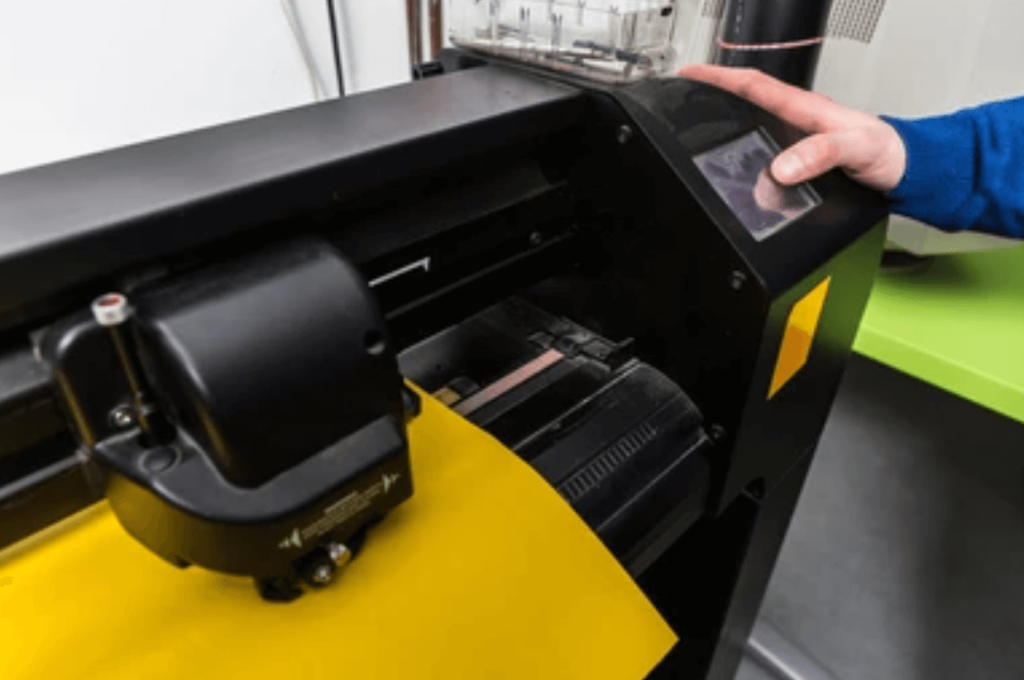
Step 1: Load the vinyl
To get started, first, you need to spread out a section of vinyl and make sure it is smooth. Then, feed it under the pinch rollers of your vinyl cutter and gently pull it through the rollers until it feels firm. During this process, make sure that the vinyl is correctly aligned to the edges of the machine’s rollers. After that, feed the vinyl through the rollers so that it can be held in place during cutting. You can use the clamps provided to secure the vinyl in place.
Once you’ve placed your vinyl correctly, it’s time to install the software.
Step 2: Install the software
Installing vinyl software is a simple process that can be done using either an installation disc or a USB stick. To get started, plug the installation USB stick into your PC and open the folder containing the software. Then, open the executable program and follow the prompts. You should be done in just a few minutes.
Fun fact: VEVOR vinyl cutters come with their own software, which is easy to install and use. Once the software is installed, you can export your designs to it for direct print/cutting.
Step 3: Find and export image/design
To find and export your image/design to the vinyl cutter software, you first need to run the software on your PC. Once the software is running, open the file option and click on “open”. This would show you a list of compatible vector designs (usually .svg) on your PC that you can export to cut.
If you don’t have any personal design, you can check out free vector designs online. Pick one, make your adjustments, and save it in a compatible format (.svg, .dxf, etc). Then you can export it to the vinyl cutter.
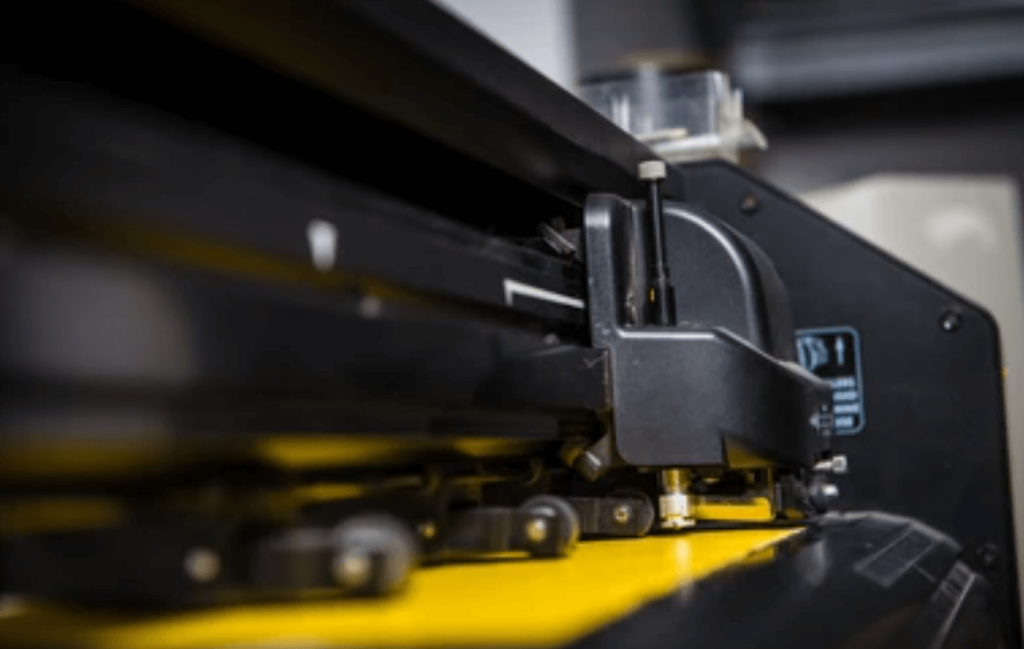
Step 4: Set up your vinyl cutting machine
Before sending your design to the vinyl cutter, it is important to set it up and perform a trial cut. To do this, you should check the blade’s cutting depth and pressure. The thickness of the vinyl usually determines these settings.
You can set the blade by following the instructions in the vinyl cutter’s manual. Locate the blade adjustment knobs and make careful adjustments based on the manual. It’s important to set the blade to suit the thickness of the vinyl. If either the depth or pressure is incorrect, you may end up with incomplete cuts or a damaged backing sheet.
Similarly, the cutting speed and force should be set based on the vinyl material. Use your machine manual to guide you in adjusting the cutting speed and force. But a general rule is that for simple designs on light vinyl, a faster speed with low depth will work best. However, for thicker vinyl, higher cutting force and blade pressure are required.
Some vinyl cutters require periodic calibration to maintain precision in cutting. To calibrate your vinyl cutter, use the calibration tests available in the vinyl cutting software and adjust the cutter based on the result.
Once you are satisfied with your settings, you can proceed to cut your design.
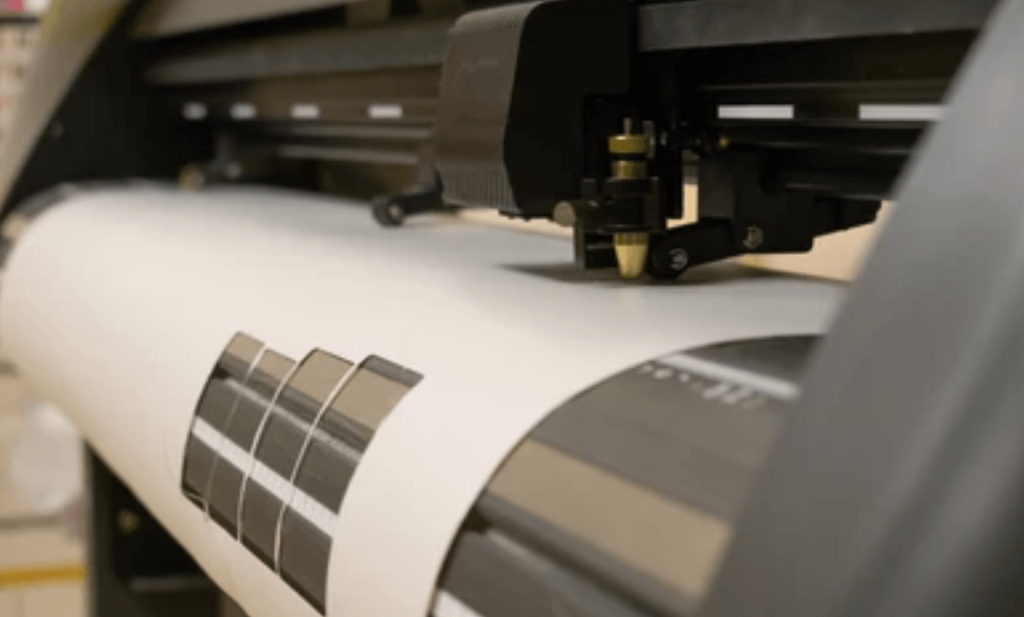
Step 5: Cut the vinyl
After you have loaded your design, click on the “start” or “cut” button on your PC to begin the cutting process. The machine will slowly cut the vinyl by following the digital pattern imprinted on your design.
Remember to always prioritize safety and avoid touching or interfering with the machine’s moving parts while it’s cutting. Be aware of jam errors and make sure to turn off the machine before attempting to correct anything.
Once the cutting is complete, wait for the machine to stop completely before unloading the cutting mat. Inspect the cutout for any errors and repeat the process if necessary.
Advanced Tips for Professional-Quality Results
To get better results when using a vinyl cutter, here are some things to note:
- Invest in quality materials, especially the blades; you’ll have cleaner and more precise results.
- Experiment with different calibrations so that you can master your cutter quickly
- When using heat transfer for vinyl, remember to mirror your design in the software before cutting so that it will appear correct on the final product.
- When you notice errors in the cutout, use your weeding tools to refine the edges instead of making another cutout.
As always, practice makes perfect. The more you practice different designs with your vinyl cutter, the better you’ll become at producing expert results.
Key Takeaways
- Vinyl cutting is a great way to explore your creative side. You can make amazing cutout designs and decals for personal use or even start a business out of it.
- What’s more, that vinyl cutting is actually really easy to do. Just think of it as using a special printer to “print” a document/design.
- To cut vinyl, you simply need to load the vinyl to the cutter, install the software, export your design, set up your vinyl cutter, and let it cut.
FAQS About How To Use a Vinyl Cutter
1. How long does it take to use a vinyl cutter?
Using a vinyl cutter depends on the complexity of your design. Simple designs can be cut out in a few seconds, while complex designs can take hours.
2. What is the best use of a vinyl cutter?
Vinyl cutters are great for a lot of things; decals, signages, heat transfers, stickers, and the like. There’s really no “best use” for a vinyl cutter
3. Can I cut vinyl without a vinyl cutting machine?
Yes, you can cut vinyl without a vinyl cutter. You can use a pair of scissors, but it’ll be really stressful and most likely inaccurate
4. Can a vinyl cutter cut wood?
Yes, vinyl cutters can cut vinyl, cardstock, and wood. So long as the blade is strong enough and the wood isn’t so thick, a vinyl cutter can cut it.


