| Difficulty Level | Estimated Cost | Duration |
|---|---|---|
| 4 out of 10 | $400 – 500 | 1 day |
The video features three patriotic DIY projects suitable for 4th of July or Memorial Day celebrations. The first project showcases a vinyl cutting machine sent by VEVOR, with simple instructions and a coupon code provided. The second project involves distressing a truck sign and adding wooden letters. The third project includes painting a wooden sign and distressing it with chalk paint and a half-bell decoration.
Introduction to the Vinyl Cutting Machine
The video showcases three patriotic DIY projects for the 4th of July, featuring the use of this vinyl cutting machine.
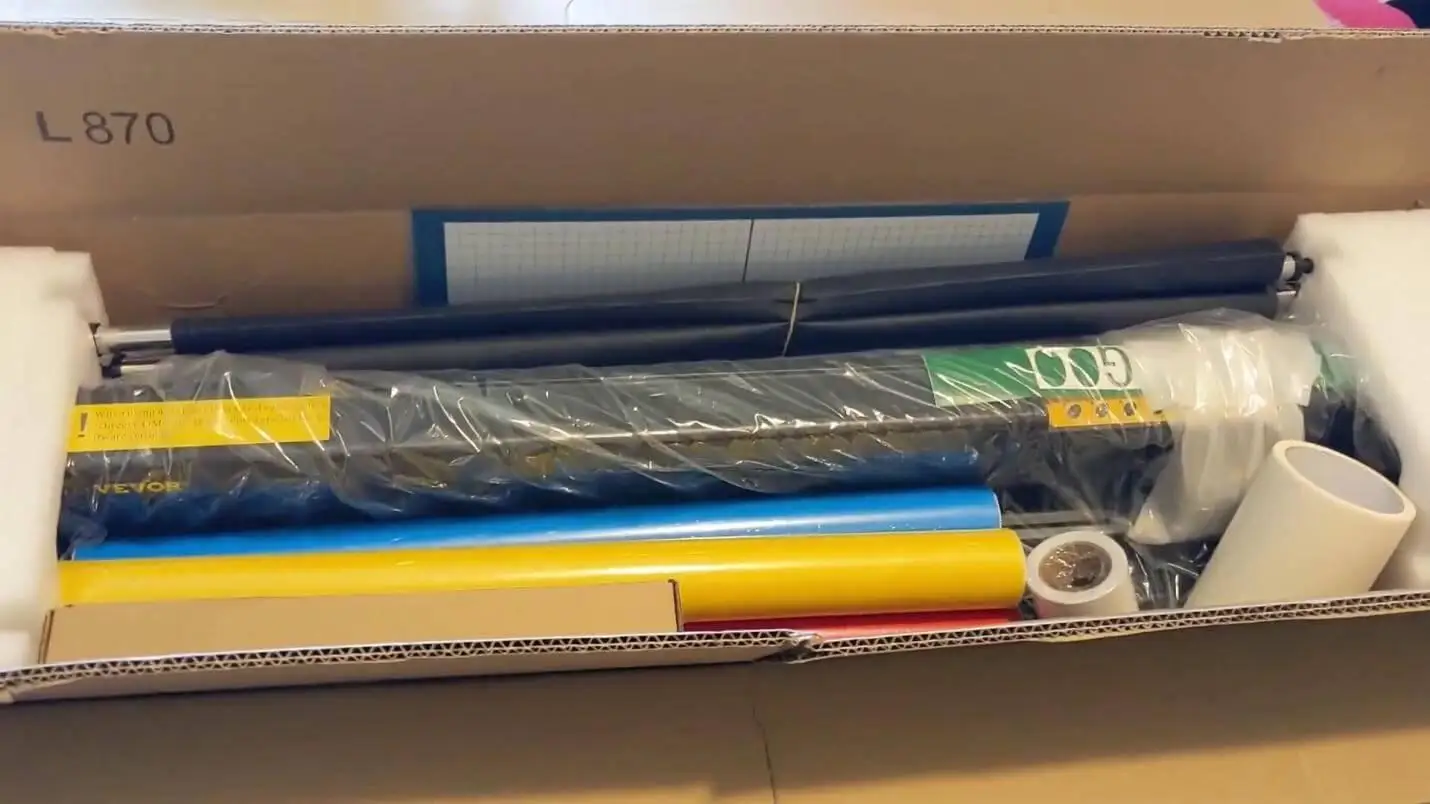
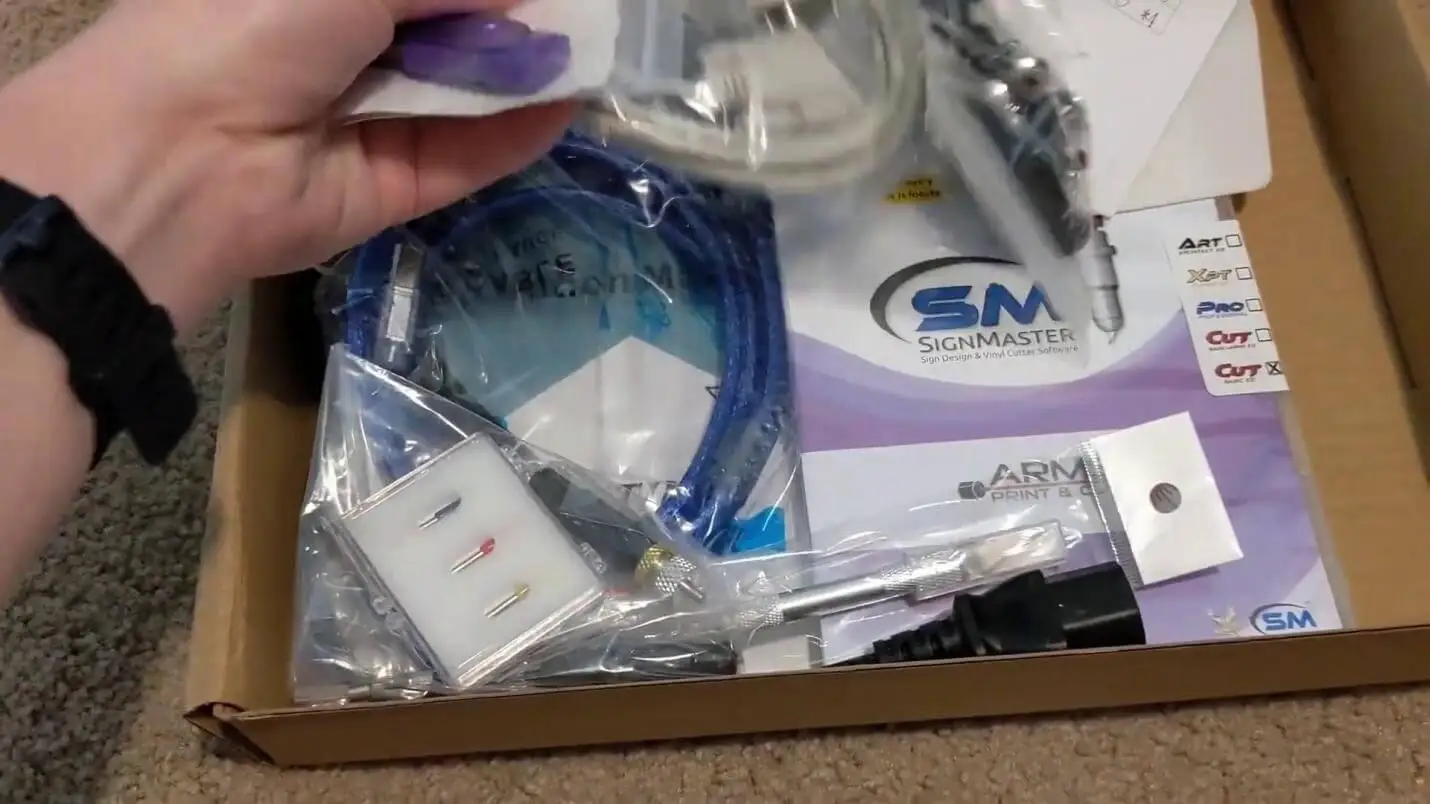
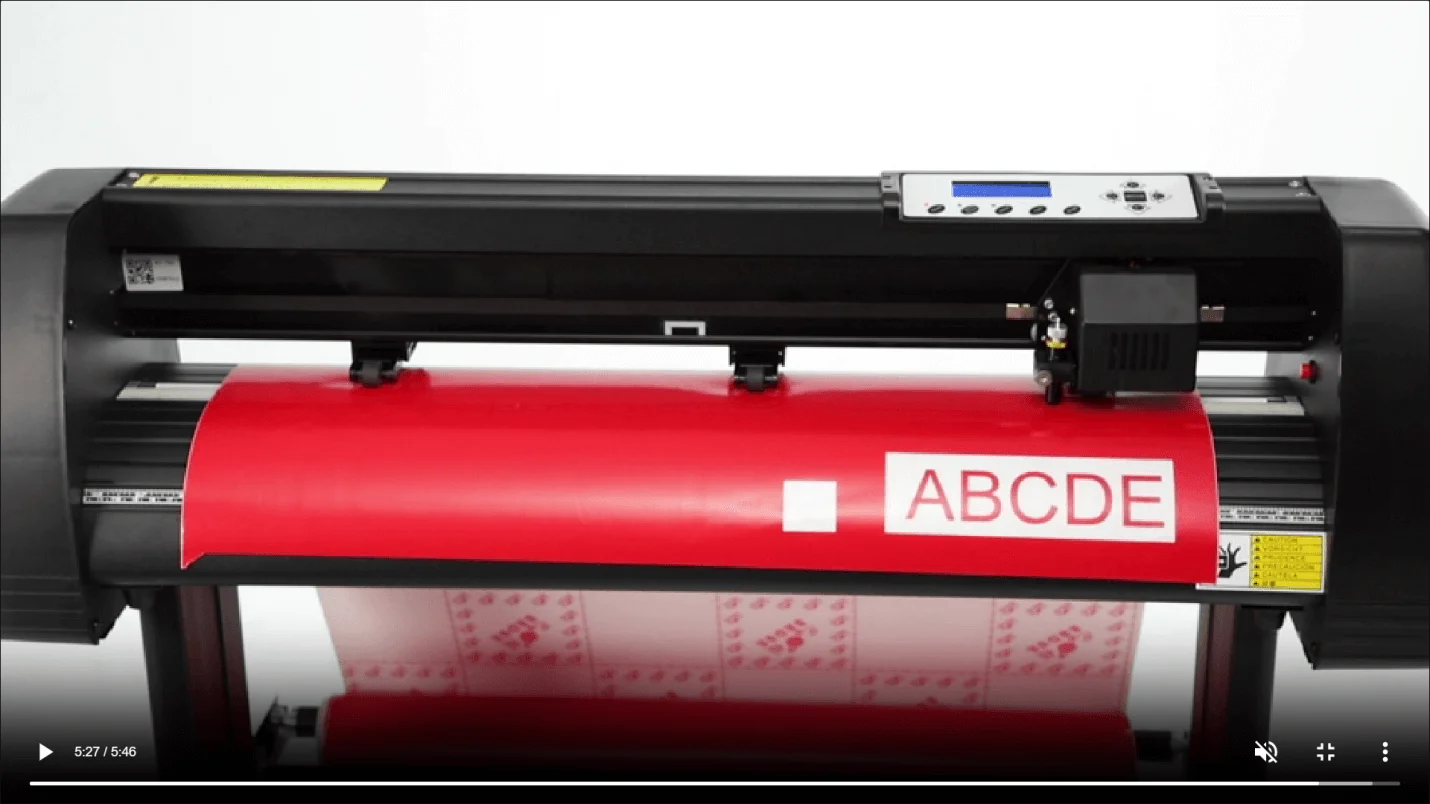
This vinyl cutting machine comes with a variety of supplies, including a cutting mat, different colors of vinyl, and additional materials. It also includes three blades suitable for cutting various materials. The machine’s functionality is user-friendly, as the cutting part fits right on top of the stand, making it convenient to use.
The machine’s functionality is user-friendly, as the cutting part fits right on top of the stand, making it convenient to use. Additionally, it comes with the Sign Master design program, which allows users to create their own designs for cutting. Here are the key features and included supplies:
- Cutting Mat: The machine includes a cutting mat that provides a stable surface for the cutting process, ensuring precise and accurate cuts.
- Different Colors of Vinyl: The package contains a range of vinyl colors, allowing users to create vibrant and colorful designs for their projects.
- Additional Materials: Along with vinyl, the machine also includes various other materials suitable for crafting, giving users a wide range of options for their creative endeavors.
- Blades: The vinyl cutting machine comes with three blades that can be used to cut different types of materials, making it versatile for various crafting purposes.
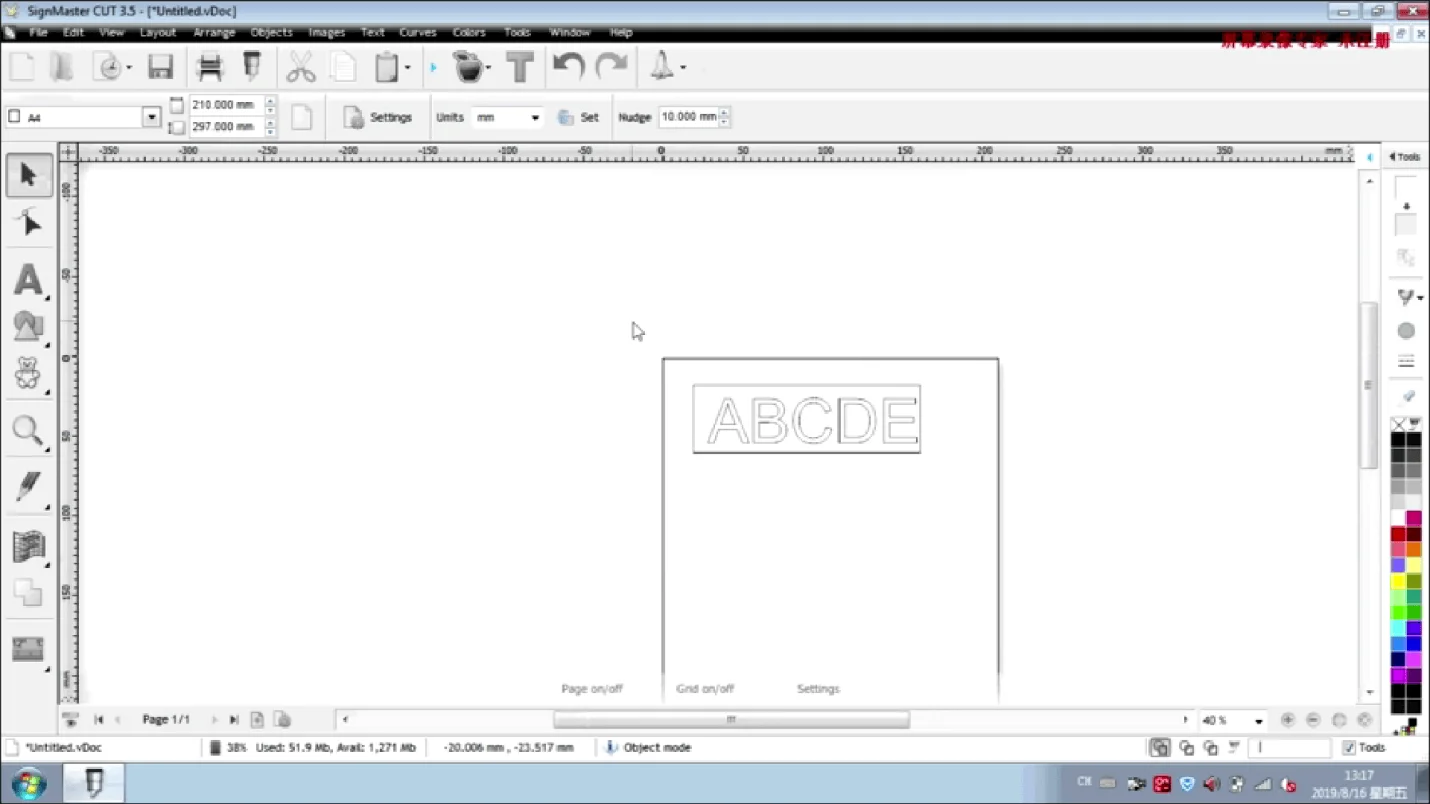
- Sign Master Design Program: The machine is accompanied by the Sign Master design program, which enables users to create their own unique designs for cutting.
- Removable Pole: The machine features a removable pole that allows users to feed vinyl squares or rolls easily, making it convenient for both small and large projects.
Please note that specific instructions may vary depending on the model of the vinyl cutting machine you have. Always refer to the user manual that comes with your machine for precise setup steps. Here’s a general guide to setting up a vinyl cutting machine:
1. Unbox and Inspect
Carefully unbox the machine and inspect all the contents to ensure that everything is included and undamaged.
2. Assemble the Stand (if applicable)
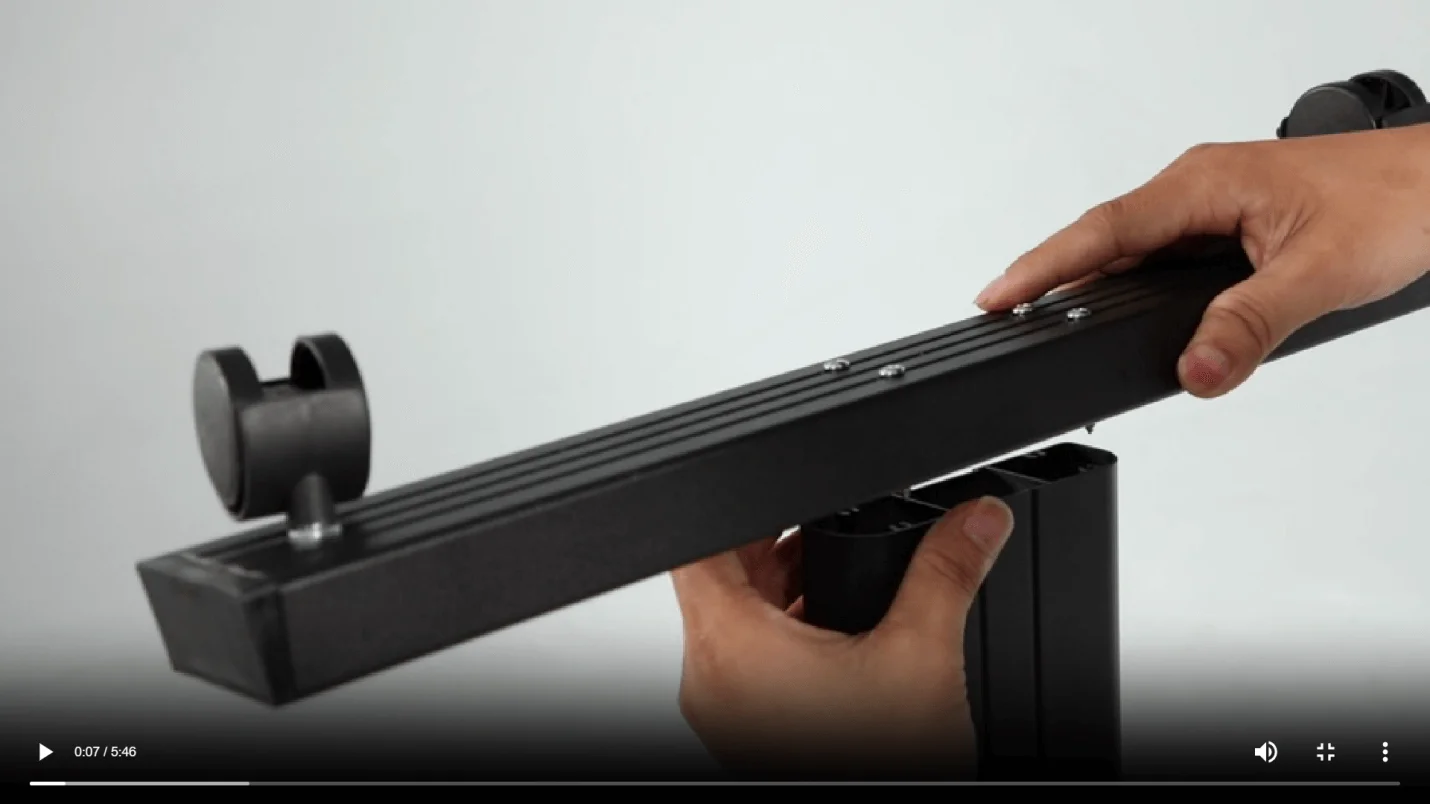
If your vinyl cutting machine comes with a stand, follow the instructions to assemble it properly. The stand provides a stable base for the machine.
3. Install the Cutting Blade
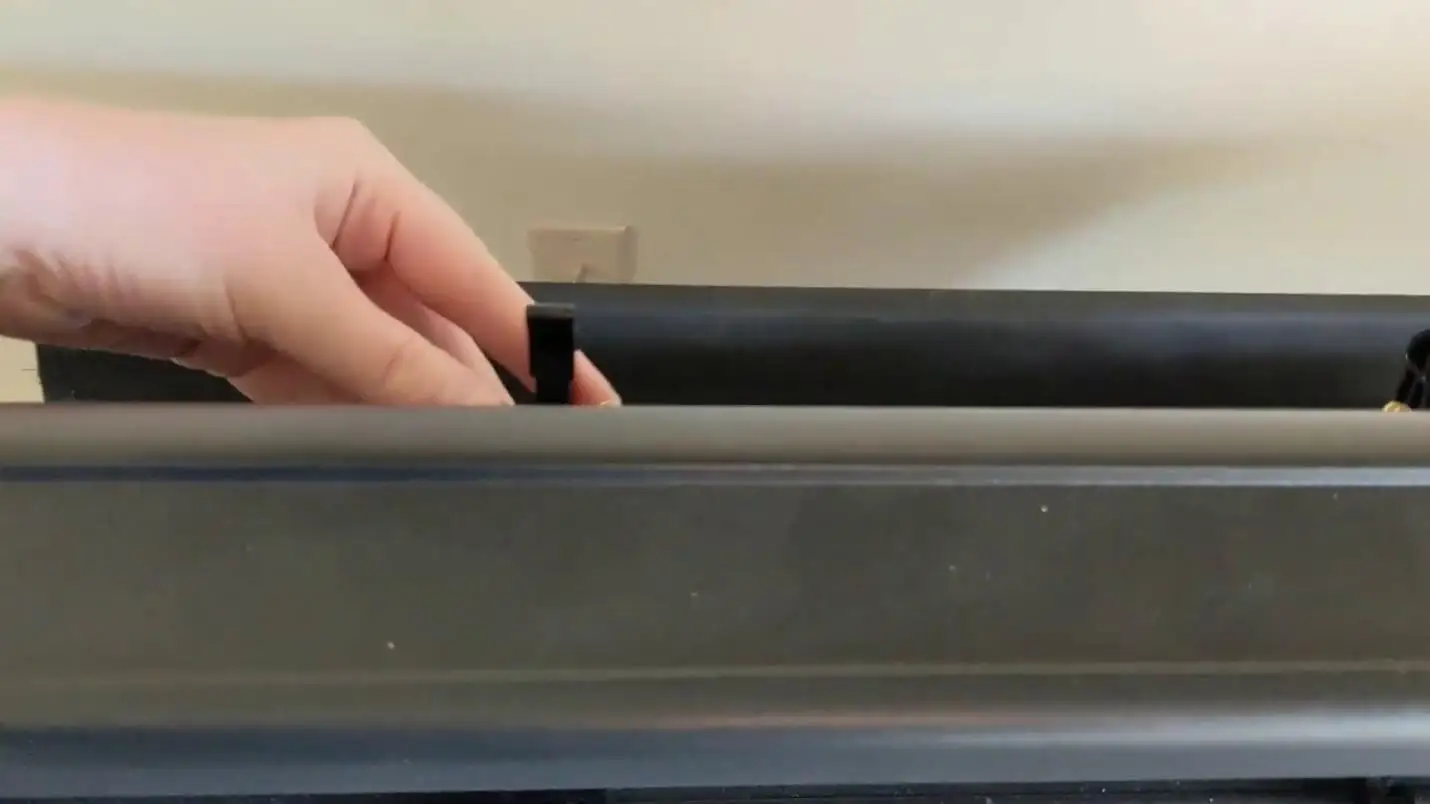
Insert the cutting blade into the blade holder. Make sure it is securely locked in place.
4. Install the Cutting Mat

Place the cutting mat on the machine’s cutting surface. The mat provides a stable platform for placing the vinyl material.
5. Load the Vinyl Material
Place the vinyl material on the cutting mat and load it into the machine. Ensure that the material is properly aligned and secured.
6. Adjust Cutting Settings
Using the machine’s controls or the software on your computer, adjust the cutting settings, including blade depth and cutting speed, based on the type and thickness of the vinyl material.
8. Load Design and Start Cutting
Import or create your design using the software and send the cutting instructions to the machine. The machine will then begin cutting the design on the vinyl material.
DIY 1 – Patriotic Sign with Vinyl Design
In this video, the content creator shares three patriotic DIY projects perfect for the 4th of July or Memorial Day. The first DIY project involves creating a patriotic sign with a vinyl design using the VEVOR Vinyl Cutting Machine.
Materials needed for the project
1. VEVOR Vinyl Cutting Machine (the one mentioned in the video)
2. Cutting mat
3. Different colors of vinyl (included with the vinyl cutting machine)
4. Other materials provided with the vinyl cutting machine
5. Blades (included with the vinyl cutting machine)
6. Dollar Tree sign (the base of the project)
7. Paint (blue and white for the background)
8. Paintbrushes
9. Sandpaper (for distressing)
10. Painter’s tape (for taping off sections of the sign)
11. Brown craft paper (optional for finishing the back of the sign)
12. Hot glue gun and glue sticks
13. Burlap bow or materials to create a bow (optional)
14. Cricut or other cutting machine (for other projects mentioned)
15. Contact paper (for making stencils)
16. Clear contact paper (for transfer tape)
17. Truffle-colored Waverly chalk paint (for distressing the sign frame)
18. Gray paint (for distressing the letters)
19. Pencil (for tracing the Liberty Bell crack)
20. Dremel (for creating a realistic crack on the Liberty Bell)
21. Fabric paint (for lettering, though it bled in the video)
22. Cashew-colored Waverly chalk paint (for distressing)
Please note that some materials used in the video may be optional or can be substituted with similar alternatives based on personal preferences and availability. It’s always a good idea to watch the video carefully to understand the specific steps and materials.
Steps in Making a Patriotic Sign with a Vinyl Design
Based on the provided context, here are the steps to make a patriotic sign with a vinyl design using a vinyl cutting machine:
Step 1: Preparing the Base of the Sign
● Find a suitable base for the sign, such as a wooden plaque or sign from Dollar Tree.
● Optionally, flip the sign over to use the backside for a smoother surface, or add brown craft paper to the back for a polished look.
● Prepare the surface by removing any excess paper or debris.
Step 2: Painting the Sign
● Use painter’s tape to create a clean line in the middle of the sign.
● Paint one half of the sign blue and the other half white using acrylic or chalk paint.
● Allow the paint to dry completely.
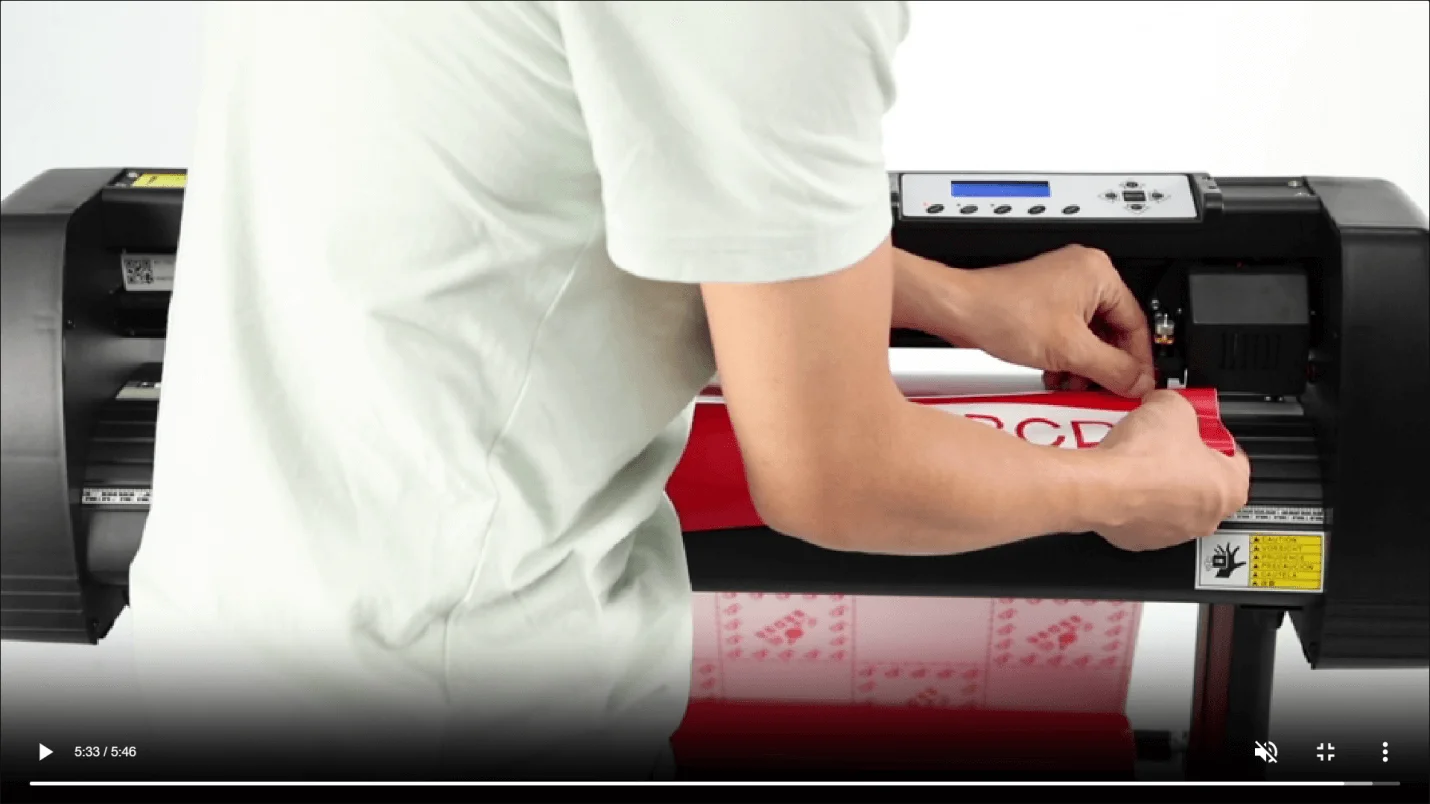
Step 3: Cutting and Weeding the Vinyl Design
● Set up the vinyl cutting machine, such as the VEVOR Vinyl Cutting Machine, with the appropriate cutting mat and vinyl.
● Load the vinyl into the machine and set the blade at the correct depth (avoid having it too far out).
● Use the machine to cut the patriotic design out of the vinyl.
● Weed out the excess vinyl, removing the parts that are not part of the design.
Step 4: Using Transfer Tape to Apply the Vinyl Design
● Apply transfer tape over the weeded vinyl design to transfer it onto the sign.
● Make sure the design is aligned correctly on the transfer tape.
● Carefully apply the vinyl design onto the painted sign, making sure it adheres well.
● Smooth out any air bubbles or wrinkles.
Troubleshooting Tips and Lessons Learned
● Be careful with the blade depth to avoid cutting all the way through the vinyl or encountering other issues during the cutting process.
● Use tacky glue instead of hot glue when attaching metal pieces to ensure a secure hold.
● Consider using contact paper or clear contact paper as transfer tape for cleaner application.
● Avoid using fabric paint for lettering, as it can cause bleeding. Stick to regular chalk paint or appropriate paint for smoother results.
● Check a reference image when distressing the sign to create a realistic crack on the Liberty Bell, if applicable.
DIY 2 – Patriotic Truck Sign with Wooden Letters
In the second DIY project, we creates a patriotic truck sign using wooden letters. The project involves repurposing a Dollar Tree sign, distressing it, and adding a truck design with the letters “U” and “S” to represent the United States.
Materials needed for the project
1. Dollar Tree Sign: A wooden or metal sign from Dollar Tree that will serve as the base for the project.
2. Vinyl Cutting Machine: A vinyl cutting machine, possibly provided by VEVOR, which will be used to cut out the design for the sign.
3. Vinyl Sheets: Various colors of vinyl sheets for creating the design elements.
4. Cutting Mat: A cutting mat to use with the vinyl cutting machine.
5. Blades: Blades for the vinyl cutting machine.
6. Painter’s Tape: To create a clean boundary for painting on the sign.
7. Paint: Acrylic or chalk paint in patriotic colors, such as blue and white.
8. Brushes: Paintbrushes for painting the sign.
9. Wooden Letters: Small wooden letters to spell out “U” and “S” for the patriotic truck design.
10. Contact Paper: To create stencils for the letters and the truck design.
11. Scissors: For cutting out the truck design from the Dollar Tree sign.
12. Chalk Paint: A truffle-colored Waverly chalk paint for distressing the sign.
13. Fabric Paint (Optional): Used in the video but not recommended for the project due to bleeding issues.
14. Hair Dryer: To heat up the glue for removing the wooden frame from the Dollar Tree sign.
15. Scraper: To remove staples from the sign.
16. Craft Paper (Optional): To finish the back of the sign.
Steps for Making Patriotic Truck Sign with Wooden Letters
Step 1: Preparing the truck sign and wooden letters
● Gather the materials, including a Dollar Tree sign, vinyl cutting machine, vinyl sheets, cutting mat, blades, painter’s tape, paint (blue and white), wooden letters, contact paper, scissors, chalk paint (truffle color), and tacky glue.
● Use the backside of the Dollar Tree sign to avoid peeling off the paper. Optionally, you can cover the back with brown craft paper for a polished look.
● Apply painter’s tape to divide the sign in half, and then paint one half blue and the other half white.
Step 2: Distressing the wooden letters
● Arrange the wooden letters (“U” and “S”) on tape to prevent movement during painting.
● Distress the wooden letters with gray paint and sandpaper, creating a weathered look.
Step 3: Attaching the letters to the sign
● Peel off excess paper from the back of the vinyl design and use the transfer tape to apply it to the sign.
● Ensure the blade depth of the vinyl cutting machine is correct to avoid cutting through the design.
● Place the design carefully onto the sign, correcting any accidental damages if needed.
Troubleshooting and using the right adhesive
● For the truck sign, use a hairdryer to warm up the glue underneath the wooden frame pieces, making it easier to remove the frame.
● If hot glue does not work for adhering the metal truck to the sign, switch to tacky glue, which is more suitable for metal and has a stronger hold.
● If there are bleeding issues with the lettering, go over the letters again with the appropriate paint color (cashew color) to sharpen the edges and improve the appearance.
DIY 3 – Liberty Bell Sign with Antique Finish
The third DIY project is a Liberty Bell Sign with an antique finish. The crafter uses a wooden sign from Dollar Tree, removes the string and frame from the back, and paints the base of the sign with cashew-colored Waverly chalk paint. The main focus is on creating the Liberty Bell design.
Overall, the DIY project involves distressing the sign, creating the Liberty Bell design, and adding a burlap bow for a vintage look.
Materials required for the project
1. Wooden sign from Dollar Tree (for the base of the sign)
2. Cashew-colored Waverly chalk paint (for the base)
3. Truffle-colored Waverly chalk paint (for distressing)
4. Metal bell from Dollar Tree (for the Liberty Bell design)
5. Small wooden letters (U, S, and A)
6. Contact paper (for creating the stencil)
7. Transfer tape (for transferring the design onto the sign)
8. Hot glue gun and glue sticks (for attaching the bell, letters, and bow)
9. Burlap bow (for decorating the top of the sign)
Steps for DIY Liberty Bell Sign with Antique Finish
Step 1: Preparing the sign and removing unwanted elements
● Start with a sign from Dollar Tree, flip it over, and use the back of the sign to avoid peeling off the paper.
● Scrape off any unwanted elements, such as a metal piece that says “home.”
● Remove the string on the back and any unnecessary frames.
Step 2: Painting and distressing the sign
● Paint the base of the sign with cashew-colored Waverly chalk paint.
● Use truffle-colored Waverly chalk paint to distress the sign, applying it with a dry brush technique.
● Apply the truffle chalk paint to the base of the sign for added distressing.
Step 3: Creating a crack in the bell using a dremel
● Take a bell from Dollar Tree (antiquated using a technique from a previous Christmas video).
● Look up a picture of the real Liberty Bell on a phone for reference and copy the crack with a pencil.
● Use a dremel to carefully create a realistic-looking crack in the bell.
Step 4: Attaching the bell and adding finishing touches
● Glue the bell onto the distressed sign using tacky glue, as hot glue may not work well for metal.
● Apply the truffle chalk paint to the base of the sign again for added distressing.
● Add a burlap bow to the top of the sign by twisting it onto the sign and gluing it in place.
With these steps, you’ll have created a DIY Liberty Bell Sign with an antique finish, perfect for patriotic decorations during 4th of July or Memorial Day.
Bonus DIY – Neutral Patriotic Signs
In addition to the previously mentioned patriotic DIY projects, the video also features a bonus DIY project involving neutral patriotic signs. These signs are perfect for those who prefer a more subdued color palette but still want to incorporate patriotic decor in their homes. The neutral colors provide a timeless and versatile look, making them suitable for year-round use.
Materials required for the project
1. Wooden Signs: Dollar Tree often offers various sizes and shapes of wooden signs that can serve as the base for the project.
2. Chalk Paint: Neutral colors like white, beige, or light brown are likely used for distressing the wooden signs.
3. Vinyl or Stencil: For adding letters, designs, or patterns to the signs, either adhesive vinyl in neutral colors or stencils made from contact paper might be used.
4. Transfer Tape: Used to transfer the vinyl or stencil onto the wooden signs accurately.
5. Cutting Machine or Cricut: If the creator has access to a cutting machine like the mentioned “vinyl cutting machine” or a Cricut, they can use it to cut the vinyl or stencil designs.
6. Paint Brushes: Needed for applying chalk paint and any touch-ups.
7. Tacky Glue: If there are any embellishments or metal pieces, tacky glue might be used for secure attachment.
8. Twine or Ribbon: To hang the finished signs or add decorative elements.
Brief overview of the process for creating neutral patriotic signs
To create neutral patriotic signs, the crafter used materials like wooden signs from Dollar Tree, chalk paint in neutral colors, adhesive vinyl or stencils, transfer tape, and a vinyl cutting machine. Here’s a brief overview of the process:
1. Choose the Base: The crafter used wooden signs from Dollar Tree as the base for the neutral patriotic signs. The back of the signs was preferred to avoid peeling off paper and make distressing easier.
2. Paint the Base: The wooden signs were painted using chalk paint in a neutral color like cashew or truffle. The base was covered with the chalk paint, and distressing was done using a dry brushing technique with truffle chalk paint.
3. Design Creation: Using a vinyl cutting machine, the crafter created designs using the Sign Master design program. The design was then cut onto adhesive vinyl, but some issues occurred during the first cut due to the blade being set incorrectly.
4. Transfer the Design: After weeding out the excess vinyl, the design was transferred to the wooden sign using transfer tape.
5. Distress and Finish: The wooden signs were further distressed using techniques like sanding and painting the edges with truffle chalk paint. Some signs had additional elements like a half-cut bell or a truck made using Dollar Tree items.
6. Final Touches: The crafter used hot glue to secure elements like frames and bells onto the signs. Any excess paper was removed, and the signs were given a polished finish.
7. Finishing the Project: The neutral patriotic signs were almost complete at the time of the video, but some final touches, like finishing the letters, were left to be done later.
The process involved crafting, distressing, and assembling the elements to create beautiful neutral patriotic signs that could be displayed for occasions like 4th of July or Memorial Day and even year-round.
FAQs about Dollar Tree DIY Patriotic Decor
1. What kind of patriotic decorations can I make with Dollar Tree items?
With Dollar Tree items, you can create a wide range of patriotic decorations, including wreaths, banners, table centerpieces, porch displays, and yard signs. The store offers various materials such as ribbons, flags, artificial flowers, craft paper, and more, enabling you to customize your decorations to suit your style and preferences.
2. Do I need any crafting experience to make these decorations?
Dollar Tree DIY Patriotic Decor projects cater to crafters of all levels, including beginners. Many tutorials provide simple and easy-to-follow instructions, making it accessible for anyone interested in creating festive decorations.
3. What are the benefits of making patriotic decor with Dollar Tree items?
Firstly, the materials are budget-friendly, allowing you to create beautiful decorations without breaking the bank. Secondly, DIY projects provide a sense of satisfaction and personalization as you design and craft your own decor. Additionally, it’s a fun activity to involve family and friends, fostering a sense of togetherness during special occasions.
Final Words
In this video, we share three patriotic DIY projects perfect for the 4th of July or Memorial Day. The crafts involve creating neutral patriotic signs using materials from Dollar Tree and a vinyl cutting machine from VEVOR. Overall, the video showcases creative and budget-friendly ways to decorate for patriotic holidays.


