
Incubation is the most crucial and decisive period in a chick’s life. The first two weeks especially have an immense impact on the flock’s future performance. Over 50% of this time determines how the chicks perform for the rest of their lives, and errors during this stage may never be correctable for life. However, properly managing this period yields a maximum saleable day old chick by virtually all standards.
However, it must be stated that incubator quality is one of the leading factors determining the success of an incubation process. A modern, automated, and fully functional egg incubator like VEVOR’s monitors hatching eggs under perfect environmental conditions like humidity, temperature, and ventilation. The VEVOR Egg Incubator also features an automatic egg-turning design, 360⁰ air circulation design, high transparency, and versatile hatching for various brood types, leaving the farmer to divert their productive energy to other tasks while waiting out their egg’s incubation process.
Table of contents
Understanding the Incubation Process
Mother hens instinctively lay over their clutch of eggs to incubate them. But sometimes, they may be neglectful and cause the eggs to fail to hatch or hatch with deformities. Besides, modern or tech-assisted incubation helps to incubate multiple eggs simultaneously using an egg incubator.
Egg incubators come in various sizes and designs. However, all incubators have similar features that allow them to execute their hatching functions successfully:
- Temperature: Eggs should remain at about 99.5 degrees always. A degree lower or higher for a few hours can kill the embryo chick.
- Humidity: During the first 18 days, the incubator must maintain 40 to 50 percent humidity and 65 to 75 percent humidity for the final days before hatching.
- Ventilation: Eggshells are porous and allow oxygen/carbon dioxide to go in/out. Incubators typically have vents for fresh air to circulate, so the embryo chicks can respire.
The best incubators have a high-quality thermometer or hygrometer for measuring temperature and humidity. They also have domestic systems that help to rotate the eggs automatically in a fine-tuned ecosystem that makes incubation seamless, safer, and more efficient.
Ideally, the farmer directly transfers the eggs to the incubator and stores them between 50 and 60 degrees and 75 percent humidity. That said, you may store the eggs for up to 10 days without sacrificing the embryo’s viability. However, you want to store them with the egg’s fat side pointing up so the embryo stays alive.
Before transferring eggs inside the incubator, set the temperature and humidity, adjusting them to create an optimal environment. Maintain the optimal environment till the chicks hatch. You may need to add water from time to time to keep a necessary humidity level, especially on day 18 when you need a humidity boost.
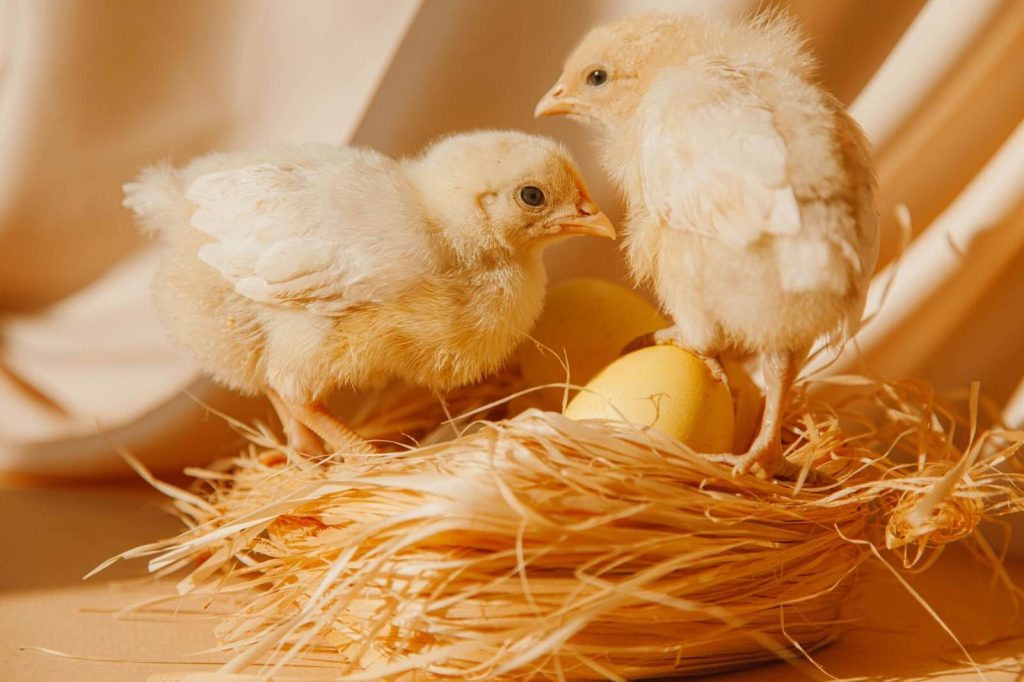
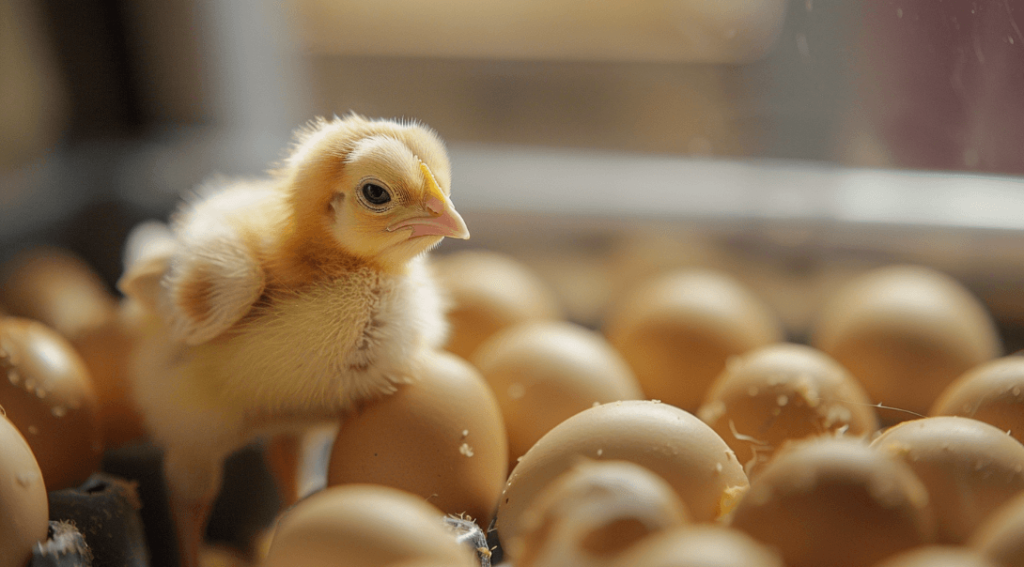
The embryonic chick becomes active in the final hatching days and may noticeably shift around in the shell. Eventually, they’ll peck a small hole in the large end of the egg and take their first breath. Once the chick is free from the egg, let it dry off in the warmth of the incubator before moving it to a brooder, where it will spend the first weeks of its life.
However, if you need a modern egg incubator with automated functions to safely hatch healthy eggs, VEVOR’s egg incubator could be your ideal product. VEVOR’s egg incubator doesn’t only help you to determine and overcome the perfect incubating atmospheric conditions; it also makes monitoring your eggs straightforward with features like its automatic egg turner, transparent lid, and 24/7 lighting fixture.
How Long Can Chicks Stay in the Incubator?
The normal incubation time for chicks is 21 days. However, chicks sometimes don’t follow the traditional hatching pattern and may have a late, draggy, or difficult hatch. During these situations, waiting for all the chicks to hatch and fluff out would be impractical and could jeopardize the health of already hatched chicks.
In a late hatch, the chicks don’t show any hatching signs until 3 to 4 days after spending 21 days in the incubator. If it takes longer than 36 hours for all the eggs to hatch, then you have a draggy hatch at hand. Many embryos would fail to hatch a draggy or late hatch even though they’re fully developed or have pipped the eggshell.
During a draggy hatch, consider removing the chicks from the incubator in shifts. Leaving earlier hatched chicks in the incubator for over 48 hours could make them dehydrated or malnourished. Note that you only want to remove chicks when they’ve completely fluffed out their feathers. Fluffing out is another name for the ‘critical rest period’ chicks need after pipping out of the shell.
Immediately after hatching, the hatched chicks go through periods of high activity, followed by long rest periods. This critical rest period is vital and doesn’t mean any danger. By the second day, they should be less damp and look more fluffy. Once they’re completely dry, you can transfer them to a chick brooder.
Also, avoid opening the incubator when some eggs are piping or unzipping. Opening the incubator to take out fluffed-out chicks could cause a sudden drop in temperature and humidity. A prolonged humidity drop can dry out the shell membranes and trap unhatched chicks in their shell. That’s why restoring the environmental conditions to the initial humidity and temperature as soon as possible is vital.
However, restoring or maintaining your incubator’s environmental conditions like humidity and temperature is straightforward with a fully automated incubator like the VEVOR Egg Incubator. The incubator automatically restores the environmental status immediately after you close back for other eggs to hatch properly and safely.
Risks of Early Transfer to the Brooder
Hatched chicks typically have damp feathers, which must dry before transferring them from the incubator. Removing the chicks from the incubator too soon could make them chill and die easily. Allowing the feathers to dry and become fluffy (or fluffing out’) must happen before transferring them.
Avoid being in a hurry to remove a hatched chick. Leaving hatched chicks in the incubator while other eggs hatch encourages others still inside the eggs to pip and hatch. However, sometimes you want to keep a watch as the hatched chicks can start pecking or pipping at newly hatched chicks.
Allowing the chick to rest for a few hours also allows its lungs to adjust while it hatches. Trumping the process could cause injury to the embryo. The VEVOR Egg Incubator has a 360⁰ egg turner and ventilation system that minimizes the risk of poorly hatched eggs. It also has an effective lighting system that makes viewing the hatching process seamless.
The Ideal Time to Transfer Chicks
During a normal chick hatch, all eggs should hatch within 36 hours. However, there may be some time gaps between when the chicks pips the shell and when they finish unzipping to hatch. But all these should happen within a reasonable time from the other.
The ideal time recommended between hatching and chick removal is about 24 to 36 hours – one hour at the earliest. The ideal chick must be able to walk well, be dried, and have fluffy feathers during this period.
Factors that could lead to a late hatch include:
- Large eggs: They take longer to incubate than small eggs.
- Long storage: The longer you store eggs before incubation, the longer hatching may take.
- Incubation temperature: Low incubation temperature prolongs hatching time.
- High humidity: High humidity prevents the proper moisture evaporation from the eggs and prolongs incubation.
- Weak embryos: Weak embryos don’t hatch swiftly and usually result from nutritional deficiencies in the parent.
- Breeder flock: An old breeding flock or an inbred breeding flock can lead to delayed hatching time.
An embryonic chick will typically finish absorbing the yolk sac around day 20-21 of incubation. After that, they begin surviving off nutrients in the egg yolk. Meanwhile, the longer hatching takes, the less reserves it has to survive on after hatching.
If you’re experiencing a late hatch, relocate the chicks to a warm incubator as soon as possible. That said, beside providing optimal environmental conditions for brooding, VEVOR’s highly regulated egg incubators help you determine the perfect timing to transfer chicks from the incubator.
Thanks to its 110V power supply and accompanying 12V battery power supply, when there’s a power outage, VEVOR’s Automatic Egg Incubator can help you maintain the perfect environmental conditions. Its temperature might fluctuate over about 0.9°F, but that’s normal and doesn’t affect incubation.
Incubator Maintenance for Optimal Performance
Cleaning and maintaining your incubator is highly vital to its optimal performance. It doesn’t matter if you have washed your machine sometime before or if it’s brand new. Germs, dirt, grit, or dust can enter the incubator and contaminate your eggs. You want to regularly clean the incubator routinely before every use.
Thankfully, various routine tips and disinfecting solutions work excellently to help you keep your VEVOR incubator in great shape. One of the most practical ways to sanitize an incubator is washing with mild dish soap. After washing with mild soap, spray pure white vinegar and dry under the sunlight to kill off some pathogens.
Disinfecting your incubator with bleach is also viable. However, we advise cleaning your incubator with bleach well before use to allow all lingering bleach fumes to escape into the air. When using bleach, mix with water in a 1-to-four ratio. Spray the mixture on various incubator parts and bar electrical fixtures. Leave the incubator wet for at least 10 minutes for general stains, or scrub stubborn stains with a brush.
Of course, you don’t have to clean your incubator daily or weekly; that would interfere with the incubation process. However, you want to clean your incubator as often as possible in between hatches. Even when your egg incubator isn’t in regular use, routine cleaning keeps it in shape when it’s time for use.
That said, suppose you just had a successful hatch at your incubator. Here’s a handy step-wise guide on cleaning your incubator.
- Take out all loose shells and dry matter
- Clean water pans and egg trays, soak in warm water and disinfectant or mild bleach, if necessary.
- Wipe plastic parts with a soft cloth
- Clean incubator bottom
- Clean electrical parts
Common Incubation Challenges and Solutions
The following tips can help you address various common incubation challenges. We have also discussed how the VEVOR egg incubator was specially designed to help overcome these bottlenecks.
Eggs showing no signs of candling on Day 7
This may have occurred due to overheated eggs or improper incubator use. Also, using the wrong temperature at the incubation’s earliest stages could be culpable. Biologically, improper nutrition in parents, inbreeding, or poor hereditary hatching rate in the breed are other possible causes.
Chicks fully formed but dead without pipping eggs
This may occur due to a low average humidity in the incubator. Also, extreme humidity (too low or high) around day 18 could cause this.
‘Sticky’ chick, smeared with egg contents
Sticky chicks may develop due to low average temperature in the incubator when the average humidity is too high or there’s inadequate ventilation.
Dry shell stuck to chicks
This could occur due to low incubator humidity when it’s time to hatch.
Too little chicks
Your chicks may be too little due to low humidity in the incubator.
Weak chicks
Weak chicks may result due to respiratory disease in parents.
Gasping chicks
Chicks could gasp if the average temperature is too low, if the eggs are stored for too long, or improperly before incubation.
Malformed chicks
Chicks may be malformed due to poor or incorrect parental nutrition. They may also result from an excessive amount of wrongly positioned dead chicks in shells. Improper turning or setting of eggs in the incubator, inadequate ventilation, or inadequate moisture could also lead to malformed chicks. Other potential causes of malformed chicks after incubation include hereditary issues, nutritional issues, and abnormally high or abnormally low incubator temperature.
Directly addressing the causes of these challenges can help you readily overcome them and hatch healthier chicks. Or better still, consider getting a VEVOR egg incubator. VEVOR’s egg incubators were carefully designed to help you overcome common incubator issues like sticky chicks, uneven temperature, inappropriate ventilation, and others listed above. That’s because of their even and readily regulative temperature and humidity conditions. Also, the products have an easy-to-understand manual to guide you in making informed incubation decisions.
VEVOR Egg Incubator: Your Partner in Successful Hatching
Looking for an ideal egg incubator for a successful hatching experience? Think VEVOR Egg Incubator. The modern egg incubator from a leading global brand boasts various top-notch features necessary for a successful hatching experience.
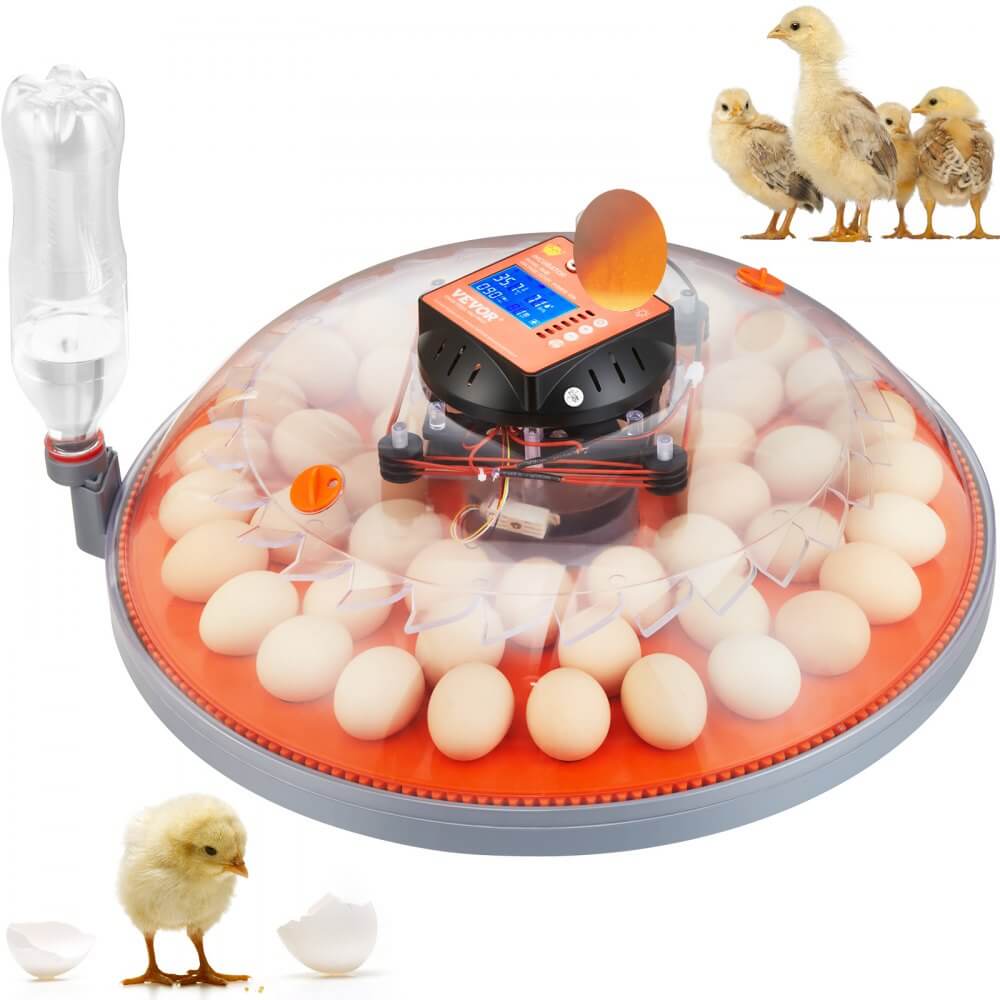
It hosts a 360⁰ air circulation design that lets airflow inside the incubator and ensures humidity and temperature distribute evenly. It also possesses a sensor that executes real-time temperature and humidity monitoring, so you don’t need for tedious adjustments for regular humidity.
These features help to promote uniform embryo growth and increase hatching quality and speed while reducing the threat of poor development or cracked eggshells. Plus, it features a highly transparent ABS material that lets people observe changes inside the eggs without opening the lid. A built-in lightning illuminates the embryo’s development, allowing you to monitor your chick’s development closely.
Lastly, VEVOR’s Automatic Egg Incubator is reliable, functional, and efficient for various species, from poultry to little birds and strange reptiles. It supplies the perfect environment for accommodating your embryonic chicks, thanks to its excellent power supply and humidity control features.
Testimonials and Customer Feedback on VEVOR Egg Incubator
Suppose you needed some social proof. Here are a few five-star user ratings from some of the current owners of VEVOR Egg Incubator.
- “Nearly 70% hatch rate, instructions were difficult to follow. Couldn’t figure out how to shut off the high humidity alarm during the hatching phase. The system has more bells and whistles than the instructions describe, but it did a great job.” – RC.
- “This is really cool! Our first attempt at incubating chicks. The machine was easy to set up, had great instructions, worked perfectly, and had great features. I candled after 8 days and yup, we’ve got chickies in the eggs! We’ll see how many of them survive in a couple of weeks.” – Chicken man.
- “I love this. It has had a 99% hatch rate for me. I cannot wait to start hatching some more when it warms up.” – Great.
Conclusion
Knowing how long chicks can stay in an incubator and when to transfer from the incubator is critical for a successful hatching experience. However, having the perfect egg incubator is essential. While there are many egg incubator options online, VEVOR’s Automatic Egg Incubator stands head and shoulder above the rest with its reliable and automated qualities.
If you’re considering replacing your incubator or purchasing your first incubator, investing in a VEVOR egg incubator would make great investment for your various hatching needs. Visit VEVOR today and watch the miracle of egg hatching by leveraging the company’s modern, versatile, and intuitive egg incubator.


