Drywall sanding is a dust-filled and time-consuming task that tires you. If you’re a professional contractor, the struggle to achieve smooth, flawless walls is too familiar. But what if there was a solution that could make this daunting task easier? VEVOR Electric Drywall Sander is the ultimate tool for smoother and manageable results. With this tool, you’ll no longer face those dust clouds and exhausting manual labor.
Let’s discover some incredible features of this drywall sander. We’ll take you on a 7-step journey to know the process of operating it.
Table of contents
5 Best Features of VEVOR Electric Drywall Sander
1. 900W Brush Motor
VEVOR Electric Drywall Sander has a 900W brush motor. This ensures strong and reliable performance. It can tackle tough sanding tasks efficiently, giving you smoother results in less time.
The brush motor will help you smooth out rough surfaces and prepare walls for painting.
2. Variable Speed Control
With this machine, you’ll enjoy the variable speed control. With a range from 800 to 1800 RPM, you can adjust the speed to match the demands of your project. No matter if you’re working on delicate finishes or tackling rough patches, this flexibility ensures you achieve the best results every time, on any surface.
3. Self Suction System
With a self-suction system, this sander takes care of dust with ease. It efficiently sucks in dust as you work. Hence, it keeps your workspace cleaner, making it more pleasant to work in.
Less dust in the air means less cleanup afterward, saving you time and effort for more important tasks.
4. Adjustable Handle
VEVOR Drywall Sander offers ergonomic comfort by reducing fatigue even during long sanding sessions. This feature allows users to customize the handle to their preferred position. It promotes a more comfortable and efficient working experience.
5. User-Friendly Design
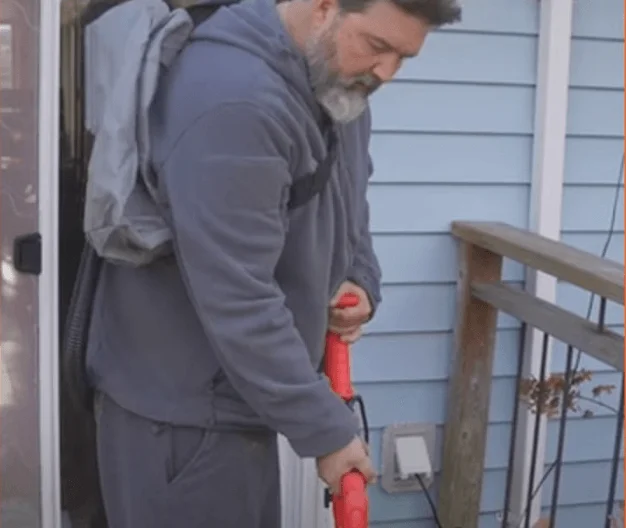
This machine has lightweight construction. This makes it effortless to maneuver, reducing fatigue during long sanding sessions. If you’re a DIY enthusiast or a professional contractor, you’ll appreciate the easy handling of this sander. It allows you to achieve precise results without strain.
7-Step Guide To Use VEVOR Electric Drywall Sander
The VEVOR Drywall Sander is made for efficiency and ease of use. Hence, it is an ideal choice for both newbies and experts tackling drywall projects. Here is a step-by-step guide to help you make the most of this powerful tool.
Step# 1: Preparation
- Safety First: Before starting, make sure you are wearing appropriate safety gear like safety glasses, a dust mask, and work gloves. Safety should never be compromised.
- Assemble the Tool: Attach the sanding disc to the sander. The VEVOR Drywall Sander comes with a variety of discs, so choose one that matches the smoothness or coarseness you need for your specific project. Make sure it’s securely fastened to avoid any wobbling or detachment during use.
Step# 2: Power & Speed Settings
- Turning On: Plug in the sander and switch it on. Begin with a lower speed setting to get a feel for the tool, especially if you are a beginner.
- Adjust the Speed: Use the variable speed control dial to adjust the speed from 800 to 1800 RPM depending on the surface roughness and your particular needs. Starting slow allows you to control the tool better and prevents gouging the drywall.
Step# 3: Begin Sanding
- Sanding Technique: Hold the sander with both hands. Apply light pressure and move it in smooth, circular or sweeping motions. This helps to achieve an even finish and prevents creating grooves in the drywall.
- Effective Use of the Self-Suction System: The built-in dust extraction system helps keep the workspace clean by sucking up the dust as you sand. Ensure that the dust bag or vacuum is properly connected and functional to manage dust effectively.
Step# 4: Navigating Corners & Edges
For corners and edges, you may detach the edge sanding piece to reach these difficult areas without causing damage to adjacent walls. Be gentle and precise to avoid scuffing up the corner joints.
Step# 5: Regular Checks
Periodically check the condition of the sanding disc. Replace it if it’s worn out to maintain efficiency and effectiveness. A worn disc can decrease performance and increase your effort.
Step# 6: Post-Sanding Cleanup
Once you have finished sanding, turn off the sander and unplug it. Clean the tool and the work area. With the self-suction feature, there should be less dust residue. But always give your workspace a thorough cleaning.
Step# 7: Tool Maintenance
After the cleanup, perform a quick maintenance check on the sander. Clean the dust collection system, check for any blockages in the motor vents, and store the tool in a dry, safe place.
FAQs About Electric Drywall Sander
What makes the VEVOR Drywall Sander suitable for home use?
Its user-friendly design, effective dust-collection system, and variable speed control make it perfect for DIY projects at home.
Can I use the sander for surfaces other than drywall?
Yes, thethis drywall sander can be used on various surfaces, including plaster and wood. This makes it a versatile tool for multiple refurbishing tasks.
How do I maintain the sander?
Regular maintenance includes cleaning the dust collection system, and checking the sanding discs for wear and tear. You should also ensure the motor vents are free from debris.
Can it be used to polish the marble floor?
The Electric Drywall Sander is specifically made for sanding tasks and is not suitable for polishing marble floors.
Wrapping It Up
The VEVOR Electric Drywall Sander is the best solution to the challenges of drywall sanding. With its powerful motor, variable speed, and excellent dust extraction, it is a top choice for both DIY enthusiasts and professionals. From smoothing rough surfaces to prepping walls for painting, this sander does every task with ease. It delivers smoother results in less time.
So, visit VEVOR today & experience the difference in your next sanding project!

