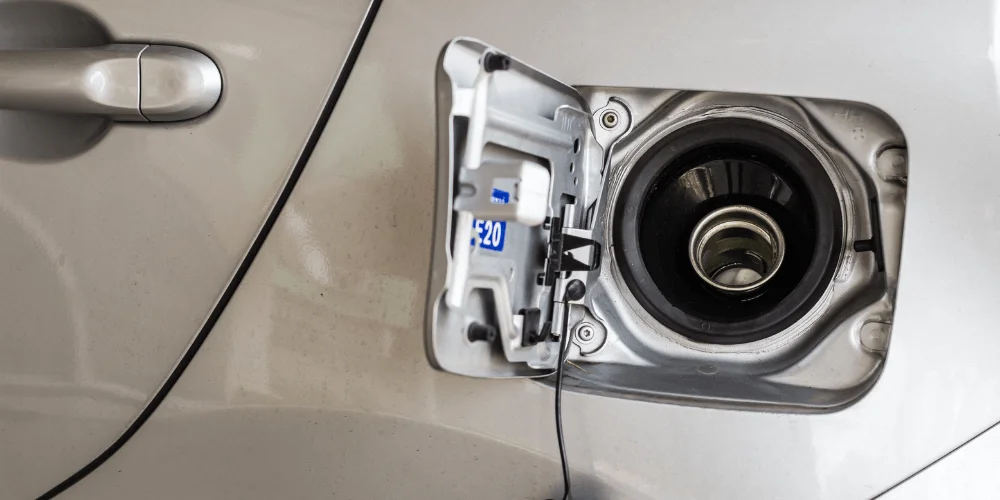
Fuel issues can be a significant concern for vehicle owners, causing inconvenience and potential damage to the engine. If you’ve been facing fuel-related problems, such as sluggish performance or frequent breakdowns, it might be time to investigate the state of your fuel tank. Use an endoscope camera to inspect your fuel tank. With the suspicion of scale buildup or other contaminants lurking within the tank, conducting a thorough inspection becomes even more crucial.
In this article, we will guide you through effectively examining your fuel tank using an endoscope camera. With the help of this handy device, you can identify any issues and determine if a replacement is necessary. Whether you’re a DIY enthusiast or simply want to stay informed about your vehicle’s maintenance, understanding the process of fuel tank inspection will prove invaluable. So, let’s delve into the details and learn how to use an endoscope camera for a comprehensive examination of your fuel tank.
Required Tools and Materials
Before diving into the process of inspecting your fuel tank with an endoscope camera, it’s essential to gather the necessary tools and materials. By having everything prepared, you can streamline the inspection and ensure accurate results. Here are the tools and materials you will need:
● Endoscope Camera
● Cable Length
● Extra Cameras
Obtain a reliable endoscope camera, such as VEVOR. Ensure it has the capability to record and capture clear visuals, allowing you to closely examine the interior of the fuel tank. It comes with a sufficiently long cable. This will enable you to maneuver and navigate the camera inside the fuel tank without any limitations, ensuring a thorough inspection.
The VEVOR endoscope has three cameras. The presence of multiple cameras, strategically positioned, allows you to capture different angles and viewpoints, aiding in identifying any potential issues within the fuel tank.
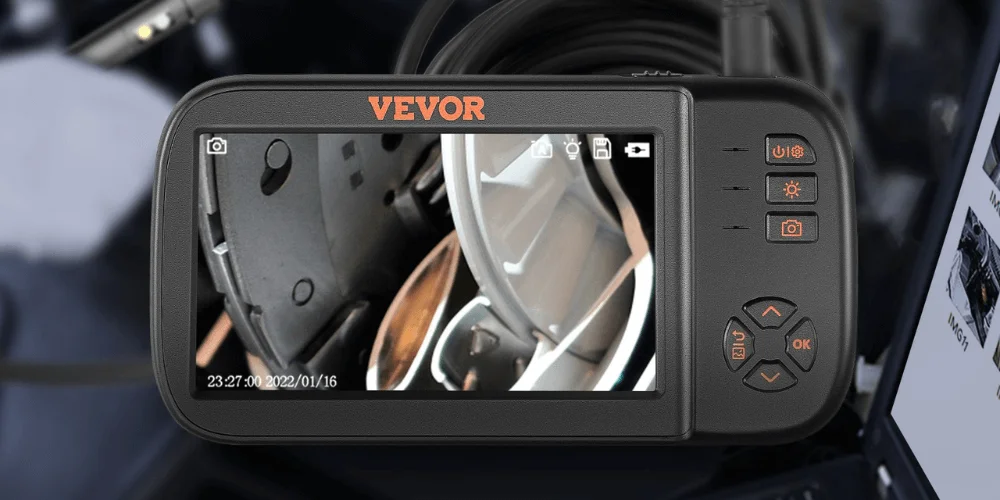
VEVOR Endoscope Camera
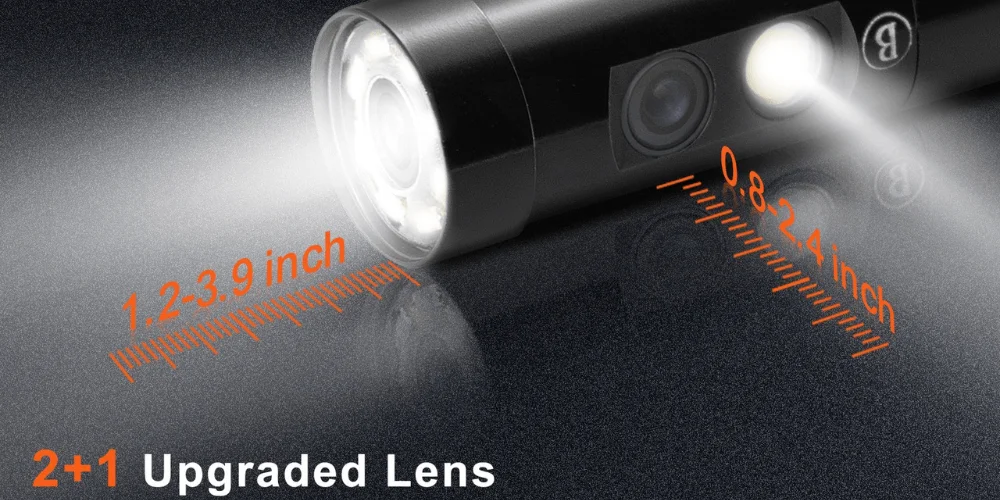
Introducing the VEVOR Endoscope Camera, a versatile tool designed to revolutionize your inspections of hard-to-reach spaces. This cutting-edge device is equipped with triple lenses, including one front camera and two side cameras, allowing you to examine areas from different angles. With varying focal ranges, it offers a broader field of view and captures sharper images, making it the perfect companion for internal engine cylinder and pipeline inspections.
With the VEVOR Endoscope Camera, you can operate for extended periods without interruption. The powerful 2860 mAh battery provides up to 4-5 hours of continuous operation. When the battery runs low, simply recharge it using the included USB charger. Additionally, it provides a 32 GB TF card for storing your pictures or videos. The hook, magnet, and protective cap accessories further assist in retrieving lost items from inaccessible places, enhancing the camera’s utility.
Features
● Triple lens design for inspecting areas from different angles
● Larger field of view and sharper images
● Screen resolution: 854 x 450, lens resolution: 1920 x 1080
● 4.5-inch IPS screen with a crystal-clear image and true colors
● 180° image rotation function for convenience
● 16.4 ft semi-rigid cable for navigating tight spaces
● Slim, IP67 waterproof, oil-proof 8 mm diameter lens
● 8 lights with 3 adjustable brightness levels for sufficient illumination
● 2860mAh battery for up to 4-5 hours of continuous operation
● Rechargeable with USB charger
The applications of the VEVOR Endoscope Camera are vast and diverse. It serves as an invaluable tool for locating invisible problems and troubleshooting them effortlessly. Whether you’re conducting auto engine inspections, sewer checks, HVAC duct inspections, or inspecting industrial pipelines, this endoscope camera is your go-to solution. Bid farewell to challenging spaces and embrace the possibilities with VEVOR’s borescope inspection camera. Experience a new dimension of inspection capabilities with VEVOR.
Recommended For Your Project
Preparing for Fuel Tank Inspection
Before you begin the inspection, ensure that you have the necessary equipment. An endoscope camera, such as the one from VEVOR mentioned above, can provide the required visibility inside the tank. Familiarize yourself with the camera’s features, including its recording capabilities and multiple camera angles. Additionally, make sure the camera is fully charged or connected to a power source to avoid any interruptions during the inspection.
Once you have the camera ready, consider the safety precautions. Since you will be working with fuel, it is essential to undertake the inspection in a well-ventilated area to prevent the accumulation of hazardous fumes. Ensure that all ignition sources are turned off, and keep a fire extinguisher nearby for added safety. With safety precautions in place and the right equipment at hand, you can effectively identify any problems within the fuel tank and make informed decisions regarding maintenance or replacement.
Step-by-Step Guide: How to Inspect Your Fuel Tank
With the VEVOR endoscope camera, you can easily and effectively examine the inside of your fuel tank for any signs of damage or contamination. Here is a step-by-step guide to help you through the process:
Step 01: Prepare the VEVOR Endoscope
The VEVOR endoscope features triple lenses, including one front camera and two side cameras, providing a wide field of view and sharper images. Its screen resolution of 854 x 450 and lens resolution of 1920 x 1080 ensure clear and detailed pictures. The large 4.5-inch IPS screen delivers crystal-clear images with vibrant colors, and the 180° image rotation function adds convenience to your work.
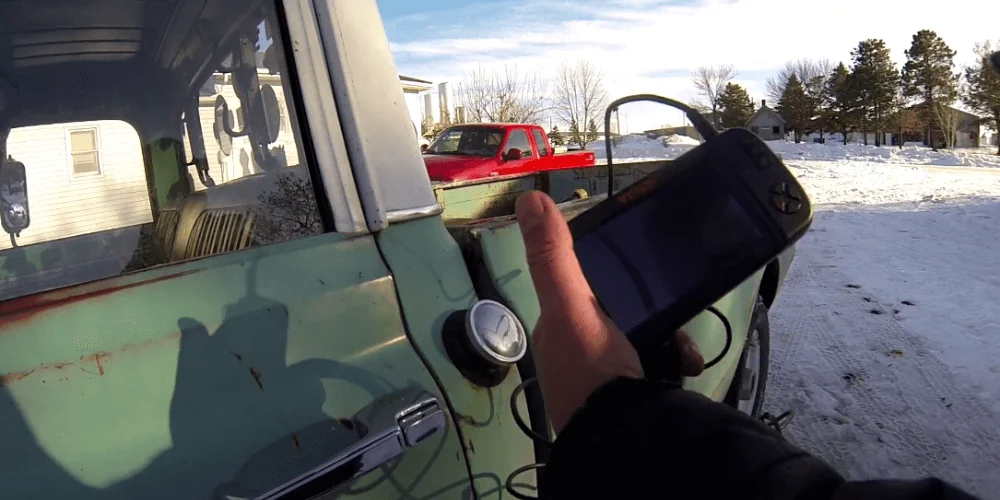
Step 02: Connect the Endoscope
Extend the 16.4 ft semi-rigid cable of the endoscope and navigate it into the fuel tank through a suitable opening. The cable strikes a balance between flexibility and rigidity, allowing easy maneuverability in tight spaces. The slim, IP67 waterproof, and oil-proof 8 mm diameter lens ensures access to hard-to-reach areas within the tank.
Step 03: Adjust the Lighting
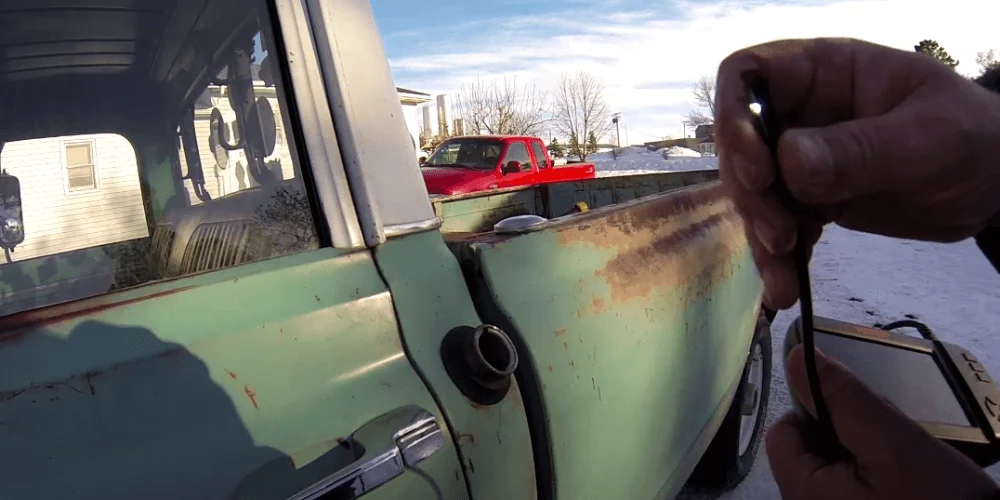
The VEVOR endoscope camera is equipped with eight adjustable lights that provide three brightness levels. This feature ensures sufficient illumination even in darker situations, allowing you to capture clear images of the fuel tank’s interior.
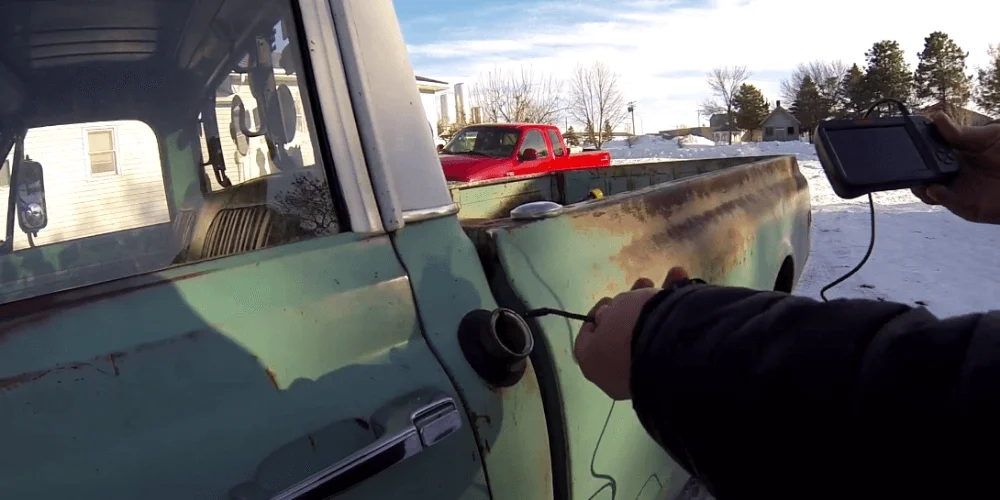
Step 04: Begin the Inspection
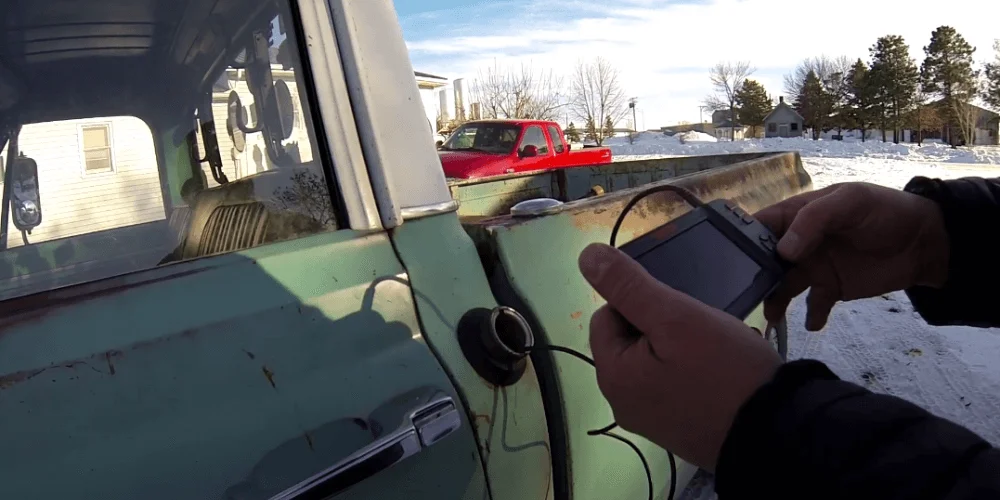
Power on the endoscope and view the live feed on the large screen. As you navigate the endoscope through the fuel tank, carefully observe for any signs of scales, barnacles, or other contaminants that could affect the fuel’s quality or the tank’s integrity.
Step 05: Capture Images or Videos
The VEVOR endoscope camera comes with a 32 GB TF card for storing pictures or videos of your inspection. Capture any areas of concern or notable findings for future reference, or share them with a professional mechanic.
Step 06: Retrieve Lost Items (Optional)
The endoscope camera also includes helpful accessories like a hook, magnet, and protective cap. If you encounter any lost items within the fuel tank, these accessories can assist in retrieving them from the hard-to-reach spaces.
Step 07: Complete the Inspection and Recharge
Once you have thoroughly inspected the fuel tank, power off the endoscope and carefully remove it from the tank, recharge the endoscope’s 2860mAh battery using the provided USB charger, ensuring it’s ready for future inspections.
Tips and Best Practices for Fuel Tank Inspection
Inspecting your fuel tank is a crucial part of maintaining your vehicle’s performance and preventing potential issues. Whether you’re using an endoscope camera or any other inspection method, following these tips and best practices will ensure a thorough and effective fuel tank examination:
Plan the Inspection Route: Have a systematic approach to inspecting the fuel tank. Plan your inspection route, considering the tank’s design and access points. Start from one end and work your way through the entire tank, ensuring thorough coverage.
Observe Signs of Damage: During the inspection, carefully observe the tank’s interior for any signs of damage, such as corrosion, rust, or leaks. Pay close attention to areas near the fuel inlet and outlet connections, as they are more prone to issues.
Look for Contaminants: Check for any contaminants in the fuel tank, such as scales, sediment, or foreign objects. These can affect fuel quality and potentially clog fuel filters or injectors. Take note of any abnormal substances and assess their potential impact on the vehicle’s performance.
Document Findings: Capture clear images or videos of any significant findings or areas of concern. This documentation will be useful for future reference, discussing the issues with a mechanic, or filing insurance claims if necessary.
Regular Inspections: Perform regular fuel tank inspections as part of your vehicle maintenance routine. This practice allows you to identify and address issues early, minimizing the risk of major damage and costly repairs.
Conclusion
Inspecting your fuel tank is an essential aspect of vehicle maintenance and safety. Whether you’re experiencing fuel-related issues or simply want to stay proactive in ensuring optimal performance, a thorough inspection is paramount. The use of an endoscope camera, such as the VEVOR endoscope, provides valuable insights into the tank’s interior, allowing you to identify potential problems like scales, contaminants, or damage.
By following this guide, you can conduct a comprehensive fuel tank inspection with confidence. Remember, if you encounter any major issues or feel unsure about the inspection process, it is advisable to seek professional assistance. A qualified mechanic can provide expert guidance, further diagnostics, and necessary repairs or replacements to ensure your vehicle’s fuel tank operates optimally.
With the knowledge and tools at your disposal, you can now take charge of inspecting your fuel tank, detecting potential problems early on, and maintaining the efficiency and reliability of your vehicle’s fuel system. Stay proactive, stay safe, and enjoy worry-free journeys on the road.


Is this endoscope rated ‘intrinsically safe’ for ‘hazardous enviroments’ by a testing and / or regulatory authority…and if so, by whom…???
Thank you for your question. The endoscope we recommend is not specifically rated as “intrinsically safe” for hazardous environments. However, it is an effective tool for inspecting fuel tanks and other applications.
If you have specific safety requirements, I recommend consulting with the relevant regulatory authorities to ensure compliance with safety standards for your intended application.