
If you are planning on using your own car buffer polisher to remove small surface imperfections, polish your vehicle, and apply wax to it, then you need to know what you’re doing. It’s easy to do a bad job when polishing a car with a buffer, but surprisingly hard to do a good job. Fear not however, because that’s exactly what we’re going to help you with today. Let’s go over some important tips for the best car polish buff results.
Table of contents
What is a Car Polisher Buffer?
A car polisher buffer is a special handheld tool that features a special fabric pad that is attached to a backing disc, which is attached to a handle, which also incorporates the motor and other important components.
The disc spins, and this can be in various patterns, whether orbital or rotary, with the aim being to buff and polish the car. The discs can come in various sizes, the motors can have differing power levels, they may move at different speeds or have adjustable speed levels and may be either corded or battery powered.
The Benefits – Why Polish a Car with a Buffer?
You might be wondering what’s so special about a car buffer and why you might use one to polish your car. Let’s find out.
- One of the biggest benefits of using a car buffer is that it helps to remove old dirt and residue, such as dust, debris, bird droppings, pollen, sap, and other contaminants from the surface of the vehicle.
- The next notable benefit of polishing a car with a buffer is that it is able to remove surface swirls that may have been left behind due to other cleaning and polishing methods.
- One of the most notable benefits is simply that using a powered device such as a cordless or corded buffer makes life a lot easier when compared to manual polishing with a rag and your own two hands. It’s just much faster using a powered tool.
- What is quite impressive about various cordless car buffers is that they are able to remove minor and moderate surface imperfections from the paint, or in other words, remove minor scratches.
- The other benefit worth mentioning is that buffers can be used to apply wax to the surface of a vehicle, thus offering long-term protection from the elements.
How to Polish a Car with a Buffer: Step-by-Step
Now that we know what the benefits of polishing a car with a buffer are, let’s go through an in-depth step-by-step tutorial on exactly how to do just that.
1. Choose the Appropriate Buffer and Pad
The first step is to choose the right buffer, which generally involves choosing between an orbital buffer and a rotary buffer, with both having their distinct pros and cons worth considering. If you need to remove rust and deep scratches, a rotary model is best.
However, if you’re looking for ease of use and a buffer that isn’t as likely to cause damage to the paint, then an orbital model is best. You also need to choose the right type of pad, with firmer pads are usually best for getting rid of deeper surface imperfections, while softer pads are best reserved for finishing.
2. Get Prepared
Before polishing, there are some vital steps that you need to take to ensure success, with making sure that your car is clean and dry being top priority. Use warm water and a dedicated cleaning solution to thoroughly clean your car.
You may need to use special tools to remove stuck-on debris. Use a microfiber towel to dry the car, or just let it air-dry. You need to remove all debris before polishing, or else you may end up scratching the vehicle when you go to buff it. You also want to move your vehicle to a shaded area, to prevent the car polish from drying before you get a chance to work it into the surface.
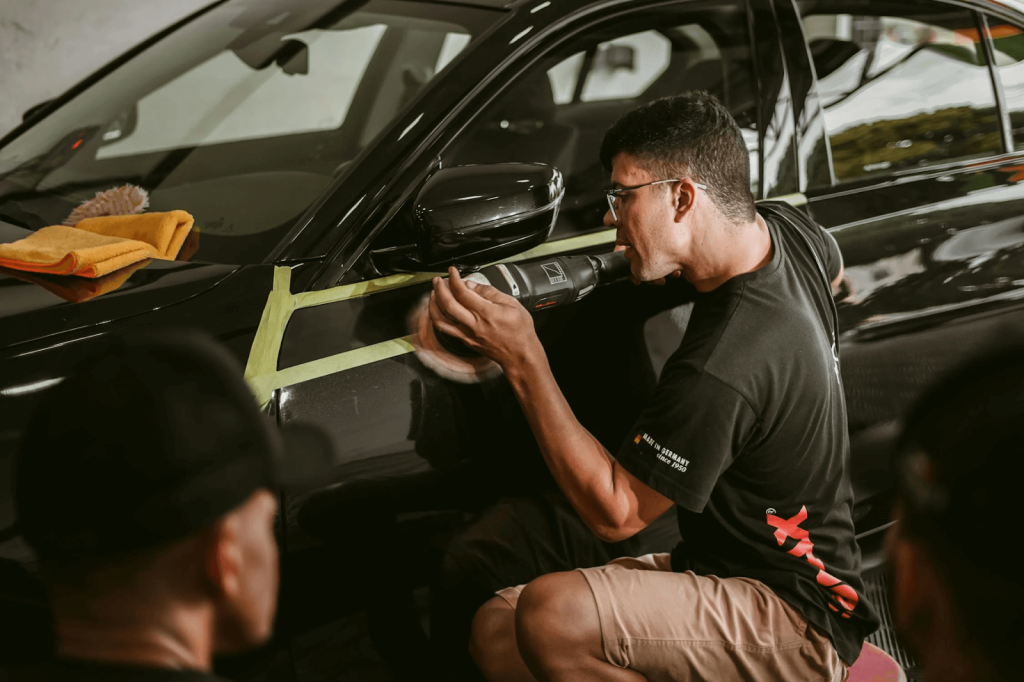
3. Apply the Tape
Perhaps one of the most important steps to take before buffing your car is to apply painter’s tape to the areas that you don’t want to buff. Buffers are quite gentle in the grand scheme of things, but they can cause damage to sensitive areas, such as window seals, badges, trim, and other such areas.
4. Choose the Right Polish
The next step before you can begin the polishing process is to choose the right polish in the first place. Some polishing compounds can be very heavy and abrasive, which is ideal for removing deep scratches and other imperfections.
You can also go for a much lighter, less abrasive, and gentler type of polish, which is ideal for removing swirls and light scratches from the surface of your vehicle. If you are not sure what to start with, see if a lighter option does the trick, and if needed, you can then switch to a more abrasive polish.
5. Put Polish on the Buffer
You now want to take a very small amount of the polish and apply it directly to the buffing pad. You may also put small amounts of the selected polish right onto the vehicle in small amounts, particularly in those areas where you will be buffing. When putting polish directly on the pad, spread it around a bit, or it will splatter and fly around when you turn the machine on.
6. Start Buffing
Now you can finally start buffing. Turn the unit on, apply a moderate amount of pressure, and start moving. Make sure to cover all areas and to move in passes that overlap each other.
Do not move too fast or apply too much force, because you may end up damaging the paint due to heat and friction, something to pay particularly close attention to with rotary buffers.
Dual action or orbital buffers are easier to use on this front, as they are less likely to cause damage. Also make sure to keep the pad as flat against the surface as possible.
7. Remove Excess Residue
After using the buffer to work the polish into the paint, you should notice that it turns a bit hazy. At this point, you need to turn the buffer off and use a microfiber cloth that is new, soft, and clean, to remove any excess polish. You don’t want too much polish on there, plus removing the excess will allow you to see how good your work is. Now is the time to look for spots that may need more work.
8. Repeat if Needed
You may need to repeat the last few steps if you notice that there are still some surface imperfections. If the polish you used was not abrasive enough to remove deeper scratches, you’ll want to repeat these steps using a more aggressive polish. On that note, if you started with a very abrasive polishing compound, you’ll need to finish up with something less abrasive.
9. (Optional) Use a Finishing Polish
If you really want your car’s paint job to pop, you can then use a finishing polish after applying the regular polishing compound. If you have a dark car, this is very useful, because even the smallest of scratches can be seen on dark paint. Moreover, no matter the color of the car, this step will ensure that your vehicle looks shiny, glossy, and like you just drove it out of the dealer’s lot for the first time.
10. Apply Sealant or Wax
You then need to protect your vehicle with a final layer of wax or sealant. This will help maintain the vehicle’s surface while also adding protection against the elements. For this step, use a microfiber cloth or foam pad to apply the wax, and then use another clean cloth to remove the excess.
Tips for Before and After Car Buffing
Let’s go over some quick tips for both before and after buffing your car, to help ensure success.

Tips for Before Buffing Your Car
- Always inspect the paint first, looking for scratches, signs of damage, and spots that will require work. Doing so helps you choose the right polish and pad.
- Make sure to thoroughly wash the car first. Any remaining residue when you go to polish can cause scratches.
- You also need the car to be 100% dry before you apply the polish. Buffing pads should not get wet, as this will decrease their performance.
- Always work in an area that is relatively cool, dry, and out of the sun.
- Don’t think that you are skilled enough to avoid unpainted areas of the vehicle without covering them up. Use that painter’s tape!
Tips for After Buffing Your Car
- Don’t leave excess polish or wax on your car once you are done.
- Take your vehicle and move it into the light, and then inspect it to see if you can see any scratches in different light conditions.
- If you don’t want your hard work to go to waste, applying a coating for protection, whether wax or sealant, is strongly recommended.
- Make sure to clean the buffing pads thoroughly once you are done with them, as this will ensure that they remain in good condition for future use.
FAQs about Car Buffing
Let’s quickly go over some frequently asked questions about buffing and polishing your car.
How Often Should a Car Be Buffed?
How often a car should be buffed depends on its condition and the environment in which you live. Usually, once or twice a year at the most is more than enough. However, if your car has severe scratches, and you often drive offroad, you may have to polish twice as often.
Is a Buffer Able to Remove Severe Scratches from a Vehicle?
Although using a buffer is great for minor and moderate scratches, it may not work for very deep scratches that go through the clear coating. Wet sanding or even repainting may be required for extensive scratching.
Can a Car be Buffed Too Much?
If your car is older or has low-quality paint, buffing too much can actually remove it. To preserve the paint on your car, use a minimally aggressive polish that is able to achieve the desired results.
How to Polish a Car with a Buffer: Final Thoughts
The bottom line is that while it takes a good deal of time and effort to polish a car with a buffer, the end result is always worth it. Speaking of time and effort, you can make your life a lot easier by choosing the right kind of buffer. For those on the market for a new car buffer polisher, checking out the various options from VEVOR is always a good idea!


