
An RV water pump makes life off-grid easy, convenient, and fun. The RV water pump enables you to access clean water for the toilet, showering, cooking, and washing hands. Without a functional RV water pump, the whole RV experience can be displeasure. A water pump comes in handy when touring places without city water or reliable water supply.
Before you start your RV escapades, ensure all the components of the water pump are functioning properly. If not, consider replacing RV water pump.
If your RV water pump is damaged, we shall guide you step by step on how to replace RV water pump and the best RV water pumps in the market you should consider. Keep reading!
Signs That It’s Time to Replace RV Water Pump
Before it breaks down completely, your water pump will give signals that it’s time for replacement. Some of the signs that you should look for include:
1. Old Age – Probably, your pump is constantly breaking down because its shelf life has expired. If your pump has served for more than ten years, consider a water pump replacement.
2. Low Water Pressure – You will know it’s time for an RV water pump replacement if the current one is constantly having low-pressure issues.
3. Leaks – Another reason for replacing RV water pump is leaks on the pump, which cannot be fixed even with repairs. It is a sign that your water pump is worn out beyond repair and needs a replacement.
4. No Water Flow – If you turn the water pump on and there is no water flow to the faucets, it means your water pump has permanently failed, and water pump replacement is inevitable.
The Step-by-Step RV Water Pump Replacement Process
You can easily do DIY RV maintenance, including the RV water pump, by using an owner’s manual. Follow this guide to help you replace RV water pump successfully.
1. List of Tools and Things Required
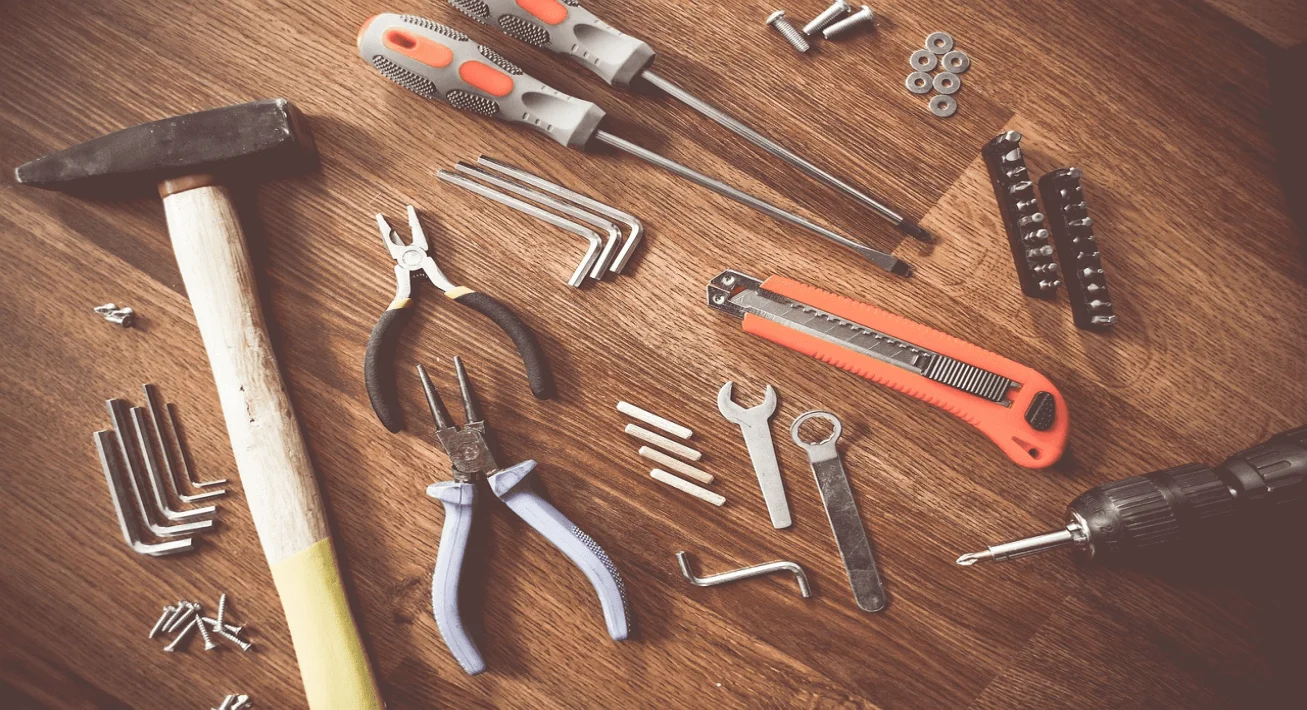
● A new RV water pump
● Drill with all bits
● A screwdriver
● Crescent wrench with channel locks
● Wire stripper
● A crimper tool
● Wire cutters
● Butt connectors
● Spade connectors
● An electrical tape
● Shallow pan to catch water
● Dry rags
● Pipe thread tape
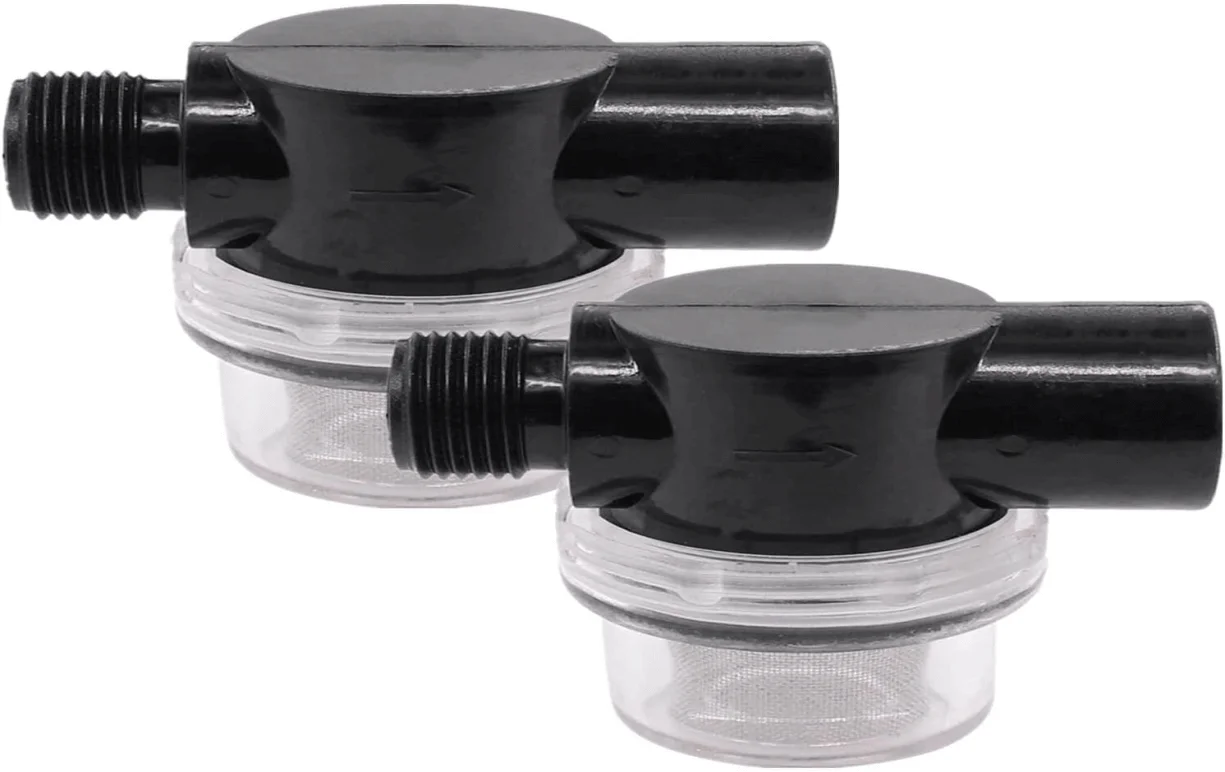
● Pump filter
A Quick and Easy Guide to Replacing RV Water Pump
Replacing RV water pump is an easy task. Use this guide to take you step-by-step in your RV water pump replacement process.
1. Turn Off the Water Pump and Disconnect from the City Water Supply
For safety, turn the water pump switch off and disconnect the pump from the city water supply.
2. Remove the Fuse
Remove the fuse that powers your water pump. It is a safety precaution.
3. Open the Faucet
Open the faucets on the RV to drain all the water and release pressure in the RV plumbing system. Start the replacement process when the water stops flowing from the faucets.
4. Detach the Water Pump from Latching Controller
Not all RVs have a latching controller. A latching controller enables your RV to have multiple on/off switches for the water pump. It is usually located near the water pump. To disconnect the pump from latching controller, cut off the ground wire first. The ground wire is the black wire. Next, cut off the positive lead from the latch controller.
The positive lead is the red wire. The positive lead, or the red wire, is attached to the yellow wire. Remove the yellow wire from the latching connector. Remember these steps or take a photo so that you can remember when you mount the new pump.
5. Disconnect the Inlet and Outlet Lines from the Pump
Place the pan or bucket underneath before you unscrew it, as some water will leak out. Use your hands when unscrewing to avoid damaging the plastic fittings. You can gently use the pliers if it’s too tight.
6. Remove the Inlet Filter
Remove and clean the inlet filter, as you might need to install it on the new replacement RV water pump. If the filter is old, worn out, or too clogged, consider buying a new one.
7. Place the New RV Water Pump in Position and Install the Filter
Mount the new pump in place and reinstall the inlet filter. Take note of the arrows on the pump and filter indicating the direction of the water flow. Ensure the arrows are facing in the same direction. Use the crescent wrench to screw the new pump fittings into the filter.
8. Place the New Water Pump into the Rightful Position
Mount the new pump into the same location as the old pump, on the RV floor or wall. Attach the screws and ensure the pump is secure in its position.
9. Attach the Inlet and Outlet Water Lines to New Water Pump
Connect the inlet and outlet hoses to the new water pump. You can use your hand to fasten the hoses connected to the threads of the fittings.
10. Connect the Wires to the Latch Controller
Connect the black wire or the ground wire by crimping on a spade connector. You can use the photos you took earlier for reference.
Take the yellow wire you had earlier snipped off and the end of the red wire and twist them together while crimping on a spade connector.
Gently pull the spade connectors to ensure they are tightly crimped to avoid electrical faults in the future due to loose connections. Lastly, place the spade connectors in their respective positions on the latching controller. If your RV does not use the latching controller, you can use the butt connectors.
11. Reconnect Back Power and Water
Once you are done replacing an RV water pump, replace the fuse to power the pump. Reattach the water hoses to the city water and fill the RV’s freshwater tank.
Open the faucets and allow water to flow for some time to ensure no sputtering. Ensure all the trapped air is pushed out. Also, keep the water pump running for a while to allow the plumbing lines to pressurize. You can monitor the new RV water pump replacement for leaks.
You can tighten the fittings if there are any leaks and turn off the pump if there is none. You have completed replacing RV water pump.
Tips for Buying the Right Replacement RV Water Pump
When choosing an RV water pump to replace the old one, consider three main factors: performance, safety, and convenience. Here are tips for buying an RV water replacement.
1. RV Pump Water Flow Rates
The flow rate is the amount or volume of water the pump can process and is quantified in gallons per minute (GPM) or liters per minute (LPM). It’s the maximum water volume the pump is capable of pumping to your faucets, toilet, or shower. Ensure the pump you choose has a pumping capacity of 3.0 and 5.5 GPM.
2. Water Pressure
Another key consideration is the pressure the pump is capable of pushing water through, measured in pounds per square inch, or (PSI). Ensure the water pressure of the pump matches the RV’s plumbing system.
3. The Size of the Pump
Another thing to consider is the size of the pump and the size of the RV. While an RV water pump should be compact to fit in the limited space of the RV, it should have enough capacity to supply water to your RV. A bigger RV will require a bigger capacity water pump.
4. Noise Level
Various RV water pumps have varying levels of noise. When choosing the RV water pump, check the noise level in dB. Choose what you are comfortable with, and allow you to rest or sleep with minimal disturbance.
5. Thermal Protection
Your safety in the RV is paramount. Most RVs use the 12V water pump with electric motors that generate heat. Sometimes, overheating of the motor can cause a fire in your RV. Buy an RV water pump with a thermal protection feature and other necessary safety features. Thermal protection will automatically switch off the water pump in case it starts to overheat.
Top 3 RV Water Pumps You Should Consider as a Replacement RV Water Pump
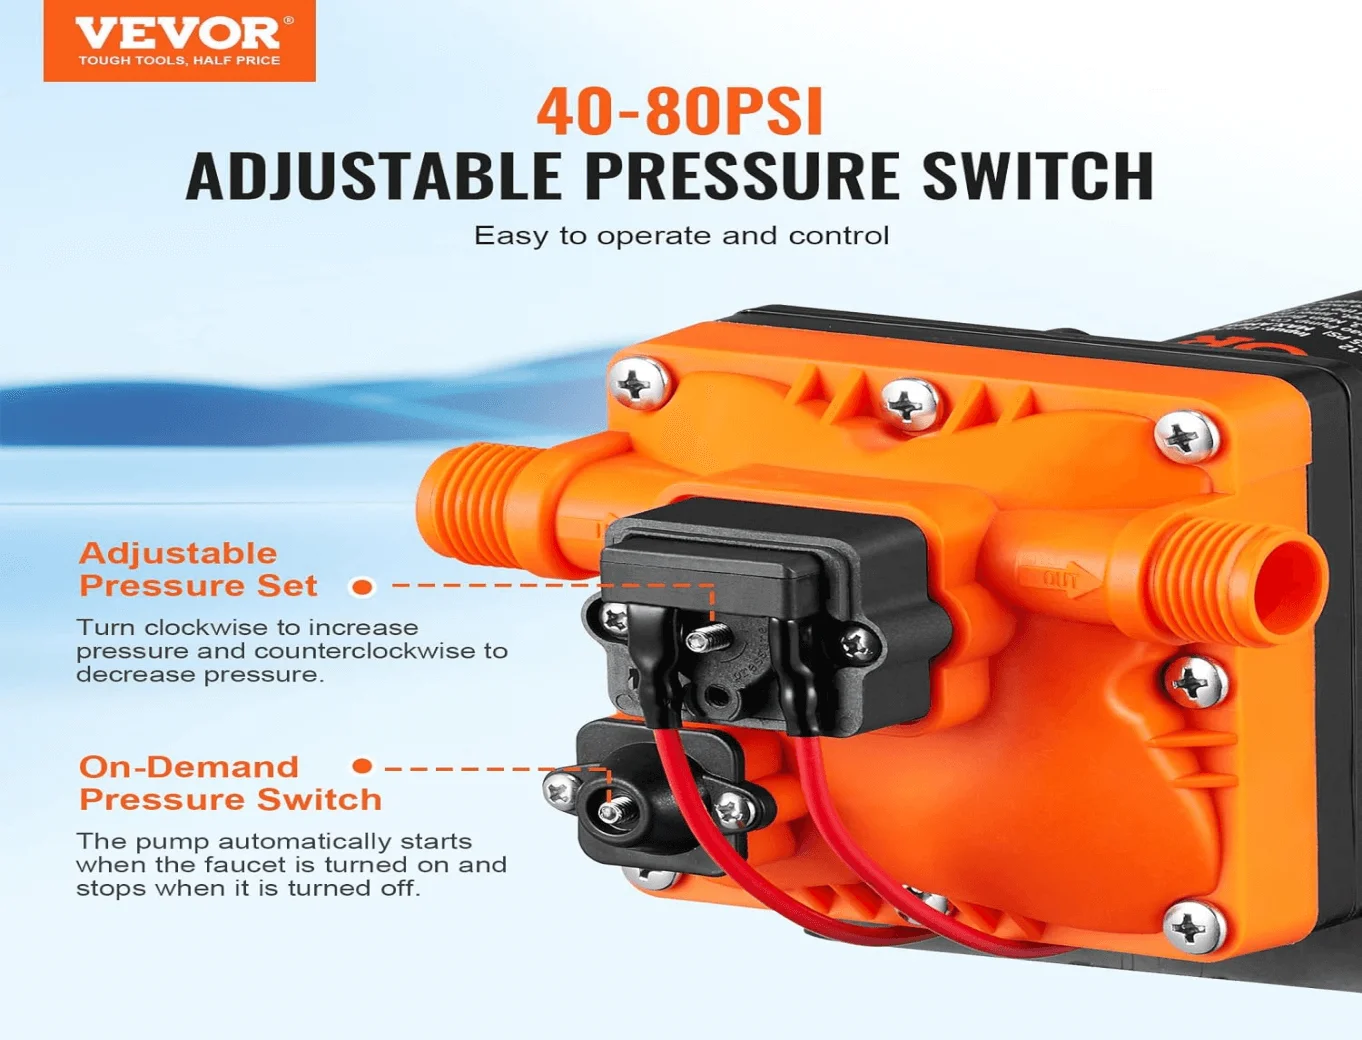
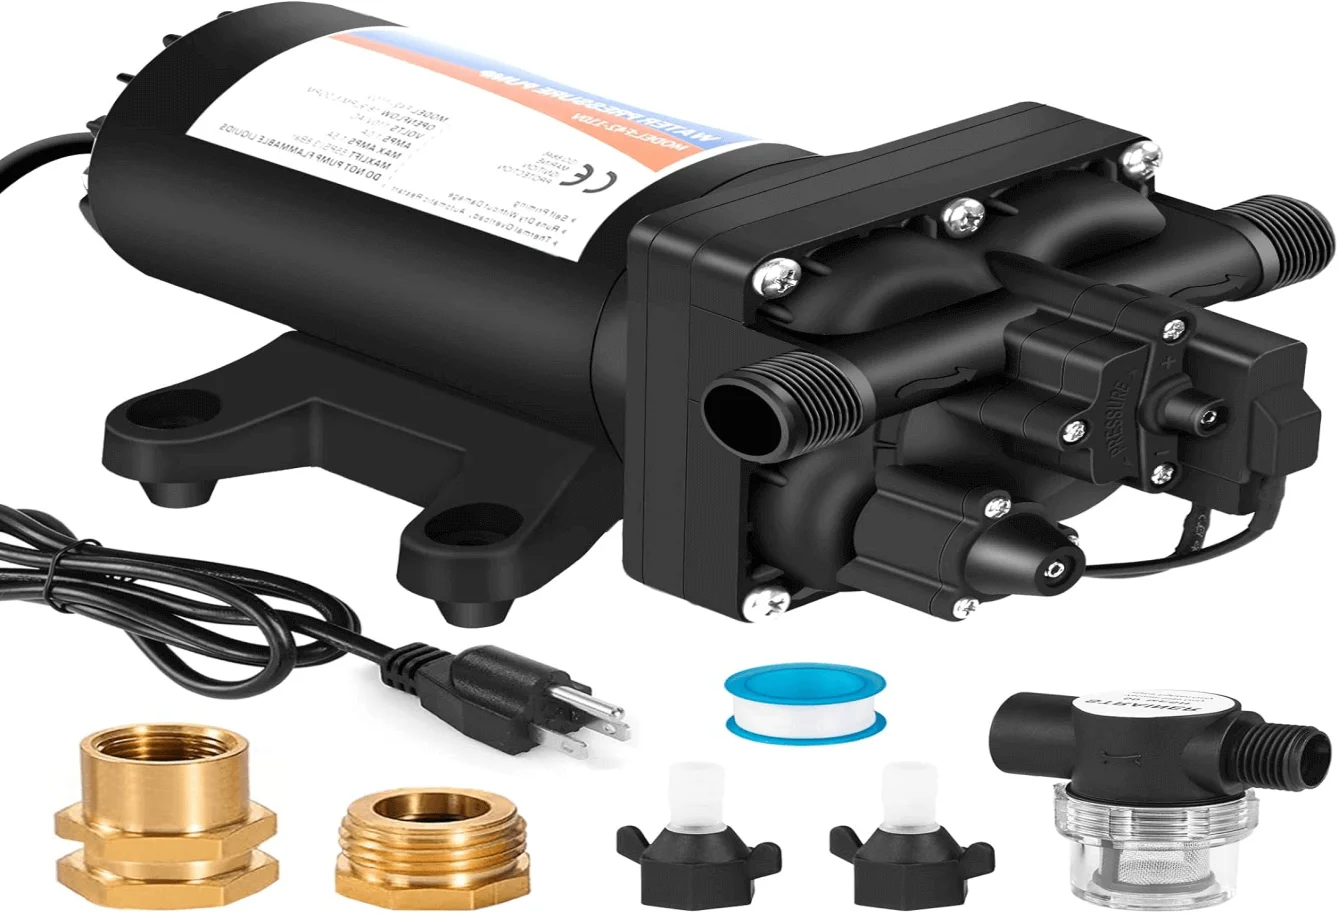
1. VEVOR 12V RV Water Pump 5.3 GPM
The VEVOR 12V RV Water Pump 5.3 GPM is a self-priming RV water pump created to meet your RV’s plumbing needs. The pump delivers a flow rate of 5.5 gallons per minute and a 70 PSI. You will have enough water when you need it. It is relatively quiet, so there are no disturbances when sleeping.
Specifications
● Flow capacity: 20 Liters per minute (5.5 Gallons per minute)
● Voltage: 12V DC
● Water pressure: 70 PSI (40-100PSI adjustable)
● Nozzle open pressure: 55 PSI (3.8 bar)
● Hose Outlet and Inlets: 12 mm (1/2″) diam. Hose
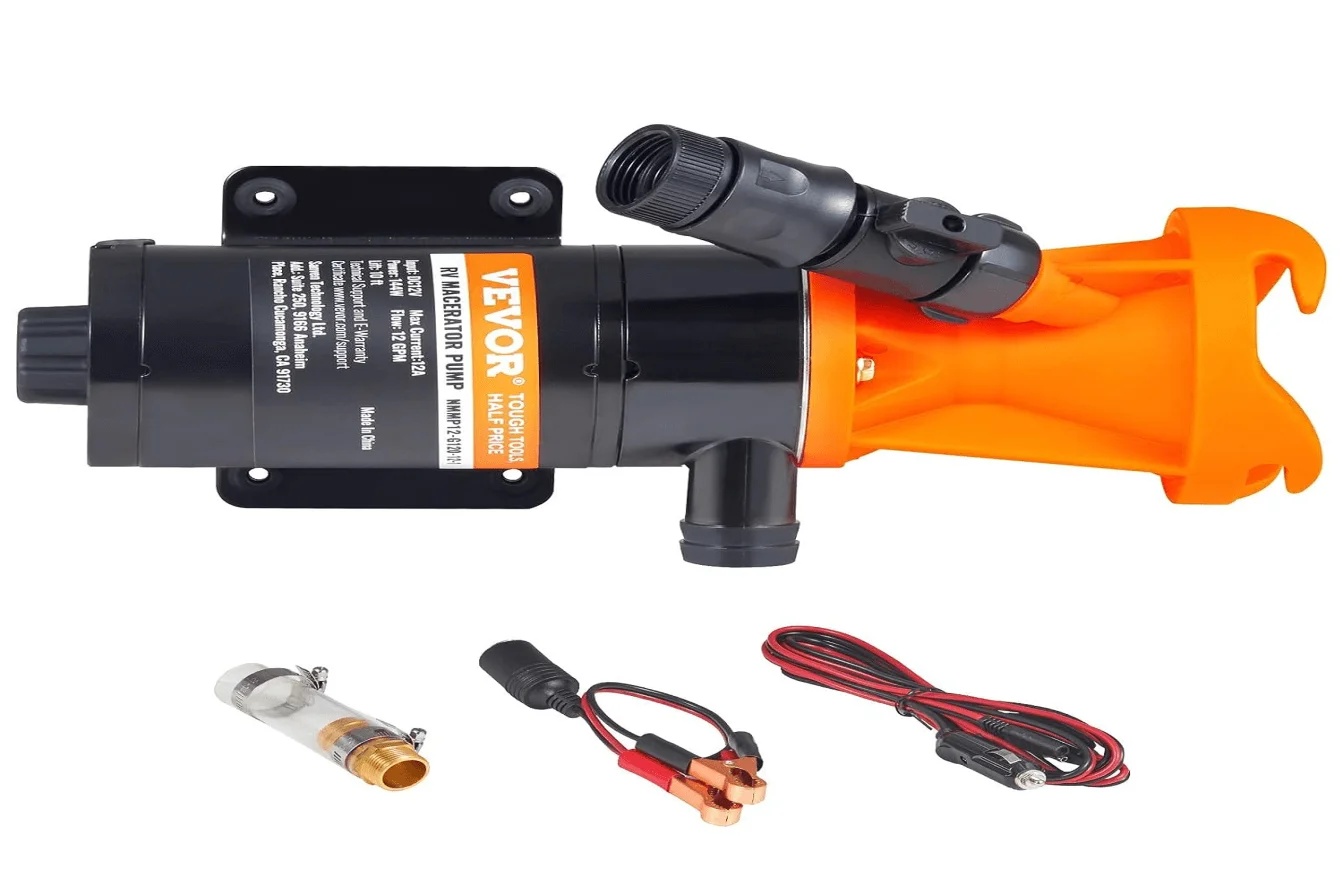
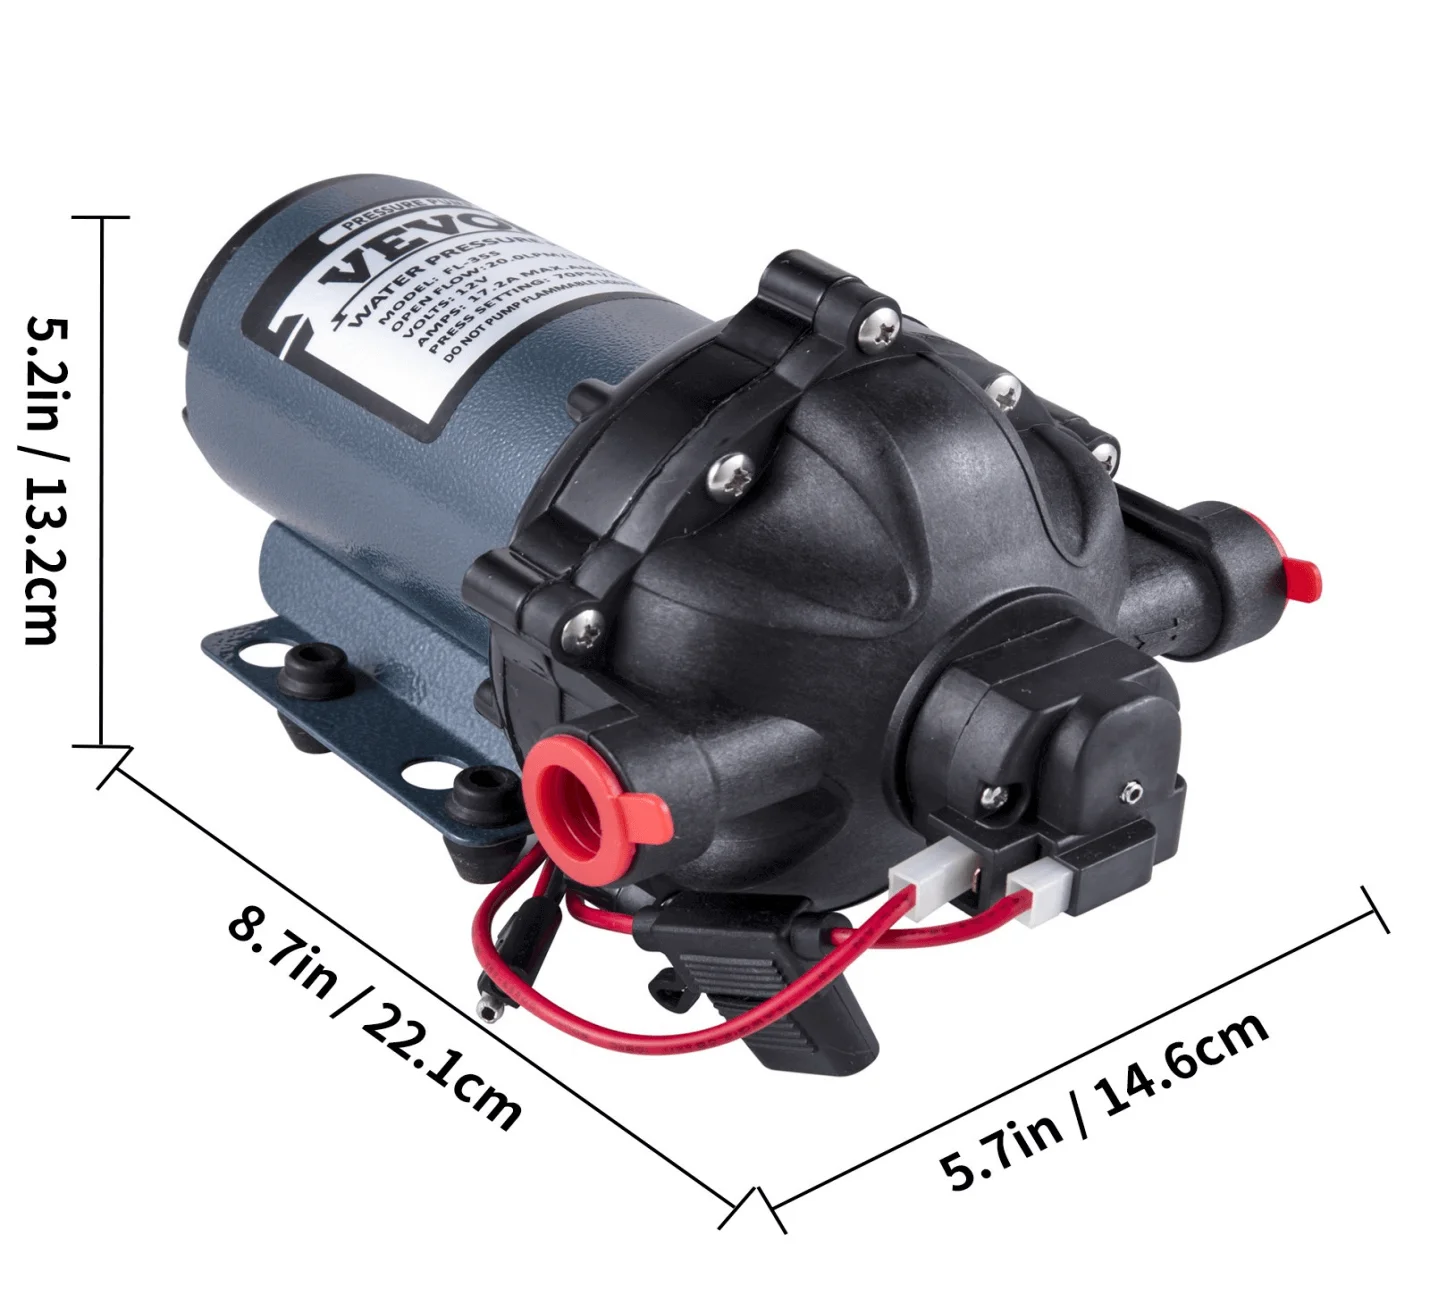
2. VEVOR 12V Self-Priming Water Diaphragm Pump 70 PSI 5.5 GPM
The VEVOR 12V water pump RV is designed to supply water to your RV adequately. It delivers a 5.5 gallons per minute flow rate with a 70 PSI. The machine is low noise, allowing you to sleep undisturbed. Also, it is equipped with safety features such as thermal protection to prevent overheating that causes heat damage or fire accidents.
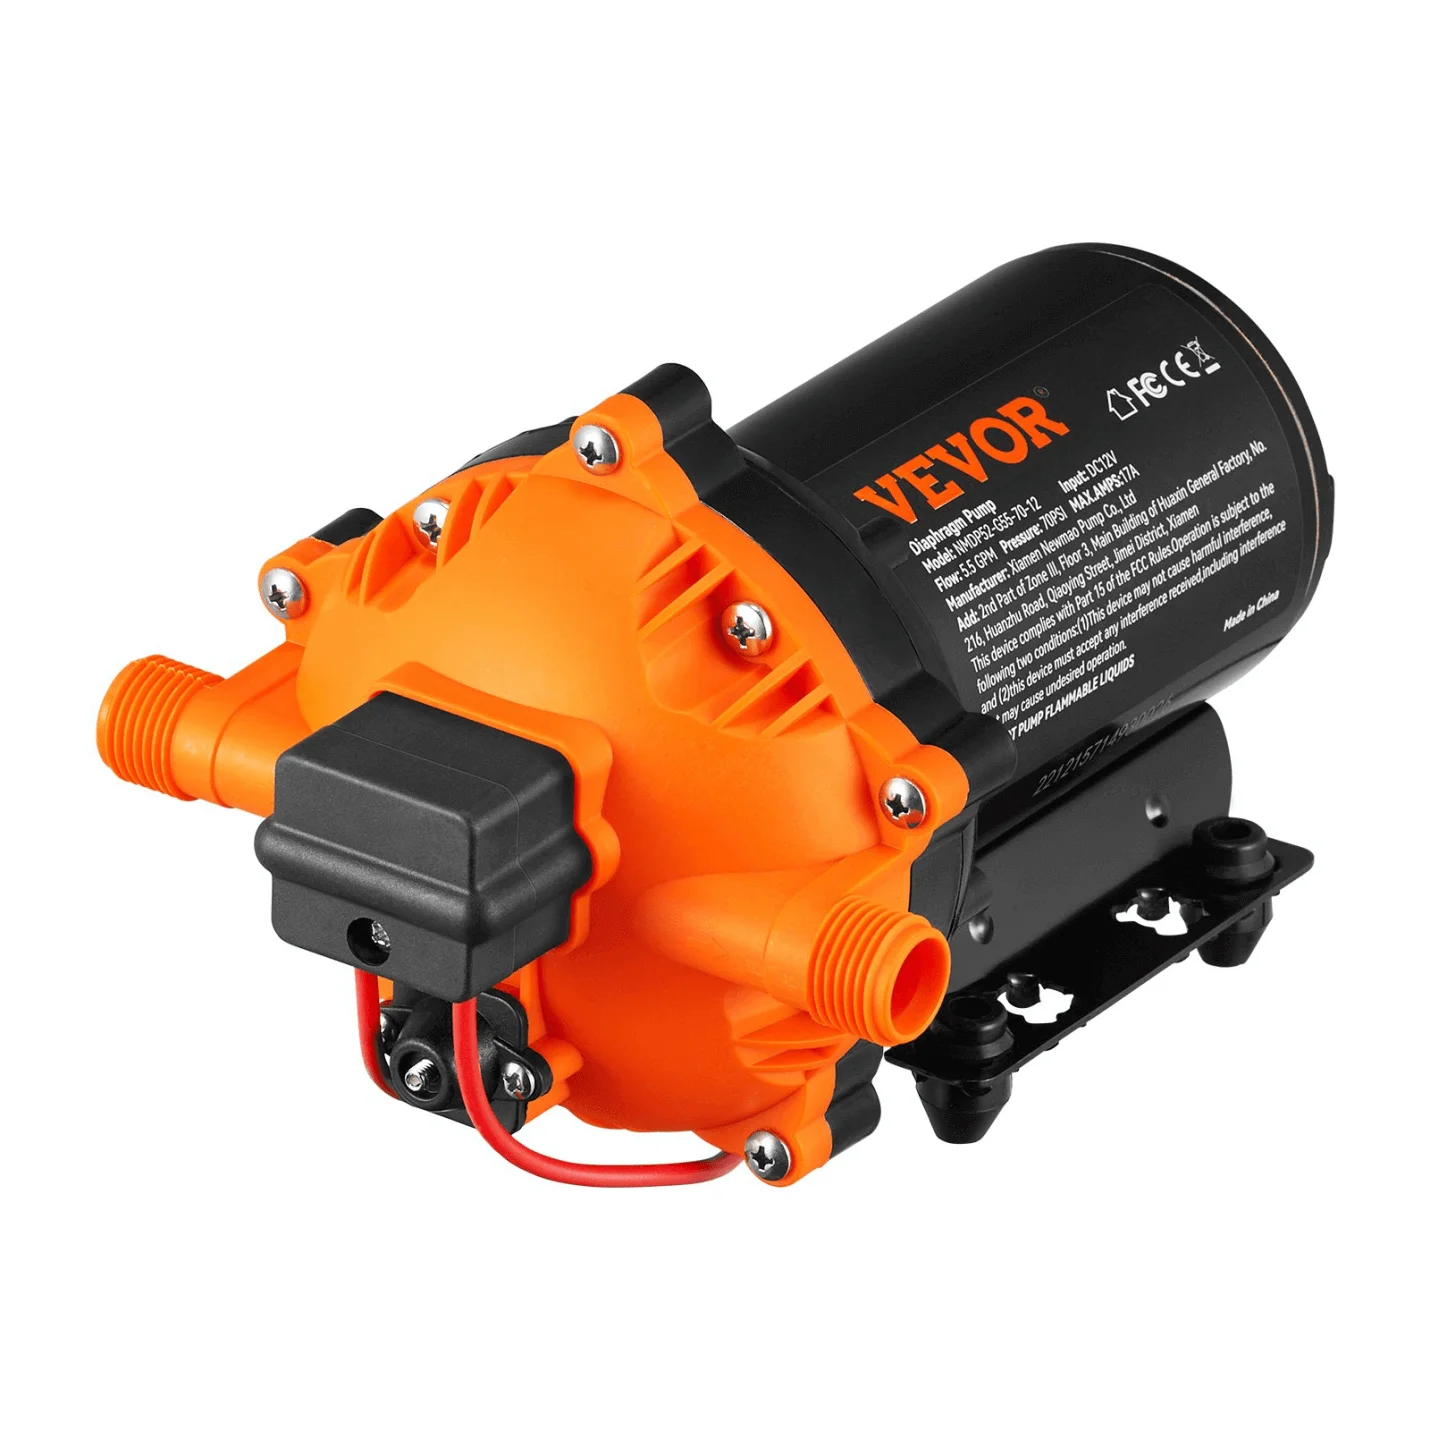
Specifications
● Max Flow Rate: 5.5 GPM
● Rated Voltage: 12V
● Rated Pressure: 70 PSI (40 to 100 PSI Adjustable)
● Inlet/Outlet Diameter: 1/2″ MNPT
● Rated Suction Height: 6 ft/1.8 m
● Liquid Temperature: 140℉/60℃
3. Shurflo RV Water Pump 12V
The Shurflo 12V Water pump has a GPM of 5.3 and 60 PSI, which is suitable for RVs. It ensures your RV is supplied with water to make your camping experiences comfortable and fun. It has a great reputation in the market, and you can trust it to serve you for years.
Features
● Maximum Flow Rate: 5.3 Gallons Per Minute (GPM)
● Voltage: 12 Volts (DC)
● Pressure Rating (PSI): 55
● Outlet/Inlet Port Type: 1/2 Inch
Conclusion
As discussed above, replacement RV water pump is easy and fast. Carefully follow the guide step-by-step to help you in replacing RV water pump. Being able to fix or replace the RV water pump is fun and satisfying. Additionally, you will save money since you do need to hire professional repair for the job.
Also, you will have a better understanding of how your RV water pump works. Consider the above-mentioned water pumps as your next replacement RV water pump.


