
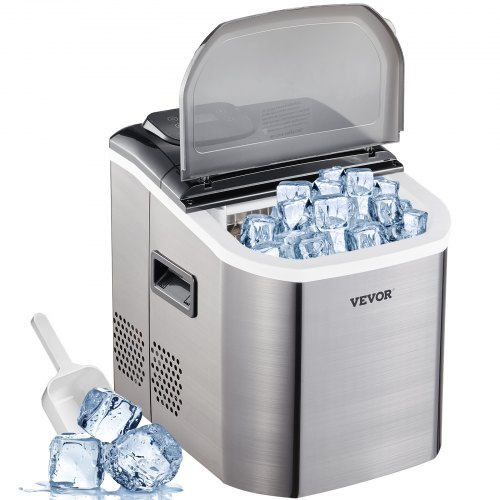
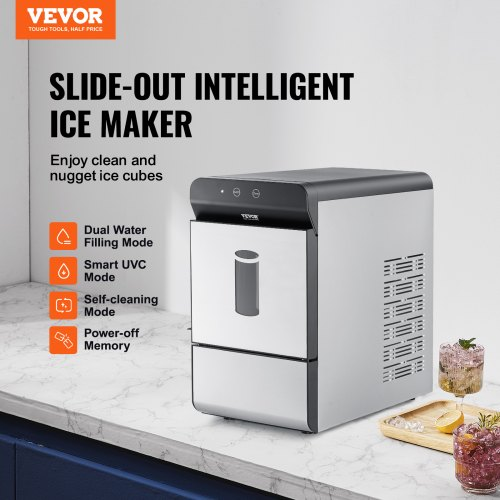
Summer is around the corner. Have you made any preps to keep it away from approaching you? Well, if yes, that is better. If not, no worries. Invite the cold drinks and bring coolness to your life with the ice maker.
Sometimes, you are a beginner and don’t know how to operate it. Some tricky problems aren’t gone as well. But you don’t have to worry anymore, as the complete A to Z guide on portable ice maker instructions is here.
We will discuss the ice-making process, troubleshooting, and understand how to use portable ice maker.
Table of contents
Part 1: How is Ice Produced?
Ice production is a phenomenal scenario. You’ll love the way it works out.
Step 1: Filtration
You have installed the water filters already, right? It is time for them to show their magic. The water pipes supply the water to the refrigerator section. Filtration ensures clean water without dust, debris, or smelly fuels.
Step 2: Condensation
The condensation sector provides the refrigerants to the water system. Copper coils provide the vapors and turn them into liquid.
There are three critical methods for condensation.
- Air-cooled
- Remote cooled
- Water cooled
This sequence further promotes the ice-making process.
Step 3: Evaporation
Refrigerants provide a low temperature and pressure whenever they get condensed in the condenser section. Now, they pass through the evaporators. The shifting of lower temperature into the water turns the water into the ice. This phenomenon shift ensures the repeat ice-making cycles depending on how much evaporation you need.
Step 4: Ice is Ready
The freezing point makes the ice stick to the surfaces. But compressors keep it away by stopping the supply of refrigerants into the VEVOR ice maker.
Depending on your ice maker type, you can get the ice out manually, or the ice maker will dispense it.
Part 2: How to Set up a Portable Ice Maker?
A portable ice maker installation differs slightly from a commercial ice maker installation. It can be a hassle if you don’t know how. Portable ice maker instructions include the following steps.
Choose a Suitable Location:
Choose a suitable place like the flat surface or floor. Ensure proper surface area with ample ventilation space.
Clean Ice Maker
Before trying the first experience, clean up the ice maker. It’s better to wash it with warm water and vinegar solution thoroughly. After washing, clean the interior and exterior with a soft cloth and rub it slowly.
Connect with a power source
Do you have a compatible power outlet? Check its voltage, power, and current to match the portable ice maker’s requirements. Plug the ice maker and turn it on.
Don’t rush. Wait at least 2-3 hours and let the refrigerants settle correctly.
Prepare Ice Maker
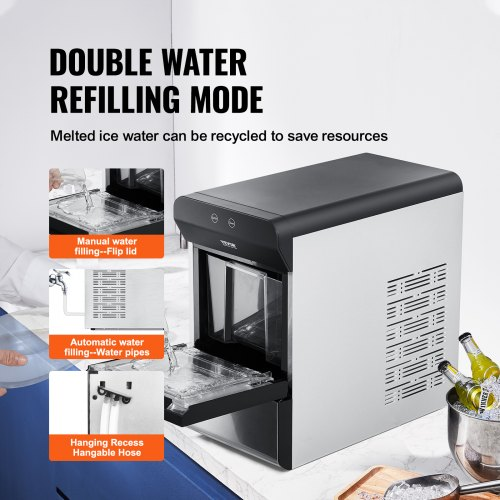
Now, blend your first experience with ice making. Inspect the water reservoir section and remove any dust or debris. Pour water until it is less than full. Don’t overfill it; otherwise, the ice maker will start spilling water.
Turn on the ice maker
Now, see the magic of the ice maker by turning it on. If there is a control panel, you can set up the ice cube size and shape sometimes.
Observe Ice production
Ice maker will make the ice. But don’t use the earlier batches of ice cubes and discard them. Do this until the ice maker reaches its optimal production capacity. Now, you can repeat the cycle and use the ice cubes you produced.
Part 3: How to Use a Portable Ice Maker
Whenever using a portable ice maker, there are some tips to follow up and understand them. These include:
- Always check the drain pipe of the water reservoir is closed. It will ensure no leakage of water and keep the water reservoir filled.
- Once you connect the ice maker to the power outlet, observe the blinking of the ICE indicator!
- When filling the water reservoir, remove the lid and basket. Check if it is clean and pour water. Close the lid and replace the basket.
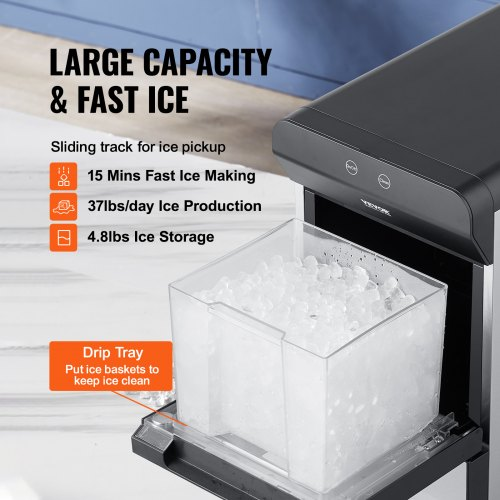
- Once complete, the ice cycle takes 7-15 minutes. An ice basket with an evaporator helps dispense the ice. Once one cycle is complete, you can get the ice, and the ice maker will start a new production cycle.
- ICE FULL indicator shows the ice basket is full of ice. Before starting the next production cycle, you must remove the ice from the basket.
- ADD WATER indicators turn on when your reservoir water is below the threshold.
- After the desired amount of ice, you can press the ON/OFF button to stop the cycle and ice maker.
Part 4: Cleaning and Maintenance Tips For Portable Ice Maker
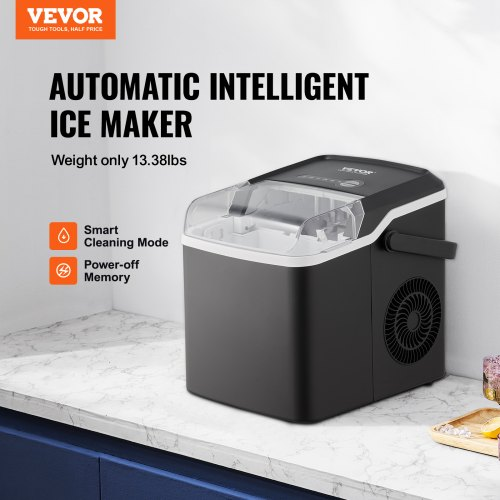
A VEVOR portable ice maker can be a financial burden if you do not maintain it properly. Moreover, cleaning a portable ice maker can be different.
Here are a few steps and tips to follow.
Unplug your ice maker and Clean
If your portable ice maker is running, press the OFF button to stop the ice-making cycle. Remove the plug from the outlet. Now, let it be at room temperature.
Check the ice tray. If residual water is present, push the ice tray to rush water into the water reservoir.
Drain Water
Move your portable ice maker away from the workplace. Make sure it is at least 60mm away. Remove the drain plug, open it, and drain all the excess water. Make sure there is no water left in the water pipes.
Water Reservoir Cleaning
Check and close the drain plug. Fill up the water into the water reservoir and press SELECT. Wait for the cleaning indicator to show up. Select the ON button to let it pump the water. Almost 6 minutes of cleaning activity will happen. After that, you can open the water drain and let the water drain out.
Ice Maker Interior Cleaning
Prepare a solution of vinegar and water. Soak the cloth and clean the inside of the ice maker. You can also rinse the interior with water and gutter out all the water.
Wash the ice basket. And dry the whole ice maker.
Exterior Cleaning
Tidy up the exterior of the portable ice maker with water. You can use dishwashing soap or simply clean it with a water-soaked cloth. Dry your portable ice maker.
Part 5: Safety Precautions When Using Your Portable Ice Maker
Once you have purchased, it does not mean you can start making the ice immediately. Instead, there are some precautions and safety measures to follow. Here are various tips.
- Don’t remove the stickers or safety labels, as they can guide your usage.
- Grab the manual from the manufacturer.
- Get an exclusive grounded power outlet. Connect it with the ice maker only; no other devices.
- Your appliance and all connections must be grounded to avoid any accidents in the event of sparks.
- Don’t use the extension cord. Because of overheating, you might receive unacceptable responses.
- Check your extension cord before using it. Don’t use it in case it shows some signs of damage.
- Get a compatible electrical system to avoid any electrical accidents.
- Place your power cord without making its connection with the other hot or cold objects.
- Don’t put any explosive articles on the ice maker. Ensure it is in a safe place.
- Avoid replacing or repairing any part unless you know how to do it.
Part 6: Portable Ice Maker Instructions: Troubleshooting Problems
Sort out the following problems on time if you make your ice.
1. Water Leakage Inside the Machine
Water leakage can happen due to overflow, misalignment between pipes, or ice. Just hit the tracking button, evaluate, and correct the problem instantly.
2. High Water Temperature
High water temperature is another big problem. Anything above 32°C can cause a problem in the ice maker. As per the portable ice maker instructions, it is better to reduce the temperature below 32°C.
3. Overheated room
If your room temperature is quite high, it can be another reason for the poor ice-making. Reduce your room temperature for better results.
4. Low water flow
There may be some block in the pipes. Especially the ice particles or debris in the pipelines cause the block to water flow. Check if ice is stuck inside; pour warm water to thaw it. If there are debris blocks, remove them instantly.
5. The ice-making cycle seems normal, but no ice is produced
Either the water temperature is relatively high, or something is happening with the refrigeration system. Correct it with a temperature of less than 32°C. Start the ice-making cycle.
6. Poor ice-making result
It often happens due to poor heat dissipation or extreme water temperature. Correct the reservoir temperature between 8°C to 28°C. You can leave a 6-inch clearance margin also.
Frequently Asked Questions About Portable Ice Maker Instructions
Why is my ice maker not making enough fast ice?
When your pipes are kinky or water flow is inadequate, ice-making speed and quantity decrease. You must evaluate such problems and put an instant end to them.
Which components make up an ice machine?
A refrigeration section is a specialist in the ice-making process. It has four parts: evaporator, compressor, condenser, and throttle valve.
Is it a problem if I leave my portable ice maker on all the time?
There is no such problem in leaving the ice maker turned on. The most common result is ice melting that gradually turns into water in the water reservoir.
How many types of ice makers are there?
There are two crucial types of ice makers you must know. One is the batch ice maker that works in the batch making. The second type is a continuous ice maker that produces ice continuously.
Conclusion
Whenever you hit a problem in ice making, grab the manual and read on. Always go through safety tips and cleaning precautions when using the ice maker. Bring up an instant solution to all your problems.
If you want excellent ice makers, VEVOR has some of the best ones. Best quality, inexpensive rates. Enjoy the chance now!


