
Are you ready to unleash the power of chill? “Chill Mastery Unleashed” brings you ice-cold experiences that are smooth and refreshing. Today, we’re diving into the exciting world of commercial ice maker installation – why settle for warm when you can have ice-cold perfection?
Imagine ice clinking in your glass as you play your favorite chill tunes. Do you enjoy the soothing sound of ice cubes? Adding the right ambiance to your ice maker installation can create a cool, effortless symphony. Let’s dive into the details of the installation of the VEVOR ice maker and reveal the secrets behind it that nobody has told you before.
Planning Your Perfect Ice Oasis
After installation, a Commercial ice maker requires electric links and drainage. Installing commercial ice machines correctly can prevent electrical dangers, water leaks, and other safety hazards.
Choose a spot for your VEVOR ice maker. Ensure the space is big enough and easy for your ice machine to clean. It should be close to the water and know commercial ice machine drain requirements. The location has adequate ventilation to prevent your ice machine from overheating.
Have you ever wondered how some ice makers produce crystal-clear cubes easily while others leave you wondering? The secret to the perfect pour lies in the size of the water line. As we unravel the mystery, learn how to size up for the best ice-making experience.
Consider a Few Things In Mastering the Ice-Maker Installation Process
Your ice maker’s water line size is like decoding its secret language. But it’s not only about the water but the efficiency, precision, and perfect pouring every time.
- Diameter: Before commercial ice maker installation, consider the diameter as it’s the initial step while finding the sweet spot. When the flow is too narrow, it can slow down, whereas excess water will be poured instead of flowing when it is too wide.
- Pressure Precision: Find the perfect balance for the perfect pour, and pay attention to water pressure because a high pressure can result in a watery spectacle, while a low pressure can result in a bland one.
- Flow Rate: Know what flow rate your ice maker needs. Get the right flow rate, and you’re done.
Tools of the Trade: Your Installation Arsenal
Ensure you’ve all the tools before commercial ice machine installation. So, these tools make your ice cream dream a reality.
Ice-Maker Installation Demystified: Step-by-Step Brilliance
Let’s turn up the cool factor and embark on the journey to install the ice maker machine, bringing a breeze of chill vibes into your space.
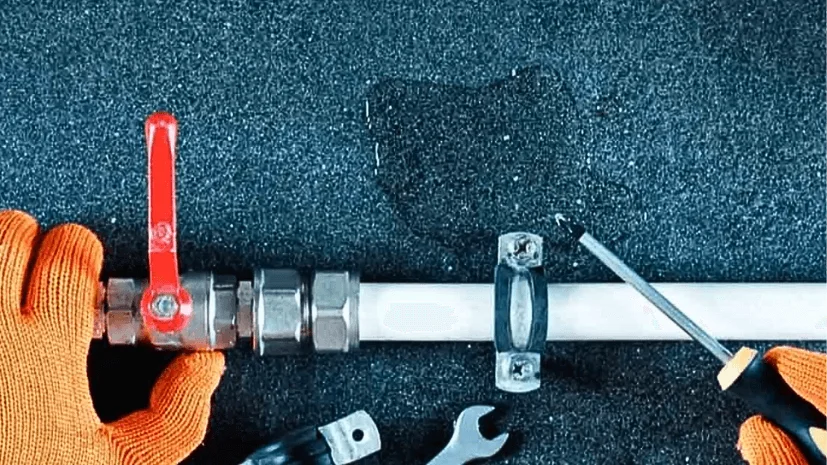
Step 1 – Water Supply Connection
Your machine needs a constant supply of water to make ice. When handling ice, you should take the same precautions as food handling. So, it’s always recommended that ice machines be fitted with a water filter to get a clean water source.
Step 2 – Ice-Machine Drain Line Installation
Do ice makers need a drain? You must establish a drainage system when mounting a commercial ice maker installation. You need to figure out where the drainpipe is. After identifying the area, ensure it should be accessible for cleaning and maintenance.
Step 3 – Install the Drain for Ice Maker
If there are commercial ice machine drain requirements, the ice machine drain line installation should relocate the water from the ice maker to the drain pipe. To the ice manufacturer, connect the water drainage system. Be sure your drain pump is prevented from leakage, secure, and drainpipe line is safe.
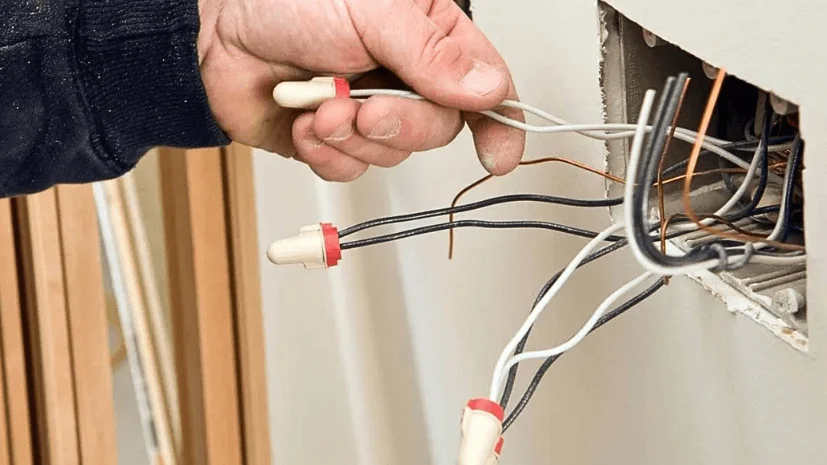
Step 4 – Electrical Connections
Now it’s time to set up a business ice maker, and you need to establish a link for the maker. Set up the specialized circuit for the ice manufacturer by installing a circuit, following instructions, and following the instructions. After this, ensure your breaker has the proper size and can deal with the current demands of the commercial ice maker installation.
Attach your ice maker to the electricity supply. Furthermore, it connects the ice manufacturer to the electricity supply.

Step 5 – Level and Stabilizing
After setting up the electrical connection for your commercial ice maker installation, stabilize and level up the machine. Now, degree your machine and level the ice manufacturing. Adjust the legs if it’s uneven. Secure the ice maker to the floor or wall so it doesn’t move. Secure it with screws and brackets.
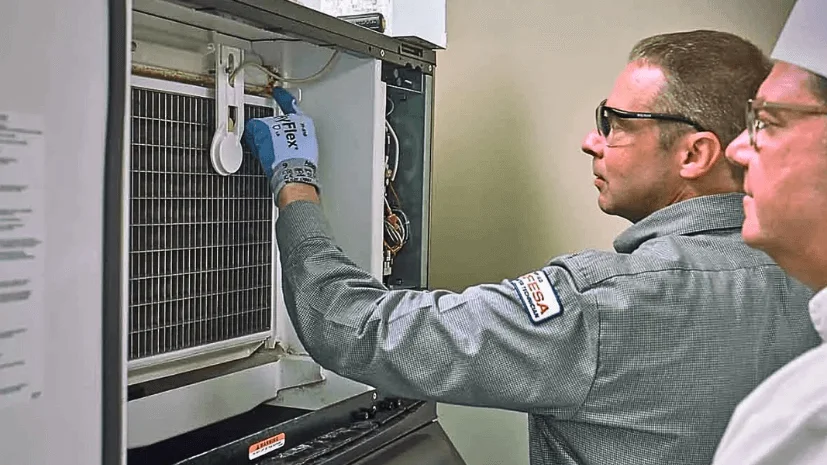
Step 6 – Examining the Machine
Finally, install a commercial ice maker and make sure it’s maintained. Then, fill up the water tank, turn it on, and run it for a couple of hours to make sure it makes ice correctly and there are no leaks. Equipment should undergo routine maintenance and regular maintenance. Ensure the condenser coils and ice container are cleaned, and the water filter is changed.
Safety Spotlight: Standards That Sparkle
These standards will ensure a sparkling commercial ice machine installation and a safe and worry-free one. Let’s take a look at some safety spotlight:
- Clutter-Free Area: Make sure your workspace is clutter-free before the installation starts. A clutter-free area minimizes the risk of accidents and provides a smooth path for installation.
- Electrical Integrity: Protect yourself from electricity. Your power sources should be grounded and suitable for your ice maker. If there’s no need for extension cords, then avoid it.
- Well-Maintained Tools: Ensure that your tools are in top shape if they will be your allies during this ice machine installation process. The use of well-maintained tools contributes to a safer working environment as well as making the process smoother.
- Read Manuals Carefully: Follow the manufacturer’s instructions carefully. You’ll get a flawless installation and safe operation with it.
The Grand Finale: Testing and Tuning
After the commercial ice machine installation, it’s time for testing and tuning to see whether it’s working fine or not. For this, follow the basic steps:
- Start-Up Ice Maker Machine: After the ice-maker installation, turn on the power supply connected to the water source. Keep an eye on the machine to see if it’s working.
- Self-Checking: When you power your machine the first time, self-check and pump out the remaining water.
- Preparing: You’ll see the inlet valves open, and the inlet water will flow it until it reaches the set level after your ice machine is energized. After this, the ice-maker will defrost for one time.
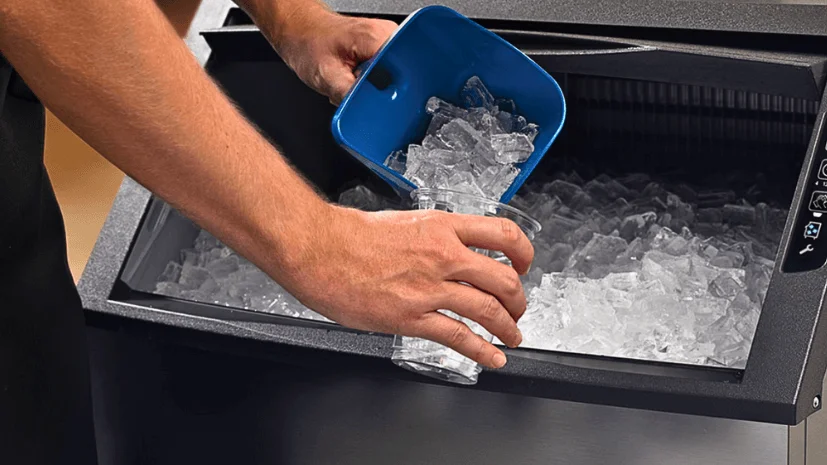
- Making Of Ice: After 30 seconds of pre-cooling, the water pump starts, and through the evaporator, water will flow smoothly. In the ice tray, ice cubes will be formed.
- Ice Harvesting: The water pump will be turned off after the ice-making process, and the defrosting valve will turn on when the hot gas enters the evaporator for a couple of minutes. Furthermore, the ice cube slides into the storage bin from the evaporator.
Note: Don’t try to put your hand into the storage bin while ice falls, as it can injure your hand.
- Shutdown Down Button: If you want to stop your ice-maker machine, then push the on/off button on the control panel.
- Bin Stop: If a storage bin is full in the running state at a certain height, then the ice sliding board will not be reset or rebounded in case of freshly produced ice cubes. So it’ll stop the ice maker in 60 seconds.
FAQs About Commercial Ice-Machine Installation
What are the common basic steps for ice-maker installation?
Ice-maker installation needs a few common enigmas like the perfect spot, electrical connection, water line connection, noise management, safety code mysteries, etc.
How to do troubleshooting for drainage and water lines after ice-machine installation?
- Water Lines: Make sure you use the right fittings, seal them well, and avoid sharp bends. Make sure the water is off before you connect.
- Troubleshooting: Make sure there’s power water, and check for blockages. In the manual, you will find error codes.
- Drainage: Use permeable surfaces, keep drainage components clean, and ensure they don’t clog.
Final Words
Commercial ice machine installation is a complex procedure. For this reason, securing and properly setting up your device is essential. When installing your commercial ice maker, always comply with the manufacturer’s guidelines and inspect local building regulations. You can redefine chilling experiences with VEVOR cubes or crushed ice. Take your cool factor to the next level -because, with VEVOR, it’s not just ice; it’s Your Ice, Your Way!”


