
Pottery wheels have been in existence for many centuries, and they’ve been used to craft some of the most artistic and functional potted pieces known to mankind. That said, if you are a beginner to the world of pottery, you might not know what you are doing, and that’s exactly what we are here to help with. Let’s figure out how to throw on a pottery wheel like a pro.
Table of contents
How to Throw on a Pottery Wheel: The Basics
Let’s just take a quick look at pottery throwing and its basics.
An Overview of Pottery Throwing
Pottery throwing is a very old art form, one that dates back thousands of years. This is where a person, known as a potter, uses clay put on a rotating wheel to shape the material into various objects. The wheel is very useful for helping to create evenly shaped and symmetrical objects. It is one of the most preferred methods for producing clay and ceramic goods that are round. Pottery wheels like this one from VEVOR, are very commonly used nowadays.
The Importance of Mastering Wheel Throwing for Pottery Making
If you plan on making pottery, then yes, mastering the art of wheel throwing is very important. The simple reality is that throwing on a pottery wheel is really the only way to shape the highest quality of objects that need to be smooth and round.
Mastering the art of using a pottery wheel means being able to make pieces that are balanced, symmetrical, and smooth. What it really comes down to is that if you don’t know how to use a pottery wheel, you really won’t be able to make any pottery at all.
Getting Set Up: The First Steps
The fact of the matter is that no matter, if you are throwing pottery or doing any other kind of art or craft, having the workspace set up and well-prepared, is key to success. So let’s figure out how to do this right now.
Preparing Your Workspace for Throwing
Here are some tips on how to prepare your workspace for throwing on a pottery wheel.
- Make sure that you have a comfortable seat. There’s nothing worse than sitting at a pottery wheel for hours on end if you don’t have proper seating.
- Working with pottery is already difficult enough, so make sure that you have enough illumination. Working in dark conditions certainly won’t produce ideal results.
- You’ll need quite a few tools to throw pottery, so make sure to keep them all organized and at hand.
- You also want the area you are working in to be free of all clutter and distractions. A clean and clear work environment is very important.
Adjust the Pottery Wheel for Optimal Use
Before you can get started with throwing pottery, you need to properly adjust the wheel. First, this involved adjusting the height at the wheel. Make sure that your arms are comfortable as they are, and that your feet can reach the pedals. Also, try to familiarize yourself with all of the controls of the pottery wheel in question.
How to Throw a Bowl on a Pottery Wheel: The Essentials
There are some essentials you’ll need for throwing a bowl on a pottery wheel, so let’s take a look at what these are.
Required Tools for Wheel Throwing
To throw a bowl on a pottery wheel, you’ll need a variety of basic tools. These may include, but are not necessarily limited to, a sponge to keep the clay wet, ribs for smoothing and shape, a wire cutter to cut the clay, and possibly some rags. Of course, you’ll need a good pottery wheel too, with VEVOR always being a good choice.
Selecting the Right Kind of Clay for Your Project
If you are a beginner, something you may not know is that there are different types of clay available for use, and which one you choose can make a big difference.
Now, we aren’t going to talk about all of the different types, but it is important to note that clay that is either medium grog or high grog is best for beginners. It’s easy to shape and quite forgiving. It’s ideal because it has plenty of integrity and structural strength.
Basic Techniques for Throwing on a Pottery Wheel
There are some basic techniques you’ll need to learn to throw a bowl on a pottery wheel, so let’s take a look at what these are.
Centering the Clay on the Wheel
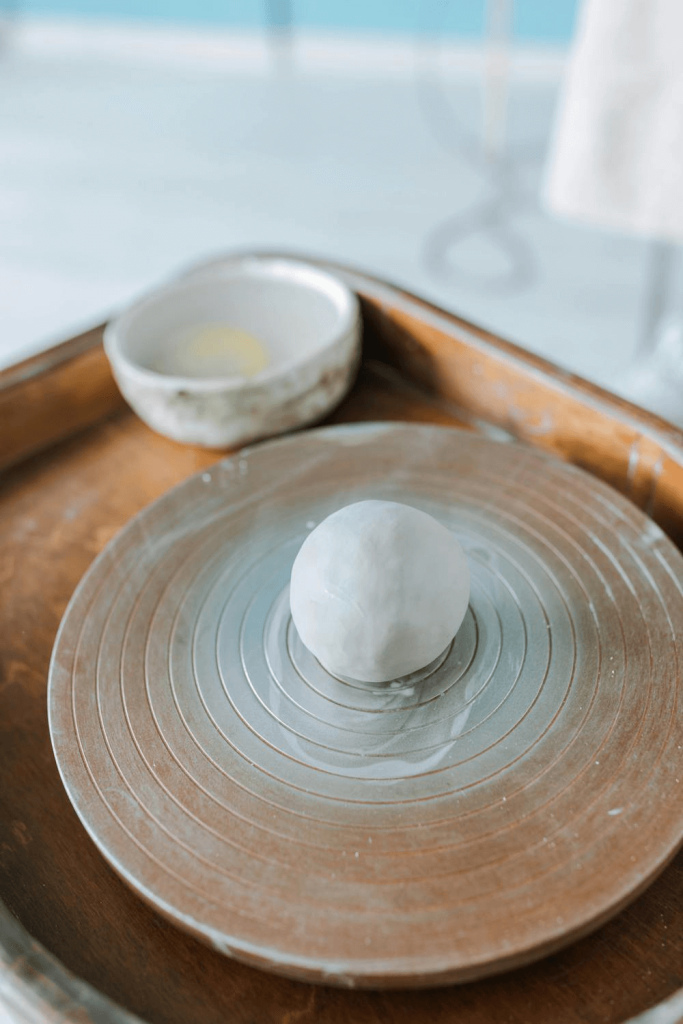
The first technique you’ll need to learn is how to center the clay on the wheel. First, put the clay in the center of the wheel and start the wheel’s motion, starting with a relatively slow or moderate speed. Using your body weight and the palms of your hands, push on the clay until it is centered.
Opening and Pulling the Walls of Your Piece
You’ll need to create an opening to make a bowl, which means that you’ll need to push your thumbs into the middle of the piece, but don’t go too deep. You then need to use your fingers and palms to slowly and gently pull those walls outwards. Make sure the walls are thick enough to remain upright!
Shaping and Smoothing Techniques
One of the best shaping and smoothing techniques that you could use in pottery making is the rib. Ribs are designed to shape both interiors and exteriors of bowls and vases. This is by far the best method. Furthermore, ensuring that the clay and your hands always stay moist is another big help.
How to Throw a Bowl on a Pottery Wheel: Step-by-Step
Let’s now go through a step-by-step tutorial on how to throw a bowl on a pottery wheel.
- Make sure that the clay has been wedged well, as you don’t want any air bubbles in there.
- Slam the clay down in the center of the wheel with a substantial amount of force, but not too much.
- Start the wheel so it begins spinning at a moderate speed. You can always increase or decrease the speed of the wheel as needed.
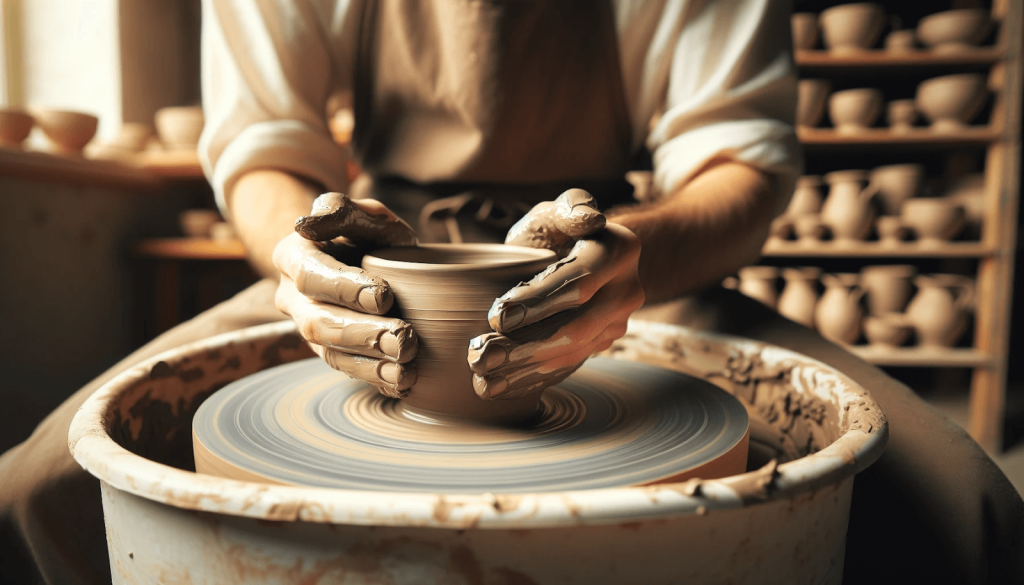
- Making sure that your hands are wet, use your palms to press down on the clay while keeping your elbows against your body for support. You are now centering the clay.
- Once you have the clay in the middle, use your thumbs to press down into the center of the clay, which will create an opening. Don’t go too deep. About a third of the clay should be left as the base.
- You can now use your fingers to make the opening wider, being sure to use controlled and slow movements.
- Take one hand and put it on the inside of the clay, and the other hand on the outside.
- While applying even pressure from both inside and out, squeeze the clay and lift it up to form the walls of the bowl. Be sure to maintain even thickness throughout.
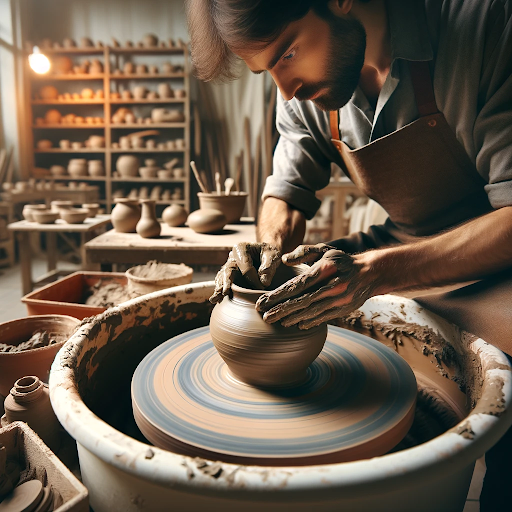
- Use your fingers, hands, ribs, and other tools to shape and contour the bowl as you wish.
- Use a soft rib or wet sponge to remove any irregularities from your piece.
- You can now apply the final touches.
Common Mistakes and Tips for Creating a Perfect Bowl
There are a few crucial mistakes that you need to avoid when creating a bowl, so let’s take a look.
- A common mistake is to make the walls so thin that the bowl can no longer support itself.
- Many people also don’t make their bowls uniform in thickness or shape.
- Another huge mistake is overworking the clay. If you work the clay too much, it may collapse.
- Applying uneven pressure when attempting to raise the walls is another big mistake.
Adding the Finishing Touches
There are some finishing touches that you’ll need to add to your bowl before it’s done. So, what are these?
Techniques for Finishing the Thrown Piece
- You first need to trim the bottom of the clay so that the base, otherwise known as the foot, is even and smooth.
- There are many decorative techniques you can use to add details, such as carve or slip designs, or even textures too.
- You’ll also need to let the piece dry under plastic wrap. Let it dry slowly, or else it may crack.
Safely Removing the Pottery from the Wheel
Removing a piece of pottery from a pottery wheel can be a challenge, but not if you follow the tips as listed below.
- Use a simple wire cutter and slide beneath the bowl. This should help separate it from the wheel.
- Use both hands to lift the bowl and hold it from the bottom as much as you can, as this will help avoid it from warping or changing shape.
How to Throw on a Pottery Wheel: FAQs
Let’s go over a few frequently asked questions about throwing a bowl on a pottery wheel.
What is the best type of clay for beginners learning to throw on a wheel?
One of the best types of clay for beginners is stoneware clay, as it features a great balance of workability, malleability, and durability.
How long does it typically take to become proficient at wheel throwing?
How long it takes to become proficient at wheel throwing depends on many factors, such as how much you practice, your initial talent, your teacher, and the tools at your disposal. It may take months or even years.
Are there any specific exercises or practices to improve throwing skills?
Repeatedly centering the clay, pulling walls, and widening pieces are all things that you should practice regularly.
How to Throw a Bowl on a Pottery Wheel: Conclusion
The bottom line is that throwing a bowl on a pottery wheel can be quite difficult, but also very rewarding. If you want to create something with your own two hands, then making a bowl is certainly a good place to start. If you’re just getting started, you may want to invest in a small pottery wheel like this one.


