
One of the most important pieces of equipment for any gardener is a garden hose. But one of the most annoying things is dealing with a tangled, kinked, or dirty hose. Putting the hose on a reel the right way will save you time, make watering your lawn a pleasant, stress-free experience, and keep your hose from wearing out. This article will help you with everything, from picking the right reel to keeping your hose neat to caring for it so it lasts for years.
This blog post will show you step-by-step how to put hose on reel, what equipment and materials you’ll need, common mistakes to avoid, and easy ways to keep your hose and reel in perfect shape for years.
Why Proper Hose Storage Matters
Before you learn how to properly put a garden hose on a reel, it’s important to understand why correct storage matters. Winding your hose properly helps prevent damage. Kinks and twists can make the material weaker and cause leaks. It is also much easier to pull out and put back a nicely wound hose, which saves time and work when gardening. If you leave a hose lying about, it can be an eyesore or a tripping danger. Proper storage keeps your landscape neat. Taking care of your hose and reel also keeps your equipment in good shape by reducing wear on connections and nozzles. Taking a few minutes to wind properly will save you hours of worry and money in the long run.
Tools and Materials You’ll Need
To wind a hose properly, you only need a few simple things. This planning stops things from going wrong and keeps the process going.
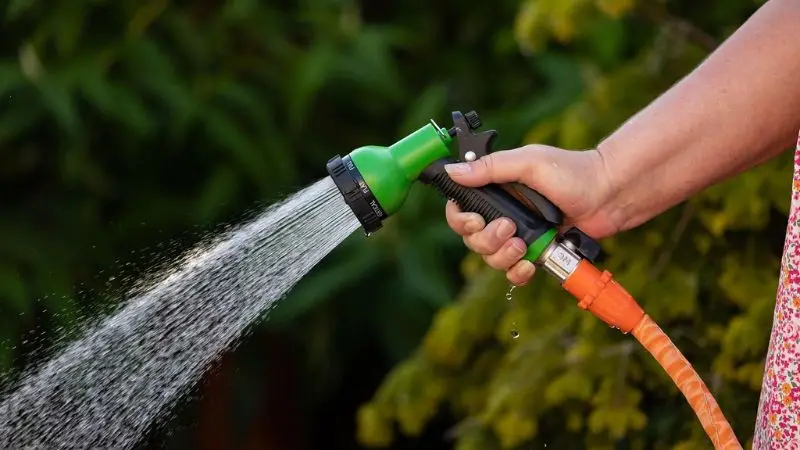
1. Garden Hose
@tada.greenhouse Replying to @☦️✨️Misty💙💚Dawn 💜🐬💜 VEVOR No kink stainless steel water hose. Upgraded today. No one like a kinking water hose #tiktokshoplabordaysale #vevor #stainlesswaterhose #waterhose #gardentools
♬ original sound – TaDa Greenhouse
Before rolling up your outside hose, ensure it is clean, not twisted, and free of kinks. When the hose is dirty, clean it thoroughly with water, then use it afterward. Cleaning the line prevents the reel from accumulating dirt, mud, and other entities that can slow its functionality over time. It is equally important to inspect the hose carefully for signs of wear and tear, including weak areas, cracks, and leaks. Before you wind it, you can either mend it or purchase another one. Following this ensures a smooth and efficient process when using a step by step guide to hose reel installation.
2. Hose Reel
To ensure it functions correctly, choose a hose reel that fits the width and length of your hose. You can purchase a manual reel with a handle for winding the hose at your own pace, or a wall-mounted reel that is easy to reach and works well in small spaces. You can use an automatic or motorized reel to do the job. It costs more, but it’s easier. Make sure the reel can retain the complete length of your hose, no matter what you choose.
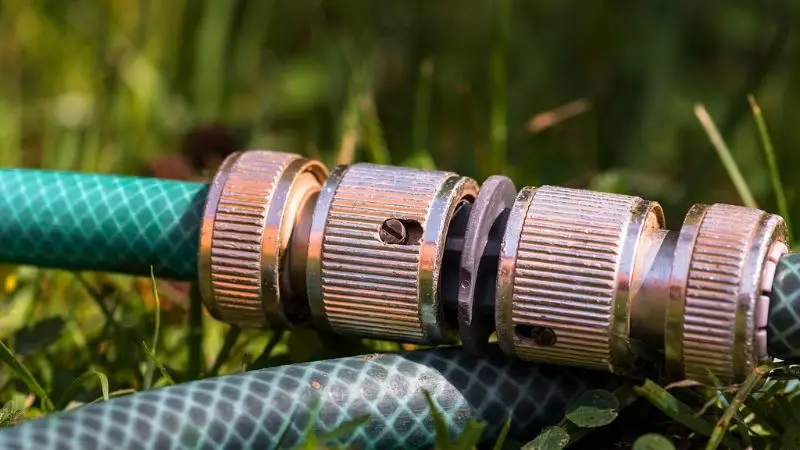
3. Connector or Hose Fitting
A connector is used to properly connect the hose to most hose reels. Always follow the manufacturer’s instructions to make sure the connector fits securely. Also, make sure the connector size works with both the reel and the hose. Some hose reels come with a starter kit that has all the necessary fittings. Proper attachment is key to learning the best way to wind a hose on a reel without kinking, ensuring your hose stays tangle-free and in good condition for years.
4. Gloves
Your garden hose does not require gloves, but gloves are highly recommended to keep you more comfortable and safer. To avoid scratchy or battered hose rims that can cause discomfort to your hands, put on gloves. They also prevent dirt, grime, and small pieces of trash from sticking to the hose, particularly after it has been lying on the ground. Using gloves can make the process of how to attach a garden hose to a wall-mounted reel safer, cleaner, and more efficient.
5. Towel or Rag
Always have a towel on hand to wipe away dirt or water. This keeps your reel clean and reduces the likelihood of it moving while you wind it. Having this equipment available makes the job go faster, safer, and more efficiently.
If your hose has stiff bends, putting it in the sun for a few minutes can make it more flexible.
How to Put Hose on Reel Without Knots
Follow these steps carefully to keep your hose neat and tangle-free.
Step 1 – Prepare Your Hose and Reel
To start, lay your hose on the ground in a straight line. Before it becomes a problem, you can spot any kinks and fix them. Check that the reel moves in a straight line. If it doesn’t, add some oil to the handle to make it easier to wind.
Step 2 – Attach the Hose to the Reel
Find the connector on your reel. Most reels feature a threaded fitting that you may use to screw on the hose. Gently twist it until it’s snug. Pull on it a little bit to make sure it’s safe. A hose that isn’t fastened properly can come loose or wind unevenly.
Step 3 – Wind the Hose Onto the Reel
To learn how to properly put a garden hose on a reel, start by holding the hose close to the reel with one hand. Use your other hand to slowly turn the handle while moving the hose back and forth across the reel to ensure it is even. Go at a steady speed. You can get tangles or an uneven coil if you wind too quickly. Keep the hose near the reel, but don’t pull it too tight, since this could cause it to kink or break.
Before winding, always check for twists. It could cause knots later if you leave even one twist.
Step 4 – Secure the Hose for Storage
When you get to the end, allow a little slack and wrap the rest of the hose around the hook or holder on the reel. Make sure the nozzle is pointing down so any excess water can drain off. Following these steps shows the correct way of how to attach a garden hose to a wall-mounted reel while keeping it safe and long-lasting.
Important: Keep the hose out of direct sunlight. Over time, UV radiation can break the substance.
Common Mistakes to Avoid
Avoid these mistakes to ensure your hose and reel last longer:
When people spin a hose, one of the most common mistakes they make is not getting it ready first. If you don’t stretch it out and look for twists first, it can get tangled and knotted, which is hard to fix later. Something else that’s wrong is that the hose winds up too fast. When you’re in a hurry, the hose doesn’t lie flat on the reel and starts to pile up in weird ways, which could lead to kinks. Moving slowly and controlling the hose with your hand is always best.
If your reel includes a guiding arm, not paying attention to it can potentially cause problems. The hose tends to bunch on one side when you don’t use it, instead of spreading evenly across the reel. Another mistake to avoid is putting too much on the reel. If you try to fit a hose that is too long for the reel, it can often become stuck and tangled. Before winding, always verify the reel’s capacity. Finally, leaving water in the hose can cause mould to grow and harm the inside. Following these tips helps ensure the best way to wind a hose on a reel without kinking, keeping it neat and tangle-free.
To keep your hose from getting damaged, always drain it before putting it away. Look for leaks every week. To maintain the reel working well, clean it and oil it once a month. Following these easy measures will keep your hose and reel in great shape, which is an important aspect of any step by step guide to hose reel installation.
Advanced Tips for a Hassle-Free Experience
- For big yards, use hose guides to keep the hose from pulling and breaking.
- It is easy to roll up and tie up a thin, light tube.
- If the reel doesn’t have a guide arm to help you wind the hose evenly, you can paint lines on it.
- If you want to keep two hoses together without cutting them, this is what you should get.
- A wheeled hose cart makes it easier to transfer and store the hose.
These tips ensure you know how to properly put a garden hose on a reel every time.
Troubleshooting Common Hose Reel Problems
Problems can still happen, even with the right technique. Here’s how to deal with them:
Hose bends or twists when winding
- Fix: Check whether the hose is bent or twisted first. When you wind the hose, be careful with your hands. To make all the loops the same size, move them back and forth. This plan makes it simple to put things away and keeps them from getting mixed up. You can maintain the hose clean and ready to use again if you take your time.
The reel handle is stiff.
- To fix it, to keep the wheels and handle in good shape, put some oil on them. Because of this, they won’t get trapped or stop working overtime. Be careful of debris, damaged stuff, or anything else that could come in the way of the turn or slow it down. Removing these elements will improve the system’s performance and extend its lifespan.
Hose comes off the reel.
- Fix: This will keep the joint from leaking or breaking. Make sure the screw is fully in. Check that it fits well and doesn’t move. If the connection still feels too loose, use a hose clamp to tighten it. This will ensure that water flows correctly and doesn’t spill or lose pressure when the item is in use.
The hose doesn’t retract smoothly.
- When you’re done checking, you’ll know if the container is empty of all the water it used to carry. Before you try to relocate the hose, make sure that it doesn’t have any structural damage on the inside. You should avoid anything that could make the treatment harder at all costs.
Conclusion
It’s not just easier to learn how to put hose on reel correctly; it also helps your hose last longer, keeps your landscape neat, and makes watering easier. Making sure your hose is ready, carefully wrapping it, avoiding common mistakes, and doing some simple maintenance will ensure that every time you use it, everything goes smoothly. The hose and reel will stay in good shape if you follow these steps. Your yard will always be ready to go. No matter if you’re watering flowers, veggies, or lawns, these simple steps will save you time, work, and stress.
FAQ
Q: How do you keep a hose from kinking?
A: Lay the hose straight before winding. Guide it with your hand, and wind slowly. Avoid sudden twists.
Q: Can I leave my hose on the reel all year?
A: Yes, but store it in a cool, dry place and always drain the water. This prevents cracking and mould growth.
Q: What should I do if my reel squeaks?
A: Add a drop of oil to the handle or gears. Wipe away dirt or debris, and the reel should spin smoothly.
Q: How often should I replace my hose?
A: A quality hose can last 5–10 years with proper care. Replace it sooner if you notice cracks, leaks, or excessive stiffness.


