A well-polished car turns heads and reflects the owner’s dedication to maintenance and care. Achieving that professional shine requires more than a cursory wipe-down; it demands precision, technique, and the right tools. A buffer is a pivotal instrument among these tools for pursuing automotive perfection.
In this guide, we delve into the art of polishing a car with a buffer. We explore the various types of buffers, safety measures, step-by-step procedures, advanced techniques, and post-polishing care to ensure your vehicle maintains its luster for the long haul.
Do not forget to check out VEVOR for a better experience!
Table of contents
Different Types of Buffers
When polishing your car, choosing the correct buffer is crucial. Two main types dominate the market: orbital and rotary buffers, each with advantages and drawbacks.
Orbital Buffer
Pros
- Beginner-Friendly: Orbital buffers are easier to handle, making them ideal for those new to car polishing.
- Reduced Risk of Damage: Their random orbit motion minimizes the risk of paint damage, making them safer for inexperienced users.
- Versatility: Suitable for various polishing tasks, including applying wax and sealants.
Cons
- Time-Consuming: Orbital buffers may require more time and effort to achieve the desired results compared to rotary buffers.
- Limited Cutting Power: While practical for light polishing, they may struggle with heavy defects and deep scratches.
Rotary Buffer
Pros
- Decisive Polishing Action: Rotary buffers provide high-speed, consistent rotations, effectively tackling stubborn imperfections and heavy oxidation.
- Faster Results: Their aggressive cutting ability means more rapid correction of paint defects.
- Versatility: Suitable for professional detailers and enthusiasts seeking precision and control over the polishing process.
Cons
- Higher Risk of Damage: Rotary buffers pose a greater risk of paint damage if not used properly due to their direct-drive spinning motion.
- Learning Curve: Rotary buffers require practice and skill to master, making them less beginner-friendly than orbital buffers.
Preparing to Polish
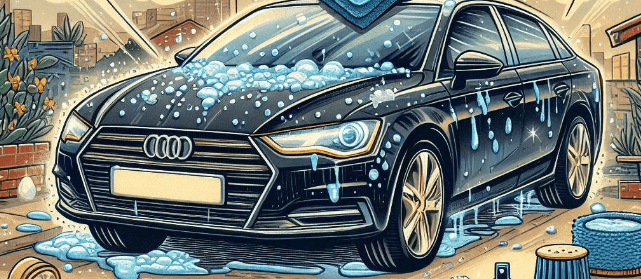
Start Cleaning
Just like you wouldn’t paint on a dirty surface, you shouldn’t polish your car without cleaning it first. It’s not just about making it look nice immediately; the polish needs to work right. If your vehicle has dirt or grime left on it, and you start polishing, you might scratch your paint instead of making it shine. Those tiny bits of dirt become little troublemakers, causing scratches you didn’t want.
Choose Your Polish
Finding the perfect polish for your car is like picking the perfect outfit—it must fit just right. You can’t just grab any polish and go. Think about what your car’s paint is like. Does it have a special coating? How much fixing does it need? Choose your polish wisely to make your vehicle look its best as if it’s fresh from the showroom.
Safety First
Polishing your car isn’t just about dealing with the vehicle itself but also handling chemicals, dust, and noise. It’s like preparing for a very calm battle. You’d want gloves to protect your hands, goggles to keep polish out of your eyes, and a mask to avoid breathing in fine particles.
Prepare Your Space
Have you ever tried cooking in a messy kitchen? It’s chaotic. The same idea applies to polishing your car. Before you start, clear out your workspace to avoid accidents, and ensure there’s enough fresh air to keep those chemical smells away. An organized and safe space lets you focus better and helps you get the shiny result you aim for.
In short, polishing your car starts with excellent cleaning, choosing the suitable polish, gearing up for safety, and ensuring your workspace is tidy and safe. Follow these tips, and you’ll be on your way to making your car shine beautifully.
Step-by-Step Guide on How to Polish a Car with a Buffer
Ever glance at your car and wish for that glossy, eye-catching shine? Polishing your car with a buffer might seem daunting, but I promise, with a bit of care and the right technique, you can give your ride a glow that’ll make it the envy of your block. Here’s a friendly guide to help you polish your car like a pro without worrying about damaging the paint.
Get Started
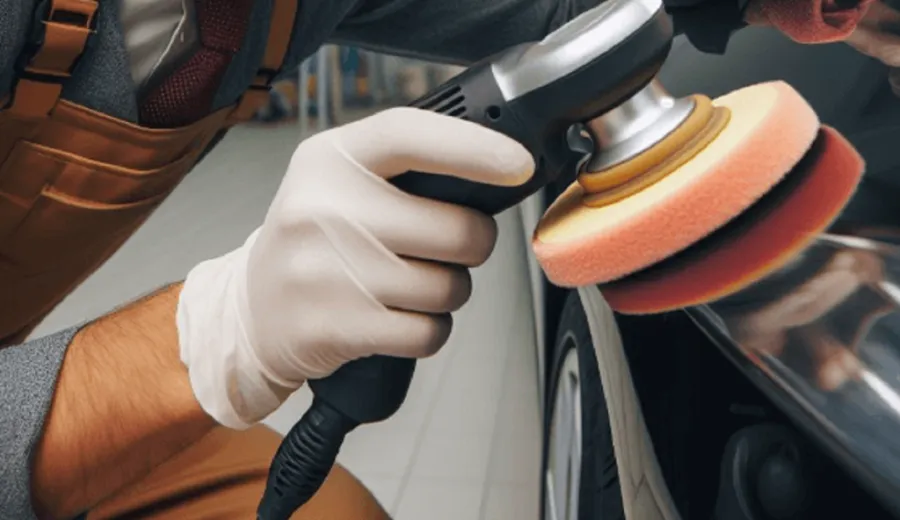
All right, first things first, we need to get the buffer pad set up correctly. It’s not as complicated as it sounds; follow these easy steps:
- Choose Your Weapon: Not all buffer pads are created equal. Foam pads are your friend if you’re just sprucing things up. Microfiber pads are your go-to if you’re combating some serious scars. Make sure it matches the kind of buffer you’ve got.

- Line it Up: Gently place the pad on the buffer’s backbit, ensuring it sits right in the center. Some buffers have nifty indicators or a Velcro system to help you.
- Lock and Load: Press down firmly to ensure the pad sticks well. You don’t want any lumps or bumps messing up the smooth rhythm you’ll develop.
Lay It On Applying the Polish
This part is critical—applying the polish correctly sets the stage for that flawless finish we aim for. Here’s how to do it:
- Pick the Perfect Polish: There’s a world of polishes out there. Choose one that suits your car’s paint job and the transformation you hope for.
- Clean Slate: Make sure your vehicle is clean and dry. This isn’t just about avoiding a muddy mess; it’s about ensuring the polish goes smooth and even.
- Dot the I’s: If you feel confident, add a small dab of polish to the pad or directly onto your car’s surface. Remember, a little goes a long way. We’re polishing, not painting.
The Art of Buffing
Imagine you’re sculpting marble – you wouldn’t go hammer and tongs at it, right? Here’s how to get the balance right:
- Gentle Beginnings: Start slowly to spread the polish around. You can pick up speed as you find your groove, but this is a marathon, not a sprint.
- Section by Section: Break it down into manageable bits. Focus on one area at a time to ensure every inch gets its moment in the spotlight.
- Smooth Moves: Use overlapping strokes to cover the area thoroughly. It’s like lawn mowing; you want to take advantage of every spot.
- Feel the pressure (or Don’t): A gentle touch is all you need. The buffer’s here to do the heavy lifting.
Polishing your car is about taking the time to care for it and paying attention to the details. With patience and some elbow grease, you can achieve that dazzling shine that will make your car look brand new. Happy polishing!
Techniques and Tips for Achieving an Even Shine with a Buffer
Polishing your car until it shines brightly isn’t just about the effort; it’s also about putting a little love into each gentle swipe. Whether you’re experienced or a newbie, getting that perfect shine with a buffer is quite the skill. Here’s a more straightforward breakdown to make your car sparkle:
- Soft Touch: Imagine dancing with the buffer, using enough pressure to move it effortlessly over the surface. This isn’t about using strength but being gentle. The goal is to avoid leaving swirl marks while working together smoothly.
- Overlap Your Moves: Think of using the buffer like brushing a canvas. Overlap each passes slightly to ensure you cover the entire area evenly, leaving no spot unpolished.
- Work in Bits: Focus on polishing small sections at a time. This way, you can give each area your full attention, ensuring nothing gets overlooked, and every part shines back at you.
- Adjust the Speed: The speed of your buffer isn’t one-size-fits-all. Some spots need you to speed up, while others require a slower pace. It’s about finding the right speed for each part of your car.
- Take Breaks to Check: Now and then, step back to look at your work from a new perspective. This helps you spot any areas you have missed or need more polish.
- Keep Moving: Be sure to stay in one place briefly with the buffer. Moving continuously helps avoid damage and ensures an even finish.
- Pick the Right Supplies: Like any good craft, quality materials make a difference. Choosing the suitable polish and pads will get you the best result, making your car look its best.
Remember, achieving that flawless shine is all about patience, care, and a bit of practice.
After Polishing Care
Weekly Bath Time: Treat your car to a regular wash to ward off the dirt and grime that threaten its sparkle. Use a gentle, pH-neutral car soap, and swap the old kitchen sponge for a soft microfiber cloth to avoid any unwanted love scratches.
Quick Touch-Ups
Keep a spray detailer handy for the days between deep cleans. It’s your best friend for lifting off light dust and those frustrating fingerprints, ensuring your car continues to turn heads.
Seek Shade
Where you park matters more than you might think. Shield your pride and joy from the sun’s harsh UV rays by parking in a garage or under cover whenever possible. Also, steer clear of trees and construction zones to dodge sap, bird mishaps, or gritty surprises.
Wax On, Wax Off
Give your car a good waxing every few months. This amplifies the shine and acts as a knight’s armor against water, dirt, and debris. Plus, it’s an excellent workout for your arms!
Seal the Deal
For an extra defense layer, consider applying a paint sealant. It’s like giving your car an invisible shield against UV damage, acid rain, and pollutants, ensuring your polish job lasts longer.
Skip the Spin Cycle
Tempting as they are, automated car washes might do more harm than good, potentially leaving behind swirls or scratches. Hand washing or using touchless washes will keep your finish in top condition.
Beyond the Surface
Remember, a shining car isn’t just about the paint – regular check-ups like oil changes, tire rotations, and braking system inspections are crucial. A well-maintained ride is more likely to keep its sparkle and performance.
Maintaining that post-polish sparkle on your car is about dedication and love for your ride. With these tips in hand, you’re well on your way to having a car that doesn’t just shine but sparkles with pride.
Troubleshooting Common Problems When Buffering
Polishing a car with a buffer can sometimes lead to unexpected issues or mistakes. Here are some common problems encountered during the buffering process and solutions to address them:
Swirl Marks
- Problem: Swirl marks are fine circular scratches that result from improper buffing techniques, using the wrong pad or polish, or buffing over contaminants.
- Solution: Try using a finer polish with a softer pad to address swirl marks. Adjust your buffing technique using lighter pressure and reducing the buffer’s speed. Additionally, ensure the surface is clean and free of contaminants before buffing.
Holograms
- Problem: Holograms, known as buffer trails or holographic effects, are faint, cloudy lines visible under certain lighting conditions. They often occur when using a polish or pad that is too aggressive.
- Solution: Switch to a less aggressive polish and a softer pad to minimize holograms. Adjust your buffing technique by reducing pressure and ensuring even coverage. Check your work under different lighting conditions to identify and correct holographic effects.
Uneven Shine
- Problem: Uneven shine may result from inconsistent buffing pressure, improper pad alignment, or using the wrong polish for the paint type.
- Solution: Maintain consistent pressure and overlap your buffing passes to ensure uniform coverage. Check the alignment of the buffer pad to ensure it is centered and securely attached. Choose a polish suitable for your car’s paint type and condition to achieve a consistent shine.
Burn Through or Paint Damage
- Problem: Burn-through occurs when excessive pressure or high buffer speed causes the paint to overheat and burn, resulting in permanent damage.
- Solution: To prevent burn-through, use moderate pressure and avoid prolonged buffing in one spot. Lower the buffer speed if necessary and monitor the surface temperature closely. If burn-through occurs, seek professional assistance from a skilled detailer or body shop to repair the damage.
Product Buildup
- Problem: Product buildup occurs when excess polish or compound accumulates on the buffer pad, diminishing its effectiveness and causing streaking or uneven polishing.
- Solution: Keep that buffer pad in top shape by cleaning it regularly as you work. A simple pad brush or a blast from compressed air can work wonders in removing that pesky residue, getting you back to achieving that perfect shine.
When to Seek Professional Help
Polishing can sometimes feel like negotiating a minefield, especially if you’re new to the game. While many hiccups can be sorted out with a bit of know-how and a professional tool like VEVOR buffer, there are times when calling in a pro is your best bet. Here’s when to dial up a professional:
- Severe Paint Damage: If things go south and you end up with burn-through or some serious scratches, a skilled professional is worth their weight in gold. They have the tools and the talent to fix things up like new.
- Challenging Correction Jobs: Some jobs just need that professional touch. We’re talking about severe oxidation, deep scratches, or other paint imperfections that laugh in the face of DIY. In these cases, those with the know-how can make all the difference.
- A Little Out of Your Depth? There’s no shame in admitting that we’re not all born with a polisher in hand. If you’re feeling out of your depth or just not quite there with your confidence, a bit of pro guidance can go a long way.
- Pressed for Time? Professional detailers are not just about skill – they offer convenience too. For those who have more to-dos than time, outsourcing this task could be a game-changer.
Investing in professional care for your car is more than just a luxury – it’s a smart move that can spare you headaches, save you time, and ensure your car looks its best. Don’t hesitate to seek out professional help when needed to keep your car in prime condition.
Wrapping Up
Polishing your car with a buffer can transform its appearance, elevating its value and appeal. With the right approach, a bit of practice, and occasional expert intervention, you’re all set to give your car a showroom-worthy shine. Remember, it all starts with the right tools and a thorough car wash. Safety first, so gear up and ensure you’re working in a well-ventilated spot. Apply the polish with care, stick to a methodical pattern, and keep that buffer moving to dodge those dreaded swirl marks.Choose from our range of high-quality car buffers at VEVOR and make your car shine like never before!


