
If you’re interested in pottery and have ever daydreamed about creating one-of-a-kind vases, you might have also considered the tools you’ll need. Contrary to popular opinion, you will not really require an abundance of costly equipment and materials. A pottery wheel, water, and clay are the major things you need.
You can make vases of many shapes and sizes by hand-shaping clay on a pottery wheel while it spins. There are several pottery wheels with diverse functionalities and features, but you will need to invest in one of the best to make the most of your artistic endeavors. Currently, one of the top options we recommend is the VEVOR’s Pottery Wheel.
This piece outlines how to use a pottery wheel to create beautiful vases. You can achieve your goals of creating excellent vases and pots you’d be truly proud of by following the steps outlined in this article.
Table of contents
Preparing Your Workspace and Tools
Always ensure your work area is neat before building a vase. If you have the right equipment, DIY pottery is less of a chore. Here are some tips to help you organize your workspace:
- Try to get rooms that are both large and brightly lit.
- Lay down a plastic sheet, newspaper, or upholstery fabric to protect your workspace.
- Get a basin of water and a sponge ready right away so you can clean the pottery wheel and other tools of the trade.
- Have rags or towels around. Use a dry towel to clean your work surface and tools after every use.
- Wear protective gear like gloves, a mask, and an apron to minimize exposure to dust and spills.
Essential Tools Needed for Pottery
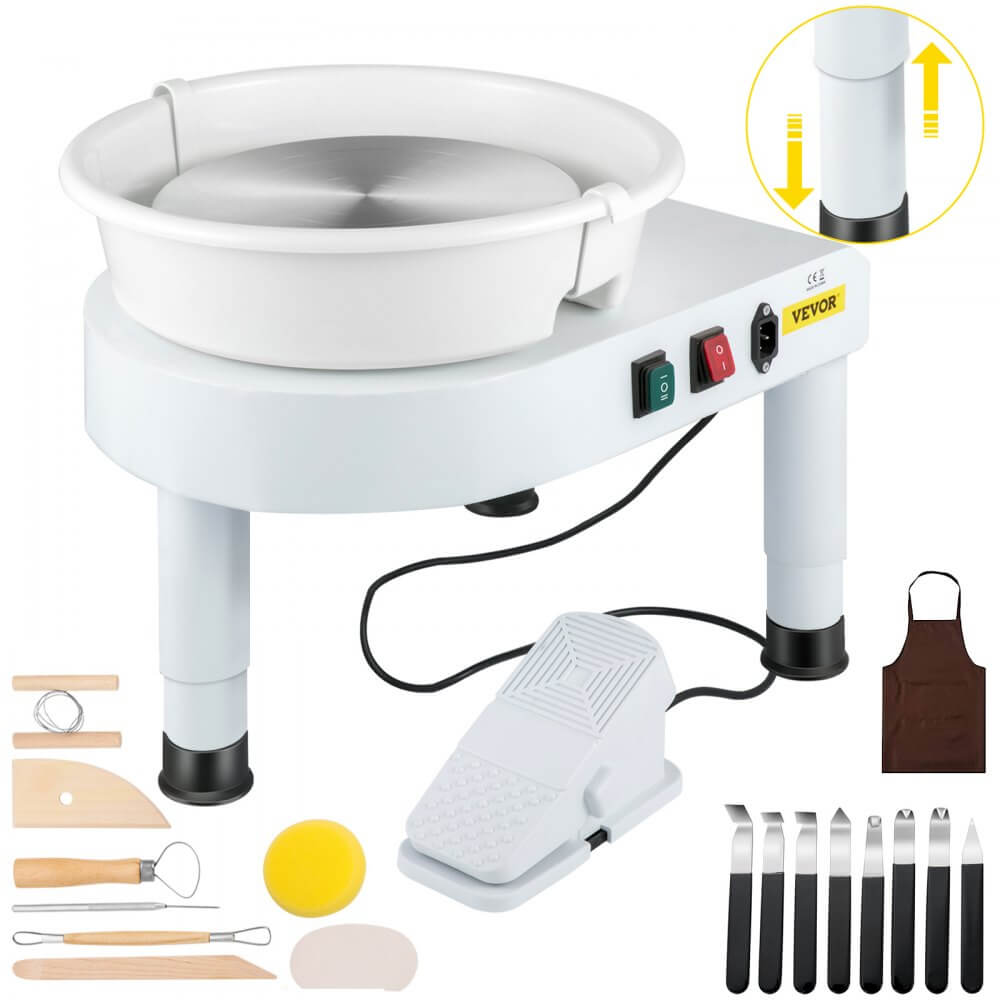
In addition to other pottery tools, the most crucial ingredient is a pottery wheel — a tool that spins the clay to give it shape. In this regard, we suggest the VEVOR pottery wheel because of its high performance and reliability.
Everyone, from complete novices to seasoned potters can benefit from using the VEVOR pottery wheel. The 450W brushless motor is strong enough to spin the clay from 0 to 300 rpm. The 30 cm wheel head is big enough to hold a decent amount of clay. It comes with a detachable ABS bowl that collects water and clay for simpler cleanup.
Putting together and using the pottery wheel is a breeze. You can start building your vase as soon as you plug it in, attach the wheel head, and fill the splash pan with water.
Steps to Centering Clay on the Pottery Wheel
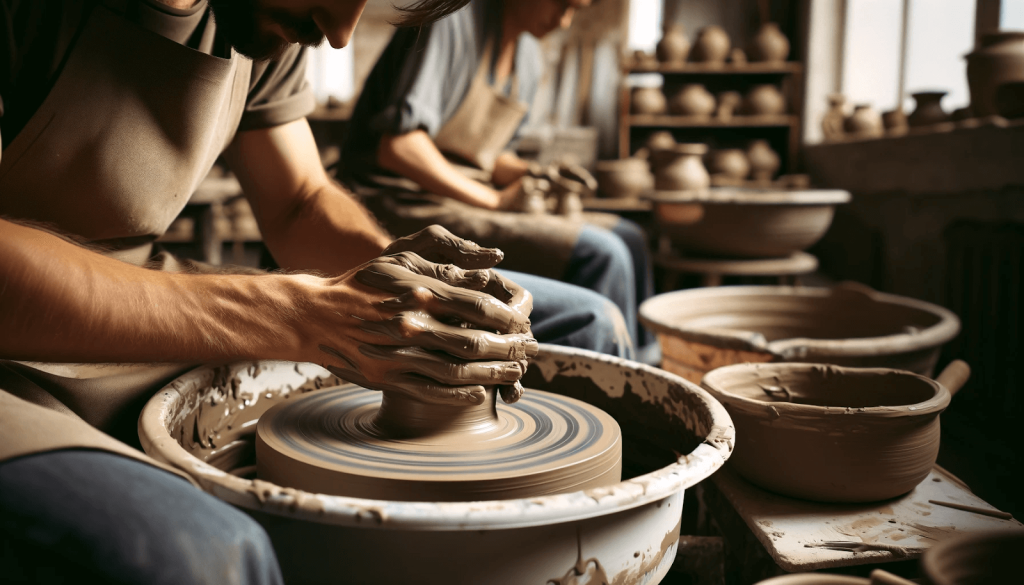
Centering the clay is a crucial and difficult step in the ceramics-making process. If you don’t want your molded clay to wobble or collapse, center it first. The following steps will guide you in centering the clay on the pottery wheel:
- Use a wire cutter to cut a clay object from its block. Clay quantity depends on vase size.
- When the clay is airless, hand-knead it until smooth and elastic.
- Knead clay on a wedging board or table. You can add water or clay to the clay to change its moisture content.
- Center the clay ball on the wheel hub. Find the wheel head center with a compass or ruler.
- Then, press the pedal to start the engine. Use the pedals to control the wheel speed steadily.
- Wet your hands before contacting the clay ball. Center the clay with one hand on top and one on the side. Using your arms or elbows may stabilize your hands.
- Roll clay between fingers, palms, or knuckles to compress.
- Make outward motions with your side hand and upward motions with your top hand as you push the clay. Invert the clay into a dome with a wide base and a narrow top.
- Once the clay reaches the center, apply pressure and compress once more. You can check if the clay is in the center using a needle instrument, your sense of touch, or eye inspection.
Tips and Tricks for Achieving Perfect Centering with the VEVOR Wheel
For those just starting, centering clay can be a real challenge. But don’t worry; we have listed some techniques to help center with the VEVOR wheel perfectly.
- Use the proper amount of clay. If you use too much clay, it will be difficult to center and shape; if you use too little, it will be easy to collapse.
- Ensure the clay has the right consistency — neither too dry nor moist.
- Keep the wheel at the correct speed. You should aim for a steady, moderate pace that suits you.
- Get your hands in the right positions. Your hands should be tight enough.
Shaping the Base of Your Vase
After centering the clay on the wheel, shape the vase base. The vase’s base supports the construction. The base should be solid and smooth. This section discusses some of the most popular vase base shaping techniques:
Open Clay
Opening the clay implies making a hole in the center and extending it to produce a hollow cylinder. Wet your hands and clay first. Make a 1 cm-deep hole in the clay center using the needle tool. Place your thumbs in the hole and squeeze them outward to widen it.
Compress Base
Compress the clay base by smoothing and flattening it to strengthen and avoid cracking. Use the rib to remove extra clay from the clay bottom. To flatten and even the clay, press the bottom inward and upward with your fingertips.
Shape the Base
Shape the vase and set its curvature and angle. Pull clay from the base with your fingertips. To build the vase foundation, twist and angle the clay with your fingers and palms.
Vase base form affects look and function. It also determines your vase’s solidity, balance, and elegance. The base of your vase should match its size, shape, direction, theme, purpose, and occasion.
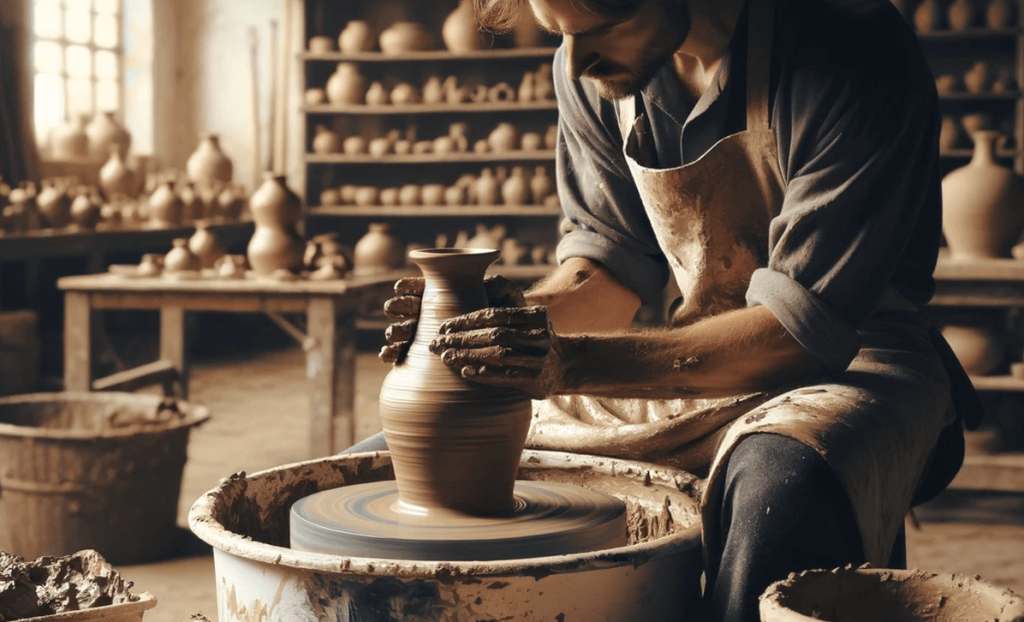
Forming the Body and Neck of the Vase
After creating the base, form the vase’s body and neck. The vase’s neck narrows the aperture while the body holds the contents. Here is the process in creating the vase’s body and neck:
Form the Body
Shape the vase by expanding and curling its walls to create volume and contour. To make the vase taller and broader, wet your hands and clay and drag the clay up and out from the base with your fingers. Curve and angle the clay with your fingers and palms to form the vase’s body.
Make the Neck
To make the neck, squeeze the clay inward and upward from the vase’s top to lower its diameter and lengthen the opening. Next, twist and angle the clay with your fingers and knuckles to form the vase’s neck.
Neck Refinement
To make the opening look nice and exquisite, smooth and polish the neck. A sponge and needle are needed to refine the neck. Wet the sponge and clay first. Wipe the opening edge with the sponge to remove clay and water. Cut any uneven or extra clay from the opening edge with the needle tool.
Adding Personal Touches and Decorative Elements
Consider adding the following elements to your vase to make it stand out:
- Carving: Cut or scrape clay to form patterns, designs, or images. Clay can be carved with a needle, wire, knife, or other sharp implement.
- Add handles. To make handles, connect clay loops or knobs to the vase’s sides. Use a coil, slab, or pinch pot to form handles. Your vase might have one, two, or more handles, depending on its form and function.
- Apply glaze. Glazing gives the vase color, luster, and protection by coating the clay with a thin layer of liquid. Glaze the vase before or after firing, depending on the glaze. Vary glaze colors to create effects.
VEVOR Pottery Wheel Enables Complex Designs
With the VEVOR pottery wheel, you can easily customize your vase. The 30 cm pottery wheel head holds enough clay, making vase shaping and decoration more flexible. Also, adjust the pottery wheel speed with a foot pedal. You should change speed to make the wheel work for your vase.
Finishing Touches: Trimming, Drying, and Firing
Finally, trim, dry, and fire your vase. This will make your vase more elegant, durable, and gorgeous. Provided below is a guide on how to go about this:
Trim the Vase
Trimming the vase removes excess clay from the bottom and sides, making it lighter and smoother. Here is how to do it.
- You need a bat and trimming tool to trim the vase.
- First, dry your vase until it’s leather-hard or firm but damp.
- Connect your vase to a bat, a flat disc that fits on the wheel head.
- Start the wheel after placing the bat on the wheel head.
- Cut extra clay from the vase’s bottom and sides with the trimming tool.
- The trimming tool can also produce a foot—a tiny ring that lifts the vase.
Vase Dry
Drying the vase makes the clay firm and ready for fire. Follow this process to vase dry.
- Use a towel, plastic bag, and shelf.
- Wrap your vase in a towel after removing it from the bat.
- Put your vase in a plastic bag and close it.
- Place the vase on a cool, dry shelf. This lets your vase dry slowly and evenly.
- Your vase should be bone-dry, meaning it contains no moisture. This can take days or weeks, depending on the size and thickness of the vase.
Fire the Vase
Kilning the vase makes the clay permanent and sturdy. Follow these simple steps to achieve the goal.
- A kiln, shelf, and wash are needed to fire the vase.
- Start by washing the flat plate that holds the vase in the kiln.
- Put your vase on the kiln shelf and load it.
- Adjust the kiln temperature and duration to suit your vase type and size.
- Depending on the nature and size of your vase, you want to fire it for 800°C to 1300°C and 6–24 hours.
Conclusion
It’s enjoyable and satisfying to make your vases. Your imagination can be unleashed, and you can create something truly admirable. However, you need the perfect tools to achieve your artistic goals. A piece of equipment like the VEVOR pottery wheel is required to ensure a smooth operation.
Durability and ease of use characterize the VEVOR pottery wheel. It’s an ideal tool for DIY pottery enthusiasts because of its efficiency and reliability. The fact that it comes with a complete set of accessories, and is easy to assemble makes it a dream tool for DIYers. Invest in a VEVOR pottery wheel today to achieve your dream of creating stunning vases all by yourself.


