
Would you like to learn how to adjust the PEX crimping tool correctly? When you can break it down, it is really easy. All you do is use the screw or wheel to fine-tune the tool until it fits your PEX rings, and check it with a Go/No-Go gauge. It does not need any sophisticated skills; it only takes cautious, minor adjustments and appropriate testing. The tool provides good, solid crimps with no leaks or loose joints when done right. There is no hurry, only to adjust, test, and repeat until you get a perfect fit.
Tools and Materials Needed for Adjusting a PEX Crimping Tool
It is a good idea to place all the tools in a single place before commencing any adjustment work. This will help you stay organized and focus on the process itself rather than having to find things later. The initial step in learning how to properly adjust a PEX crimping tool is to have a proper setup. Once everything is in place, the process will be easier and more precise.
Preparation also minimizes errors and assists you in having a better grasp of each move. It develops a straightforward working process that can be easily followed, particularly by novices.
Tools You Need to Get Started
No complicated equipment is necessary. Some simple tools suffice to start with appropriate adjustments.
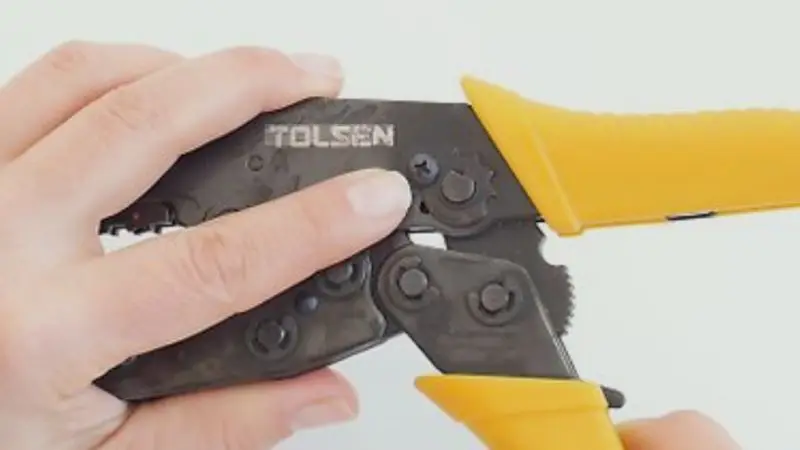
- PEX crimping tool – principal crimping tool to compress rings.
- Ruler or tape measure- aids in proper sizing.
- Go/No-Go gauge- investigates whether the crimp is right or not.
- PEX rings – practice fittings.
- PEX pipe pieces – short pieces to test adjustments.
- Screwdriver- a tool used to tighten or loosen screws.
With these tools at hand, you will find it easier to achieve accuracy and know how to set a PEX crimping tool for consistent crimping results without confusion or time loss.
@ezequielgutierr87 @Vevor Tools #UN MEXICANO CHINGON
♬ sonido original – UN MEXICANO CHINGÓN
Why These Tools Are Important
All the tools have a particular purpose in ensuring that your crimping is good and sound. You need to press the crimping tool and make sure that the ruler is used to measure and align properly before beginning. The Go/No-Go gauge is particularly significant in that it will show whether your adjustment is right or not so good.
- Crimping tool – This is used to press the ring in place.
- Ruler – makes sure to measure properly prior to crimping.
- Go/No-Go gauge- ensures the crimp is correct.
- Rings and pipe – allow practice and testing of fit
- Screwdriver- can be used to adjust the pressure of the tools when necessary.
It is quite useful to learn how to adjust a PEX crimping tool to proper fit, as each of them aids in a particular part of the process.
In most instances, the screw on the tool is used to make small adjustments. This is related to tightening or loosening the PEX crimping tool adjustment screw, which determines the tool’s tightness when pressing the ring.
Once you have a clear understanding of the functions of each tool, a step-by-step guide to adjusting a PEX crimping tool correctly will become easier and allow you to obtain the same results every time you use it.
How to Adjust a PEX Crimping Tool Step by Step
Small changes affect the final output, and you need to know how to operate the tool before adjusting it. This is where you learn to adjust the PEX crimping tool, since the slightest alteration can affect the crimp’s strength. Slow and steady efforts will give you better and more reliable results.
When you cannot make big changes, you can make small changes, which can help you stay in control. It also minimizes the possibility of over-tightening the tool or over-loosening it.
Step 1: Find the Adjustment Part on Your Tool
The first step is to examine your PEX crimping tool to see where the adjustment is. Most of their tools are controlled by a screw, wheel, or dial that regulates pressure. This is a necessary step when learning to set a PEX crimping tool to get the same crimp results, since the tool cannot be adjusted until you locate this component.
The adjustment area is typically around the handles or on one side of the tool. There are those models that employ a visible screw, others that employ a small wheel or concealed mechanism. When it is difficult to move, a screwdriver might be required, and a little oil can be used to loosen it in order to adjust easily.
Step 2: Change the Pressure Using the Screw or Wheel
After finding the part of the adjustment, open the handles to have a clear view. This is a critical step in learning how to adjust a PEX crimping tool to fit, since the pressure determines how tight the ring will be to the pipe.
When the screw or wheel is turned clockwise, it raises pressure, and when it is rotated anticlockwise, it lowers pressure. When making a crimp, you must always do small turns rather than big turns since the smallest turn can change the outcome of the crimp. When your tool is screwed, then use a screwdriver. In case it has a wheel, adjust it manually.
One should repeat the testing of the tool after every change to be able to observe the effect the change is having on the performance.
Step 3: Set the Right Size for the Best Fit
The second thing to do after pressure adjustment is to ensure that the tool is of the appropriate size for PEX rings and pipe. It is a significant aspect of a step-by-step instruction on how to properly set up a PEX crimping tool since getting the size right results in a solid and air-tight bond.
In case you need to measure the width of the handle of the tool, do it with a ruler or a tape and compare the result with the recommended settings. Next, add a PEX ring to a short piece of pipe and do a test crimp to verify the outcome.
When the ring is loose and slides easily, it is of too low pressure. When the pipe is damaged or crushed, the pressure is excessive. The proper environment is one where the ring is tight, remains in position, and appears even when crimped.
Step 4: Check Your Adjustment Using a Gauge Test
The last but most significant step to learning how to tighten or loosen a PEX crimping tool adjustment screw is testing. The Go/No-Go gauge is used to indicate whether your adjustment is correct.
Once you have crimped a ring, the Go side of the gauge must slide over the ring without any difficulty, but the No-Go side must never slide over the ring. When this does occur, your adjustment is all right and can be used. In case of passing or failure on both sides, the tool must be adjusted.
It is always good to repeat this test a couple of times before working on real data. It ensures your tool is correctly positioned and helps you make reliable, free connections every time.
Common Problems When Adjusting a PEX Crimping Tool
It is necessary to know what normally goes wrong during adjustment before rectifying problems. Even minor pressure variations or improper handling may lead to a significant difference in the end outcome. Such difficulties are typical in the process of learning how to adjust the PEX crimping tool, particularly for beginners. As soon as you know them, it will be much easier to clean up and redo your crimping.
Crimp Feels Loose After Adjustment
This indicates that the tool is not applying sufficient pressure to the ring. With this, the ring will not hold the pipe tightly, which may result in weak joints or leaks in the future. It normally occurs when the adjustment setting is either too low or not adjusted adequately. When being taught to use a PEX crimping tool to achieve consistent crimp results, it is always worthwhile to apply force gradually and check after every slight modification. These are intended to ensure that the ring does not slide around and, at the same time, to avoid excessive force.
Crimp Feels Too Tight or Damages Pipe
When the crimp is too tight, the pipe will be crushed or deformed. This implies that the tool is putting excessive pressure. This undermines the pipe and the ring instead of establishing a safe connection. This mostly occurs when users are not keen on setting pressure settings. In the process of figuring out how to get a PEX crimping tool to fit, it is important to alleviate pressure a little and revisit. Smaller, contained adjustments aid in damage avoidance and maintain a robust and secure connection.
Crimps Are Uneven or Not Centered
Uneven crimps occur when pressure is not applied evenly or when the tool is misaligned. This may cause a weak connection on one side and decrease durability. It generally arises from improper adjustment or manipulation during crimping. When learning to tighten or loosen a PEX crimping tool adjustment screw, it is noteworthy to check the alignment before each work. The tool must close in evenly all around the ring. Using a few practice pieces will also help maintain the balance, smoothness, and sealing of the crimp.
How to Maintain Your PEX Crimping Tool for Better Performance
It is also worthwhile to perform proper maintenance to ensure the tool functions efficiently after adjustment and use. A tool that has been properly maintained offers improved performance and fewer problems with adjustments over time. It will also aid in keeping you on track when doing how do you adjust a PEX crimping tool to fit in, as a smooth flow enhances control and precision.
Keep the Tool Clean After Every Use
Washing the equipment after every use removes dirt, dust, and residual material that may interfere with performance. The adjustment components can be hardened or less reactive when debris accumulates. This will make the accuracy in making changes low. Maintaining the tool clean also assists in how to adjust pex crimping tool, as smooth areas can be more easily controlled during the adjustment. The mechanism is easily maintained with a simple wipe after use, and long-term reliability is guaranteed without unnecessarily wearing it out.
Apply Light Lubrication for Smooth Movement
A little oil on the moving parts will help the tool move. A lubricated screw or wheel will be difficult to manipulate without lubrication, and consequently, adjustments are less precise. This proves particularly useful when learning to position a PEX crimping tool to achieve consistent crimp results, since smooth movement makes it easier to control pressure. Friction is also minimized by lubrication, which helps prevent wear on parts and allows the tool to be used longer, as it remains in good working condition.
Check Settings Regularly for Accuracy
Periodic inspection will keep the tool in a proper state. Although settings may have been correct previously, they may gradually change over time with repeated use. Otherwise, this may impact the quality of crimps. Rapid testing helps ensure accuracy and guides the adjustment of a PEX crimping tool‘s adjustment screw, as a minor adjustment may be necessary at times. The setup of a tool can be checked by a test run, which provides the same and reliable results with each use of the crimping tool.
Wrap Up
The PEX crimping tool can be adjusted without much difficulty as long as you know every step. It is simply a matter of discovering the adjustment factor, establishing the correct pressure, and, particularly, trial and error. Any slight alteration significantly changes the quality of the end crimp, so patience is observed throughout the process. You get leak-free and strong connections when you follow a simple routine and check your work regularly. With time, you get more confident and precise through practice. This simplifies and increases the reliability of daily plumbing, reducing errors and trial and error.
FAQ
What is the frequency of changing your PEX crimping tool?
Every new project requires you to check and adjust your tool. This has your connections tight and leak-free.
So, what do you do when your crimp rings are not passing the Go/No-Go gauge?
Then, attempt to clean your tool and make a few adaptations. Re-test with a new ring. When it still fails, verify any damage or replace the tool.
Is it possible to use a single crimping tool to work on all PEX sizes?
No, you need the right size tool for each PEX ring. Other tools have jaws that can be adjusted; however, never ignore the manual of your tool.


