
| Duration | Cost | Skill Level |
| 1-3 days | $30-$300 | Beginner |
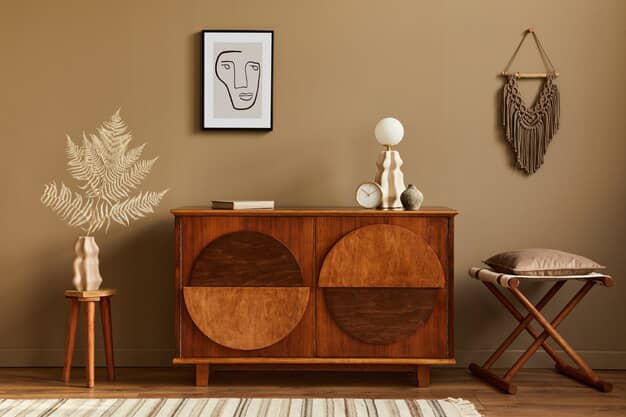
Console tables play a key role in improving the aesthetics and appeal of your home. These tables usually vary in size and shape but are usually short and wide furniture and can be placed against a wall. Building a fancy console table can be an amazing and fulfilling experience for you. It helps you to save cost and save space in your home and you also get to enhance the beauty of your home in the process. Aside from enhancing the beauty of your home, console tables are versatile hence they can also be used as hallways or entryway tables.
Are you pumped and ready to get started? In this article, you’ll learn everything you need to know about building a console table, whether you’re a beginner or you have previous experience in DIY.
Before we get started with the step-by-step guide, let’s examine how you need to prepare to build a console table.
Table of contents
Preparing to Build Your DIY Console Table
Building a DIY console table isn’t rocket science and can be done in five easy steps. The steps involve planning your do it yourself console table, gathering your tools, measuring and cutting your materials, building the parts, and applying the finishing touches. The type of DIY console table you intend to make will usually determine your budget. Usually, it is advisable to plan based on your budget but the average DIY console table typically costs between $30 and $250.
You also have to determine what type of materials to use for your console table. The most popular choice is wood which could be solid pine or oak. You can also use marble, metal, or glass for your console table depending on your budget and the functionality you require. You can get your materials from trusted online stores or walk-in stores. Most household stores offer DIY materials and you can easily pick up everything you need from there.
Once you have a budget and all your materials are ready, we can then proceed to the next stage which involves the actual building of your DIY console table which is discussed next.
5 Easy Steps to Build a DIY Console Table
In this section, we’ll be discussing 5 easy steps to make a console table yourself. Building is console table can take anywhere between a few hours to a few days depending on what type of console table you intend to build.
Nevertheless, you should find it a relatively easy task if you follow the easy steps we’ll be discussing below.
Step 1: Planning Your DIY Console Table
- Create a table design plan factoring in your needs
The first step to building your DIY console table is to have a plan. This involves determining the type of console table you want to build; this could be a waterfall console table, narrow console table, or skinny console table.
- The design plan should include style, size, and functionality
Next, you need to create a design for your console table by considering what you need it for or its intended uses. When creating your design, it should include style, size, and functionality. You don’t want a design that won’t function the way you want it to. You also want the size to fit perfectly so it does not take more space than intended. So get your size and style right to fit the aesthetics of your home and be fit for purpose.
- Recommend using design plans available online as an alternative
If you’re having trouble coming up with design plans, you can check online for console table design templates to help make your design easier.
- Choose your building and finishing materials
Lastly, choose your desired building and finishing materials for your table. This includes screws, glue, wood, metal, and other necessary materials.
When you are done planning, the next step is to gather your tools and we will be discussing that below.
Step 2: Gather Your Tools
There are essential tools you need to make your console table. These key tools are discussed below:
- Cordless Drill: This is an electric drill hammer used to drill holes in certain materials such as wood or to drill in screws and others into a material or surface. Cordless drills use rechargeable batteries and can also be used to remove screws. A cordless drill is a must-have to make your console table and it costs $150 on VEVOR.
- Saw and Accessories: This is another important tool to have in your collection. Saws have a toothed blade and are used to cut hard materials such as wood, metals, and others. There are different types of saw such as mitre saw, table saw, jigsaw, and more. Although they have different uses, they all perform the basic function of cutting materials. Saws have different accessories and you’ll need these in your project as well. Prices for saws and accessories on VEVOR vary between $250 and $600 based on what type of saw you want.
- Grinding, Sanding, and Finishing Tools: A grinding machine uses an abrasive wheel to remove from a material such as wood or metal. This tool makes use of rotating abrasive wheels to smooth, shape or finish work materials through grinding. Prices of grinding machines start from as low as $122 on VEVOR. A sanding machine or sander, on the other hand, is a portable power tool used for smoothing, polishing, or cleaning a material such as wood, plastic, or metal. Sanding machines can also be used to roughen surfaces when preparing a material for finishing. Their prices start from $66 on VEVOR. Lastly, finishing tools as the name implies, are used to finish materials. They are usually used to smooth out surfaces or to shape and trim materials. The starting price for these tools on VEVOR is $85.
Now that you have all your tools ready, let’s go to the next step.
Step 3: Cut Up
This is where the real work begins. First measure and cut your wood into specific sizes based on your design plan. Consider cutting your frame to measure at least 35” to ensure your table has adequate elevation. Sometimes, you can find already cut pieces from your home store. If you don’t, don’t worry, just cut them yourself into your plan’s dimensions. You can either use a circular saw, table saw or any saw you have to do this. If you’re building a simple console table, you need to cut three pieces of wood-two would serve as the legs and one would serve as the top.
For a simple console table of 3 pieces, you can consider cutting into a 45-inch long table top and 35-inch long legs. You can choose an 11 ½ wide wood or go for something wider based on your budget and functionality needs. When working don’t forget to put on safety gear and follow necessary safety precautions.
After you cut your materials into your desired shapes and sizes, it’s time to start putting them together.
Step 4: Build In Bits
Now your table should really start coming together. You can either drill holes first before drilling in your screw or drilling the screw in directly. If you’re drilling the screw directly into the wood, place the legs under the table top and drill in your screws on both sides at the edges where the legs were placed. To drill a hole first, you need to create two holes on each side of the other tabletop and on both sides of the legs as well. You can use two or three screws for each part. Once the holes have been created, you can drill in your screws from the outside to attach the pieces together.
Your console table is almost ready, so let’s look at how to apply the finishing touches.

Step 5: Finishing
After installing the screws, flip the back of the table and trim out all excess wood. You can miter the edges to give it an even and sleeker look and feel. If you don’t have a wood filler, you can mix some sawdust and wood glue to create a paste and fill the screw holes if any. Next, sand down the entire table from top to bottom. For further aesthetics, you can paint the legs in a crisp, clean line with any color of your choice.
While doing your console table can be fulfilling and budget-friendly, you simply might not have the time or even the skill required to put it together. But you still need a console table where you can display pictures or place other items so that shouldn’t stop you from having one. VEVOR offers quality, sturdy, durable, and affordable console tables that fit your needs and enhance the beauty of your home. VEVOR console tables are made by top experts from the highest quality materials and are backed with warranties. VEVOR also has console table parts that you can build from scratch yourself if you intend to build your DIY console table.
Before concluding this guide, there’s one more bit of information we have for you. Check out the special note below.
Special Note: Floating DIY Console Tables
Floating console tables are one of the latest in the console table collections. These console tables are different from regular console tables as they are specially designed to be mounted on walls without visible support. These allow them to be built without supporting frames it legs. They are sleek and beautiful and are mouthed to the wall using a bracket or other types of mounting system at a preferred height.
There are many simple designs for floating tables. These tables usually come in different types of designs, styles, materials, and finishes. Some come with extra features such as shelves or drawers which help to provide increased functionality. These tables are becoming increasingly popular due to their sleek and elegant look. They also help to save more space compared to regular console tables and can also be used in the living room, hallway, or entryway.
Key Takeaways

- Making your own floating table is a relatively easy task. This involves making adequate preparations, collating the necessary tools, cutting your materials, fixing them together, and applying finishing touches.
- You can also choose to go for a floating DIY console table which is a modern and sleeker console table for your home.
- When working on your table, remember to prioritize safety wear necessary safety gear, and take safety precautions.
- If you’re finding it difficult to make your DIY console table, VEVOR has pre-built console tables specially designed to fit your needs. They also have console table parts for easy DIY setup.
FAQS About Console Table DIY
What do I need to build a DIY console table?
This depends on the type of console table you want to make. But generally, you will need materials like wood and metal, as well as tools such as saws, cordless drills, sanders, and grinders, to build a DIY console table.
How much would it cost to build a DIY console table?
The cost of building a DIY console table usually depends on what type of table and materials you intend to use. On average, they range from around $30 to $500.
Which is cheaper between DIY or a pre-built console table?
A DIY console table could be the best if you’re on a tight budget, but the price usually depends on the materials and type of table you want to build. If you intend to build a sophisticated console table, then there are pre-built console tables that are cheaper.


