As the air starts to turn crisp and autumn colors start to fade, you know that winter is coming. And for that, you have to get prepared—not only get ready yourself but also winterize your RV. Winter can be cruel for RVs as well.
While winters may seem like a big break for RVs, it is quite the opposite—winters can be deadly. If not winterized properly, harsh winter elements could wreak havoc on your RV’s water system and other crucial components, making winterizing your RV an absolute necessity.
When it comes to winterizing an RV, there are two methods: winterizing with an Antifreeze agent and winterizing with an air compressor. Where the antifreeze method is quite hectic and costly, winterizing an RV with an air compressor is easy-peasy. If you do not know how to winterize an RV with an air compressor, continue reading. In the comprehensive guide, we are going to discuss all about winterizing RVs with air compressors.
So, let’s get winterizing.
Table of contents
Benefits of Using Compressed Air to Winterize
Winterizing your RV using an air compressor offers several key benefits over traditional methods like antifreeze. Let’s explore some of the advantages that make this method a popular choice for RV owners:
1. Faster and Easier
One of the most significant advantages of winterizing a camper with an air compressor is its speed and ease of use. Unlike the antifreeze method, which can be time-consuming and messy, blowing out the water lines with air is a much faster and more straightforward process. You just have to simply connect an air hose and open faucets one by one instead of mixing, pouring, and pumping gallons of antifreeze.
2. Environmentally Friendly
Another crucial benefit of using an air compressor for RV winterizing is its eco-friendly nature. This method significantly reduces the amount of antifreeze used, minimizing the potential environmental impact. Antifreeze, while effective, can be harmful to wildlife and pollute waterways if not disposed of properly. By choosing compressed air, you can contribute to a cleaner environment and protect our ecosystems.
3. Thorough Cleaning
Beyond simply removing water, compressed air also provides the added benefit of cleaning your RV’s water lines. As the air blasts through the system, it dislodges any sediment, debris, or mineral buildup that may have accumulated over time. This thorough cleaning helps prevent future problems and ensures your water lines remain clean and functional for longer.
4. Cost-effective
An air compressor is a versatile tool that can be used for various tasks beyond RV winterizing. This makes it a valuable investment that can save you money in the long run. Compared to purchasing gallons of antifreeze each year, investing in a good air compressor can be a more cost-effective and sustainable solution.

Essential Tools and Accessories for Winterizing RV With Air Compressor
Before embarking on your RV winterizing journey with an air compressor, gather all the necessary tools and accessories to ensure a smooth and efficient process and prevent delays or frustration.
Essential Tools
- Air Compressor: This will be the heart of the winterizing process. Choose a compressor with sufficient pressure (30-50 PSI) and airflow capacity (at least 4 CFM) to effectively—and safely—blow out water lines.
- Blowout Adapter Kit: To connect the air compressor hose to your RV’s water inlet, creating a secure and leak-proof seal.
- Wrenches and Pliers: To remove drain plugs, adjust valves, and tighten connections.
- Drain Bucket: To collect the expelled water from the system during the blowing process.
- Safety Glasses and Gloves: To prevent injuries from unexpected air blasts or flying debris.
Essential Accessories
- RV Antifreeze: While the air compressor method reduces the need for antifreeze, some areas, like traps and low points, still require it. Choose non-toxic, food-grade RV antifreeze.
- Hose: A dedicated hose to connect the air compressor to the blowout adapter kit ensures easy maneuvering and prevents damage to your RV’s water inlet.
- Teflon Tape: Applying Teflon tape to threaded connections helps prevent leaks and ensures a secure seal.
- Paper Towels and Rags: These come in handy for cleaning spills, wiping up residual water, and keeping your workspace organized.
- Air Line Filter: This filter removes moisture and contaminants from the compressed air, protecting your RV’s plumbing system from potential damage.
- Pressure Gauge: This gauge helps monitor the air pressure during the process, ensuring you stay within the recommended limits for your RV’s plumbing.

How to Winterize Your RV with an Air Compressor: A Step-by-Step Guide
With the advantages of using an air compressor for RV winterizing established, let’s delve into the practicalities.
Here’s a detailed step-by-step guide to ensure your RV is prepped and protected for the winter:
Part #1: Preparation
- Gather Tools and Materials: Before starting, ensure you have all the necessary tools and materials readily available.
- Level Your RV: Park your RV on a level surface to ensure proper drainage of water during the process.
- Turn Off Utilities: Turn off the water pump, water heater, and any other water-related utilities.
- Disconnect and Drain Filter: Disconnect and drain the water filter to remove any accumulated sediment.
- Open Drains and Faucets: Open all faucets, showerheads, and low-point drains to allow water to flow freely during the process.
Part #2: Blowing Out Water Lines
- Connect the Air Compressor: Securely connect the blowout adapter to the air compressor hose and attach it to your RV’s water inlet.
- Start from Furthest Point: Begin blowing out the water lines, starting with the furthest point from the water inlet working your way back towards the inlet. This ensures all water is expelled effectively.
- Open and Blow Out Each Faucet: Open each faucet individually and blow compressed air until it runs clear and no water remains. Repeat this process for all faucets, showerheads, and low-point drains, ensuring no water remains in the lines.
- Bypass Water Heater: Once the lines are clear, turn off the water heater bypass valve and open the pressure relief valve. Remove the anode rod and drain the water heater. Then, blow compressed air through the water heater outlet until no water is coming out.
Part #3: Additional Steps
- Antifreeze: I know we wanted to winterize without antifreeze, but it is kind of a necessary evil. You will have to put it in specific locations, such as P-traps and other low points in the system, to prevent freezing. Refer to your RV’s owner’s manual for specific instructions on which traps and low points require antifreeze and the recommended amount.
- Leak Checks: Check for leaks throughout the system and tighten any loose connections if necessary.
- Disconnect Compressor: Disconnect the air compressor and store it properly.
- Clean the interior: Empty all bins, drawers, and cabinets, and squeaky clean all the surfaces of your RV.
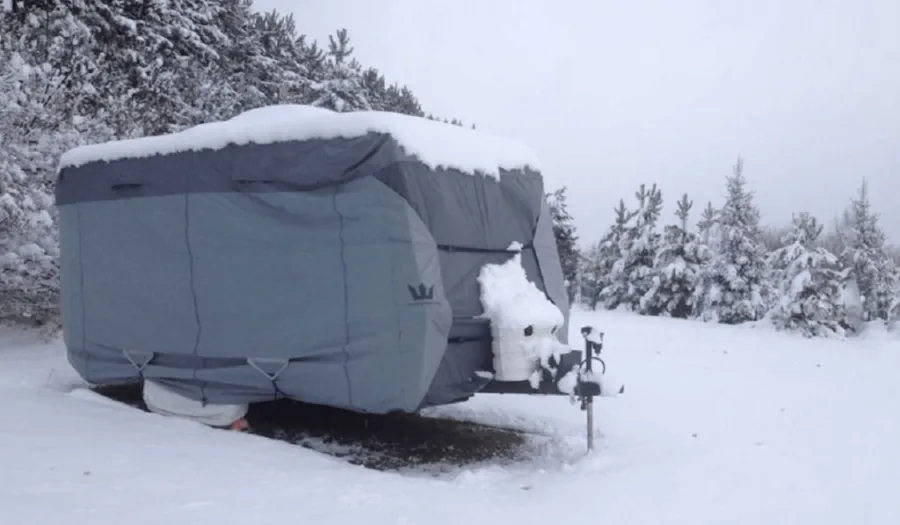
- Cover the RV: Once the interior is taken care of, consider inspecting the exterior of your RV and look for leaks and cracks. And then cover it with a weather-resistant RV cover.
Part #4: Final Checks
- Double-check: Double-check all valves, drains, and connections for proper closure to prevent any leaks or freezing damage.
- Storage: Store your RV in a protected, well-ventilated location to safeguard it from winter elements further.
Following these step-by-step instructions, you can confidently winterize your RV using an air compressor, ensuring it remains protected and ready for adventures when spring arrives.
What Type of Air Compressor Should You Use to Winterize Your RV?
To winterize your RV using an air compressor, you should use a portable air compressor with a tank capacity of around 2 gallons or more. Before getting an air compressor for winterizing an RV, you should know that the tank’s volume is more important than the pressure. As for effectiveness and safety, you need to set the pressure between 30 and 50 pounds per square inch (psi) to blow out the water line effectively and safely. Also, make sure that the compressor delivers sufficient CFM (cubic feet per minute) of airflow. As a general rule, a CFM rating of at least 4 CFM is recommended for efficient winterizing.
For maximum convenience, you may also want to look for a portable (lightweight and compact) air compressor. Depending on your budget and preferences, you can also look for additional features such as oil-free operation, automatic shut-off, and pressure regulation to maximize convenience and safety.
Choose VEVOR Air Compressor for Your RV Winterizing Needs
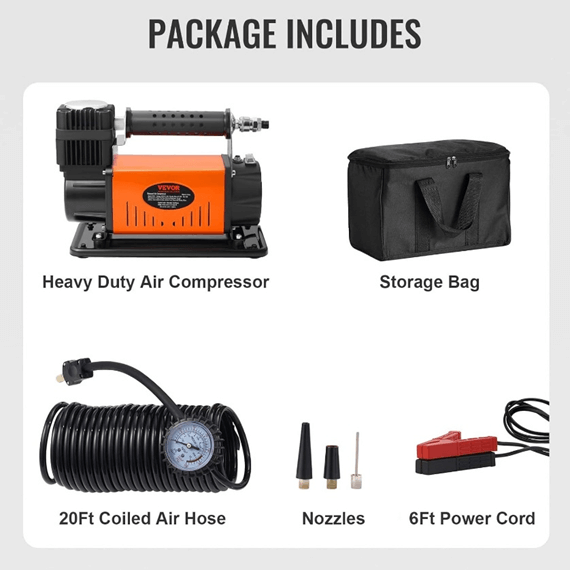
If you are having trouble finding a good air compressor for RV winterizing, you should check out the VEVOR 12V Off Road Portable Air Compressor. It is a heavy-duty 150 PSI air compressor with a maximum flow rate of 6CFM, allowing you to not only effectively blow out the water lines of your RV but also inflate your tires and other inflatable products. It also comes with a pressure gauge, allowing you to maintain optimum air pressure for effectively blowing out the water from the plumbing lines without breaking them.
Conclusion
To winterize an RV with an air compressor is an easier and tidier alternative to winterizing an RV with antifreeze, which can be messy. But know that you will still need some antifreeze to put in specific locations, such as P-traps and other low points in the system, to prevent them from freezing. Follow the steps discussed above to winterize your RV with an air compressor. Make sure that you blow all the water out of the plumbing lines and that there are no pockets of water left behind in the plumbing lines.
Remember, the key is to blow air (at 30-50 PSI) for longer periods to get all the water out. Do not rush and apply higher pressure than what’s recommended by the manufacturer, as it could damage the water lines.


