
Winters in a truck, van, bus, or boat can become really dreadful if you do not have decent heating gear. The situation can get even worse, with the added complication of condensation on all of your panels., if your locomotive is not insulated.
What if we tell you that a simple solution to all of your concerns is diesel heater installation?
VEVOR 12V Diesel Air Heater will solve your problems at once by keeping your space warm, cozy, and dry for the whole season.
This article brings you a comprehensive step-by-step guide to installing a diesel heater. From pre-installation preparation to post-installation maintenance tips, our diesel heater setup guide will help you at every step.
Pre-Installation Preparation for Your Diesel Heater Setup
The pre-requisite to setting up anything, including diesel heater installation, is preparation. You must have your supply box ready with all the tools that you think will be necessary for the project.
Parts, Supplies, and Required Tools
To install a VEVOR diesel heater, you might require the following parts, supplies, and tools:
- A diesel heater
- A battery for the heater remote control
- Carbon monoxide alarm
- Heat shield wrap for fuel lines
- 10 ft of 10 ga wire
- Miscellaneous Hardware (nuts, bolts, wire connectors, clamps, zip ties, etc)
- A screwdriver
- 2″ Hole saw
- Adjustable Wrench Set
- Dremel and Cutting Disks
- A drill machine
- Carbide Drill Bits
- Wire Strippers and Crimpers
- A Multimeter
- Socket Set
Pre-setup Preparation Tips
Nothing is more frustrating than sitting down to work and realizing your gear is incomplete or faulty.
- Create a checklist of the tools, supplies, and parts you might need for diesel heater installation.
- Double-check your stuff before sitting down to work and ensure everything is there.
- Pre-test your equipment, especially drills, to avoid an added hassle while you already have an ongoing project at your hands.
Installation Location Selecting
Now that you have got the right gear for your 12V diesel heater installation, it is time to find the perfect spot for mounting it. The mounting location of your diesel heater is one of the most crucial parts of the process because it will determine how and where you will run all the related ducts, cables, and hoses.
Depending on your cabin’s size and your locomotive’s layout, you can consider the following locations:
- Under the passenger seat in the front
- In the center, under the floor
- At the back, especially if you spend a lot of your time there
If you want the heat to disperse evenly throughout the space, placing the heater in the center, under the floor, would not be a bad idea. However, some people prefer installing their diesel heaters at the front, under the passenger seat, because the location is easy to access. Moreover, this saves them space and provides them with more options for how they want the heat to spread.
Installing Under Passenger Seat
If you are planning on installing the VEVOR diesel heater at the front, ensure it is in the right location. There is a two to three-inch wide gap on the underside of the van for running the combustion and exhaust system. Drill a tiny hole first and check under the vehicle for the location. If you don’t like the spot, simply seal the hole with a dab of sealant and a sheet metal screw.
However, if you think the location is perfect, increase the diameter of the hole to fit everything rather than having to run them through multiple slots. It is particularly helpful when you want to remove the heater in the future. All you need to do is remove the four screws in the mounting plate, and the entire thing will come off.
How to Install VEVOR Diesel Heater: A Step-by-Step Guide

Here’s a comprehensive guide on how to set up a VEVOR diesel heater for beginners and pros:
Step 1: Mounting the Heater
Where and how you mount your heater will play a vital role in its performance and longevity. After confirming the ideal location for your diesel heater installation, it is time to proceed by mounting the mounting plate.
To do that, cut a hole into the floor where you intend your system to be. Check the diameter of the hole compared to the mounting plate to estimate the size you will need, which is usually around 100 mm. The plate will fit into this slot, whereas air intake and exhaust will come out of it.
Place the heater upside down to attach the mounting plate. However, the plate is not the only thing you will fix here before mounting the diesel heater. Attach all the necessary pipes and lines, such as the fuel line, the exhaust, and the air intake pipe, to the bottom of the unit using the clamps.
Lastly, slide the pipes through the opening, secure the heater in place, and firmly screw the four corners. Before mounting, you must apply silicone around the opening to seal the plate.
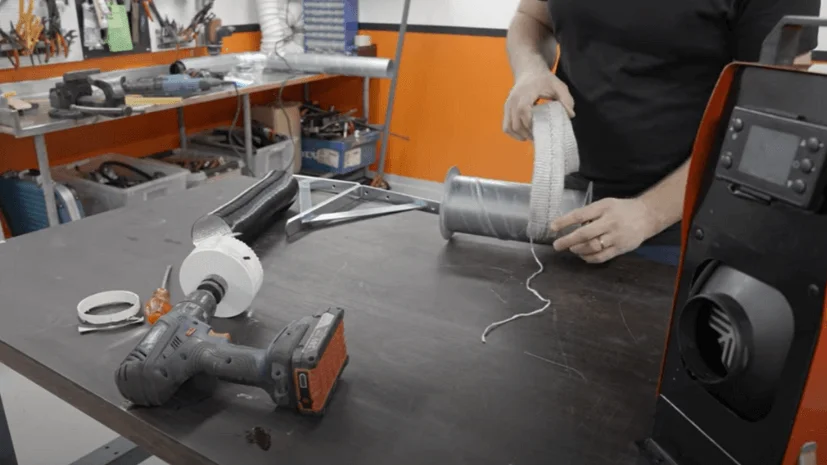
Step 2: Ventilation Setup
It is necessary to position the air ducts in a way that ensures maximum airflow. It should be the spot with sufficient clearance, free from any obstructions and equipment that can impede the smooth channeling of air. Make sure that you have enough space on all sides, 70 mm on the access cover side and 30 mm on the other sides, to route all the ducting, wiring, and fuel tubing. The space will make it easy for you to service and inspect the system later for maintenance.
Lastly, your air intake should be away from direct sources of debris, such as areas where loose dust or gravel might be present.
Mapping out your fittings in advance will enable you to plan ahead properly and identify the best spots for all your parts. However, it is one of the most challenging steps of diesel heater setup for many, especially beginners.
Tip: Go with the most straightforward way, crawl under the bus, analyze how much space you have, and locate what should go where.
Step 3: Setting up the Exhaustion Outlets
The location of the hot air vent is as crucial as any other step of diesel heater installation. Firstly, you must ensure that it is situated in a safe place, free from the threat of getting knocked or bumped. Above all, the exhaust vent must be away from flammable surfaces to prevent fire hazards.
Measure the area, mark a point, and cut a hole to route the ducting. Adjust the outlet vents and attach ducting to the vent casing. Generally, you won’t require ducting for air inlet ventilation, but if you do, make sure to position them far away from the outlet vents.
Step 4: Connecting to the Fuel Source
Punch a hole at the side of the fuel tank and feed the nozzle using a wire coat hanger or another type of flexible wire. Add the fuel line to the nozzle and spot a suitable location to mount the fuel filter and pump under the van.
Remember that you will need to cut three lengths of the fuel line – from the fuel tank to the filter, from the fuel filter to the pump, and from the pump to the heater.
Lastly, the fuel pump has to be at an incline, with the discharge end rising 15 to 35 degrees above the inlet. You can incline the pump up to 90 degrees if needed.
Step 5: Electrical Connections
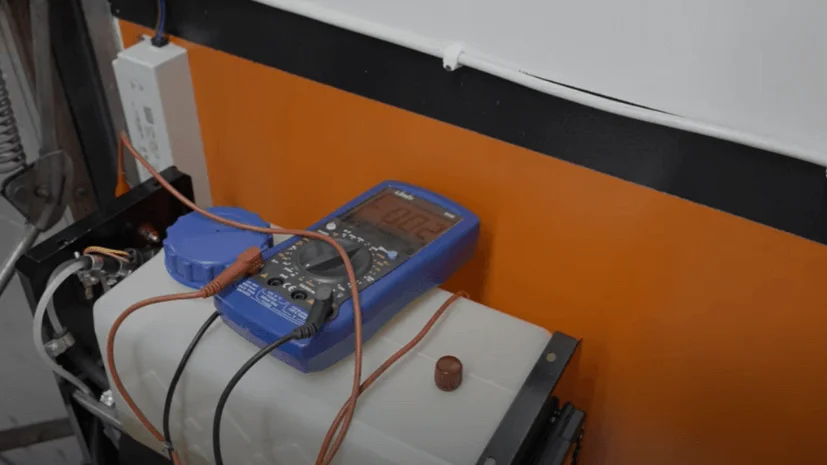
After securing the diesel heater in place, route all the wiring from the control panel and fuel pump to your fuse panel.
Electrical connections and related wiring of diesel heaters are not very complicated. They are convenient, easy-to-connect, plug-and-play parts of a diesel heater setup. Match the connections for the fuel pump, motherboard, and controller to establish electrical wiring. Then, install a fuse and connect the positive and negative wires to the battery source.
While making other connections, don’t forget to set up an LCD monitor display for your diesel heater. Choose a convenient place on the wall that you can access at all times and mount the screen.
Tip: Ensure your wires are safe from moving parts and sharp or hot surfaces.
Step 6: Initial Start-Up and Testing
Your VEVOR diesel heater is set and ready to use, which is the most awaited step of the process.
Switch the power button on and see the heater begin its start-up sequence until the controller illuminates. You will hear the sounds of the fan ramping up and the fuel pump clicking.
Once the heater is finally on, heat bars will appear on the monitor. Let the temperature go all the way up, and keep it there for fifteen minutes before switching it off.
Troubleshooting Common Installation Issues
Minor problems and technical complications come in a package with every piece of equipment. Here is how you can tackle those challenges for your diesel heater:
The Fan is Making Weird Noises
Constant weird noises from the diesel heater’s fan are a sign that it is hitting a part, plausibly the cover, inside the unit.
Hence, open up the compartment to check what keeps touching your fan. Slightly adjust the fan and file down any plastic protrusions that might be skimming against it.
Diesel Heater Leaking Fuel
If you spot a pool of fuel under your vehicle, there’s a high chance your fuel is leaking.
Leaky fuel is a common problem that indicates faulty or loose connections. So, the first thing is to inspect the connections and tighten them. However, if the issue persists, contact the provider or have a professional inspect the system for you.
The Heater Might Not Start the First Time
Your diesel heater won’t turn on when you switch it on for the first time because the fuel lines are full of air, and the pump cannot pump the fuel from the tank to the combustion chamber.
If the heater fails to start, try restarting it a couple of times until it fires up. Press and hold the power button to help it ignite. In some cases, the heater can take five to six times before functioning smoothly.
Post-Installation Maintenance Tips for Diesel Heater
You must take care of your heater and its maintenance to avoid costly repairs and services. By doing this, you will also be able to extend its life up to several years without having to replace it.
- Make appropriate adjustments when using the heater at high altitudes to prevent carbon soot from building up inside the burn chamber.
- Prevent overfilling your device with fuel, as it harms the heater in the long run. Besides, it might cause your heater to blow clouds of smoke instead of turning on.
- Inspect the diesel heater’s ducting for blockage, debris, and dirt build-up, and have it cleaned.
- Operate your device for a minimum of twenty minutes once or twice each month.
- Use climate and eco-friendly fuel to power your diesel heater.
Summing Up
If you have made it to the end of this guide, you know pretty much everything there is to know about VEVOR diesel heater installation.
Diesel heaters might feel like a costly investment to some, but they are worth every penny you spend on them.
When installed and used properly, a fine-quality diesel heater can survive eight to ten winters for you. VEVOR has a range of good quality diesel at various prices for you to choose from. Not only this, but our website has all the necessary gear that you might require to install these devices.


