Want to know how to set up a MIG welder? Nice choice! Installing a MIG Welding Machine can be easy if you follow clear, precise instructions. It can sound technical at first, but anyone can learn it with the right guidance. Safety is highly important; therefore, always wear the proper protective gear and check your equipment thoroughly before starting. Even as a beginner, you can get clean, strong, professional welding results when everything is set up right.
In this article, we’ll walk you through how to set a MIG welder step by step so that you can grasp the process fully and operate confidently from the very start.
Essential Safety Precautions Before Setting Up a MIG Welder
@travistrujillo30 this vevor mig-tig-stick welder puts down some nice welds!! #weld #fabrication #mig #weldernation #vevor @vevor shop @Vevor_US
♬ original sound – T-RAV 🔧🪛🛠🔩🔨tools and more
Before you begin setting up your MIG welder, focus on safety. Good habits safeguard you and help you achieve greater results. Let’s take a look at what you need to wear and how to set up your workspace for welding safety.
Protective Gear Checklist
Always put on the correct gear before you even turn your welder on. Here’s a short checklist to help you get ready:
How to set a mig welder for beginners? When MIG welding, you need protective gear to shield you from sparks, heat, and UV radiation. Wear a welding helmet with the proper shade lens to protect your eyes and face from the intense welding arcs. Wear a welding jacket, a long-sleeved shirt, and thick cotton or denim pants to protect yourself from burns. Welding gloves protect against heat and metal edges and extend over the wrist. Safety glasses protect your eyes from sparks and falling metal inside your helmet. Sturdy, closed-toe leather boots protect your feet. It is uncomfortable, though all the welding gear keeps you safe.
Workshop Safety Setup
Now let’s speak about your workspace. You want a safe, clean, organized place to weld. Dispose of any combustible materials, such as paper, rags, or chemicals. Keep a fire extinguisher close by and know how to use it.
How to set up a mig welder with gas? Place your welder on a firm surface. Make sure your cables are not running across walkways. Good ventilation is crucial because welding fumes can be dangerous. Open a window or turn on a fan to create a cross breeze, pushing air out of the room.
How to Set a MIG Welder Step-by-Step
Step 1 – Choose the Right Wire and Gas
How to set a mig welder correctly? You want to begin the mig welding procedure with the correct ingredients. Choose a wire that is the same metal as your metal. ER70S-6 wire is suitable for most mild-steel tasks. If you want to weld stainless steel or aluminum, you will need a specific wire. Then choose the proper shielding gas. For mild steel, use a 75% argon/25% CO2 mixture. Pure argon is excellent for aluminium. Always consult your welder’s manual for suggested settings.
Step 2 – Install the Welding Wire Correctly
Open the welder’s side panel. Mount the spool of wire on the spindle. Pull the wire through the drive rollers and into the liner. Make sure the wire runs smoothly. Shut the panel. If you miss this step or do it too quickly, you could end up with wire jams later on.
Step 3 – Adjust Wire Feed Speed
Adjust the wire feed speed with the control knob. How to adjust wire speed on a mig welder? If you set it too high, the wire will dig into the weld pool and splatter. “Too slow and the arc will cut out. Inside the panel, most machines contain a chart. Use it to identify the ideal settings for your wire size and metal thickness.
Step 4 – Set Voltage and Amperage
How to set up a mig welder with gas? Set the amperage and voltage as needed for the job. Higher voltage will make a flatter, wider bead. The bead at the lower voltage will often have a smaller diameter. You should refer to either the chart or the instructions to identify the appropriate settings. The more you do your practice sessions, the more you will be able to improve your performance.
Step 5 – Configure Gas Flow Rate
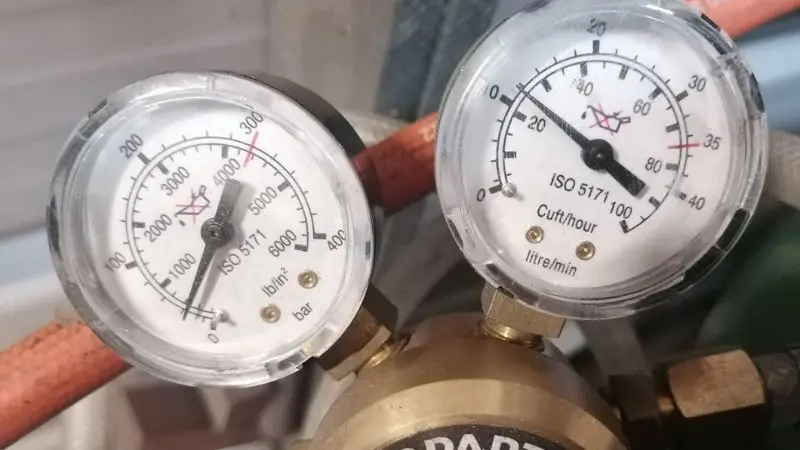
First, turn the gas on, and then adjust the flow to your liking. Most mig welders run at an ideal speed of 20 to 25 cubic feet per hour (CFH). Buying too much petrol wastes your money. If you don’t have enough gas, you could get air into your weld, contaminating it.
Step 6 – Test the Setup Before Welding
Before beginning to weld, practice on some old metal. Moreover, ensure the bead has a respectable appearance, and the line is straight. If not, you should adjust the settings. Gain wisdom from your errors and learn to avoid repeating them in the future. Your best mig welder settings for mild steel recovery will be aided by taking this step.
Best MIG Welder Settings for Different Materials
Choosing the right MIG welder settings makes a big difference in your results. How to set a mig welder for beginners? Each metal needs its own approach. Let’s look at the best settings for mild steel, stainless steel, and aluminum.
Mild Steel Settings Guide
You will often work with mild steel. It is forgiving and easy to weld. For most projects, use ER70S-6 wire. How to set a mig welder correctly? Set your voltage and wire feed speed based on the thickness of your metal. Here is a quick table to help you:
Use this MIG welding parameters guide to help you choose the right wire size, voltage, and wire feed speed for your metal thickness. 1/8-inch metal, .030-inch wire, 18–19 volts, wire feed speed of 275–325 ipm. This will produce clean welds. For thicker metal (1/4 inch), use .035-inch wire at 20 to 22 volts and a wire feed speed of 325 to 375 inches per minute for stronger penetration and higher-quality welds. Correct settings can improve welding performance, reduce spatter, and help make cleaner, stronger welds.
Stainless Steel Setup Tips
Stainless steel needs a bit more care. Use a wire made for stainless steel, like ER308L. Set your gas to 98% argon and 2% CO2. Keep your voltage steady and use a slower travel speed. This helps you avoid warping and keeps your welds clean.
Aluminum MIG Welding Adjustments
Aluminum can be tricky. You need pure argon gas and a spool gun for the best results. How to adjust wire speed on a mig welder? Set your MIG welder settings higher than you would for steel. Aluminum melts fast, so move quickly and keep your hand steady.
For larger metal parts, .035-inch or .045-inch MIG welding wire will provide higher strength and deeper penetration. Increase the voltage and slightly increase the wire feed speed for thicker material to keep the weld steady. Always make sure your workspace and metal surface are clean before welding, as debris, rust, oil, or paint can create weak, dirty, or irregular welds. Good settings and clean materials will produce better, smoother, more professional welds.
Common MIG Welder Setup Mistakes to Avoid
Even if you follow every step, you can still run into problems. Let’s look at some common mistakes people make when setting up a MIG welder. If you know what to watch for, you can fix issues before they ruin your welding project.
Incorrect Wire Speed Issues
MIG welding is a lot about wire speed. If the wire speed is too fast, the wire will push into the weld pool, creating a mess. How to set up a mig welder with gas? If you set it too low, the arc will keep blowing out. When you weld, you want a constant, smooth sound. If you hear popping or you see the wire burning back off, pause and check your wire speed. Make slight adjustments until the weld looks good.
A poor ground-clamp connection can be a big headache. If your clamp is dusty or loose, your welding arc will not remain stable. You may notice poor welds or excessive splatter. Always clean the location where you are going to put the clamp. Make sure the clamp bites well. This keeps your welds strong and improves your MIG welder’s performance.
Wrong Gas Selection
Use the wrong gas and your weld is ruined. For most mig welding, you need a mix of argon and CO2. How to set a mig welder correctly? Choosing the improper gas can leave your welds looking dirty or weak. Always check your gas before you go. Check your welder’s manual for the correct settings and gas type for your metal.
Overheating and Spatter Problems
Welding for too long or using the wrong settings can make your machine overheat. You might see too much spatter or even burn through your metal. Take breaks to let your welder cool down. Watch for signs of overheating, like a hot gun or strange smells. If you see lots of spatter, check your voltage and wire speed. Small changes can make a big difference.
Pro Tips for Better MIG Welding Results
Maintaining a Consistent Travel Speed
How to set a mig welder for beginners? You want your welds to be pretty and consistent. One of the greatest ways to do this is a constant travel speed. If you go too fast, your weld bead will be narrow and weak. If you go too slowly, you can end up with a large, sloppy bead with excessive accumulation. Watch the puddle as you weld. As you continue along, the puddle should remain the same size. Practice on scrap until you reach a speed that works for you. This will help you get better results on your mig tasks.
Proper Gun Angle Technique
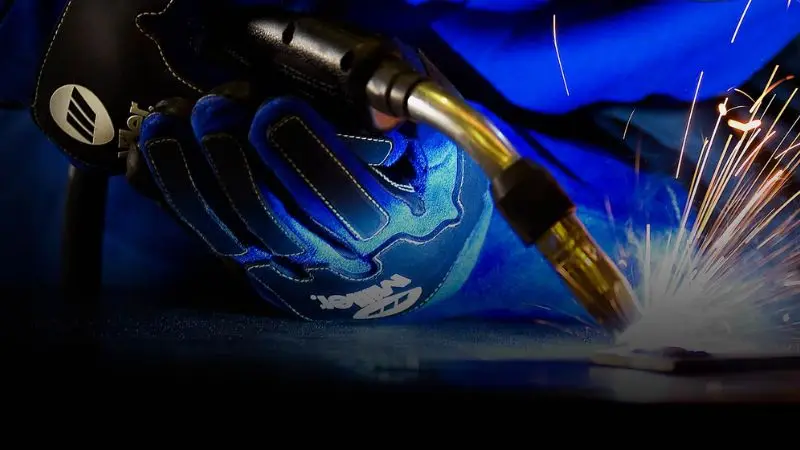
If you hold your MIG gun at the appropriate angle, it makes a tremendous impact. Usually, you should hold the pistol at a 10 to 15 degree inclination from straight up. Aim the gun in the direction you wish to weld. This helps the shielding gas get across the weld region and keeps your bead clean. If the gun is held too flat or too steep, you may get spatter or a weak weld. Try several angles on the scrap until you find the best mig welder settings for mild steel on your material.
Cleaning and Maintenance Tips
Good cleaning and frequent maintenance. Keep your MIG welder in good working condition. How to set a mig welder correctly? Before you begin welding, clean your metal. Paint, corrosion, and oil removal. No matter how good your settings are, dirty metal can ruin your welds. Check the gun tip and nozzle for splatter after each project. Wipe them off so the gas can flow freely. Inspect cables and connections for wear. Replace any that appear damaged.
Note: Take care of your equipment so you spend more time welding and less time correcting issues.
Conclusion:
So now you know the main steps of how to set a mig welder and get it ready for safe, successful operation. Safety is the number one issue; therefore, make sure you have the right safety gear and carefully check your machine settings before you start any welding task. Make sure you have the proper wire and shielding gas, and then configure the welder for the type and thickness of metal. And, it’s important to test your settings on some scrap metal before you start your main project. The more you practice, the more control and weld quality you will have in time. Just keep at it and practice till you grow comfortable and do better, cleaner welds.
FAQ
What is the best way to learn MIG welding as a beginner?
Start with simple projects. Watch videos or take a class. Practice on scrap metal. You will get better with each weld. Ask questions if you get stuck. Stay patient and keep learning.
How do I know if my MIG welder settings are correct?
Listen for a steady crackling sound. Look for a smooth, even bead. If you see too much spatter or holes, adjust your settings. Test on scrap metal before you start your real project.
Can I use the same gas for all metals?
No, you need different gases for different metals. Use a mix of argon and CO2 for steel. Pure argon works best for aluminum. Always check your manual before you start MIG welding.
Why does my wire keep jamming in the MIG welder?
Wire jams occur when you load the spool incorrectly or use dirty wire. Check the drive rolls and liner. Make sure the wire feeds smoothly. Clean your equipment often to prevent jams.