
Do you want to know how to sand drywall for a smooth finish? Start by grabbing the right tools and gently smoothing the surface. Sanding drywall helps you erase bumps and lines. This user-friendly tool, equipped with expert tips, will streamline your standing experience also deliver flawless results. It’s also an ultimate tool for smoother and more manageable results. It’s an essential step in constructing or renovating a building. It’s a solution for making drywall sanding faster, easier, and less messy. Don’t worry if you’re new to this. You can achieve professional-looking results with a bit of patience and the correct method.
Tools and Materials Needed for Effective Drywall Sanding
Good results can be guaranteed with the appropriate tools and materials. The suitable equipment simplifies the process and delivers high-quality results. It is either a small patch to be repaired or significant damage. This is the best way to sand drywall, helping users achieve better finishes. It solves the issue by explicitly specifying the required objects: grinding discs, protective equipment, and dust-collection equipment. This is the complete how-to of repairing any size of damage:
Require Drywall Sanding Equipment
To have smooth walls, you must have the tools. If you want high-quality tools for drywall sanding, consider a pole sander with a swiveling head. It makes it easy to access difficult places. They are easy to hold in your hand, and drywall sanding is simplified.
The following list may be used to jump-start you:
- Hand sander or sanding block
- Pole sander (really useful on ceilings and high walls)
- Sandpaper (most jobs require 120-150 grit).
- Sanding sponge (best to use on corners and tight areas)
Essential Drywall Sanding Safety Gear
Sanding drywall like a professional is also the most significant way to help by reducing exposure to drywall dust. It generates substantial dust when worn, but it keeps dust out of your lungs and eyes. It keeps you comfortable and safe while you work on long projects or when working indoors.
You should protect yourself with the proper safety gear:
- Dust mask or respirator
- Safety goggles
- Work gloves
- Old clothes or a coverall
Finishing Extras for Drywall Sanding
These extras help you keep your space clean and make cleanup easier. They improve surface quality and support better dust control. It enables you to focus on achieving a perfect finish without worrying about dust. These materials allow users to match the sanding level to the task.
You can use a few extra items to make the job even smoother:
- Drop cloths or plastic sheeting (to cover floors and furniture)
- Vacuum with a brush attachment
- Shop vac with a drywall dust filter
- Painter’s tape (to protect trim and outlets)
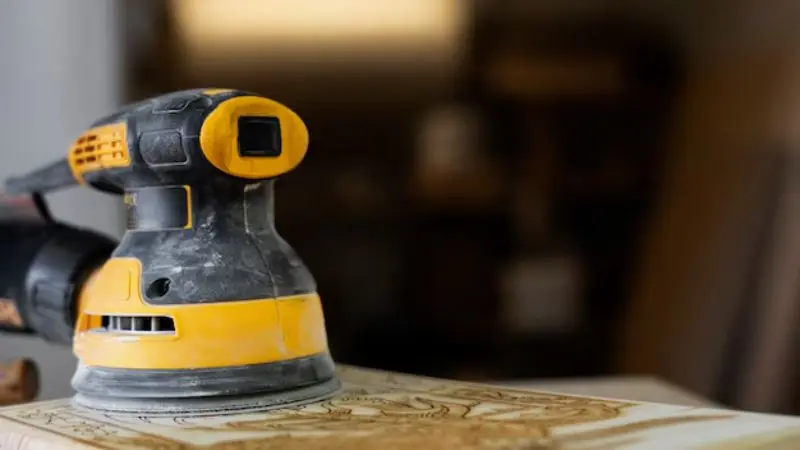
Electric Drywall Sander: Step-by-Step Drywall Sanding Guide
You are confident in performing any drywall repair, from a minor dent to a large hole. This manual will take you through this step by step. With these guidelines, you can make your walls look professional. Sanding drywall does not require special skills. All you have to do is choose the appropriate tools and follow our guide.
Room and Wall Preparation for Drywall Sanding
You should start by clearing the room. You can move furniture out or cover it with drop cloths. You can also tape plastic sheeting over doors and vents. You want to keep dust from spreading everywhere. You should check sanding drywall corners and edges for any protruding nails or screwt. You can also wipe the wall with a damp cloth to remove loose debris. You also need to drive them in to achieve a flat surface for sanding drywall. This guide explains how to protect your furniture and belongings. It also emphasizes clearing the room to ensure you have enough space to move freely and maintain a safe environment.
Selecting the Proper Sandpaper Grit
Pick the right sandpaper for the job; for most drywall sanding, use 120-grit to start. This grit removes bumps without scratching the wall. If you see rough patches, switch to 150-grit for a smoother finish. The recommended grit sequence is 120 grit first, then 150 grit for final passes. This helps you get paint-ready walls. This feature enables users to select the most suitable sandpaper for different drywall tasks. Choosing the wrong grit wastes energy and extends the project timeline. The correct grit ensures the walls are even and ready for painting or finishing.
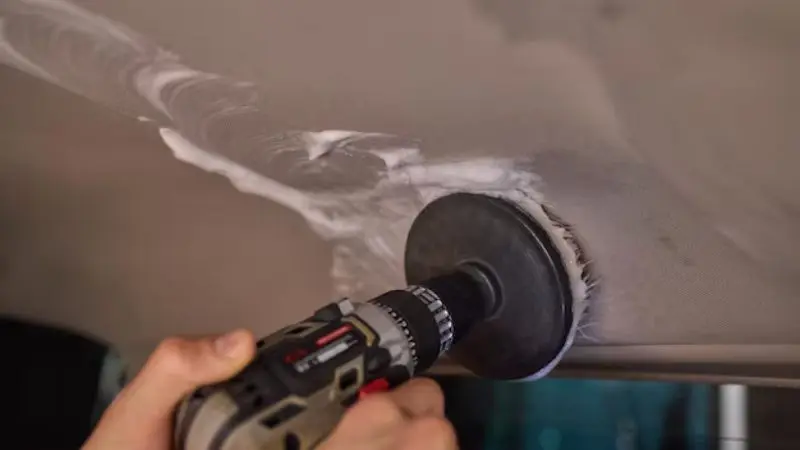
Smooth Drywall Sanding Techniques
Hold your sanding block or pole sander with a light grip and move in gentle, circular motions. Don’t press too hard; let the sandpaper do the work. You should always sand drywall seams and feather the edges. This blends the joint compound into the wall. You can also use a sanding sponge for corners. You want to keep the surface even for paint-ready walls. How to sand drywall without making dust? By simplifying the sanding process. This technique helps users avoid visible ridges or bumps that can ruin the wall’s finished look. It also ensures that the entire wall is uniformly smooth.
Smoothing Stubborn Drywall Spots
Occasionally, you have rugged ridges or withered drops. A little more pressure can be used, or a sanding sponge can be used. A scraper will be used on the complex areas, then we’ll return to sanding the drywall. You should regularly monitor your progress. You can also run one’s hand along the wall to access or measure smoothness. Before you are finished, you want everything flat. That’s how to sand drywall for painting to achieve a professional finish. This guide describes the way to approach such spots safely and successfully. This ensures that even the most difficult areas in the wall can be smoothed effectively without damage.
Complete Dust Control and Cleanup Guide for Drywall Sanding
With the right tools and techniques, you will achieve a perfect finish. Your walls will appear professionally painted. This guide contains professional advice and necessary materials. It also includes easy, step-by-step instructions for sanding drywall. Selecting the appropriate vacuum drywall sander can be challenging, given the wide variety available. Having so many models available, it can be challenging to make the right choice.
Using a Vacuum for Dust Control
When sanding drywall, you want to control dust. You can attach a vacuum to your sander. Many sanders have a port. A drywall dust filter shop vac is good. A dust collection system is also usable. These are the best ways to sand drywall effectively and remove dust around your workplace. You feel less stressed and waste less time cleaning. Always check your vacuum filter beforehand. A pure filter captures more dust.
Here’s a quick table to compare options:
| Tool | Pros | Cons |
| Shop Vac | Easy to find | Can be noisy |
| Dust Collection Sys | Very effective | Costs more |
| Sander w/ Vacuum | Less mess | Needs setup |
Comparing Wet and Dry Sanding
Wet sanding uses a damp sponge instead of sandpaper. You dip the sponge in water, wring it out, and gently rub the wall. This method creates less dust. Dry sanding is faster and yields a smoother finish. It involves sanding the wall without adding water. You might use wet sanding for minor touch-ups or tight spaces. You should try both methods to determine which is most effective for sanding drywall. These expert sanding tips often recommend wet sanding for final passes. This method is effective for repairing minor dents and scratches.
Post- Sanding Cleanup Tips
Finish strong with a thorough cleanup, then wipe down surfaces with a damp cloth. You should vacuum the floor and any nearby furniture, and remove drop cloths and plastic sheeting. These expert tips for sanding drywall recommend checking corners and outlets for hidden dust. You want your space clean and ready for painting. How to sand drywall without making dust? The electric drywall sander is easy to collect dust particles. This makes it easier to reach every corner, seam, and edge, so no hidden dust spots remain.
Common Drywall Sanding Mistakes to Avoid
You want smooth walls, and even one mistake can ruin your work. Let us review the pitfalls to avoid to ensure drywall sanding delivers the best results. It is important to remember that the most common errors to avoid when sanding drywall are not rigid to repair, provided you stay vigilant. Be patient and cross-check yourself. You will have a tremendous difference in your completed walls!
Using and Selecting the Wrong Sandpaper
Choose rough sandpaper to scratch the wall. Using sandpaper that is not coarse enough may prevent you from removing bumps. You must always begin with 120-grit and end with 150-grit. The greater the pressure, the faster the results. When sanding drywall corners and edges, applying too much pressure can cause grooves and other irregularities.
Let the sandpaper do the work.
- You begin by collecting your equipment and cleaning the room.
- Select the appropriate sandpaper and sand it off gently.
- Monitor your progress to ensure smooth walls.
Safe and Effective Drywall Sanding
Dust from sanding drywall can get everywhere. If you skip wearing your mask or goggles, you risk inhaling dust or getting it in your eyes. You should stop often and run your hand over the wall. You will find that missed spots or rough patches are easier to fix early. You can shine a light along the wall to spot trouble areas. Many people forget to sand corners and edges. You can use a sanding sponge for these spots. You want every part of the wall to feel smooth. You also should stay patient and trust your process. You now know how to sand drywall like a pro!
Wrap Up
Proper sanding of the drywall is necessary to achieve smooth, professional-looking walls. With the right tools, sandpaper, and techniques, you can perform any repair with confidence. This blog will ensure you always prioritize safety by protecting your clothes and reducing dust. It includes a complete guide to assist you in deciding on the proper sanding technique to use, whether wet or dry, depending on the job to be done. You should be cautious in stubborn spots to achieve a perfect finish. It ensures cleaning is done correctly and that you are ready to paint. Even inexperienced people can produce paint-ready walls with patience and practice.
FAQs
When will the drywall be smooth enough?
Run your hand over the wall. When you do not feel any bumps or ridges, then you are ready to paint. Check against shadows using light.
Is it possible to drywall by sanding without creating a mess?
You can! Wet sanding or vacuum sanding. Wrap drop cloths on furniture and cover floors. Clean dust immediately after you are done.
What do I do when I oversand?
The following steps are when you over-sanded:
- Don’t worry.
- Use a coating of joint compound.
- Let it dry.
- Once more, a slight smattering with sand.
What type of grit sandpaper would you recommend for sanding drywall?
You have to begin with 120-grit on rough spots. Switch to 180-220 grit for finishing. Do not forget to check your wall. If there are scratches, use a finer grit.


