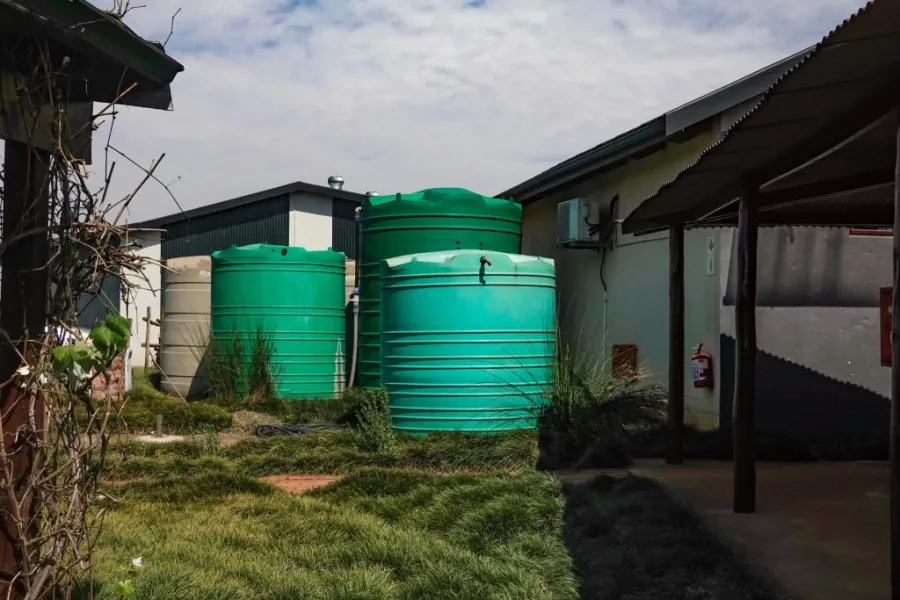
Imagine you never have to worry about a water bill again. Learning how to install a water tank system is not something you can do over a weekend. It is about being in charge of the water in your home, which is very important. Likewise, if you want to collect rainwater to help the earth or make a survival kit, water tank systems are a good place to start. This is how you can take care of yourself, and you dont not to rely on others for water.
Getting this project done correctly requires upgrading from “just a tank” to a professional-grade system. With a good strategy and some high-quality water management tools, you can leave a drought-resistant legacy for your land that will last for generations.
Preparing for your water tank installation
Before you start rolling a large tank across your lawn, you should have a plan. Preparation distinguishes between a system that lasts and one that causes a big flood. Taking ten minutes to inspect your surfaces now will save you thousands later.
Selecting the Right Location
Choose a level area that is close to your current plumbing or downspouts. If space is limited, you can choose a collapsible water tank that fits where rigid models do not. Access for maintenance is critical.
Avoid placing the tank near huge trees since their roots can displace the soil. A shady location is ideal for keeping the water cool and preventing algae. Proper placement keeps your water as pure as possible before filtration begins.
Calculating the Weight Load
Water is quite heavy. A full 500-gallon tank weighs more than 4,000 pounds, which is almost the same as a large SUV. You must guarantee that the earth can support this concentrated load without sinking or changing over time.
If you’re learning how to install a water tank on a roof construction, this step is essential. You may require a structural engineer to inspect your rafters. Never guess when thousands of pounds are sitting above your head.
Building a Solid Foundation
A flat, reinforced concrete pad is considered the gold standard for tank bases. If you’re on a tight budget, a compacted crusher-dust base is an excellent choice. It must be at least 100mm wider than the tank to avoid edge erosion.
To make sure the base is completely level, you should use a spirit level. If the tank is not level, it can exert pressure on the seams of the tank, and this can lead to the tank failing. The tank will be a lot safer if it has a base because this keeps the tank from tipping when the water level in the tank goes up and down.
Essential Tool Kit
You’ll need a specific set of tools for every setup. Having everything ready prevents those annoying mid-project trips to the store. Here is what you should have on your workbench:
- Plumbing: PVC cutters, primer, and high-strength solvent cement.
- Measurement: A 25-foot tape measure and a 4-foot spirit level.
- Tightening: A 90-piece bit and ratchet set for pump mounts and bracket security.
- Heavy Duty: A 65-piece impact socket set for driving large anchor bolts.
- Drilling: A power drill with hole saw bits for the inlet and overflow ports.
How to install a water tank at home
Getting the tank into position is the “heavy lifting” phase. Once the tank is settled, the rest is mostly plumbing. This is how to install a water tank at home for maximum efficiency and longevity.
Positioning the Tank
You should carry the tank onto the base that you have prepared with some help from other people. It is an idea to get several people to help you or use a hand truck to move the tank, so you do not scratch the bottom of the tank. The tank needs to be centered on the pad because this is very important for making sure the weight of the tank is distributed evenly.
Centering the tank on the pad is really important for the tank. Once it’s down, do one final check with your spirit level. If it’s slightly off, use thin rubber shims to stabilize the base. Avoid wooden shims, as they will rot and cause the tank to tilt eventually.
Connecting Inlet and Outlet Pipes
Drill your inlet hole at the top of the tank using a hole saw bit. Connect your house gutter or main water line here. Use a bulkhead fitting to ensure the connection is watertight and vibration-resistant.
The outlet pipe should be near the bottom, but not at the very base. Leaving two inches of space prevents sediment from entering your pipes. For temporary setups, you can even use a durable water tank bladder for easy transport.
Installing an Overflow System
Every tank needs a way to vent excess water during heavy rain. Install an overflow pipe that is at least the same diameter as your inlet. This pipe should lead water away from the foundation.
Add a fine mesh screen to the end of the overflow. This keeps mosquitoes and pests from entering your water supply. It’s a simple step that keeps your stored water much cleaner for longer periods.
Testing for Leaks
Fill the tank slowly, about 10% at a time, to check the seams. Watch the bulkhead fittings and valves for any signs of moisture. It’s much easier to fix a drip now than when the tank is full.
If you spot a leak, tighten the fitting or reapply solvent cement. Once the tank is half full, wait an hour to see if the weight causes shifting. If everything is dry, you are ready for the next phase.
How to install a water tank with pump
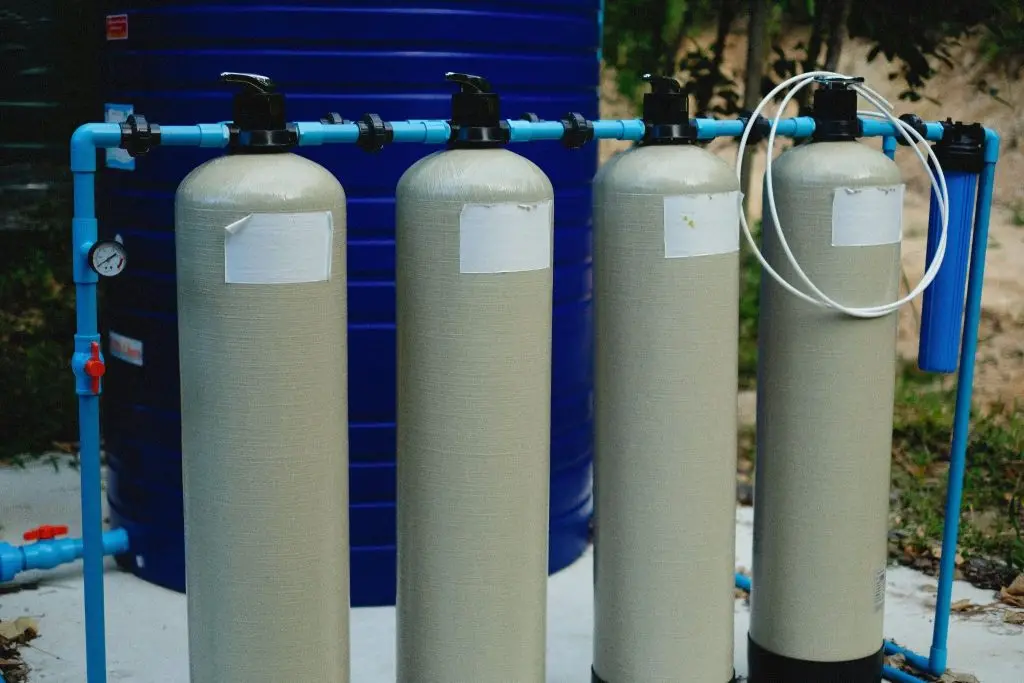
If you want actual water pressure for your home, you need a pump. Learning how to install a water tank with pump components allows you to run showers and garden hoses with ease.
Choosing the Best Pump Location
Place your pump as close to the tank as possible. This reduces the work the motor has to do to pull the water. Most homeowners install a self-priming pump on a small concrete slab.
Make sure the pump is sheltered from the rain and sun. A simple ventilated cover will extend the life of the motor significantly. This prevents the internal electronics from overheating or rusting over time.
Wiring and Electrical Safety
Pumps need their own special electrical circuit to be safe. If you do not feel good about doing the wiring, you should get a professional to do this part. You should always use an outlet that is okay to use outside and has a thing that stops electrical shocks, which is called a GFCI outlet.
Ensure the wires are buried in a protective conduit. This prevents accidental damage from garden tools. A 48-piece bit and ratchet set is perfect for securing the electrical box and pump housing.
Installing Check Valves and Strainers
A check valve is really important because it stops water from going into the tank. This is good because it keeps the pump ready to go. The pump will always have pressure when you need it. You should put the check valve on the line that sucks water from the tank to the pump.
Add an inline strainer to catch any debris before it reaches the pump. Small grains of sand can ruin a pump motor in seconds. Check this strainer every few months to keep the water flow strong.
Priming the System
Most pumps need to be “primed” with water before the first run. Open the priming port on top of the pump and fill it with water. This removes air pockets that prevent suction.
Turn on the power. Open a faucet at the end of the line. You might hear some noise as air comes out. Once the water flows steadily, the pressurized water system is working properly.
How to install a water tank on roof

If you want to save on electricity, a gravity-feed system is the way to go. This is how to install a water tank on the roof surface, so you have a flow even during a power outage.
Structural Integrity Check
Before buying a tank, check your roof’s load-bearing capacity. Standard roofs aren’t built for a two-ton water tank. You may need to add extra beams or columns directly under the tank’s position.
Look for a spot directly above a load-bearing wall. This transfers the weight straight down to the foundation. Always prioritize safety over convenience when placing thousands of pounds of water on your home.
Weight Distribution Techniques
Do not put a tank right on the shingles. You need something to spread the weight of the tank across a lot of rafters. A round tank is very heavy. It can damage the shingles. The best thing to use is a steel frame or a thick wood deck that has been treated to withstand pressure. This will help keep the tank safe, and it will not hurt the shingles.
The platform should be slightly larger than the tank base. Use a 3/4-inch drive set for the massive leverage needed to secure structural bolts into your roof’s heavy timber rafters.
Securing Against Wind and Weather
A water tank on a roof is like a sail. If the water tank is empty, a strong wind can blow the water tank right off the house. You should use duty galvanized straps to anchor the water tank to your support platform.
Ensure the straps are tight but not crushing the plastic. Check these straps annually for any signs of rust. For large mounting brackets, a 34-piece metric set will provide the perfect fit for every bolt.
Plumbing for Gravity Feed
The taller your tank is, the better the water pressure will be. For every foot that the tank is elevated, you get 0.43 PSI of pressure. A water tank that is ten feet high usually works well for watering your garden and flushing toilets at home.
Furthermore, use larger diameter pipes to reduce friction in gravity systems. This helps to get a flow rate without a pump. If you plan to drink this water, learn how to make distilled water. You can also check the benefits of water distiller systems for purification.
Maintenance and troubleshooting
Your tank is a living environment. A minimal maintenance program is required to keep the water clean and the hardware running properly. A little more attention can save you money on future repairs.
- Flush the Sediment: Once a year, open the bottom valve to clear out any sludge.
- Check the Roof: If you have a roof tank, look for leaks that could damage your ceiling.
- Pump Care: Use a 33-piece impact set to keep all pump mounting bolts tight and rattle-free.
- Filter Cleaning: Rinse out your inlet and outlet filters every three months to maintain flow.
If you encounter a heavy structural repair, a 23-piece impact socket set is a lifesaver. For deep-set valves, a deep socket set ensures you can reach every fitting.
FAQs
Where is the best place to put a water tank?
The optimum location is a level, firm surface near your plumbing fixtures. It should be easily accessible for maintenance but kept out of direct sunlight to avoid algae. If you want to collect rainwater, you must be near a downspout.
How do I calculate the weight of a full water tank?
A gallon of water weighs about 8.34 pounds. To calculate the total weight, multiply the tank’s capacity in gallons by 8.34, then add the tank’s weight. This computation is critical to preventing foundation sinking and roof collapse.
What size water tank do I need for a family of 4?
When it comes to emergency supplies, a family of four requires at least 500 gallons of water for a few days of basic use. This water is for drinking and washing. If you want to use rainwater for gardening and flushing the toilet, you’ll need a 1,000 to 2,000-gallon tank. A tank of this size will provide enough water to last through dry spells.
Do water tanks need a vent?
Certainly, there must be venting for the tanks. This will help in ejecting air from the tank as water is filled inside it, and entering air as water is removed from the tank. As water is pumped out fast and air cannot enter the tank, the tank might explode.
Conclusion
Acquiring the knowledge on how to install the water tank system is not just about being handy around the house. It is an approach used to ensure that your house does not depend on external factors to access water. From the moment you create the pad and finally make the pump work, you have established an infrastructure that protects your family and even saves you money.
You have managed to turn a complicated technical process into a personal triumph through the use of the right tools and proper techniques. Relax, breathe, and celebrate your ultimate prize, the sound of your filled tank!