
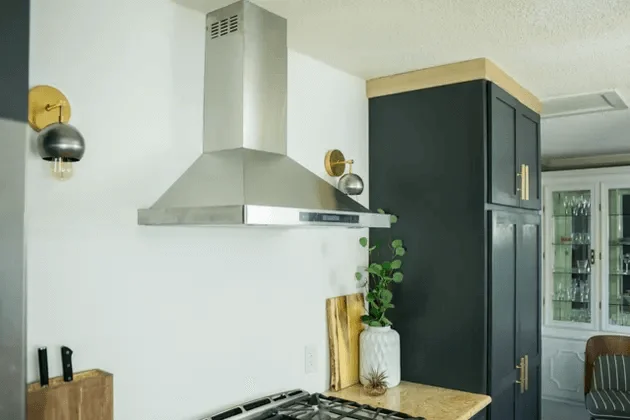
Congratulations on your decision to enhance your kitchen with a ductless range hood installation! Whether you’re aiming to improve ventilation, eliminate odors, or create a cleaner cooking environment, this step by step guide will assist you in achieving your goal.
Installing a ductless range hood is a relatively straightforward process, especially when compared to traditional vented hoods. The key distinction is that there’s no need for a vent connection. In this article, we will provide you with clear instructions on how to install ductless range hood, ensuring that you can complete the process with confidence and efficiency.
Before Ductless Range Hood Installation
Before embarking on the process of installing ductless range hood, it’s crucial to take the necessary safety precautions and ensure you have all the required tools and materials at hand. Proper preparation will not only streamline the installation process but also contribute to a safer and more efficient outcome.
1. Safety Precautions
Safety should always be a top priority when installing ductless range hood. Here are some key safety precautions to keep in mind:
● Turn off the Power: Before beginning any electrical work, ensure the power to the kitchen’s electrical box is switched off. You can use a circuit tester to verify that the power is indeed off.
● Use Protective Gear: Wear appropriate safety gear, including gloves and safety glasses, to protect yourself during the installation.
● Work in a Well-Ventilated Area: Since you’ll be dealing with electrical work and potentially connecting the hood to an electrical source, it’s important to work in a well-ventilated area to prevent exposure to fumes.
2. Tools and Materials Needed
To simplify the process of installing your ductless range hood, gather the following tools and materials before you begin:
● Tape Measure: This tool will help you accurately measure and mark the installation locations.
● Stud Finder: A stud finder will assist you in locating and securing the mounting bracket to a sturdy part of the wall.
● Mounting Screws: These are essential for securely attaching the mounting bracket to the wall.
● Electrical Wire: Ensure you have the appropriate electrical wire for connecting your range hood to the power source.
● Electrical Box: You’ll need an electrical box to safely contain the wiring connections.
● Charcoal Filter: If your ductless range hood requires it, have a charcoal filter ready for installation. This filter is crucial for trapping odors and grease.
● Circuit Tester: This tool will help you confirm that there is no electrical current running to the area where you’ll be working.
● Power Drill: A power drill will make it easier to create holes for screws and other necessary installations.
● Pencil: Use a pencil for marking reference points and measurements on the wall.
● Keyhole Saw or Reciprocating Saw: These saws will come in handy for cutting holes or making adjustments as needed during installation.
● Cabinet Jack or Similar Support: To prop up the range hood during installation, a cabinet jack or a similar support tool is essential for maintaining stability and ensuring a secure fit.
By gathering these essential tools and materials in advance, you’ll be well-prepared for the installation process. Learning how to install ductless range hood begins with proper planning and organization, setting you up for success as you proceed to mount the hood.
7 Easy Steps to Install Ductless Range Hood
Installing ductless range hood is a manageable task when you follow these seven straightforward steps. With the necessary tools and materials at your disposal, you’ll be on your way to a cleaner and more efficient kitchen in no time.
Step 1: Preparation and Tools
Before diving into the ductless range hood installation, gather all the required tools and materials, as mentioned before. Don’t forget to turn off the power at the kitchen’s electrical box for safety. This step is essential to ensure a smooth process.
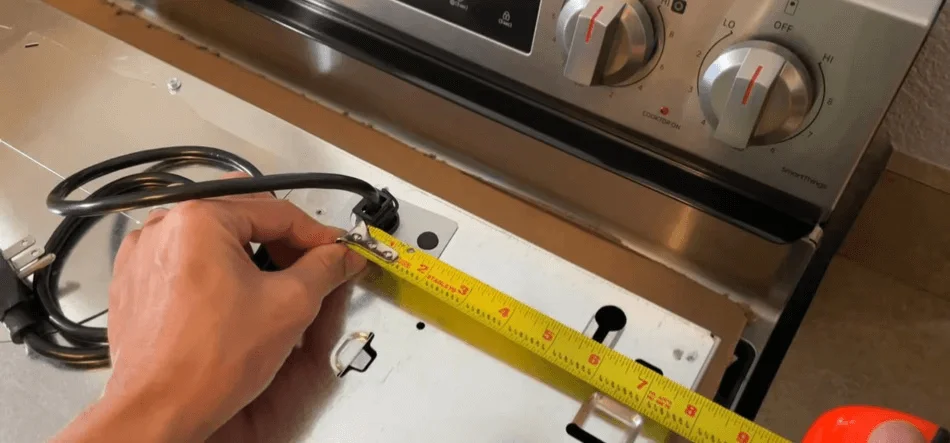
Step 2: Finding the Ideal Location
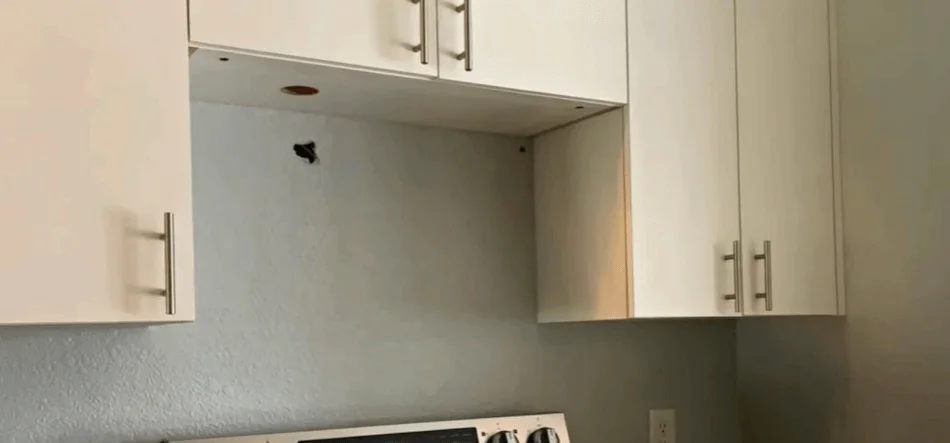
Selecting the right location is crucial for optimal performance. Use your tape measure to mark the ideal spot, aligning it with the manufacturer’s recommendations. Proper placement ensures effective capture and filtration of cooking odors and grease.
Step 3: Assembling the Range Hood
Assemble your ductless range hood as per the manufacturer’s instructions. This typically involves attaching the chimney bracket and securing it with mounting screws. Ensuring proper assembly guarantees stability during installation.
Step 4: Installing the Charcoal Filter
If your range hood requires a charcoal filter, now is the time to install it. The charcoal filter is essential for trapping odors and grease, maintaining a fresh and clean kitchen environment.
Step 5: Electrical Wiring

For safe electrical wiring, connect the range hood to the power source using the appropriate electrical wire. Adhere to electrical codes and guidelines to ensure a secure connection. If you’re uncertain about electrical work, consider seeking professional assistance.
Step 6: Mounting the Hood
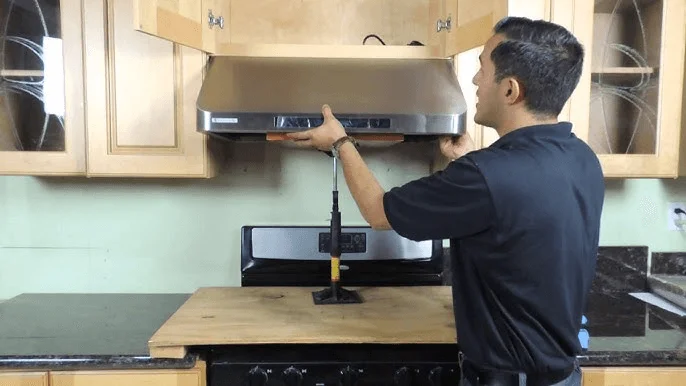
With the range hood assembled and electrical connections in place, it’s time to mount the hood to the wall. Utilize your previously marked location and secure the chimney bracket to a wall stud using mounting screws. This step is crucial for anchoring the hood securely.
Step 7: Testing and Final Adjustments
Before concluding the installation, conduct a thorough test of the range hood. Activate the fan and lights to ensure they function correctly. Listen for any unusual noises or issues. If needed, make final adjustments to ensure the hood is level and aligned with your cooktop.
By meticulously following these seven steps for ductless range hood installation, you’ll significantly enhance your kitchen’s ventilation and cooking environment. Learning how to install a ductless range hood equips you with the skills to enjoy a more enjoyable and efficient culinary experience. Now, confidently tackle this project and reap the rewards of a well-ventilated cooking space.
Maintenance Tips
Maintaining your range hood, whether it’s a ductless or ducted model, is essential to ensure it continues to function efficiently and effectively. Here are some valuable maintenance tips to keep your kitchen ventilation system in top shape:
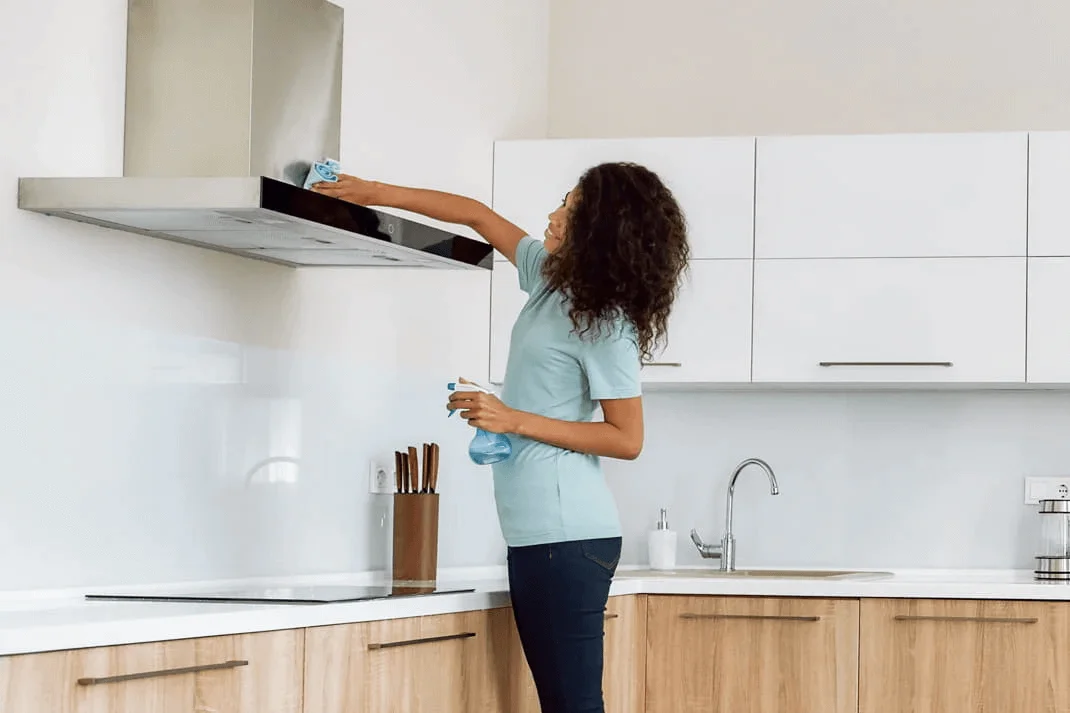
1. Regular Cleaning: One of the most critical aspects of maintaining your range hood is regular cleaning. For ductless range hoods, this includes cleaning or replacing the filters regularly. Grease and cooking residue can accumulate in the filters, reducing their effectiveness. Cleaning or replacing them ensures optimal performance. For ducted range hoods, cleaning the ductwork periodically is crucial to prevent blockages and maintain proper airflow.
2. Inspect and Tighten Fasteners: Periodically inspect the mounting screws and brackets. Over time, vibrations and usage can loosen these fasteners. Ensure they are secure to maintain the stability and safety of your range hood.
3. Check Electrical Connections: If your range hood has electrical components, such as lights or a fan, check the electrical connections to ensure they are secure. Loose connections can lead to malfunctions or safety issues.
4. Replace Charcoal Filters: If your ductless range hood uses charcoal filters, replace them as recommended by the manufacturer or when you notice a decline in odor-absorbing capacity. Fresh filters are essential for effective odor removal.
5. Clean the Exterior: Wipe down the exterior of the range hood regularly to remove grease and dust buildup. Use a mild detergent and a soft cloth to maintain its appearance.
6. Inspect Ventilation Path: If you have a ducted range hood, occasionally inspect the ventilation path to ensure there are no obstructions. Blockages can reduce the effectiveness of the hood.
7. Professional Maintenance: Consider scheduling periodic professional maintenance, especially if you have a complex ductless range hood or a ducted range hood with intricate ductwork. Professional technicians can thoroughly clean and inspect your system, addressing any issues that may have arisen.
By following these maintenance tips, you’ll prolong the lifespan of your range hood and ensure it continues to provide efficient kitchen ventilation. Whether you have a recirculating range hood or one with ducted ventilation, regular care and attention will keep your kitchen environment clean and pleasant.
Upgrading to Ducted Ventilation
If you currently have a ductless range hood and are contemplating an upgrade, converting to ducted ventilation could be a smart choice.
When and why to consider ducted installation
1. Enhanced Performance: Ducted range hoods, such as 800 CFM range hoods or even more powerful 900 CFM range hoods, are known for their superior performance in removing cooking odors, smoke, and grease. If you frequently cook and want the most effective ventilation, ducted installation is the way to go.
2. Quieter Operation: Ducted hoods tend to be quieter than their ductless counterparts. If a quieter cooking environment is important to you, the transition to ducted ventilation can significantly reduce noise levels.
3. Long-Term Cost Savings: While ducted installations may have a higher upfront cost due to the ductwork and installation, they can result in long-term savings. Ducted hoods are more energy-efficient and require less frequent filter replacements, reducing ongoing maintenance expenses.
4. Home Resale Value: Upgrading to ducted ventilation can increase the resale value of your home. Potential buyers often appreciate the convenience and effectiveness of a ducted range hood.
Steps for converting a ductless hood
Converting from a ductless range hood to a ducted one involves several steps:
1. Assessment: First, assess whether your kitchen has the necessary space and structure for ducted installation. Ensure there’s a pathway for the ductwork to exit your home.
2. Ductwork Installation: If space and structure allow, hire a professional to install the ductwork. This includes creating an exhaust path from the range hood to the exterior of your home.
3. Range Hood Replacement: Purchase and install a ducted range hood that matches the size and capacity you desire.
4. Professional Installation: It’s crucial to have a professional install the new ducted range hood and connect it to the newly installed ductwork to ensure proper ventilation.
By considering the benefits of ducted ventilation and following these conversion steps, you can enjoy improved kitchen ventilation, reduced noise levels, and long-term cost savings in your home.
Conclusion
In this comprehensive guide on how to install a ductless range hood, we’ve covered the essential steps, tools, and maintenance tips to ensure your kitchen remains fresh and enjoyable. Whether you’re opting for a ductless or ducted range hood, the importance of proper installation and regular upkeep cannot be overstated.
As you embark on your journey to a cleaner and more efficient cooking environment, remember that the right range hood can make a world of difference. So, take the time to assess your kitchen’s needs, choose the ideal range hood, and maintain it diligently. Your culinary adventures will be all the more enjoyable for it. Now, take action and transform your kitchen today!
FAQs about Installing Ductless Range Hood
1. Can I install a ductless hood myself?
Yes, you can install a ductless range hood yourself, but it’s important to follow the manufacturer’s instructions and take safety precautions.
2. How much does it cost to install a ducted range hood?
The cost of installing a ducted range hood varies widely depending on factors like kitchen layout and ductwork requirements, but it typically ranges from $300 to $1,500 or more.
3. Do ductless range hoods plug in?
Yes, ductless range hoods typically plug into a standard electrical outlet for power.


