
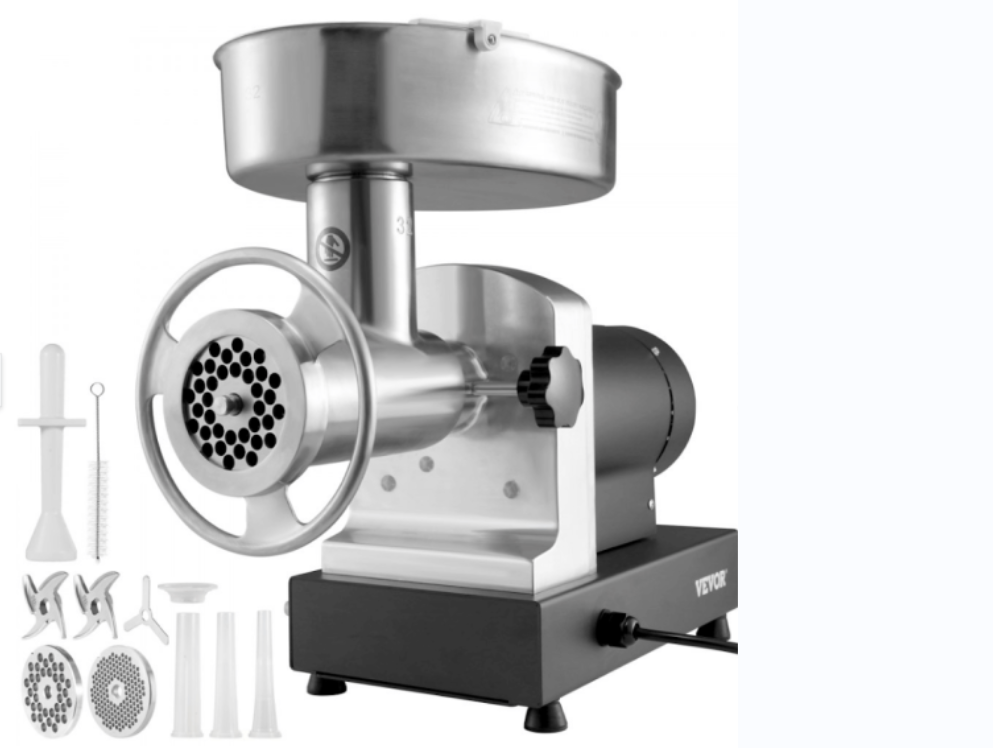
A well-maintained meat grinder is a kitchen essential that stands as a testament to both craftsmanship and commitment to quality. The VEVOR meat grinder, renowned for its precision engineering and durable design, elevates the art of food preparation to new heights.
To ensure your VEVOR meat grinder operates at peak performance, regular and thorough cleaning is imperative. In this comprehensive guide, we will walk you through the step-by-step process of how to clean a meat grinder properly.
From disassembly to reassembly, we will explore each component of the meat grinder, highlighting key cleaning techniques, recommended tools, and essential maintenance tips.
By following these guidelines, you not only ensure the hygienic preparation of your favorite meats but also guarantee the longevity of your VEVOR meat grinder, allowing it to perform flawlessly with each use.
Table of contents
Why Regular Cleaning Matters
Here’s why regular cleaning matters and how it contributes to the peak performance of this indispensable kitchen tool:
Hygiene is Non-Negotiable
Firstly, hygiene takes center stage. Regular cleaning of your meat grinder ensures that harmful bacteria, contaminants, and residual meat juices are banished, providing a hygienic environment for food preparation. This is not just about compliance with health standards; it’s a commitment to the well-being of those who savor your culinary creations.
Preserving Flavor Purity
The purity of flavors is the essence of gastronomy. A clean meat grinder prevents cross-contamination and the mingling of different meat flavors. Whether you’re crafting savory sausages, tender burgers, or exotic meat blends, regular cleaning ensures that each grind is an unadulterated expression of the chosen ingredients, allowing their natural tastes to shine through.
Enhancing Equipment Longevity
A well-maintained meat grinder is an investment in your kitchen’s future. Regular cleaning prevents the accumulation of grime, grease, and meat residue that can lead to corrosion and wear. By removing these elements promptly, you not only extend the life of your equipment but also optimize its performance. Imagine your meat grinder as a finely tuned instrument; regular cleaning is the melody that keeps it playing in perfect harmony.
Maintaining Consistent Performance
Consistency is the hallmark of any skilled chef. Regular cleaning ensures that your meat grinder operates at its peak efficiency with every use. From the smooth rotation of gears to the seamless flow of meat through the grinding plates, a clean grinder guarantees a uniform texture and quality in your ground meats. Say goodbye to uneven results and hello to culinary precision.
Ease of Use and Convenience
A clean meat grinder is a joy to work with. It not only facilitates a smoother and more effortless grinding process but also simplifies the disassembly and reassembly steps. Regular cleaning transforms your meat grinder from a potential hassle to a user-friendly, reliable companion in the kitchen.
Step-by-Step Guide: How to Clean a Meat Grinder
Here is a detailed step-by-step guide on how to clean a meat grinder:
Pre-Cleaning Preparation
Before starting the cleaning process, it is crucial to ensure safety. Unplug the meat grinder to prevent any accidents during the cleaning.
Disassembly
Removal of Residual Meat and Debris
Prior to disassembly, remove any remaining meat particles and debris from the grinder. This can be done using a dedicated brush for hard-to-reach areas or by using compressed air for thorough cleaning.
Step-by-step Disassembly
Safely disassemble the different parts of the grinder according to the manufacturer’s instructions. This may involve unscrewing various components and carefully removing them.
Washing the Removable Parts
Soaking Strategy
Soak the removable parts of the grinder in warm, soapy water. This helps to loosen any remaining residue and makes the cleaning process more effective.
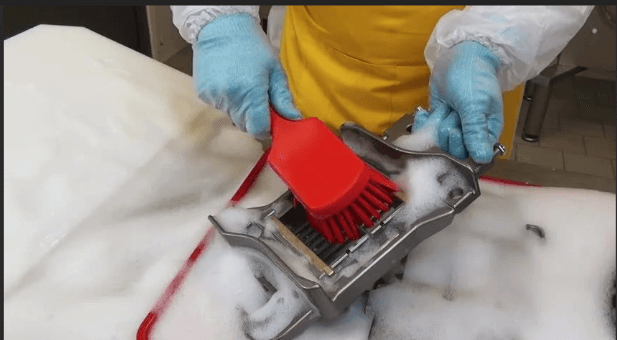
Scrubbing Techniques
Use non-abrasive brushes and scrubbers to clean each component thoroughly. Pay special attention to hard-to-reach areas to ensure all residue is removed.
Avoiding Harsh Chemicals
It is important to avoid using harsh chemicals, as they can damage the grinder and pose a safety risk. Use mild detergents for cleaning.
Handling Grinder Blades and Plates
Blade Removal
Safely detach the blades from the grinder for individual cleaning. Follow the manufacturer’s guidelines for this process.
Sharpening Tips
Check the condition of the blades and sharpen them if necessary to maintain their effectiveness.
Inspecting Blades
Thoroughly inspect the blades for any signs of wear or damage. If any issues are found, consider replacing the blades.
Drying and Sanitizing
Air Drying
After cleaning, allow all the components to air dry completely. Alternatively, use a clean towel to dry them thoroughly.
Sanitizing Procedures
Once dry, sanitize the parts using safe sanitizing agents to ensure they are free from any harmful bacteria or contaminants.
Preventing Rust
For metal components, take steps to prevent rust by ensuring they are completely dry before reassembling the grinder.
Reassembly and Functional Check
Putting It Back Together
Reassemble the meat grinder, following the manufacturer’s instructions in reverse order of disassembly.
Functionality Test
Before use, perform a functionality test to ensure that the grinder is working correctly and that all parts have been reassembled properly.
Lubrication
Apply food-grade lubricants to the grinder as recommended by the manufacturer to ensure smooth and efficient operation.
Following these detailed steps will help maintain the cleanliness and performance of your meat grinder, as well as ensure the safety of the food being processed.
Common Mistakes to Avoid When Cleaning Your Meat Grinder
Cleaning your meat grinder is a bit like taking care of a trusty kitchen companion. To ensure you’re treating it right, let’s go over some common mistakes to avoid:
Skipping Safety Steps
- Mistake: Ignoring the importance of unplugging the meat grinder before cleaning.
- Why to Avoid: Safety first! Skipping this step could lead to accidents during the cleaning process.
Rushing Disassembly
- Mistake: Disassembling the grinder without following a step-by-step guide.
- Why to Avoid: Rushing might lead to confusion or missing out on crucial cleaning spots. Take it slow for a thorough clean.
Neglecting Residual Meat
- Mistake: Not paying attention to leftover meat particles.
- Why to Avoid: Neglecting residue can affect the taste of your next grind and compromise hygiene. Be meticulous in clearing all remnants.
Using Harsh Chemicals
- Mistake: Opting for strong or abrasive cleaning agents.
- Why to Avoid: Harsh chemicals can damage the grinder’s components and leave behind unwanted residues. Stick to mild detergents for a safe clean.
Forgetting Blade Maintenance
- Mistake: Neglecting to sharpen and inspect grinder blades regularly.
- Why to Avoid: Blades that aren’t well-maintained can lead to uneven grinding and affect the overall performance of your grinder.
Skipping Drying Time
- Mistake: Reassembling the grinder before components are fully dry.
- Why to Avoid: Moisture can lead to rust and compromise the cleanliness of your meat grinder. Ensure everything is thoroughly dry before putting it back together.
Overlooking Functionality Check
- Mistake: Failing to test the grinder’s functionality after cleaning.
- Why to Avoid: Without a functionality check, you might miss issues that could affect your next cooking session. Ensure everything is working smoothly before use.
Ignoring Lubrication
- Mistake: Neglecting to use food-grade lubricants.
- Why to Avoid: Lubrication is like a treat for your grinder. It ensures smooth operation and helps prevent wear and tear over time.
By steering clear of these common pitfalls, you’ll be on your way to mastering the art of cleaning your meat grinder, preserving its performance and longevity.
Maintaining Sharp Blades for Optimal Meat Grinding
Maintaining sharp blades is the secret sauce for achieving optimal meat grinding every time. Here’s a simple guide to keep those blades in prime condition:
Importance of Sharp Blades
Having sharp blades in your meat grinder is like having a well-tuned instrument in a symphony – it makes all the difference. Here’s why sharpen your meat grinder is very important:
Efficient Grinding
Sharp blades effortlessly cut through meat, ensuring a smoother and quicker grinding process.
Consistent Results
Sharp blades produce uniform meat textures, enhancing the overall quality of your culinary creations.
Preservation of Flavor
By minimizing heat generation during grinding, sharp blades help preserve the natural flavors of your ingredients.
Tips on Sharpening Meat Grinder Blades
Keeping your blades sharp is key to maintaining peak performance. Here’s a simple guide on how to sharpen them:
Tools Needed
Obtain a sharpening stone or a specialized blade sharpener for meat grinders.
Disassembly
Safely remove the blades from the grinder before starting the sharpening process.
Angle Matters
Maintain the original angle of the blade while sharpening to ensure optimal cutting efficiency.
Consistent Strokes
Use even and consistent strokes on the sharpening stone, focusing on both sides of the blade.
Check Sharpness
Regularly check the sharpness of the blade during the process to avoid over-sharpening.
VEVOR Above All
When it comes to grinder blades, VEVOR stands out for durability and sharpness. Here’s why their blades are a cut above the rest:
High-Quality Materials
VEVOR’s blades are crafted from premium materials, ensuring longevity and sustained sharpness.
Precision Engineering
The blades undergo precision engineering, guaranteeing optimal cutting performance for an extended period.
Compatibility
VEVOR’s blades are designed to seamlessly fit their meat grinders, ensuring a perfect match for efficient and reliable grinding.
By prioritizing the sharpness of your meat grinder blades and considering quality options like those offered by VEVOR, you not only enhance your grinding experience but also prolong the life of your meat grinder. Keep those blades sharp, and let the culinary symphony continue!
Common Cleaning Challenges for Your Meat Grinder
Cleaning your meat grinder is a crucial step in maintaining its performance, but it’s not always a walk in the park. Here are some common cleaning challenges and how to tackle them:
Residue in Hard-to-Reach Areas
Challenge: Stubborn residue hiding in tricky spots.
Solution: Invest in a narrow brush or toothpick to access those hard-to-reach areas. A little patience and precision can go a long way.
Persistent Odors
Challenge: Lingering smells from previous grinds.
Solution: Try grinding a small piece of bread or cracker after cleaning. This helps absorb any lingering odors and freshens up your grinder.
Blades Difficult to Remove
- Challenge: Blades seem stuck and won’t come off.
- Solution: Before attempting to remove the blades, ensure the grinder is unplugged. If they’re still difficult to remove, a gentle tap with a rubber mallet can help loosen them.
Rust on Metal Components
- Challenge: Metal parts showing signs of rust.
- Solution: Prevent rust by thoroughly drying components after cleaning. If rust persists, a light scrub with a fine steel wool pad can help, followed by reapplication of a food-grade lubricant.
Dull Blades After Cleaning
- Challenge: Blades lose their sharpness post-cleaning.
- Solution: Sharpen the blades regularly using a specialized meat grinder blade sharpener or a sharpening stone. Follow the recommended angle to maintain optimal cutting efficiency.
Unpleasant Taste in Ground Meat
- Challenge: Despite cleaning, the ground meat has an off-putting taste.
- Solution: Ensure all parts are thoroughly cleaned, especially areas prone to residue buildup. Consider grinding a small amount of white bread after cleaning to further eliminate any residual flavors.
Ineffective Air Drying
- Challenge: Components take too long to air dry.
- Solution: Increase airflow by placing parts in a well-ventilated area. Alternatively, use a clean, dry cloth to wipe components before air drying to expedite the process.
Detergent Residue
- Challenge: The smell or taste of detergent lingers after cleaning.
- Solution: Rinse all components thoroughly after using mild detergents. Consider a final rinse with plain water to ensure no detergent residue remains.
By addressing these common cleaning challenges head-on, you’ll keep your meat grinder in top-notch condition and ensure that each grind is a smooth and flavorful experience.
In a Nutshell
The meticulous process of cleaning your meat grinder isn’t just a task; it’s the key to unlocking peak performance in your culinary endeavors. From safety precautions to detailed disassembly and thorough cleaning techniques, every step contributes to a seamless and flavorful grinding experience. Ready to enhance your grinding experience? Check out VEVOR Meat Grinders for precision and performance that goes beyond expectations.


