
When your car gets repaired, it needs extra care and maintenance. It’s not only about appearance but also about maintaining its fixed areas. It is the question of almost every car owner after repairing how to clean a car after body repair without causing any damage to its finishes. If you’re also confused, then don’t worry! With the right steps, you can safely handle post-body repair cleaning and keep it looking like a brand-new car. In this guide, we’ll walk you through easy and safe steps to clean your car properly after bodywork, helping you protect the new paint job and maintain that showroom shine.
Gather Your Supplies:
Tools You’ll Need
To properly clean a car after body repair, it is really important to do its preparation before cleaning it. Below is a list of tools and products that are recommended to help you clean a car after body repair safely and properly:
- Waxing with Soft cloths: When you apply wax while you clean a car after body repair, using soft clothes will give it a smooth touch on the repaired parts, and also will not scratch the surface.
- Dry with Microfiber towels: Using microfibre towels when you clean a car after body repair, with gently absorb water and will not leave any streaks on it.
- Remove tight spots with Sponge mitts: Sponge mitts are very helpful, while you clean a car after body repair, in reaching narrow spaces like door handles, trim, and around emblems.
- Microfiber sponges to remove grime: The gentleness of microfiber sponges is very effective in removing dirt, and you don’t want to put pressure on the newly repaired paint.
- Foam or wax-based car wash shampoo: When you clean a car after body repair, always use a gentle, pH-balanced soap.
- Various wax types (liquid, paste, carnauba): When you wax after you clean a car after body repair, it adds more protection and shine to the surface of the car body.
- Portable vacuum with attachments: It is very useful for interior detailing, especially when you feel dust or debris has settled in during the body repairs.
All the above-mentioned tools are very helpful when you clean a car after body repair. By using the right equipment, you can make the entire process of cleaning more effective, safe, and professional.
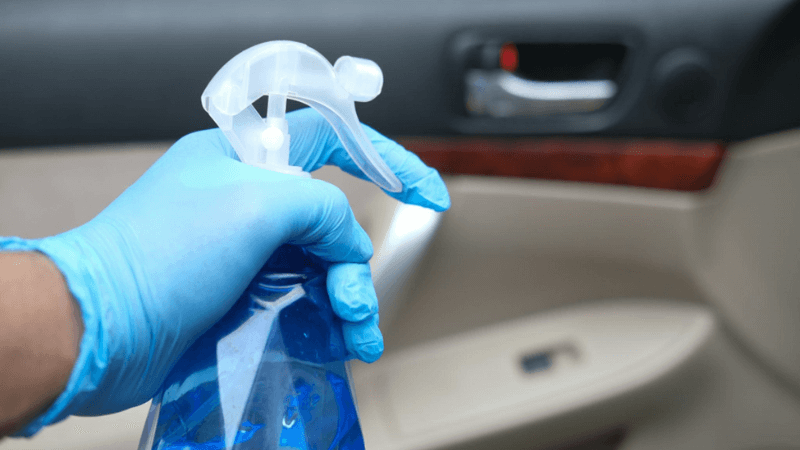
For Safety, use pH-neutral Products.
Choosing the right soap is just as important as selecting the correct tools when you clean a car after body repair. One of the most critical factors is using a pH-neutral product. These soaps are gentle on fresh paint and help preserve the integrity of newly repaired surfaces.
Auto care expert Kramer explains:
“Water beading and runoff are facilitated by a pH that is neutral or slightly acidic. Excessive alkalinity can damage drying agents or clear coatings and make cleaning more difficult.”
That’s why when you clean a car after body repair, you should avoid harsh detergents or overly alkaline formulas. A pH-balanced car wash soap is designed so that it can remove dirt from the surfaces easily and will not strip or damage the finish.
Examine the Repaired Area

Check for Indications of Damage or Flaws
Before you begin to clean a car after body repair, take a moment to carefully inspect the area that was restored. When you clean a car after body repair, you can easily catch the imperfection of the recent repair and prevent yourself from any hassle later.
When you clean the car after body repair, look closely to see if there is any damage, such as minor scratches or uneven paint. Also, observe how light reflects off the paint; if you see irregular reflections, then your car surface may get uneven paint.
If you notice anything odd while preparing to clean a car after body repair, immediately contact the repair shop. Addressing these small issues early can save you from long-term damage and preserve your car’s look.
Determine Which Areas Require More Attention
When you clean a car after body repair, you need to know that not all parts of your car need the same level of care. Freshly painted parts and newly finished surfaces are often more delicate, and you have to treat them with extra caution. This targeted approach will give you the best result in cleaning a car after body repair.
See the areas carefully that may have dirt or dust during the repair process. If you ignore these spots, then your car can get scratched easily. You can use a soft cloth or sponge to gently clean these narrow parts. You should avoid hard scrubbing, as excessive pressure can ruin the look of the recently repaired car.
Clean the Vehicle
Make Use of Cool Water with Low Water Pressure
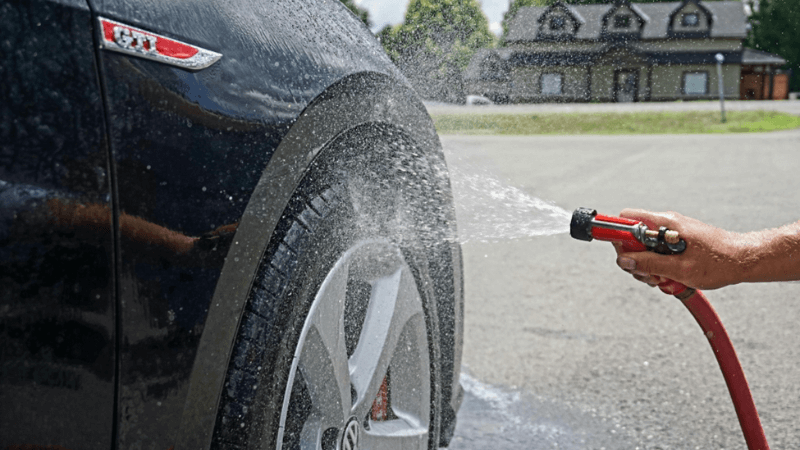
The initial rinse is a key step when you clean a car after body repair. Always use cool water to protect freshly painted surfaces. Warm or hot water may soften the finish, making the repaired areas more vulnerable to damage.
Also, avoid using high water pressure. It seems like a time-saver, but powerful streams can be harsh on delicate parts of your car, such as vinyl wraps, clear coats, or matte finishes. To clean a car after body repair properly, you can use a standard garden hose or a low-pressure nozzle that is gentle, even you rinsing water from it..
How to Properly Clean a Car After Bodywork
If you want to clean a car after body repair, it’s important to follow some of the best ways that will help you to protect delicate finishes and newly repaired parts. These tips will surely to clean a car after body repair safely and effectively.
- For matte or satin finishes, you can use a microfiber mitt, but with gentle and even strokes.
- When washing convertible tops, avoid direct water streams. A light rinse is best to preserve the fabric.
- For classic or vintage cars, you can hand wash while using low-pressure water, so you can protect their older seals and recent, delicate paint.
- Vinyl wraps require special care. Always use a regular garden hose to avoid peeling at the edges or corners.
By following these practical steps, you not only clean a car after body repair correctly but also safeguard the longevity and appearance of the vehicle.
Clear Away Loose Dirt to Avoid Scratches
Loose dirt or debris on your car’s surface can feel like sandpaper. Before you clean a car after body repair, always rinse thoroughly to remove as much dirt as possible. Skipping this essential step can result in fine scratches that are difficult to remove and may damage the freshly restored paint.
Why is pre-rinsing valuable when you clean a car after body repair?
- If you wash without rinsing, it can leave particles in the clear coat of the paint.
- If you are going to use abrasive tools and harsh soaps, the damage will be worse.
- When you rinse it fully, it clears away dust particles and protects sensitive finishes.
Use a hose to target difficult areas where grime builds up, like wheel wells and trim lines.
How to Safely Wash Your Car
Use a Car Wash Solution with a pH Balance
Choosing the right soap is crucial when you clean a car after body repair. A pH-balanced formula is strong enough to remove
Steer Clear of Abrasive Tools and Harsh Chemicals
Grime but gentle enough to protect fresh paint and coatings. When you clean a car after body repair, look for soap labeled “safe for new finishes” or “pH-neutral.” It’s critical to avoid anything abrasive when you clean a car after body repair.
Common risks to avoid when you clean a car after body repair:
- Acidic products can corrode metal and ruin your paint.
- Rough tools may tear through protective coatings or clear coats.
- Strong chemical cleaners can emit toxic fumes or irritate skin.
Here is a brief overview of the risks associated with harsh chemicals:
| Risk Type | Potential Outcomes |
| Toxic Chemicals | Asthma and other respiratory issues can be brought up. |
| Chemical Risks | Hazards are associated with paints and chemicals used for repairs. |
| Hazards of Waste Management | Risks are associated with improperly discarding hazardous repair materials. |
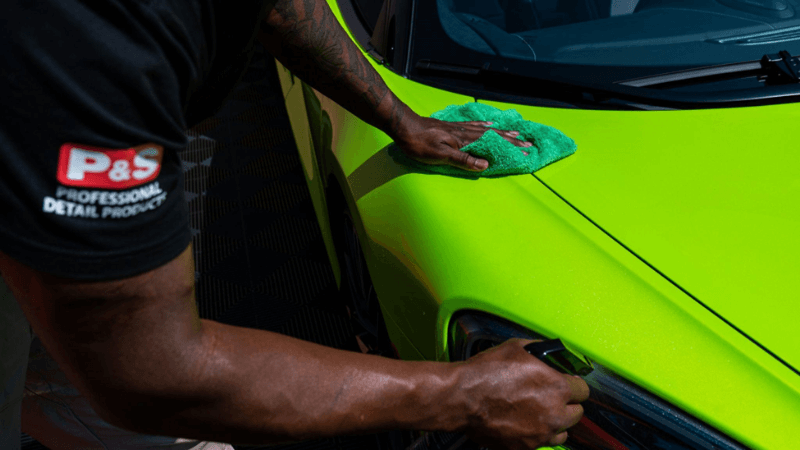
Use Gentle Soaps, Microfiber Towels, and Soft Sponges
If you want to safely clean a car after body repair, always choose gentle soaps, microfiber towels, and soft sponges. These tools reduce the risk of scratching the delicate finishes of newly repaired cars. If you are not sure whether a product is safe, first test it in a hidden area. This simple precaution will help you prevent unwanted damage to the visible parts of the car. When you clean a car after body repair, even a minor scratch can ruin professional work; that is why it is said that caution is the key.
Use the Two-Bucket Washing Technique
One of the most effective auto body shop cleaning tips to clean a car after body repair is the two-bucket method. It helps prevent swirl marks and recontamination of your cleaning tools.
Here’s how to do it properly:
- First of all, you will fill one bucket with soapy water and another bucket with clean rinse water.
- Then you will dip your mitt or sponge into the soap bucket, clean a small section of your car, then rinse the mitt in the clean bucket before going back for further cleaning in soapy water.
- This process will guarantee that dirt will not return to your car’s surface, keeping it safer every time..
But if you need a more gentle way to clean a car after body repair, you should begin with a foam cannon or foam sprayer.
Step:4
Dry Completely
Once you clean a car after bodywork, make sure to dry it properly, as it has the same importance as washing it. Make sure to gently pat the towel across the body repair, as rubbing in circles can cause swirl marks. Whenever you clean a car after body repair, drying it properly is a must, as it will prevent water spotting as well as keep its coating fresh.
When you clean a car after body repair, every small step, including how you dry, makes a lasting difference in the final result.
Pro Tip: Not sure if a product is safe? Test it on a concealed spot first. If there’s no adverse reaction, it’s generally okay to use it across visible surfaces.
Drying Is Just as Important as Washing
After you clean a car after body repair, drying it properly is as essential as washing it. If you rush or skip the cleaning part, it can destroy the efforts that you put into cleaning a car after body repair properly.
Soft microfiber towels that should be clean are highly recommended for use as they can absorb properly and remain gentle on fresh surfaces.
Drying Tips When You Clean a Car After Body Repair
- Pat, don’t rub: If you just pat instead of rubbing on delicate, freshly repaired parts, it will help to avoid the micro-scratches.
- Dry from top to bottom: If you dry from top to bottom, it will not waste your efforts as surfaces that are already dried will not become wet again from dripping water.
- Check hidden water traps like:
- Side mirrors
- Door handles
- Panel creases
- Trim and moldings
- Side mirrors
These often hold moisture and can leave behind spots if not addressed. To completely clean a car after body repair, you must pay attention to these tucked-away trouble zones.
Avoid Water Spots, Especially on Repaired Surfaces
Letting water air dry may seem harmless, but it’s a mistake when you clean a car after body repair. Minerals left behind can create spots that dull the shine of new paint or finishes. Preventing water spots is part of the careful process it takes to clean a car after body repair, the right way.
How to Prevent Water Spots:
- Use clean microfiber towels that soak up water fast.
- Dry immediately after rinsing—don’t wait.
- Look thoroughly at areas that can retain water, like:
- Badges
- Mirrors
- Window seals
- Door handles
- Badges
Pro Tip: Always inspect your towels. Even a slightly dirty or rough towel can scratch your paint and ruin the efforts that you’ve made to clean a car after bodywork.
Waxing and Sealants (Optional Step)
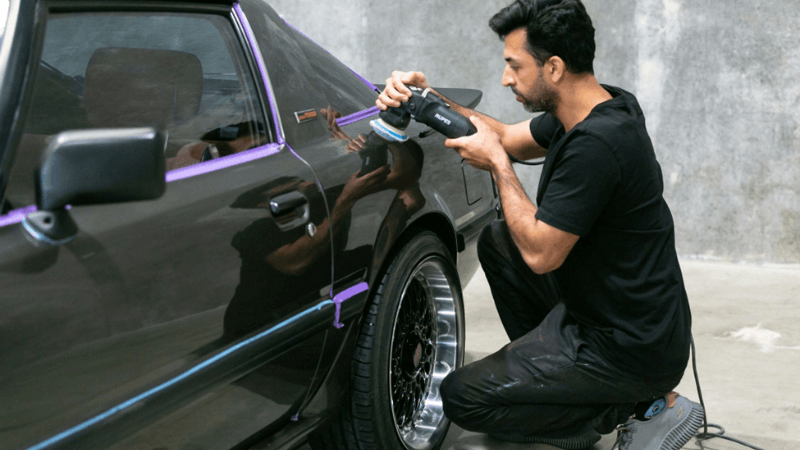
Once you clean a car after body repair and allow it to dry, you may want to restore the deep shine and add protection with wax or a sealant. But be cautious; fresh paint needs time to cure.
Most finishes require 30 to 90 days before they’re ready for waxing. If you apply waxing too early after the body repair, it can seal in solvents, which can lead to cloudy or uneven results.
Before You Wax:
- Consult your body shop to confirm the paint is fully cured.
- If approved, use non-abrasive, high-quality wax.
- Apply sparingly and avoid heavy buffing, especially near repaired areas.
Waxing is a major part of your post-repair car care routine. After you clean a car after body repair, always prioritize protection over appearance until the paint is completely cured.
Waxing and Sealants: Proceed with Caution
Before you start waxing your car after bodywork, make sure that the repaired parts are fully cured. Most professional shops say that you should wait for 30 to 90 days before waxing to clean a car after body repair.
Tip: If you’re unsure about the curing time, always ask your body shop for specific guidance based on the paint type of your car.
How to Apply Wax or Sealant Safely
When it’s time to apply for protection after you have cleaned the car after body repair:
- You should use a clean, soft applicator pad, but not abrasives
- First, apply wax in small sections
- Don’t forget to follow drying instructions and gently buff with microfiber cloths
Avoid aggressive rubbing. If you gently apply the wax or sealant, it will extend the repair’s life and enhance the overall appearance.
| Product Type | Lasts For | How Often to Reapply |
|---|---|---|
| Sealant | 6 months to 1 year | Reapplies Less often |
| Wax | 1 to 3 months | More frequent maintenance is required |
Final Look: Don’t Miss a Spot:
After you complete your detailing, conduct a final inspection so you can catch the remaining flaws, if any. This step will ensure the quality and catch the missed spots too:
- Properly check for visible defects
- Never forget to use bright light or flashlights to see if any spot imperfection is visible.
- Look carefully for the paint thickness.
Pro Tip: If you do a basic visual check, it can prevent you from future issues.
Maintaining a Safe, Clean Environment for Repaired Areas:
After you repair your car, its continuous care is important. Dust and debris collect in corners and can harm new paint. If you do gentle, regular cleaning, it will keep the car’s surfaces healthy.
Tips:
- Clean crevices gently
- Avoid harsh products; stick with pH-neutral soaps
- After the waiting period, reapply the sealant for lasting protection
Research shows that properly cleaned and sealed surfaces last longer and prevent future damage.
Conclusion:
We have concluded that post-body repair cleaning is a must for maintaining your car’s shine. Start the post-repair car care routine by washing with automotive-safe soap and removing small dust particles. Avoid harsh chemicals when cleaning a car after body repair, as they will damage its appearance. After washing, don’t forget to dry it with a microfibre cloth. Clean narrow spaces with a vacuum. You can do waxing after 30 to 90 days of repairing. Post-repair car care routine helps your car’s sensitive finishes and restores paint. With these auto body shop cleaning tips, your car stays beautiful.
FAQ:
Q: How soon can I wash my car after a body repair?
A: You should wait at least two weeks before doing the first wash.
Q: Can I use a pressure washer on newly repaired areas?
A: Try to avoid pressure washers; you may use a soft hose instead.
Q: What’s the best way to protect new paint?
A: You can use microfiber towels and pH-neutral soap to protect new paints. Don’t forget to apply wax or sealant after 30–90 days.
Pro Tip: Ask your body shop for tips for your specific repair. Their advice will help you in achieving long-term success.


