| Difficulty Level | Estimated Cost | Time Taken |
| Expert | $500 | 2-3 weeks |
Well, necessity is indeed the mother of invention. Slumping over a computer, back sitting, and shoulders hunching with the hours ticking are the alarming issues that require a standing desk. If you’ve ever been in this state, then for sure you know how necessary it is to have a DIY standing desk at work.
Sitting for too long and facing many problems like obesity is the main reason you need a standing desk. It takes your personal needs and budget into account. Hence, there are many reasons why you need to switch to the standing desk, but without spending big bucks, how do you make a desk stand? Well, it’s as simple as you think, but for this, you need to follow a proper guide to make a DIY adjustable standing desk.
You only need the material, the time, and the mindset to build a diy standing desk. So, in this article, we’ll walk you through incredible and easy ideas about how to make a desk stand.
Table of contents
Why You Should Build a Standing Desk Yourself
Building a standing desk has many advantages. You may notice that changing the place or things can switch our moods and boost our energy level; it’s the same as in the case of a DIY standing desk. The DIY standing desk kills the sedentary sitting and promotes overall health.
Over the past years, the stand-up desk has gained popularity. To improve office morale, a DIY adjustable standing desk is the best option to offer to your employees for their wellness. There are many benefits of a standing desk, which are as follows:
Burn calories
Do you know you can burn more calories than sitting even if you simply stand without doing any work? In per hour, standing burns 100-200 calories while sitting burns only 60-120 calories. Additionally, you can keep your mind in wellness mode when you’re standing, can do some leg lifts, and take jumping jacks.
Improves Posture
Using a homemade standing desk with proper ergonomics allows good posture. Keep your monitor at eye level about 20 inches far from your face, 20-degree tilt, and bend your arm 100 degrees at your sides. With weight shifting between legs, wrists must hover relaxed above the keyboard. Do you do all this?
If not, then having a DIY standing desk can only improve your posture. Because sitting for longer can lead to disc, shoulder, and neck discomfort.
Keeps Circulation Going
Our bodies are made to move if we glance at human evolution. We improve our leg muscles when standing. It also prevents blood clots from forming in the legs. Those who sit for a long time notice slow blood circulation in their legs. It can also lead to blood clots.
Improve your Focus and Boost Energy
If you find yourself distracted after a hectic workday, standing allows you to focus while boosting energy and increasing productivity. The study found that people who stand at work are 50% more productive than those who work while sitting.
Whenever we feel well, we’re in a better mood. All of this can happen due to standing. So, if you’re feeling lazy at your office, get on your feet and build a DIY standing table.
Essential Tools for Making a DIY Standing Desk
Tools
- Lathe
- Table Saw
- Wood Clamps
- Actuators
- Drill Machine
- Hammer Drill
- Electric Screw Driver
- Chain Saw
- Sandpaper
- Chisel
Materials
- Yellow Pine
- Nuts and Bolts
How to Build a Standing Desk: A Step-by-Step Guide
Making a standing desk ensures that the heavier the base, the more stable the top is. Let’s take a look at the step-by-step guide to building a standing desk:
1- Wood Cutting
Using a chain saw, you need to cut the wood twice by dividing it in half, then cut these pieces in half again. But if you don’t have any experience, don’t dig into this project. The wood cutting is nearly 3/3 and a half. All you need to do is this process from both sides.
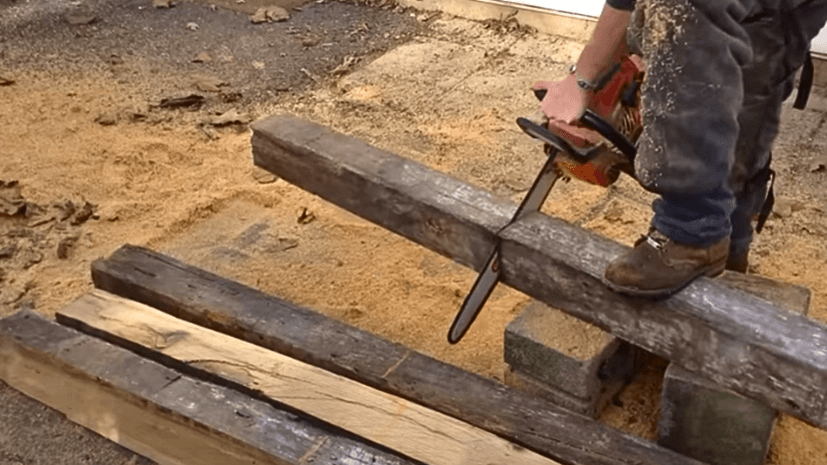
For building a DIY standing table, you need two yellow pine pieces. After cutting them in half, you need to cut them out from the center. So all you need is 4/4 pieces.
2- Pass Plywood Through Planner To Make Your Own Standing Table
To make smooth edges, pass a piece of wood through the planner. By doing this, you’ll easily remove the outer edges. This will be easy if you cut out the wood perfectly. It’ll also remove the dust from the wood pieces. The shorter one for the base and the longer one for the top.
Cut the wood edges using your hands and pass it through the planner. Do all sides by this; don’t forget to flip the other side of the wood.
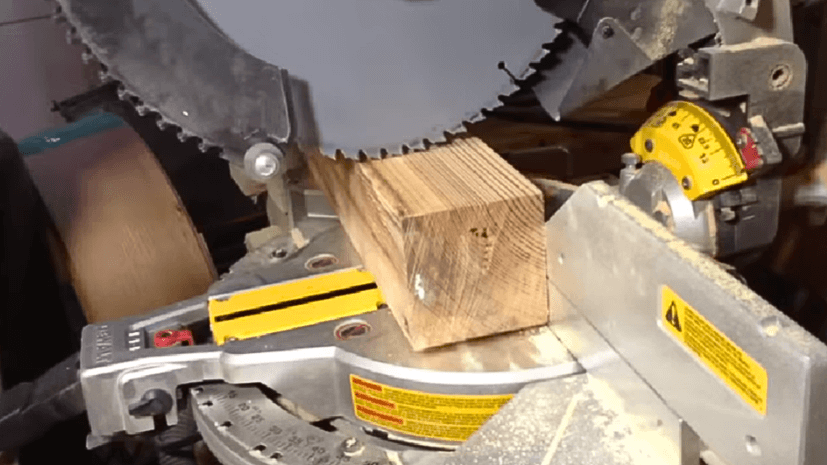
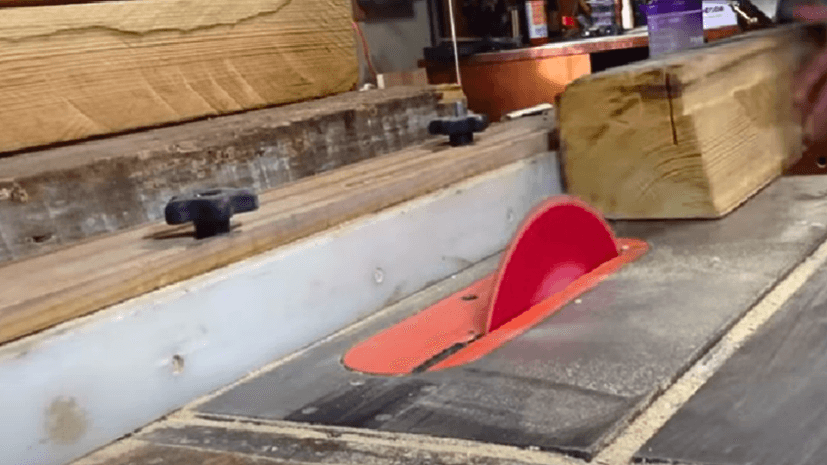
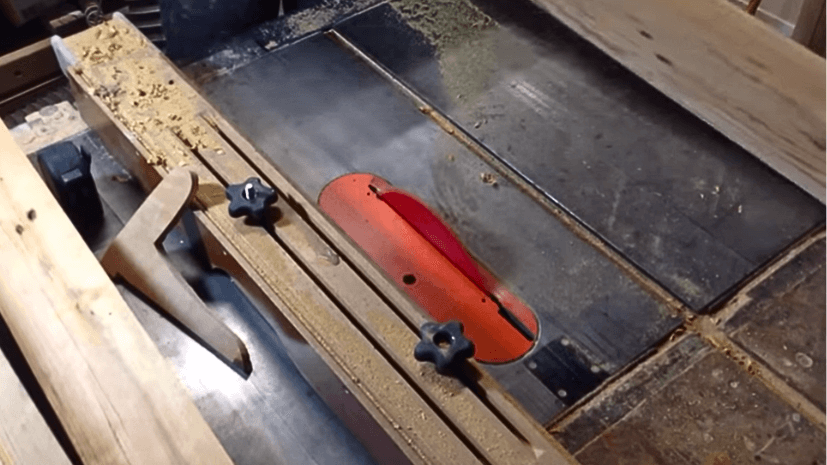
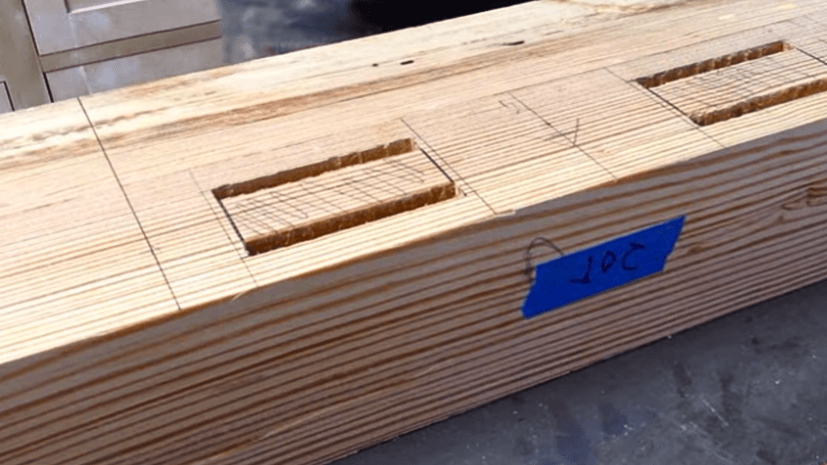
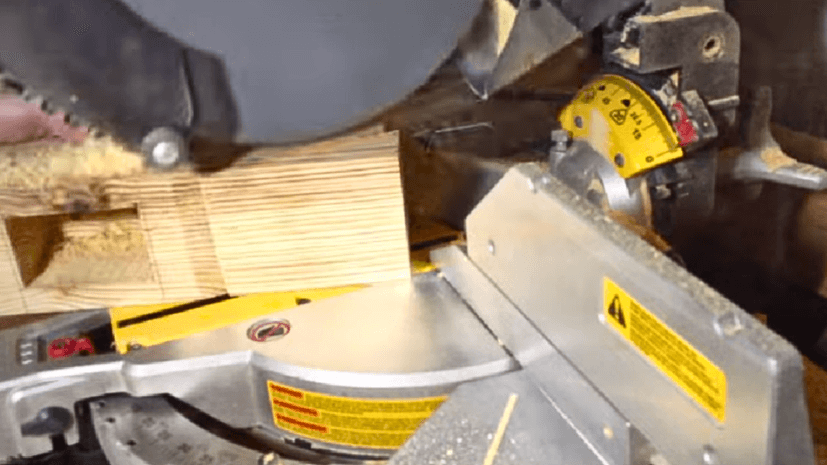
3- Blocks Cutting With Meter Saw to Building A DIY Standing Table
The first step to be considered is to select the right saw blade and cut out the square blocks. Took the edges after cutting them. Mark the bases to 23 inches, and the top will be 24 inches. Mark the top and bottom before doing this.
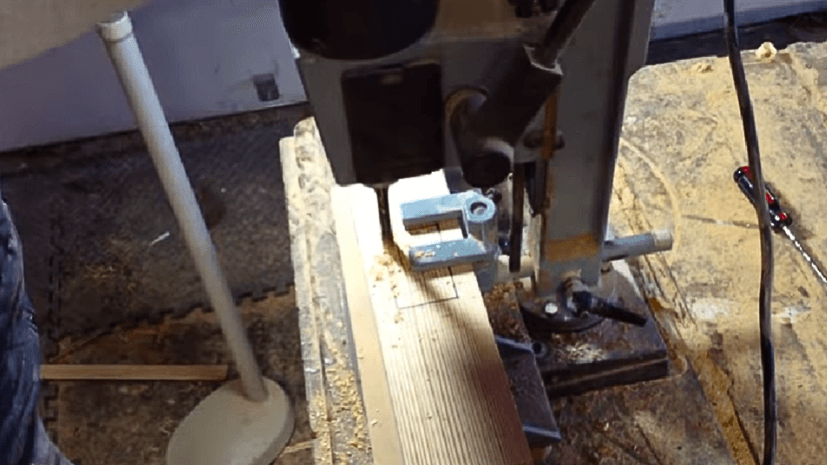
4-Measure and Drilling
First of all, with the help of a pencil, measure the wood and then mold it through the lathe. From both sides, repeat this process. Do this when one side has done it, then flip the other side.
Do the exact process with the other three wood pieces. If you don’t have a modest machine, a lathe machine works the same way, and you don’t need to do the difficult work.
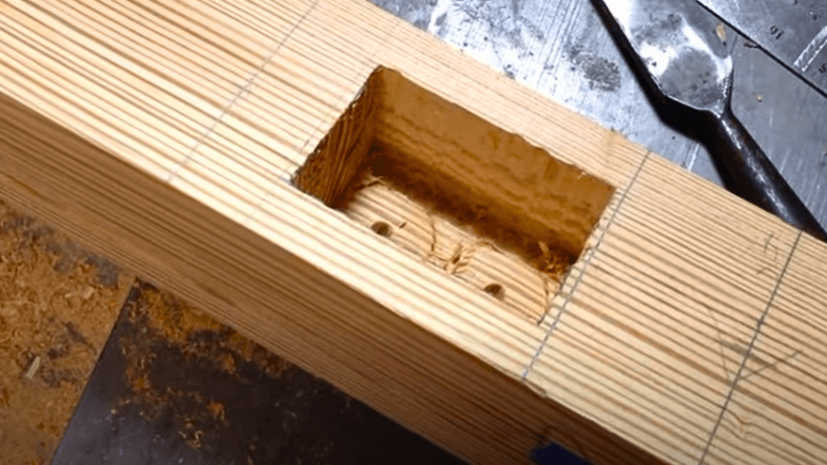
Clean out the holes, start working on the second one, and cut down the square sizes to 26 inches.
Use a hammer to break out the wooden part, then, with the help of a chisel, clean it. Put a mark on the wood and cut the edges with the lathe machine.
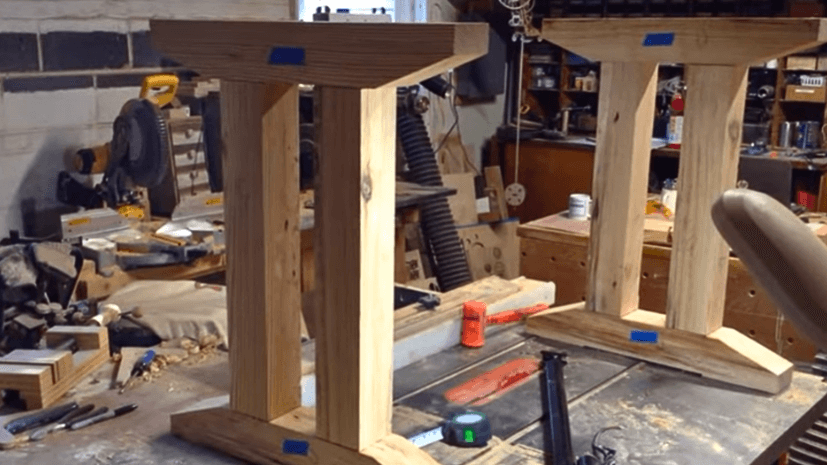
Now, all four pieces are ready after molding and cutting. If you still have some unclean parts, clean them by applying pressure. By moving it forth and back. You’ll see that a small amount of material will be removed—the bases of your table are ready. You only need to place the top of the table.
5-Fix Actuators
You have to remove the material from the table to put the actuators. So, measure and cut down the parts. After this, clean the particles from the wood.
Place actuators in the bracket. Before placing the clean material inside the hole, For the side parts, cut the plywood. This plywood is about three-quarters of an inch. Cut brackets on both sides. To fit these sides on the back.
Cut out the long bracket from two sides to place the actuators. You need to cut the plywood carefully. It’ll hit your actuators if you don’t cut it out carefully. Now, clamp the sides together in which you’ll be going to place actuators. Apply glue to attach the sides. As a result of the glue, if you don’t do this, you will have many issues like moisture, etc.
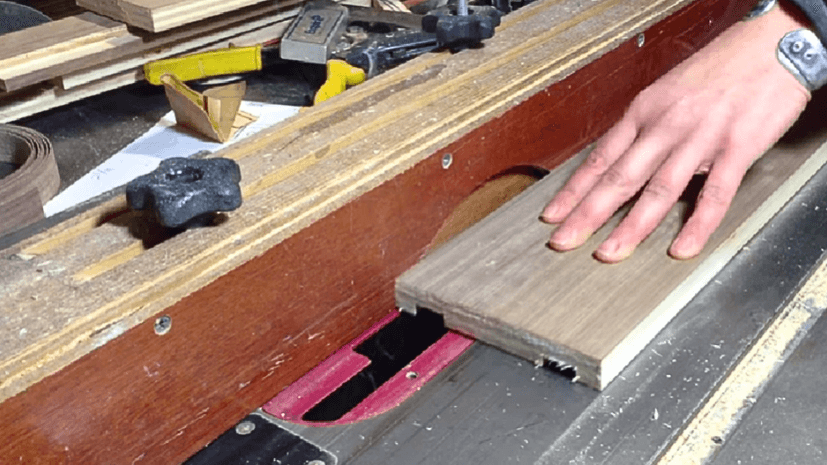
Open the clamps from the wood and place the actuators in them. Now cut the small, long pieces for the top of the DIY standing table. You can use them by ripping the one side and then the other. Use a table saw to remove the edges. You only need to cut it for 30 seconds because you’ll need a flat, smooth, sturdy side.
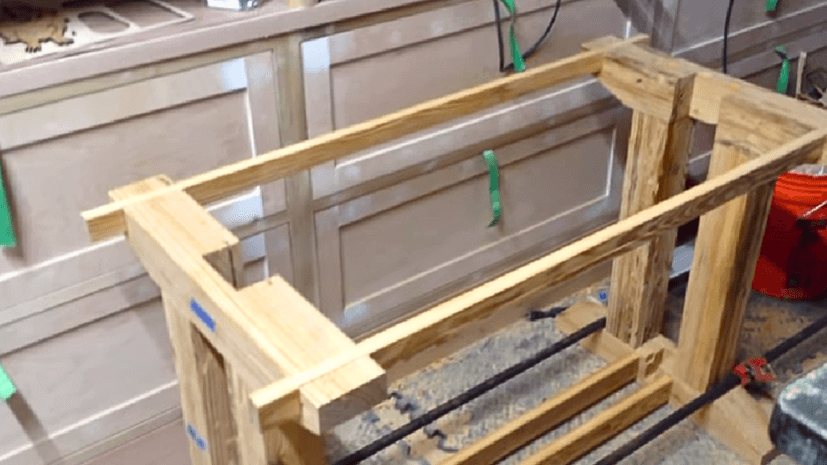
You can place these pine woods long-cut wood at the base end and the top. You’ll see that you can easily place these wooden pieces together without applying the glue if cut correctly while making your DIY stand desk. Wired up the actuators in the wood. You need an adapter to run them.
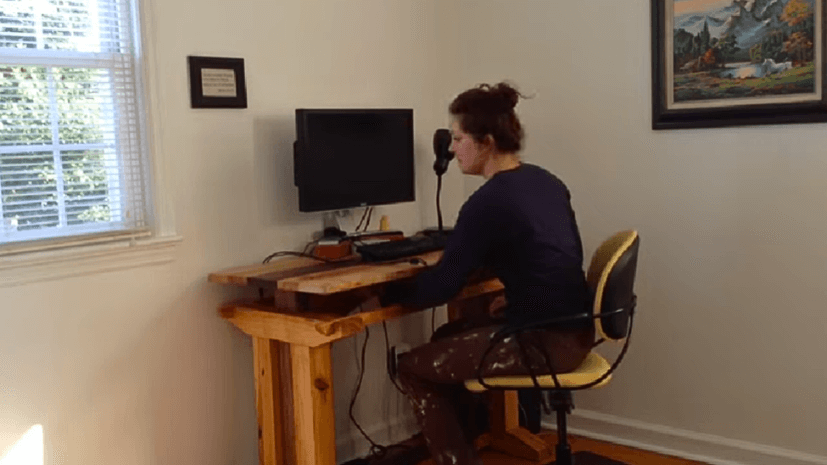
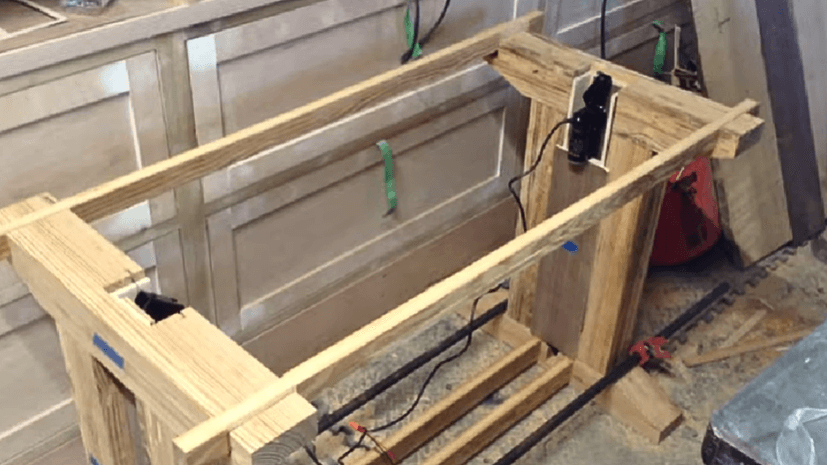
Apply the osmos to give the wood the finishing and shine, and place the cut top over the table. You can see how helpful the actuators are. You can easily make your DIY home office desk length short and tall with the help of actuators.
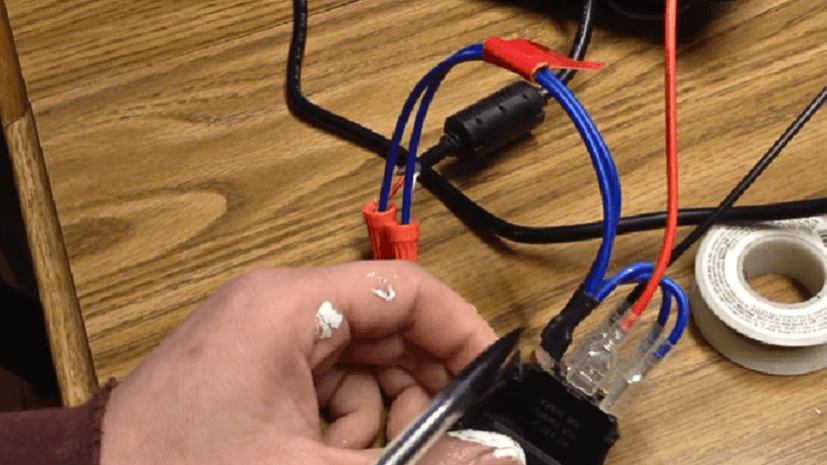
One more thing to remember before wiring: the blue wires will go across each other; one blue wire will be attached to another blue wire. With the on and off buttons, you can easily switch your actuator on and off, and that’s how you can change the DIY standing table height.
Maintenance and Care Tips For DIY Standing Table
However, if you are done with building your DIY standing table, maintenance is the next step you have to do. It needs good care to keep your DIY standup desk in pristine shape. DIY standing desks are mostly low maintenance, but you can still pay attention to this. Your DIY adjustable desk gets daily wear and tear. If you’ve been working long on it, you should take care of it. Here, you can follow some tips to make your DIY standing table last longer.
Standing desk designs are made up of different materials. It can be plywood, bamboo wood, birch, or laminated. But you usually follow the same maintenance tips. However, it depends on the usage. If you have ever spilled coffee on the table, how do you remove the watermarks from it? It raises many questions about how you clean your DIY standing table. Here are the following tips that you can follow to maintain your DIY standing table:
- Never leave a water puddle on your desk because the liquid can creep through the table and destroy it.
- There’s a reason why mouse pads are being made: while using your desktop, use a mouse pad.
- Always write with light pressure. Never put heavy pressure on the desk; it can lead to scratches and dents.
- Don’t sit on your DIY standing desk if you’re even a lighter weight.
- Make sure all of your pens don’t leak.
- Always clean your DIY standing table with a dry cloth.
FAQs about DIY Standing Desks
1-Does making your own DIY standing table cost you less?
Making your DIY standing desk can be cheaper than buying a commercial one. You can easily use recycled materials or materials on hand, so it doesn’t cost you much. However, if there’s a need to buy some materials, then it’ll be less expensive.
2- How long can you stand with a DIY standing desk?
The researcher says that it’s essential to stand after 2 hours of sitting for one hour. You can easily adjust the DIY stand desk height. Mostly high-quality DIY standing tables have electric controls or gas lifts to allow you to adjust the height of your DIY stand desk multiple times a day.
3- How much electricity does a DIY standing desk use?
If you are worried about the high bills and not using the DIY standing table, then there’s no need to worry as you can adjust the battery with them to prevent electricity bills. Usually, the average electronic DIY standing desk uses 200 watts. It’s only used when the motor is running.
4- What are the benefits of a DIY standing desk?
It can rid of your back and shoulder pain. If you have a bad posture, it can help you maintain a good posture. With a DIY adjustable desk, you can ease your back pain.
Conclusion
A homemade standing desk doesn’t cost you anything with adding custom features like adjustable and storage. Skipping buy a standing desk table is not a good idea, so try to build a functional and elegant DIY standing table at home with different ideas. Numerous DIY standing desk plans can help you build a standing model with high-end operating features. If you want to build your DIY standing desk, browse the VEVOR and do a shopping spree.


Hi, I check your blogs regularly. Your humoristic style is
awesome, keep doing what you’re doing!