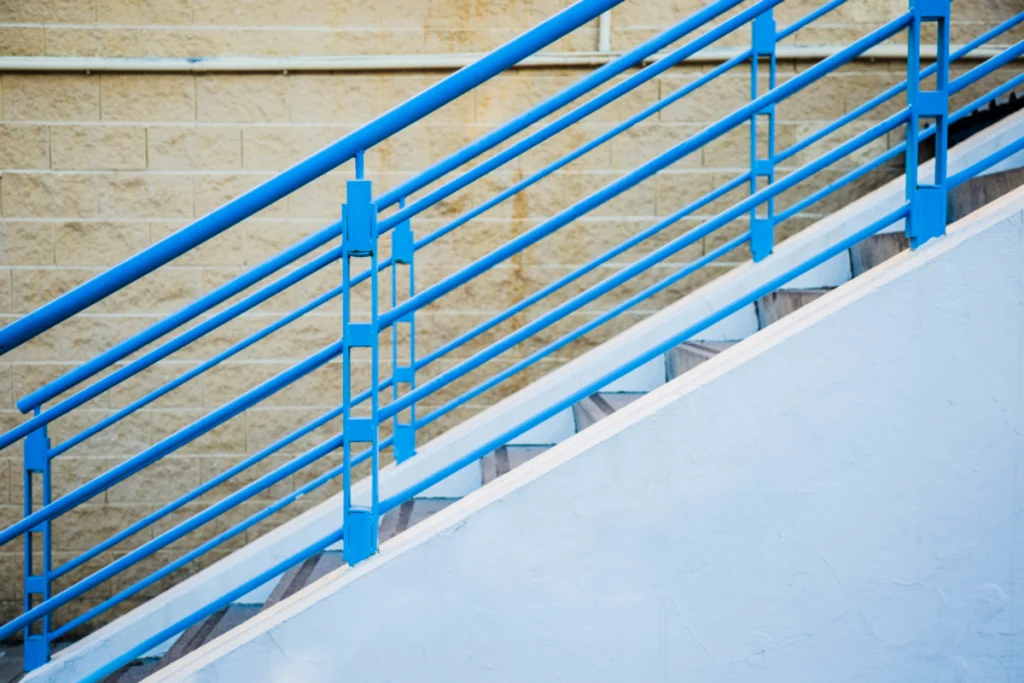
A DIY pipe handrail is an attractive, strong choice that can be modified to match your home style. These stainless steel pipes last a long time without rusting. They come in different widths to match what you need. With some basic tools and supplies, plus our step-by-step instructions, you’ll be able to make nice, safe outdoor steps quickly and easily.
The main advantages of crafting your pipe handrail are full creative control and getting safety features tailored to your space. You can choose the diameter, shape, and mounting style. The pipe can also withstand the elements better than wood or metal railings over time with no warping, rotting, or rusting. Learn just how easy and rewarding building your handrail can be.
In this guide, we will stroll through all that you want to be aware from picking the best pipe and fittings to securing posts in the ground for the most stability. You will learn bit-by-bit directions for estimating, cutting, gathering, and introducing a modified stainless steel stair railing.
We will make the process approachable even if you’ve never done a railing project before. Let’s get started!
Gathering Essential Tools and Materials
Creating a DIY pipe handrail requires having the right equipment and materials ready. With some advanced planning, you can gather everything needed for an efficient and successful project.
Selecting the Right Pipe for Your Handrail
When choosing a pipe, galvanized steel is the best bet for outdoor use. The zinc covering empowers the pipe to endure climate openness without rusting or consuming. Stainless steel pipe comes in different widths, normally going from 1⁄2 inch to 2 inches.
Consider both the aesthetics you want plus the grip size needed. 1 1⁄4 to 1 1⁄2 inch diameters provide a comfortable handhold size. Opt for galvanized steel with the thickest walls available to add stability and strength since the pipe will see a lot of use and wear and tear.
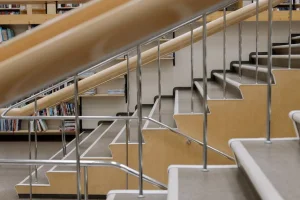
Measure the length of your stairs to determine how much pipe is required for the handrail to span the entire staircase. Remember to account for the additional length needed to extend the rail beyond the top and bottom steps.
Tools Needed for Cutting and Assembly
Constructing a pipe handrail relies on having the proper essential tools for precise measuring, cutting, drilling, and assembling:
- Use a quality fish tape measure to calculate the total handrail length needed and the exact spacing between vertical posts along the stairway.
- Pencil and marker assist with delineating cut lines by making temporary marks on the galvanized steel pipe.
- A sharp pipe cutter with sturdy guide rollers enables straight, clean cuts through thick galvanized round pipe.
- Magnetic drill equipped with varied high-carbon drill bits for steel bores necessary mounting holes into pipe and wood/concrete posts.
- A heavy-duty straight pipe wrench (or two) tightens fittings to assemble the interconnected pipe sections into a cohesive rail.
- A 4-foot level aligned vertically against posts as you work ensures plumb, even posts for mounting the finished rail.
- Heavy-duty steel pipe vise firmly secures pipe pieces to prevent unwanted movement when cutting or drilling holes.
Fasteners and Mounting Essentials
Choose weather-resistant fasteners designed for outdoor use like galvanized steel hardware. Deck screws, bolts, and bracket mounts should have a coating to prevent rusting.
Flanges allow you to anchor the bottom of posts into concrete. For the tops of posts fastening to a surface like a deck, use post hangers or anchors suitable for the material.
End caps on the starting and ending pipe lengths finish off the rail nicely. Flexible interlocking rubber tiles can cushion the pipe against posts for quieter use.
With the fundamental supplies ready, review the upcoming sections which detail constructing the frame, cutting and assembling pipe sections and installing your new handrail. Let’s continue!
How to Build a Pipe Handrail for Outdoor Steps
Installing a pipe handrail on your outdoor steps provides safety and style. Follow these key steps to add a DIY pipe handrail to your exterior stairs.
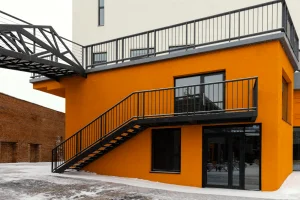
Measuring
When we talk about how to build a pipe handrail for outdoor steps? The first step includes measuring. Carefully measuring is crucial for the proper installation of a DIY pipe handrail. You will need to measure:
The height of the steps from the leading edge of the tread to where you want the top of the handrail needs to be 34-38 inches above each stair. Measure vertically straight up from the edge of each step to mark the desired railing height. Getting this vertical measurement exactly right is vital.
The total depth of each step horizontally from the leading edge to the back of the step should also be measured. This distance determines the length of railing pieces needed for each step. Be sure to capture the side-to-side width at the widest point of the step as well.
Finally, measure and mark the spacing needed between the outer side edges of the steps and where the posts need to be positioned. This spacing must be exact to cut the horizontal railing pipes accurately to fit between posts. Even small measurement mistakes can prevent proper fitting.
Determine the angle
To determine the angles properly is vital for aligning pipe railing DIY. Follow these key steps to determine the angle:
Use a Bubble Level
Hold a bubble level along the stairs, posts, and planned handrail path to measure slope and side-to-side angles at multiple points. Level horizontally first, then check the level vertically.
Use Protractor Tool
Mark a protractor tool directly against all stairs and planned railing angles. Transfer the angle measurements accurately onto paper for reference.
Compare Readings
Double-check bubble level and protractor readings against one another to verify accuracy. Transfer exact angle measurements from stairs to cut pipe pieces.
Mark Positions
Correctly marking post positions takes patience. Follow these steps:
Plot Locations
Based on your measurements, map out exact intended mounting locations for pipe posts on graph paper. Indicate stair dimensions, angles, and railings.
Mark with Chalk
Taking measurements from the graph, clearly mark post locations on the actual stairs using a chalk line stretched between marks.
Check Alignment
Use a level and tape measure to verify marked positions are perfectly straight and properly aligned with stairs, angles, and planned railings.
Adjust if Needed
Erase and re-mark positions if any are off. Confirm all measurements before drilling holes for posts.
Drill Holes
Drilling properly sized holes is crucial for securing pipe post mounts. Follow these steps:
Select Masonry Bit
For concrete stairs, use a masonry drill bit sized for the anchor bolt diameter per specifications.
Select Standard Bit
For wood stairs, choose a standard twist bit 1/8″ to 1/4″ smaller than anchor hardware. Sharp bits prevent splitting.
Set Depth Guide
On the drill, adjust the depth stop to prevent drilling too deep for anchors. Test on scrap materials first to set depth.
Drill Pilot Holes
Drill straight down at marked locations, clearing dust often. Let holes cool before setting anchors.
Mount with Masonry Bolts
When anchoring DIY pipe handrail posts to concrete stairs, use 3/8-inch galvanized masonry sleeve anchors. Based on specifications, drill properly sized holes for the anchors at all marked post locations using a hammer drill and masonry bit.
Slide side-mounted base plates over exposed anchor bolts, align precut posts perfectly vertically using two bubble levels, and install washers and nuts onto anchors protruding through plates. Finally, firmly tighten nuts with lock washers using a calibrated bolting torque tool to meet code.
Place Base Trim over Fasteners
For a polished, integrated look, measure the exposed height of anchor bolts protruding from concrete after mounting posts and secure decorative wide-flange base trim caps sized slightly deeper than the hardware exposure.
Position the curved cover caps flush against the perimeter of side-mounted base plates, in line with vertical posts. Use a rubber mallet and gentle taps to fully seat caps around anchors and plates until trim is firmly affixed in place concealing mounting hardware.
Select base trim in black, galvanized or colored powder coated finishes to match metal DIY pipe railing components. Base covers provide a clean, flush railing appearance.
Attach Post and Rail
Properly connecting railing pipes between posts requires precision. Follow these tips:
- Measure Twice: Confirm post positioning, then carefully measure horizontal pipe runs needed to fit exactly between posts based on stair dimensions.
- Cut Precisely: Using a pipe cutter, carefully cut iron pipes to exact measurements marking cut lines.
- Set Elbows and Tees: Dry fit elbow, tee, and crossover fittings between cut pipes and posts to test angles and fit.
- Adjust and Tighten: Make minor adjustments as needed for smooth connections.
- Check Alignment: Align pipe railings to 34-38 inch height marks for consistency.
- Secure Bolts: Finally, firmly secure all anchor bolts and screws through connected post fittings.
Attach Top Post
Once horizontal rail pipes are firmly secured between posts at proper heights per your measurements, cut vertical top post pipes to run above the top rail down to elbow fittings. Determine the required top post length by measuring from the highest horizontal rail elbow to your target height accounting for the post cap length.
Cut the post pipe to measurement with a pipe cutter allowing it to feed snugly into the elbow fitting already attached to top rail. Fasten tightly with rail screws at the proper spacing distance from the stair edge based on your original plans. Install post caps onto cut top ends for a finished appearance.
Tighten the Screws
Thoroughly inspect all pipe joints, connections, and fittings across the entire railing assembly. Then, methodically tighten all hardware from the bottom bases and plates working upwards.
Properly torque all concrete anchor bolts to specifications. Validate that the final alignments are perfectly straight and properly spaced. Also, recheck that the heights and stairway spacing match the original plans.
Finish by touching up any scratches or flaws with paint. Carefully securing every fitting connection completes the stair railing installation.
With the railing fully secured, we must also consider critical safety measures and precautions for working on the project.

Safety Measures and Precautions
Installing a secure, long-lasting DIY pipe handrail on exterior stairs requires upholding critical builder best practices and homeowner maintenance for optimum safety.
Ensuring a Sturdy Railing Installation for Safety
Proper installation is critical to ensuring a railing can withstand the tests of time and fulfill its primary purpose of safety. Begin by precisely measuring and double-checking the depth of all post holes.
Use a level to confirm vertical posts are perfectly plumb and multi-angled fittings align accurately. Systematically apply the torque for each bolt or nut as outlined in the manufacturer’s instructions, and check the top plates and padding.
While installing the secure DIY pipe handrail on exterior stairs, consider the placement of an exhaust fan to ensure both safety and proper ventilation.
Regular Maintenance for Longevity and Safety
Once the installation is complete, closely examine all pipe fittings for any small gaps indicating potential failure, and immediately repair or replace any subpar parts before issues escalate.
Use fine-grit abrasives to clean built-up rust and corrosion from pipe surfaces followed by a fresh coat of protective paint in vulnerable areas. Measure consistently to verify rail height remains adequately above tread nosings, which may subtly shift slightly over many seasons.
Choose a Complete Railing Kit to Install DIY Pipe Railings Easily
If you’re looking to install a DIY pipe handrail along your stairs but lack experience, choosing a complete railing kit makes the job much simpler. This VEVOR stair railing kit makes the do-it-yourself project a breeze. Sometimes putting in new rails seems too hard, and hiring someone costs too much. But not with this setup!
VEVOR includes everything needed in one box. No running all over town for extra parts. Just open up and you’re good to start. Best of all, their pieces fit together like a puzzle. No fancy tools or skills are required.
The instructions take you step-by-step so even newbies like me can’t mess it up. And if you get stuck, their customer support is super helpful.
You will be done before the weekend is over. Then everybody in the house can appreciate your handy work every time they go up and down the stairs. Friends will be impressed too when they see your sweet handiwork.
Key Features of the VEVOR Pipe Handrail Kit
The Following are the main features of the outdoor stair railing kit:
- Includes all necessary components for DIY installation in one complete kit: pre-cut steel pipes, wall mounts, brackets, screws, and anchors.
- Pipes are available in 3 common lengths (3ft, 6ft, 9ft) to customize to your stair dimensions.
- Durable carbon steel construction with matte black powder coat finish.
- Smooth pipe surfaces provide a comfortable gripping surface.
- Pipes thread easily into wall mounts and corner brackets without welding or soldering.
- Wall mounts have pre-drilled placement holes for simple alignment and attachment.
- Each wall mount supports up to 440 pounds of weight load.
- Brackets connect pipes at corners and bends securely yet adjustably.
- Flush mounting against walls but separated enough for unhindered stair use and cleaning.
- Instructions are provided for straightforward step-by-step installation.
- The affordable price point for a high-quality DIY railing system.
- Sleek industrial design complements a variety of interior aesthetics.
- Proven durability and reliability for household use for years to come.
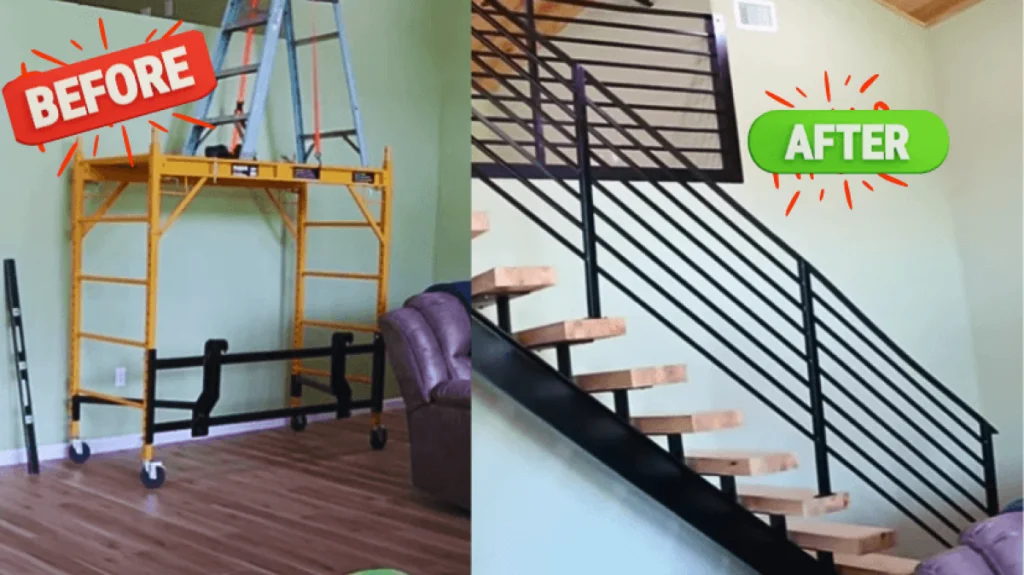
With its complete railing kits, the VEVOR enables anyone to achieve a polished industrial handrail without hiring a contractor.
FAQs about DIY Pipe Handrail
Which pipe is best for railing?
Steel pipe is the most durable material for a handrail because it is strong yet lightweight. It holds up well to years of use and won’t crack like wood.
Can I use PVC pipe for handrail?
While PVC pipe is inexpensive, it is not strong enough to safely serve as a handrail. Over time and with everyday use, PVC can develop stress cracks and break under weight.
Should the handrail be on the right or left?
Building codes require a handrail on both sides of the stairway for safety. This allows people to hold the rail with either hand as they climb up or down.
Where should a handrail start and stop?
The handrail should extend a minimum of 12 inches past the top and bottom riser to allow people space to safely stop or start their descent up or down the stairs. This helps prevent falls near the ends.
Conclusion
DIY pipe handrail is a rewarding way to enhance safety and style around your home. Following the step-by-step instructions in this guide allows anyone to tackle the project successfully.
From choosing durable materials to careful measuring, cutting, and assembly, paying attention to techniques ensures a sturdy, long-lasting result. The finished handrail adds value while preventing slips on stairs.
With some basic tools and weekend work, your new DIY pipe handrail will be admired for years of protected outdoor enjoyment. Overall, this DIY accomplishment means celebrating independence and pride in a job well done.
Explore VEVOR for more home improvement solutions like garage flooring mats – enhancing safety and style effortlessly.

