One of the cheapest and easiest ways to secure a home garden is with a chicken-wire fence. It prevents the entry of small animals while still allowing sunlight and air to penetrate, promoting healthy plants. Most gardeners choose this option because it is flexible, easy to install, and suitable for gardens of various sizes. You can establish a lot of protection around your vegetable space without incurring excessive expenses with a little planning and the correct materials. Knowing how to create a chicken wire garden fence is easy for novices who want an affordable, easy-to-build way to secure their garden and keep their plants safe in the long term.
Materials and Tools You Need for a Chicken Wire Garden Fence
Before starting your fencing project, it is important to gather all the necessary materials and tools. It is better to have it prepared so that during installation, everything will be easier and avoid delays. You may have a small backyard fence in mind or an extensive vegetable garden fence, but regardless of the kind of fence you choose, the right supplies will enhance longevity and effectiveness.
The material you use may be the difference in how effective your fence is in keeping out animals, as well as other threats to your garden. This knowledge will enable you to design a high-quality chicken-wire fence to enclose your garden that meets your gardening requirements.
Choose the Right Chicken Wire Mesh for Your Garden
When designing a garden fence, one key consideration is choosing the appropriate chicken wire mesh. Chicken wire comes in various gauges, mesh sizes, and heights to meet various gardening applications. Smaller mesh holes can be used to keep out rabbits and other small animals, whereas larger holes may be suitable for the general boundaries of the garden. The reason galvanized chicken wire is commonly used is that it does not rust easily and can withstand outdoor conditions.
When choosing material, ensure you consider the size of your garden and the kind of wildlife you wish to remove. Many gardeners seek the best chicken wire for garden fencing because a more durable, stronger mesh can provide long-term protection. Quality wire can also save on maintenance and replacement costs in the future.
Select Strong Fence Posts and Support Materials
Fence posts provide the chicken wire with a framework, ensuring it is firmly fixed. Wooden posts, metal T-posts, and steel stakes are common options. Wooden posts provide a classic look and integrate well with the garden scenery, whereas the metal ones are less expensive to install and might need less maintenance. The post spacing must be calculated to avoid the wire falling over time.
Other materials like zip ties, fencing clips, staples, and tension wire may be used to enhance the stability of your fence. These elements are particularly handy for constructing a DIY chicken wire fence to protect a garden, as they help keep the mesh tight and stable. High-support materials make the fence effective during the fluctuating climatic conditions.
Gather the Basic Tools Needed for Fence Installation
Appropriate tools help install fences more quickly, easily, and accurately. Simple implements usually consist of a measuring tape, a wire cutter, pliers, a hammer, a post driver, and a shovel or post-hole digger. These will assist you in measuring the fence line, cutting wire to the right size, and ensuring that posts are properly set in the ground. The appropriate equipment will also minimize installation errors.
When the research is on how to build a chicken wire garden fence, one of the best things to do would be to prepare the tools before you begin. Effective tools enable you to work safely and get a professional appearance. The fence, installed properly, should be able to endure the daily wear and offer reliable protection to the garden.
Wear Safety Gear While Installing the Fence
The use of fencing materials and tools must be safe at all times. The edges of chicken wire can be sharp and can give a cut if one is not careful when touching it without protection. To prevent the currently exposed hands during the cutting, stretching, and attaching of the wire, it would be advisable to wear heavy-duty work gloves. Eye protection should also be considered, such as safety glasses, to protect your eyes from pieces of wire or debris that may fly at very high speeds during installation.
Long-sleeved, high-quality clothing and protective footwear can also help provide extra protection during outdoor workouts. These are the basic measures that are particularly useful in understanding how to install chicken wire in the gardening areas due to the frequent involvement of digging, cutting, and working with metal. Safety measures are not only helpful in preventing injuries but also help to make the whole fencing project more comfortable and efficient.
How to Plan Your Chicken Wire Garden Fence
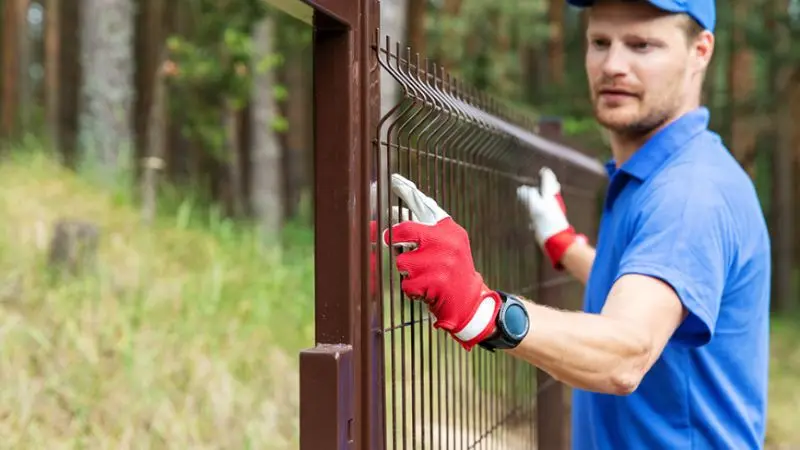
A well-planned fence will give you a stronger, more effective fence. It is important to evaluate your garden space before starting installation, and what you really require. A properly designed fence will save time, minimize material wastage, and improve the security of your plants.
You can prevent the common mistakes by measuring the area, selecting the appropriate height of the fence, and marking important points. These straightforward planning measures will simplify and improve the process of building a chicken-wire garden fence.
Measure the Size of Your Garden
To plan a fence, the first thing to do is to measure the size of the garden area you wish to enclose. Measure the length and width of the space with the help of a measuring tape or a measuring wheel. Making precise measurements will help you estimate the amount of chicken wire, the number of fence posts, and other materials you will require. This will help reduce unnecessary expenditure and material wastage during installation.
If your garden has an unusual shape, divide it into smaller sections and measure each section individually. And the accurate size also allows making a cheap garden fence with the help of chicken wire, easier since one can buy only the amount of materials needed to complete the project. Proper measurements are the basis of successful fence construction.
Choose the Right Height for Your Fence
The correct fence height is a key consideration to keep unwanted animals off your plants. The optimal height often depends on the types of pests prevalent in your region. For instance, a shorter fence may be sufficient to keep rabbits away, while larger animals might need a higher barrier. A 3-6-foot-long fence is considered by most gardeners to be a sure way to protect vegetables and flowers.
In putting up a chicken wire fence around a vegetable patch, security and appearance are important factors to consider. Having a fence that is too short might not be sufficiently protective, whereas a fence that is too high might increase costs. The right height choice helps create a convenient and appealing garden fence.
Mark Where the Fence Posts Will Go
The second step after measuring the garden and determining the fence height is to mark where the individual fence posts will be located. Mark the fence line using stakes, strings, or marking paint. The spacing of the fence posts should also be uniform to hold the chicken wire and prevent the posts from drooping over time. Regular spacing also enhances the appearance of the fence.
Post locations are also carefully marked, ensuring the installation process is easier and that straight-line fences are maintained. It is a particularly helpful preparation to do when you are researching chicken wire fence ideas to use in a vegetable garden project, since you can see how it will look when finished before you start building it. Correct post installation leads to a more solid and stable fence.
Check Property Boundaries and Local Fence Rules
Prior to putting up your fence, ensure that you know the boundaries of your property and also check any legal requirements that may be in place. There are laws on fence height, location, and materials. It is best to check these requirements beforehand to avoid conflicts with neighbors and potential legal problems in the future.
Underground utility lines may also be identified prior to post-hole digging. These precautions will help you to proceed with your fencing project without any problems. Knowing local regulations is a significant step in planning a DIY chicken wire fence that will safeguard your garden and help you build it without wasting time or effort.
Step-by-Step Guide to Building a Chicken Wire Garden Fence
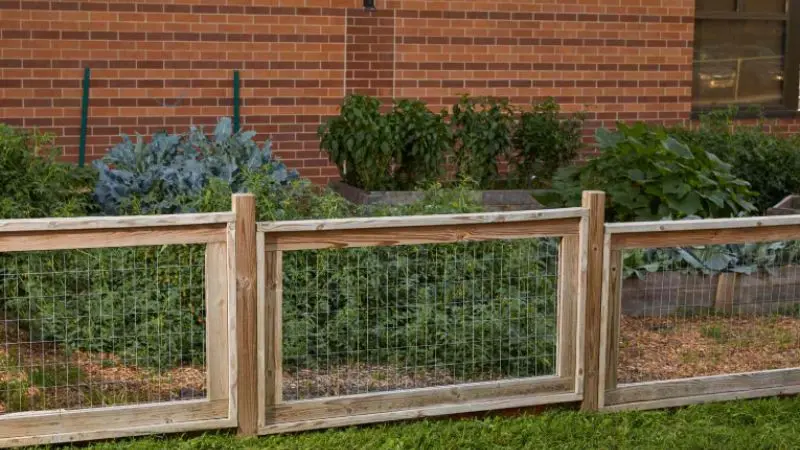
The time has come to begin building your fence; all the planning is done, and you have all the materials you need. It is the phase when your preparation will be transformed into a concrete framework that will safeguard your garden. Following a step-by-step process will help you stay organized and prevent installation errors.
A simple method also simplifies the work for beginners just learning to build a chicken-wire garden fence. With the help of every step, you will be able to build a solid and sturdy fence around your plants and vegetables.
Step 1: Mark the Fence Line Around Your Garden
The first step is to clearly define the perimeter of the area where the fence will be placed. Draw the precise outline of your garden boundary with string or wooden posts, or marking paint. This will keep you on track when putting posts up and keep the fence on a straight and even path.
When designing a chicken wire fence around a vegetable patch, a well-marked layout is particularly significant, as it determines the protected area. This step will save us many mistakes in the future and will also streamline the remainder of the installation process.
Step 2: Install Fence Posts Securely in the Ground
After marking the perimeter, begin to install your fence posts evenly spaced. Setting up the posts: holes deep enough to hold them firmly in place, and then firmly embedded in the ground. Depending on your budget and your garden setup, you can use either wood or metal posts. Ensure that all the posts are straight and then fill the hole with soil or concrete.
The greatest strength of any DIY chicken-wire fence for protecting the garden lies in the posts, since they support the entire structure. With proper installation, your fence will be stable even when there is wind or when other animals put pressure on it.
Step 3: Unroll and Position the Chicken Wire Properly
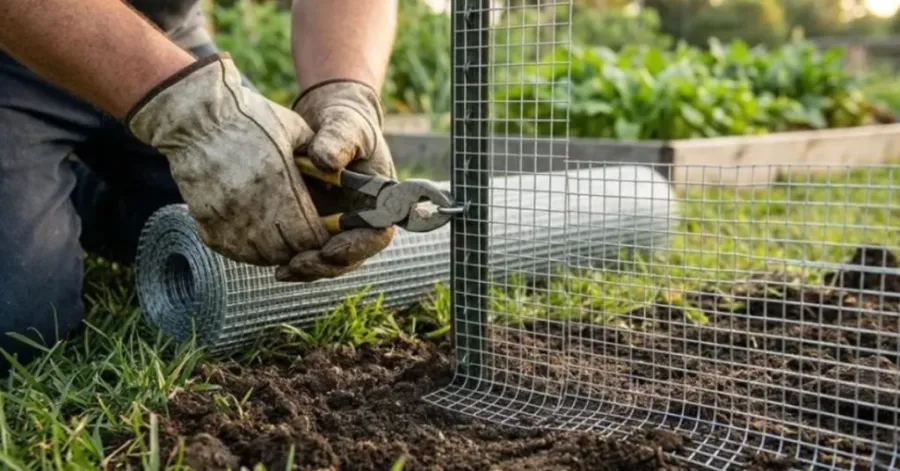
Once the posts have been established, roll the chicken wire along the fence line. Slowly work to prevent tangles or sharp turns of the mesh. Install the wire so that it reaches the full height of the posts and runs along the entire boundary of the garden.
This will be critical when installing chicken wire in the garden areas, as proper placement will ensure complete coverage and enhanced security. A well-laid and well-aligned wire plan also enhances the overall appearance of your fence.
Step 4: Attach the Chicken Wire to Fence Posts
At this point, attach the chicken wire to each of the fence posts with staples, clips, or heavy-duty zip ties. Begin on one side and run along the fence, holding the wire as close as you can. Ensure that there is no loose area or gaps between the mesh and posts.
A strongly knotted design enhances lifespan and supports the concept of a low-cost garden fence wire, as it uses chicken wire, which does not require constant repair. The fence should also be properly attached, which makes it stable and efficient to use over a long period in the garden.
Step 5: Secure the Bottom Edge to Block Gaps
The bottom of the fence is significant, as animals tend to enter through it. Pound the chicken wire into the ground or bend it out to form a small shield. Another thing you can do is to add additional soil, rock,s or landscape pins to keep it in place.
This method is most commonly used in a chicken-wire garden fence to prevent small animals, such as rabbits, from digging under it. A safe bottom edge is a huge boost to the safety and efficiency of your garden protection.
Step 6: Check the Fence and Strengthen Weak Areas
After the fence has been completely laid, go around the entire area and check it. Find loose wire, loose attachments, or unlevel areas. Secure any loose sections and make areas that might require additional support.
This last step will ensure your structure is sturdy and durable, particularly when you use chicken-wire fence ideas in layouts for larger vegetable gardens. An inspection will help you build a clean, stable, and reliable fence that will secure your plants.
How to Make Your Chicken Wire Garden Fence Stronger and Longer Lasting
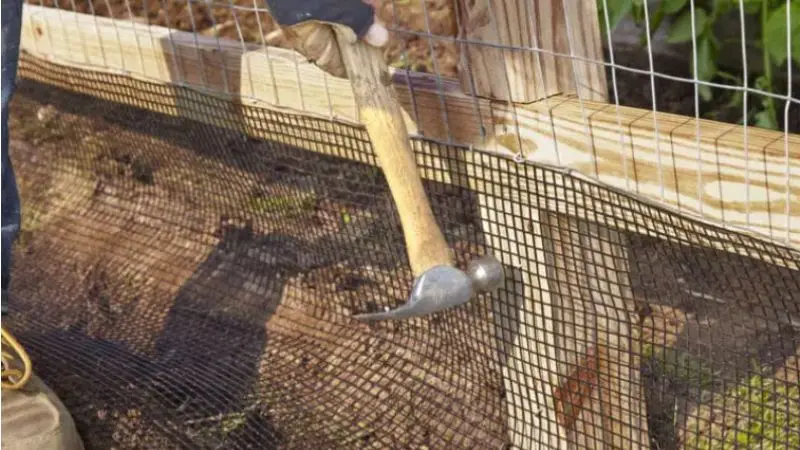
After your fence has been put in place, the next thing that you want to do is to ensure that it is durable. A chicken wire fence can be highly effective, and its effectiveness will rely on the materials and reinforcement levels. By making the right decisions, you will be able to enjoy your garden through many seasons without the need to do frequent repairs.
Fence strengthening also enhances its weather, animal, and day-to-day wear resistance. All you need are these small additions that can significantly enhance the work of your chicken wire garden fence in the long run.
Choose Rust-Resistant Chicken Wire for Long Life
One of the most effective methods of extending the life of your fence is by using rust-resistant materials. Galvanized chicken wire is strongly recommended, as it is coated to prevent moisture and corrosion. This assists the fence in resisting the rain or even humid weather.
In choosing what to work with, most gardeners would opt to use the best chicken wire garden fencing that is both tough and withstands the weather. Superior wire ensures that you do not need to replace wire so often, and your garden will be covered longer. Durable mesh is worth the investment to make your fence reliable and safe.
Add Strong Frames for Extra Support
Adding a frame to your chicken wire fence can greatly enhance its strength. Frames made of wood or metal are used to ensure the wire is firmly in place and does not loosen over time. The fence also looks cleaner and more organized with the help of frames.
The technique is particularly applicable in constructing a DIY chicken wire fence in order to protect the garden since it provides stability to the whole structure. A good frame is used to evenly spread the pressure all over the fence, and this makes the frame more resistant to bending, pulling, or damage by animals.
Keep the Fence Tight to Prevent Sagging
One of the most common problems with chicken wire fences is sagging over time. To avoid this, ensure that the wire is pulled out during installation and attached to each post properly. Alternatively, you can add tension wires or more support lines on the top and bottom.
An essential aspect of the installation of chicken wire in garden areas is proper tensioning that ensures that the structure is firm and straight. Not only does a tight fence look better, but it also has a better performance in keeping your plants safe.
Protect Your Fence from Weather and Outdoor Damage
The weather, such as rain, wind, and sunlight, may slowly deteriorate a fence unless it is well-maintained. Durability can be significantly enhanced by coating wooden posts with protective finishes or by using weather-treated products. Frequent examination can also be used to detect the initial damage.
This is particularly necessary in planning a chicken wire fence around a vegetable patch, where long-term security is required to grow plants. Building a strong, stable, and effective fence involves taking simple precautionary measures to ensure it remains in good condition across seasons.
Common Mistakes to Avoid When Installing a Chicken Wire Garden Fence
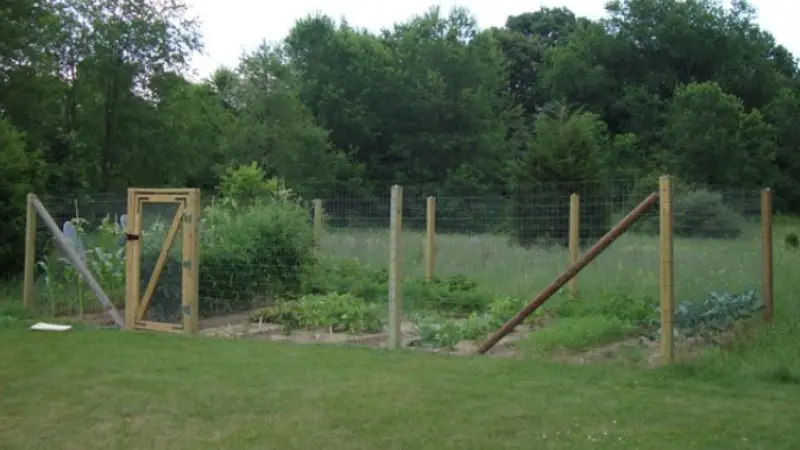
A small project like a fence may fail miserably when one overlooks a couple of details. Most gardeners are in a hurry, and they end up with problems such as poor support, spacing, or shielding of plants. These tips will prevent typical mistakes and create a better, more solid wall.
These are some of the most common mistakes encountered when one is first learning to construct a chicken-wire garden fence. Proper installation helps in enhancing the longevity and protection of the garden.
Mistake 1: Using the Wrong Size of Chicken Wire Mesh
The most common error is selecting the incorrect mesh size. In case the openings are too wide, small animals such as rabbits or rodents can easily get into the garden. Conversely, a mesh that is too fine can be more costly and difficult to handle than necessary.
When choosing the right material to use in building a chicken wire garden fence, it will matter a lot since it will determine the level of protection your garden will have. The correct size of mesh will keep your plants secure without any needless additional spending or effort.
Mistake 2: Spacing Fence Posts Too Far Apart
The other common error is to put fence posts too far apart. When the posts are not spaced sufficiently, the chicken wire may become loose or slack, or change shape as time passes. This undermines the whole structure, making it less effective.
Adequate spacing is particularly essential in a DIY chicken wire fence to protect your garden since the main support of the wire is the posts. The spacing of posts should be even to maintain a tight, stable, and visually attractive fence.
Mistake 3: Leaving Gaps at Ground Level
The significant issue is that disregarding the gaps at the bottom of the fence will allow small animals to squeeze or dig under it easily. The smallest hole can render the whole fence useless.
This is a critical area when using the chicken wire fence to surround a vegetable patch, as most of the garden pests are ground level. A well-secured base will ensure that you do not get undesired access and your crops are safe and secure.
Mistake 4: Not Securing Fence Corners Properly
The weakest point in a chicken wire fence is frequently the corners. The wire may loosen, pull away, or collapse under pressure unless it is properly reinforced. This may affect the stability of the entire fence line.
Corner support is also a very important factor when installing chicken wire in garden projects, as corners are the areas under the highest tension. By reinforcing these sections, the fence is made strong, balanced, and durable even when strained.
Wrap Up
Another reasonable way to secure your garden without incurring high costs is to build a chicken-wire fence. Planning the layout, setting up the posts, and locking the wire are all significant in the development of a robust and sound barrier. When properly applied, it helps keep pests away from vegetables and encourages healthy plant growth throughout the season. Using high-quality materials and preventing common errors will enhance durability and performance. You can make a little or a big one, but a well-constructed chicken wire garden fence can offer a long-term solution and security to any kind of home gardener.
FAQs
How can a chicken wire fence be used optimally in a garden?
The primary aim of the chicken wire fence is to guard vegetables and plants against small animals such as rabbits and chickens. It offers a lightweight, malleable shield that is simple to install and support in most garden arrangements.
What is the life span of a chicken wire garden fence?
When galvanized wire is used and the fence is well maintained, a chicken wire fence can last several years. The lifespan and durability of the installation, as well as the quality of the installation, are also influenced by weather conditions and quality.
Will I be able to install a chicken wire fence?
Yes, it can be easily installed with rudimentary tools. With proper planning, measuring, and securing of your posts, you will be able to construct a strong structure without needing a professional for most garden sizes.
What are the depths of fence posts to be?
The ground length of fence posts should be covered by a minimum of 1/3 of the post length. This depth offers stability and eliminates leaning or movement caused by wind or pressure.
Can a garden be protected with chicken wire?
Chicken wire is sturdy enough to protect small animals and a general garden. But in the case of sizeable pests, it might require reinforcement with sturdier posts or additional fencing to enhance its security.