
As we use the garden sprayers very little, the parts sometimes don’t function properly. Therefore, we all must know the basic parts, maintenance, and repairs to avoid frustration. Repairing becomes easier when we know all the parts and their functions. In this way, maintenance is also straightforward and ultimately saves you from costly repairs. This blog explains simple steps to maintain your sprayer parts. Let’s dive into a useful guide for your garden routine. Maintain your garden sprayer parts to save time and money.
Why Regular Maintenance of Garden Sprayer Parts Is Essential

Preventing Clogs and Damage
The primary step to keep your sprayer parts is to prevent clogs. These clogs can be for any reason. Sometimes, if a sprayer remains unused for an extended period, dust and debris can become trapped in the tubular parts and nozzles. Therefore, proper cleaning of all parts is recommended. Moreover, the prayer should be stored in a covered container, such as a bag, to prevent dust from sticking.
Ensuring Optimal Spray Performance
A well-maintained sprayer gives you even coverage. You get the right amount of spray on your plants, which helps them grow strong. If maintenance is neglected, the spray pattern may change. You might waste product or miss spots in your garden. Checking the nozzles and seals helps you catch issues early.
Extending the Lifespan of Your Sprayer
Taking care of your sprayer means you use it for years. You save money because you don’t have to buy new equipment often. Regular checks help you spot worn garden sprayer parts before they break. Replace damaged components immediately to avoid larger issues.
Common Garden Sprayer Parts That Require Maintenance
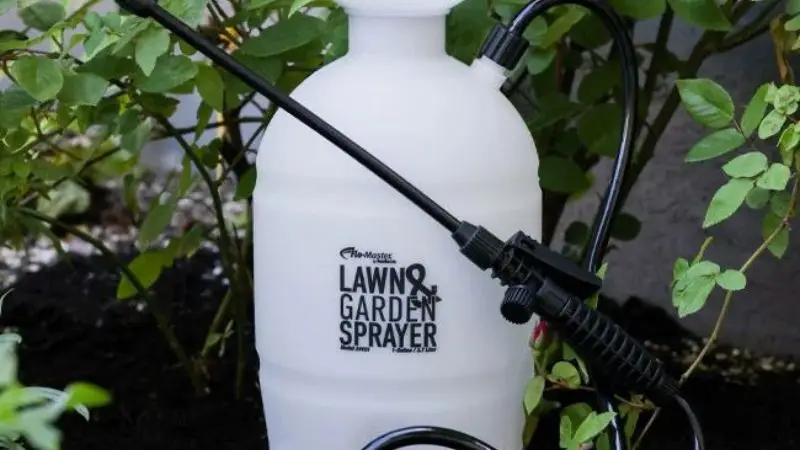
Nozzles and Spray Tips
Nozzles and spray tips play a significant role in how your sprayer works. You want even coverage and good performance every time. Dirt and residue can block these garden sprayer parts. If you notice uneven spray or clogs, it’s time for cleaning. You can soak nozzles in warm water to loosen debris. Always check for cracks, wear, or damage before each use.
Hoses and Seals
How to replace garden sprayer parts? Hoses and seals connect everything. If you spot leaks or cracks, you need to act fast. Damaged hoses can lower pressure and waste product. Seals keep liquid inside the sprayer. You should inspect these parts often. Replace any hoses or seals that look old or brittle.
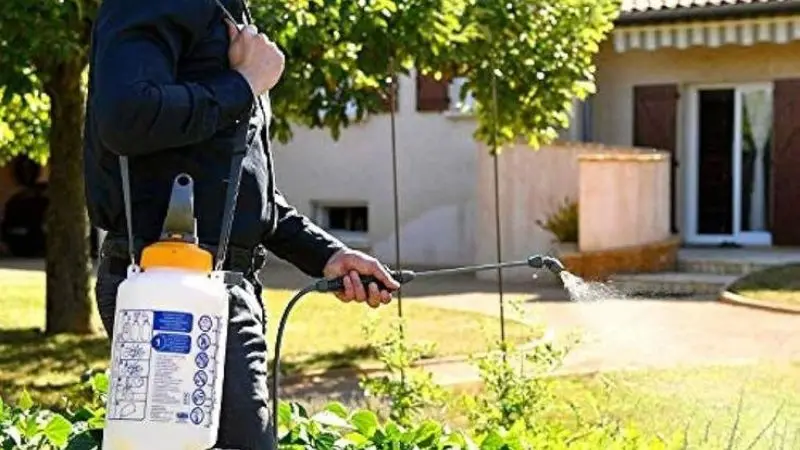
Pump Mechanism
The pump moves liquid from the tank to the nozzle. If the pump fails, your sprayer won’t work. You should listen for strange noises and test the pump’s pressure. Lubricate moving parts to keep everything smooth. If you find any broken components, replace them right away.
Tank and Filters
The tank holds your spray solution. Filters keep dirt out of the system. You want to rinse the tank after each use. Clean filters help prevent clogs and protect other garden sprayer parts. If you see cracks or buildup, replace those parts. Good tank and filter care boosts your sprayer’s performance.
Step-by-Step Guide to Maintaining Your Garden Sprayer
Daily Maintenance Tips
You want your sprayer to last and work well every time. Start with regular cleaning and inspection after each use. Rinse out the tank and run clean water through the nozzle. Wipe down the outside to remove dirt. Check for leaks or cracks. These tips help you catch problems early and keep your sprayer in good shape.
Weekly or Monthly Checks
Check the performance of your sprayer often. You can check for any leakages or any repairs. Mostly check the sprayer every month. Check all the parts separately. Hoses, seals, and sprayer tips can be tested. Clean your garden sprayer. Check for any clog; if present, remove it. These simple steps will improve the efficiency of your sprayer.
Seasonal Deep Cleaning
The right time to thoroughly clean all the equipment in your home is with the change of season. Like all tools, sprayers should be cleaned appropriately. You can use the hot water with soap. Wash all the parts separately. Let it dry for some time and then tighten up all parts. This is all you will do, and your sprayer will be working smoothly.
How to Replace Garden Sprayer Parts Effectively
Identifying Worn or Damaged Components
You want your garden sprayer to work every time. Start by checking each part for signs of wear. Look for cracks in the hoses, leaks around the seals, or a nozzle that sprays unevenly. If the pump feels stiff or the handle squeaks, you might need a repair. Sometimes, you see rust or buildup on metal parts. These are all signs you need a replacement.
Choosing the Right Replacement Parts
Picking the correct replacement parts keeps your sprayer running smoothly. Always check your sprayer’s brand and model. Refer to the manual or look up part numbers on the old pieces. If you use the wrong part, you might cause more damage or need another repair soon. Local garden stores often carry standard parts, but you can also find them online.
Step-by-Step Replacement Process
You can handle most replacements with a few simple tools. Here’s a quick guide:
- Turn off and empty your sprayer.
- Remove the damaged part carefully.
- Clean the area before adding the new part.
- Install the replacement and make sure it fits tightly.
- Test your sprayer with water to check for leaks.
Tips to Extend the Lifespan of Garden Sprayer Parts
Proper Storage Techniques
You want your sprayer to last for years. Good storage makes a big difference. Always clean your sprayer before you put it away. Store it in a dry spot where it won’t freeze or get too hot. Keep it off the ground to avoid moisture. If you have a shed, use a shelf for proper storage. You can hang hoses to keep them straight. This helps prevent cracks and keeps everything ready for next season.
Using the Correct Chemicals and Solutions
Choosing the right chemicals helps you extend the life of your sprayers. Some strong cleaners or garden solutions can damage seals and hoses. Always check the label before you mix anything. Use only chemicals compatible with your sprayer. If you’re not sure, ask at your local garden store. This simple step improves sprayer performance and helps keep parts working well.
- Read instructions for every solution.
- Rinse your sprayer after each use.
- Avoid mixing unknown chemicals.
Routine Inspection Schedule
Set up an inspection checklist to catch problems early. You can use a maintenance checklist to track what you check and when. Want to know the garden sprayer parts for a broken nozzle? Inspect nozzles, hoses, and seals monthly. Write down any damage or leaks. This preventive maintenance helps you detect issues before they worsen. Regular checks help you get optimal performance from your sprayer.
Conclusion
Now you know how to maintain and replace garden sprayer parts. As a beginner, you can also perform DIY repairs using these easy steps. So why hire a specialist if you can specialize in the process? Just keep in mind that regular cleaning is the basic step to keep every tool in top condition. The basic rule for your home routine is maintenance. Your pocket will thank you if you take care of your home tools!
FAQ
When should I clean the sprayer parts for optimal performance?
To keep your sprayer working properly, thoroughly clean your sprayer after every use and store it in a clean space. This will prevent any dirt or debris from getting stuck in the sprayer. sprayer nozzles.
What to do with a leaking sprayer?
Sometimes, leaks occur due to loose parts. Empty the sprayer and tighten all parts. If the leakage persists, there is a need to replace the leaking part.
Can you use any solution in your sprayer?
No, you should only use solutions made for your equipment. Some chemicals can damage your sprayer. Always read the label before you fill your equipment.


