
If you’ve come to find out how to put a hose on a hose reel without any stress, you are in luck. Anyone can learn how to wind a garden hose properly after a bit of practice to avoid any knots or kinks and, of course, aggravation. This guide ensures an easy-to-follow process regardless of whether you have a manual or automatic hose reel. At the end, you will place your hose on the reel just right, ready for the next watering. Even a novice can neatly organize it in order to help save time and keep the garden hose in good shape.
Tools and Materials You Need Before Installing a Hose Reel
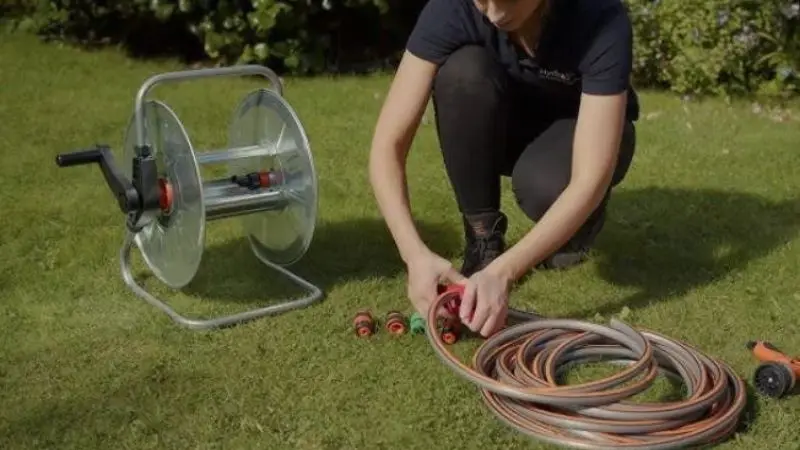
Get everything you need in one place before you start. Time is saved, and you don’t have to stop midway. Having the right materials and tools makes the hose reel installation easier and less frustrating.
Proper preparation also makes it easy for readers to know how to put a hose on a hose reel.
Manual or Automatic Hose Reel: Which One to Use
Hose reels can mainly be found in a manual and an automatic style. Choosing the right one affects how easily and conveniently the hose gets handled. Manual hose reels have a handle that you can turn to help with more controlled and even wrapping. A spring or motor pulls the hose back onto automatic hose reels with less effort. Knowing the type of reel you have can create a convenient way to attach a hose to a garden hose reel so that the hose has a smooth wind without stress or sudden tugs.
Check Garden Hose Size Before Attaching It
Before attaching the hose, always check the length, thickness, and fitting type. Garden hose sizes vary, and not all reels support all hoses. When the hose is too long and/or wide, it may not wind onto the reel. Fittings that fit can prevent leaks and ensure smooth water flow. Choosing the right hose makes reading instructions on how to properly wind a hose onto a reel easier, and also prevents your hose from tangling, suffering from pressure loss, or experiencing damage through daily use.
Extra Items That Make Hose Reel Installation Easier
Optional accessories can ease the installation and facilitate long-term use. Hose guides allow for smooth winding of the hose on the reel. Quick-connect fittings enable speedily attaching and removing without tools. Wall mounts allow the reel to remain steady and grounded. Using these attachments makes it easier and neater to attach a garden hose to a reel and comes complete with a step-by-step guide and additional options.
Step-by-Step Guide to Put a Hose on a Hose Reel
Setting up a garden hose on a reel is simple when following clear steps. Using the right sequence prevents tangles, leaks, and uneven winding. This piece offers a simple, practical step-by-step guide on how to put a hose on a hose reel that works for both novices and experienced gardeners.
If you follow the steps correctly, you will learn how to put a hose on a hose reel properly and keep a clean watering setup.
Step 1: Choose the Right Hose Reel
Choosing the proper hose reel is the first step in ultimately achieving success. Firstly, assess the size of your garden and the length of the hosepipe. Compact reels are perfect for smaller yards, while larger spaces will need reels that can hold longer hoses. The reel must not be overloaded and comfortably hold the full hose length. The correct reel choice makes hose reel installation easier and strains the hose less. When the reel fits your requirements, you can join the garden hose to a reel more easily, and it will wind evenly for storage.
Step 2: Disconnect the Hose from the Spigot
Before installing it, remove the hose from the water. Shut off the water supply entirely and carefully twist the hose connection away from the faucet. Allow residual water to drain from the hose if it was previously in use. By relieving hose pressure, it becomes easier to handle and helps prevent spills. This step gets the hose clean for easy handling and allows the user to learn how to put a hose on a hose reel without a mess or straining the fittings.
Step 3: Attach the Hose to the Reel Connection
After the hose is released from the reel, locate the leader hose or inlet connection. Attach and hand-tighten one end of the garden hose to this connection on the right. Though the connection should be snug, it should not be so tight that the threads are damaged. So, the next step is the correct setup of a hose on a reel. A leak-proof connection ensures steady flow and no leakages. The assembly of the garden hose reel can be simply done apart from that. It will not require adjusting as well.
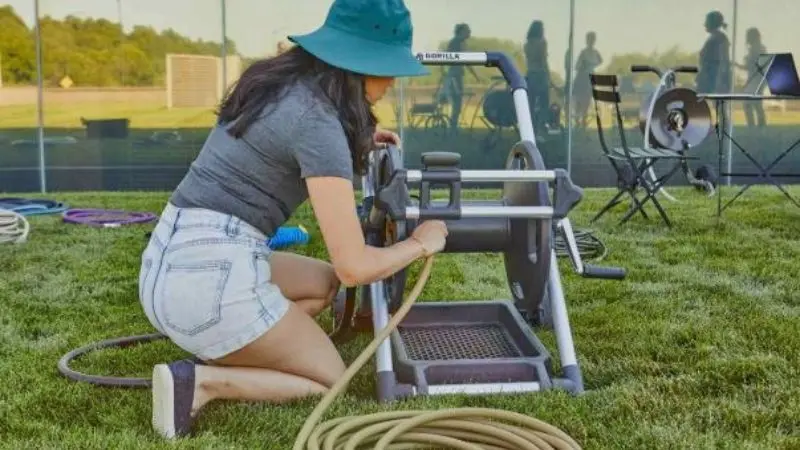
Step 4: Wind the Hose Onto the Reel Evenly
While reeling in the hose, do it slowly and evenly. With one hand, turn the handle or reel mechanism and guide the hose with the other. As the hose wraps around the drum, keep it straight and flat. Even winding prevents kinks and overlaps. How you wind a hose, which can be done in various ways, is an important part of proper hose storage; it can affect the long-term durability of a hose. By taking time here, the hose stores neatly and unwinds easily on the next use.
Step 5: Secure the Hose End in Place
As soon as the hose is completely wound, secure the loose end in the holder or clip on the reel. This prevents the hose from slipping off the reel and becoming uncoiled while in storage. A properly secured hose will be organized and ready for the next use. Attaching the empty garden hose to a reel completes the physical process and keeps the garden area clean and tidy. The fittings won’t get damaged due to dragging the hose or from pressure.
Step 6: Check Hose Alignment and Tension
Take a last look at the hose on the reel and how it looks. The hose should be flat across the reel and should not be loose or unevenly looped. If sections are overlapping, rewind that part so it fits correctly. Final check ensures the hose gets stored and will last longer. This step indicates the successful installation of the hose reel and reiterates everything learnt about the efficient and professional method of putting a hose on a hose reel.
How to Maintain Your Hose Reel for Long-Term Use
Taking care of it after it has been set up is just as essential as setting it up. Keeping up to date with routine maintenance will help your watering system run smoothly with less risk of damage. If you use the hose and reel properly, they will stay safe for years.
This section will discuss some simple habits that help you wind a hose onto a reel as a pro and also keep the mechanism functional every time.
Prevent Hose Twisting and Kinking During Use
Garden hoses get damaged, and water flow is reduced due to twists and kinks. Make sure to guide the hose with your hand as you wind it to keep it straight. If a loop begins to form, you must stop winding and fix it. This custom preserves the hose lining and contributes to flexibility. The objective of preventing twists is to make future usage easy, and also, a simple form of attaching a hose to a garden hose reel without fuss with knots or the pressure building up when watering.
Store the Hose Reel in a Shaded or Covered Area
Direct sunlight and harsh weather can greatly diminish the lifespan of both hose and reel. Storing the reel in a shaded or covered location will prevent cracking, fading, and weakening of materials. This is best done in a garage, shed, or secured wall area. If you keep the reel covered, you will have less dirt build-up and less moisture. Storing the hose reel properly ensures successful hose reel permanent installation, and the hose will stay flexible and reliable for years.
Clean and Inspect the Hose and Reel Regularly
Over time, dirt, debris, and moisture can build up on the hose and reel, affecting performance. To help prevent abrasive buildup from happening and wearing out your hose, rinse out the hose now and then and wipe the reel down. Check connections and fittings for leaks or damage, especially after use. It is easier to attach a garden hose to a garden reel if we spot the problems early. Moreover, we also prevent bigger repairs in the future. Cleaning and checking regularly clears the way to water flow and prolongs the life of everything.
Common Hose Reel Mistakes You Should Avoid
Whether you have the right materials and methods, small mistakes can shorten the life of your hose and reel. Improper usage or storage of your hose after installation can cause many problems. Skipping these blunders will keep your setup clean, efficient, and lasting.
Gaining insight into these common mistakes also helps you put a hose on a hose reel correctly, protecting your investment for a lengthy time.
Winding the Hose Too Tightly on the Reel
When you wind the hose too tightly, it may seem to be good for long-term use, but it does the opposite. When too much tension is applied, it puts pressure on the hose walls and causes flat spots and cracks. These hose issues can affect the water flow for hoses. If the hose is wrapped too tightly, it will be substantially more difficult to unwind later. When the tube rests on the reel naturally, it remains flexible and strong. Correct tension is one of the most important parts of how to properly wind a hose onto a reel for proper operation without undue stress.
Using the Wrong Hose Reel for Your Hose
The wrong reel size is a common mistake that leads to tangling and uneven winding. If a hose reel is too small, the full length of the hose won’t fit. As a result, it will cause overlapping inside the reel and create excess pressure in the hose. A large reel can make the hose seem loose and more difficult to handle. The hose length and diameter must be compatible with the reel for better balance and storage. Choosing the right reel will simplify the hose reel’s installation and make it easy to attach a hose to a garden hose reel without constant readjustments and fuss.
Wrap Up
The task of installing and maintaining a hose reel would become simple if each step were carried out in a particular order. Let’s take a look at selecting the right reel and evenly winding the hose to promote long-term performance. This guide has explained to you how to put a hose on a hose reel in a way that is easy to understand and practical for most garden setups.
If you follow this step-by-step guide to putting a hose on a hose reel, it helps to reduce tangles, prevent damage, and keep your garden neat. A hose is flexible, easy to use, and ready to go when you need it. But only if you handle and install your hose reel effectively.
FAQ
How often should you wash your hose reel?
The hose reel needs to be cleaned every few weeks. This helps the soil not get on the hose and crush it.
Can you leave your hose on the reel all year?
Keeping your hose in the house will keep it safe. Freezing temperatures can cause hose cracking and reel damage.
What happens if you keep getting kinks in your hose?
Use your hands to guide the hose as you reel it in. If it still twists, unroll it and begin again. A hose guide may also be useful.


