
Imagine stepping out of the shower and wrapping yourself in a warm towel. You can make this a reality with a bathroom towel warmer. You do not need to be a pro to get great results. With some simple steps, you can upgrade your space and enjoy that spa-like comfort every day. Ready to boost your bathroom’s coziness? Let’s get started!
Choose Your Towel Warmer
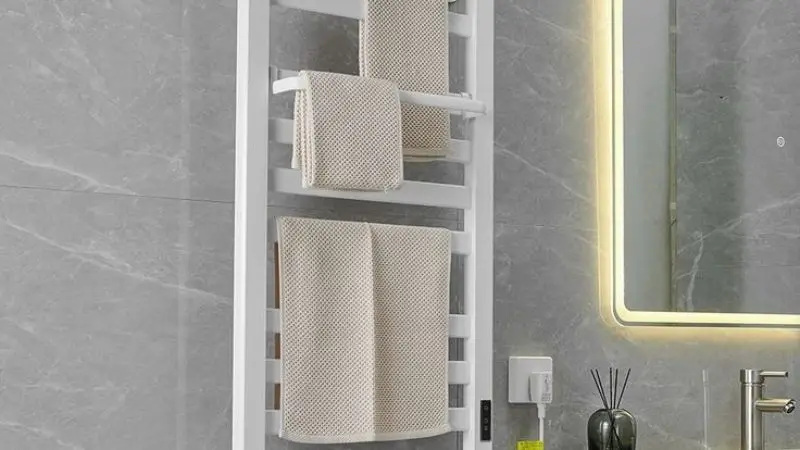
Is a towel warmer worth it in the bathroom? The answer is yes. So, you want to pick the best towel warmer for your bathroom. You have two main choices: electric or hydronic. Each type has its own perks. Let’s break it down so you can decide what fits your space and style.
Electric vs Hydronic
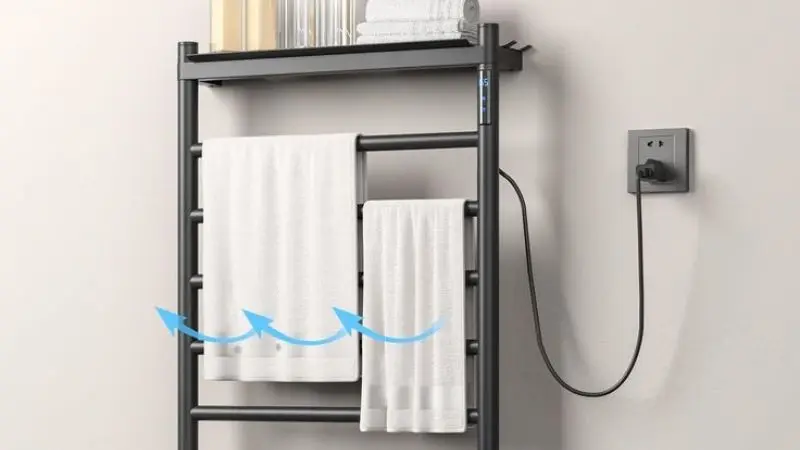
How does a bathroom towel warmer work? You can easily use a towel warmer. Electric towel warmers plug into a wall outlet or get hardwired. You can install them quickly. You just need a power source nearby. These models heat up fast and work well for most homes. Hydronic towel warmers connect to your hot water system. They use water for heating. These are frequently found in larger bathrooms or centrally heated homes. Installing hydronic models takes longer. You might require a plumber. If you already use hot water for other heating, it may be more energy-efficient.
Essential Things to Think About
Consider the following before making a purchase:
- Size: Measure your area. Verify the towel warmer’s fit.
- Style: Select a layout that complements your bathroom.
- Verify the IPX rating for safety. This indicates whether the warmer is suitable for damp environments.
- Cost: Consider the cost and energy consumption over time.
- Controls: Some models come with temperature or timer settings. It’s easier to use your bathroom towel warmer with these features.
Gather Tools and Materials
Before you begin, gather your supplies and equipment. This facilitates the installation of your towel warmer. Later, you won’t have to dash to the store. Having everything prepared lets you focus on creating a unique atmosphere in your bathroom.
Tools Checklist
Expensive tools are not necessary for this task. You may already have the majority of the standard tools in your toolbox. To keep you organized, use this easy checklist: 🙠 Use the appropriate drill bits for your wall.
- A flathead screwdriver and Phillips
- A tape measure
- Level a marker or pencil
- Stud locater
- Electric model wire stripper
- Wren that can be adjusted for hydronic models
- Goggles for safety
Materials List
You also need the right materials for the job. These items help you mount and connect your towel warmer easily. Check your towel warmer’s manual for any special needs.
- Mounting brackets
- Screws and anchors
- Electrical wires and wire nuts
- Pipe fittings
- Wall plate covers
- Touch-up paint
Prepare for Towel Warmer Installation

Safety Checks
How can a towel warmer be installed in the restroom? Consider safety for a moment before you begin. You want your towel warmer to be long-lasting and effective. If you intend to install an electric model, start by shutting off the power at the breaker. To protect your eyes, put on safety goggles. Verify your towel warmer’s IPX rating. This rating indicates the unit’s suitability for use in damp environments. Observe your local electrical code at all times. Seek advice from a qualified electrician if you’re unsure.
Marking Placement
Now concentrate on picking the right spot. Your towel warmer should be placed in a convenient yet secure location. Stay at least 600 mm (2 feet) off the ground and 300 mm (1 foot) away from toilets, sinks, and bathtubs. This keeps your towels dry and helps stop water splashes. Use the shipping box as a template for mounting. Mark the bracket locations by holding them up against the wall. To ensure that your marks are straight, pick up a level.
- Mark the locations of the top and bottom brackets.
- Verify your measurements one more time.
- Verify that the towel warmer won’t obstruct cabinets or doors.
Wall and Code Requirements
Before you drill, inspect your wall. Locate a good spot that has firm support, like a stud. To assist, use a stud finder. Anchors might be required if mounting on drywall. Use the appropriate drill bit for brick or tile. After installation, you may occasionally need to patch sheetrock or paint. Before you start, make sure you are aware of the building codes in your area. Following these guidelines helps you stay out of trouble later.
Towel Warmer Installation Steps
Step-by-Step Towel Warmer Installation Process
You are prepared to begin the detailed installation procedure for the towel warmer. Take your time and do each step. Working diligently will yield the best results.
- Examine your parts and tools: Arrange all of your equipment and supplies. Double-check that you have everything from your checklist. This keeps you from pausing in the middle of the task.
- Mark the Mounting Points: Mark the locations of the mounting points. Mark the desired location for the towel warmer with a pencil. Press the shipping box or the mounting template up against the wall. Ensure that your marks are evenly spaced and level.
- Drill the holes: Put on your safety goggles. At the designated locations, drill holes. You can use ordinary screws if you strike a stud. For additional support, use wall anchors if not.
- Mounting brackets should be attached: Attach the brackets to the wall with screws. To ensure they are secure, gently tug on them. The towel warmer should last for many years.
- Hang the towel warmer: Lift it onto the brackets. If it feels heavy, ask for assistance. Ensure that it rests flat against the wall.
Maintenance for Longevity
You can keep your towels comfortable every day if you maintain your towel warmer. You don’t need specialized knowledge or expensive equipment. Enjoy the benefits of a towel warmer in your bathroom for many years by simply following these guidelines.
Cleaning Tips
Over time, dirt and dust can accumulate on your towel warmer. To ensure it continues heating efficiently, keep it clean. Once a week, clean the bars with a gentle cloth. If any spots appear, gently rub them off with a cloth dipped in warm water. Steer clear of abrasive cleaners as they may harm the finish.
- Before cleaning, unplug or switch off the towel warmer.
- Use a moist cloth to clean the brackets and bars.
- Use a fresh towel to dry everything.
- As you clean, look for any loose screws.
Frequent Inspections for Safety
Safety inspections help detect issues early. You want your towel warmer to heat up smoothly. Every few months, inspect the connections and wires. Verify that nothing appears worn out or broken. Look for leaks near the pipes if your model is hydronic.
Conclusion
You just learned a few easy steps to install a towel warmer in a bathroom. Choose the appropriate model first. Next, prepare your workspace and gather your tools. After that, make sure everything is safe by following the installation instructions. You’re capable! Leave a comment with any questions or advice you may have.
Someone else might gain confidence from your story as well!
FAQ
How much time does it take to heat a towel warmer?
The majority of towel warmers take 10 to 30 minutes to warm up. The warmth is immediately apparent. For specifics, consult your handbook, as some models might require more time.
Can I install a towel warmer in the bathroom myself?
You certainly can! Many people install bathroom towel warmers themselves. Simply use the appropriate equipment, adhere to the instructions, and exercise caution. Consult an expert if you’re not sure.
Is it safe to leave towel warmers running all day?
The majority of electric towel warmers are safe to use continuously. They have built-in safety features and consume little power. To save energy, you can turn them off when not in use.


