
If you’re wondering, “Can you put print heads in an ultrasonic cleaner?” the answer is yes, but you should proceed with caution. Not all print heads are suitable for ultrasonic cleaning, so it’s essential to check if yours can handle it before starting. Following the correct procedures will help prevent damage and ensure effective cleaning. Many people choose ultrasonic cleaners because they can remove stubborn ink clogs more safely and efficiently.
Can You Put Print Heads in an Ultrasonic Cleaner
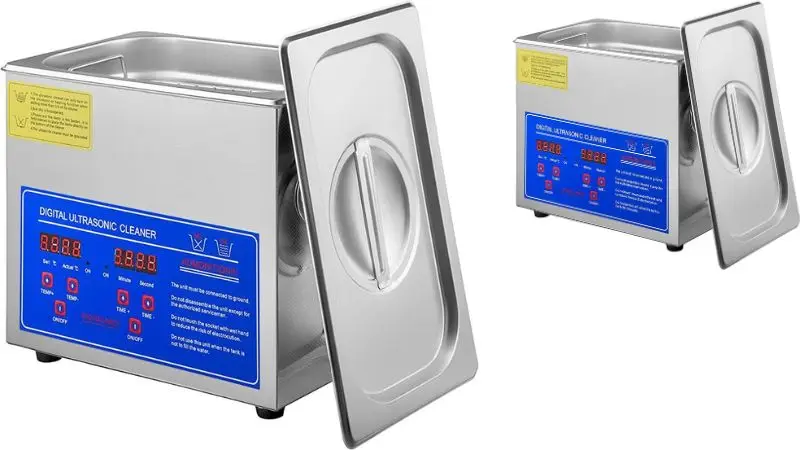
How Ultrasonic Cleaners Work
An ultrasonic cleaner uses sound waves to create tiny bubbles in a liquid. These bubbles form and burst quickly. When you place printheads in the cleaner, the bubbles reach into small spaces, like printer head nozzles. The bubbles help remove dried ink and debris. You do not need to scrub or use harsh tools. The process works well for deep cleaning because it can reach places you cannot see.
You fill the ultrasonic cleaner with a cleaning solution. Most people use distilled water or a gentle cleaning fluid. You set the temperature to about 25-30°C (77-86°F). You place the printheads in the cleaner, making sure only the nozzles touch the liquid. The machine runs for about 10-15 minutes. After the cycle, you rinse the printheads with clean water. This step removes any leftover solution.
Pros and Cons
The best ultrasonic cleaner for printer heads has both advantages and disadvantages. You should weigh these before deciding if this method is right for you.
Pros:
- You can clean the printer head nozzles more deeply than with manual methods.
- The process removes stubborn ink clogs that block printheads.
- You do not need to use sharp tools or brushes, which lowers the risk of scratching.
- The ultrasonic cleaner saves time and effort.
Cons:
- You can do ultrasonic cleaning of print heads at home. Some may get damaged.
- If you submerge the electronics, you can ruin the printhead.
- Using the wrong cleaning solution can harm the printheads.
- The process may void your printer warranty.
| Pros | Cons |
| Deep cleaning of nozzles | Risk of damage to some printheads |
| Removes tough ink clogs | Possible harm to electronics |
| No need for harsh scrubbing | A wrong solution can cause problems |
| Saves time and effort | May void warranty |
Printhead Compatibility and Safety
Suitable Printheads
The answer to the question “Can you put print heads in an ultrasonic cleaner?” The answer is yes, some printheads can go in an ultrasonic cleaner. Most removable printheads with metal printer head nozzles are okay. These usually come from older inkjet printers or pro models. Check your printer manual to see if your printheads come out and have metal nozzles.
Metal nozzles are strong and do not get hurt by the cleaning. If your nozzles are clogged, proper ultrasonic cleaning tips for print heads can help fix them. Printheads without electronics near the nozzle area work best for this. Common suitable printheads:
- Removable inkjet printheads with metal nozzles
- Printheads from professional or wide-format printers
- Models designed for regular maintenance
Printheads to Avoid
Some printheads should not go in an ultrasonic cleaner. Do not clean printheads with plastic nozzles or built-in electronics. These can break easily. If you put electronics in the liquid, you can ruin the printhead. Many new printers have printheads that combine electronics and nozzles. These can break if you use an ultrasonic cleaner. Do not attempt to clean fixed printheads that cannot be removed from the printer.
| Printhead Type | Safe for Ultrasonic Cleaner? |
| Removable metal nozzle | Yes |
| Plastic nozzle | No |
| Built-in electronics | No |
| Fixed printhead | No |
Key Safety Precautions
You need to follow safety rules when using an ultrasonic cleaner. Only let the printer head nozzles touch the cleaning solution. Never let the electronics get wet. Set the temperature between 25-30°C (77-86°F) to keep printheads safe. Clean for only 10-15 minutes. Avoid using harsh solvents for ultrasonic cleaning print heads without damaging them. Start with distilled water or a gentle cleaning fluid. If printheads are still clogged after cleaning, try again or ask for help.
How to Clean Printheads with Ultrasonic Cleaner
What You Need
Get all the things you need before you start. You need to get everything ready so that you can clean the printheads safely and well. Here’s a list of what you need:
- Ultrasonic cleaner (the smaller the better)
- Distilled water (at least two containers)
- Optional: gentle cleaning solution for the printhead
- Isopropyl alcohol that is at least 90% pure
- Two bowls or tubs, one for washing and one for rinsing
- Paper towels or cloths that don’t leave lint
- Gloves to keep your hands safe
- Clock or timer
Steps to Get Ready
Before you start, you need to get the printheads and ultrasonic cleaner ready. Do these things:
- Take the printheads out of your printer. Look in your printer’s manual for directions.
- Place the printheads on a clean and dry surface. Don’t touch the nozzles.
- Put distilled water in the ultrasonic cleaner. If needed, you can add a small amount of gentle cleaning solution.
- Put fresh distilled water in the first tub to rinse. For the last rinse, fill the second tub with distilled water and a few drops of isopropyl alcohol.
- Wear gloves to keep your hands clean and prevent oils from getting on the printheads.
Cleaning Process
You can now use the ultrasonic cleaner to clean the printer heads. For the best results, do the following:
- Put the printheads in the cleaner that uses ultrasonic waves. Only put the nozzle area in the water. Keep the electronics out of the water.
- Set the temperature between 25 and 30 degrees Celsius (77 and 86 degrees Fahrenheit). This protects the printheads.
- Use the ultrasonic cleaner for 10 to 15 minutes. The sound waves will help remove ink and other debris stuck in the nozzles.
- Remove the printheads from the cycle and place them in the first tub of distilled water. Gently swirl to remove any remaining cleaning solution.
- Place the printheads in the second tub, which contains distilled water and isopropyl alcohol. This step helps get rid of water and speeds up the drying process.
- Shake off any extra liquid gently. Don’t hit or tap the printheads.
Aftercare and Drying
You have to let the printheads dry before putting them back in the printer after you clean them. This is what you need to do:
- Put the printheads on a lint-free cloth or paper towel with the nozzles pointing down.
- Let them dry in the air for at least an hour. You can use a can of compressed air to help things dry faster, but don’t use heat.
- Use a cloth dampened with isopropyl alcohol to clean the outside of the printheads. This gets rid of any leftover residue.
- Look for any moisture that might still be in the nozzles. Before putting the printheads back in, make sure they are completely dry.
- Put the printheads back in your printer and do a test print after they have dried.
Ultrasonic Cleaner Best Practices
How Often to Clean
You shouldn’t use an ultrasonic cleaner every time you see a small problem with the print. If you see stubborn clogs or streaks that don’t go away with regular cleaning cycles, most printheads only need a deep cleaning. First, see if the printer has a built-in cleaning function. Use the ultrasonic cleaner if that doesn’t work. Most home printers only need to be cleaned every few months. You might need to clean your printer more often if you use it a lot. Before you clean, always check the quality of your print.
Solution Handling
Always use fresh distilled water or a gentle cleaning solution in your ultrasonic cleaner. Never reuse old solution because it can hold ink and dirt from past cleanings. Change the solution after each session. Keep the temperature between 25-30°C (77-86°F) to protect your printheads. Do not add harsh chemicals or strong solvents. These can damage the nozzles and shorten the life of your printhead.
| Solution Type | Safe to Use? |
| Distilled Water | Yes |
| Gentle Cleaner | Yes |
| Harsh Solvents | No |
| Tap Water | No |
Fixing Problems
Don’t worry if your printhead still doesn’t work after you clean it. First, make sure you did everything right. Don’t let the electronics touch the liquid, though. Try running the ultrasonic cleaner for less time. Try the printer’s built-in cleaning cycle if you still see problems. You might need to get a new printhead or ask a professional for help if nothing else works.
Last Thoughts
If you’re careful, you can use an ultrasonic cleaner to clean printheads. Before you start, always read the manual for your printer. Use only distilled water or mild cleaning solutions. Keep the electronics dry at all times.
- You can only take off clean printheads that have metal nozzles.
- Don’t use very hot water or strong chemicals.
- If you’re not sure, get help from a professional.
FAQs
Can you clean printheads with tap water in an ultrasonic cleaner?
Do not use water from the faucet. Minerals can get stuck in the printhead when you use tap water. For safe and effective cleaning, always use distilled water.
What should you do if your printhead is still clogged after cleaning it with ultrasonic waves?
Try running the ultrasonic cleaner for less time. You can also clean your printer by using its built-in cleaning cycle. If there are still clogs, get help from a pro.
Can you use an ultrasonic cleaner to clean printheads that have electronics built in?
No, you should never use an ultrasonic cleaner to clean printheads that have electronics built in. Liquid can break the electronics and ruin the printhead.
How often should you use an ultrasonic cleaner to clean your printhead?
You shouldn’t clean your printhead unless you see streaks or clogs that won’t go away. Every few months, most printers need a deep cleaning. First, run the cleaning cycle on your printer.


