
If your fence posts are showing signs of damage, don’t worry—you can fix them yourself! With a few simple tools and the right approach, learning how to repair fence post damage is easier than you might think. Whether it’s a wobbly post or one that’s completely broken, most DIY methods work well for common issues.
You don’t need to be a pro to get the job done; just follow a clear step-by-step guide, and you’ll have your fence looking sturdy and secure in no time. With a bit of effort, you’ll save time, money, and restore your fence to its former strength.
Assess the Damage Before Starting Repair
Before jumping into repairs, it’s important to understand the type and extent of damage your fence posts have. This step sets the foundation for effective repair decisions. A thorough check helps you avoid unnecessary replacements and ensures your fixes last longer.
How to Identify Fence Post Damage
Before grabbing your tools, take a walk along your fence and inspect each post carefully. Do you notice any leaning sections? A tilt often means the ground has shifted or the base has weakened. Gently push each post—if it moves easily, it may be loose or broken.
Check closely for cracks, missing pieces, or visible damage. If the wood feels soft or crumbles when poked with a screwdriver, rot is likely the issue. Root usually begins at the base, where the post meets the soil. This part is especially important in DIY fence post repair for beginners who might overlook signs of rot or structural failure.
Decide Whether to Repair or Replace a Fence Post
After identifying the problem, the next step is choosing whether to fix or replace the post. Not every issue requires full replacement. For example, if you have a leaning post with strong wood, it might be salvageable with a brace or reset. A post with a minor crack can often be mended with a repair spur.
If you’re dealing with deep rot or a broken post that wobbles, it’s usually safer to replace it entirely. Understanding how to repair fence post problems accurately will save you time, effort, and money. Choosing the right solution is key to a lasting fix.
Gather the Right Tools and Materials
Before you begin any kind of repair, make sure you’re fully prepared. Having the correct tools and materials on hand makes the job quicker, safer, and more effective. Whether you’re planning a simple fix or replacing a post entirely, preparation is the first step in any successful DIY fence post repair for beginners.
Basic Tools You’ll Need
You don’t need fancy tools to repair fence post issues. Most of what you need is likely already in your garage or shed. Keep these essentials nearby before you get started:
- Shovel or post hole digger – to dig around the post or create a new hole
- Hammer or mallet – for driving in nails or adjusting parts
- Level – even a small one helps check if your post is straight
- Tape measure – to ensure proper depth and spacing
- Work gloves and safety glasses – to protect hands and eyes from splinters
- Cordless drill or screwdriver – for fastening hardware securely
- Saw (hand or circular) – in case you need to cut replacement wood
- Wrench or socket set – for tightening bolts or brackets
These tools are enough to support any repair job, from realignment to replacement.
Materials for Fence Post Repairs
The right materials make all the difference in durability and performance. If your post is damaged but still usable, gather materials that strengthen and preserve it. This includes supplies suited to various types of damage you may encounter when following a step-by-step fence post repair guide:
- Fence post mender or metal repair spur – to reinforce broken or weakened posts
- Exterior wood screws or galvanized nails – for long-lasting holds
- Concrete mix – essential for how to fix a fence post in concrete properly
- Gravel – to improve drainage and reduce rot
- Wood preservative or sealant – for waterproofing and protection
- Bracing stakes or metal T-posts – to support leaning posts while you work
- Heavy-duty wire or zip ties – for securing temporary supports
Each of these materials plays a key role depending on the kind of repair you’re doing.
What to Use for Fence Post Replacement
If the post is too damaged—especially at the base or from rot—you’ll need to replace it. Knowing how to repair a fence post base sometimes means understanding when full replacement is the better option. Use strong, weather-resistant materials for a long-lasting solution:
- New wooden fence post – pressure-treated for durability
- Concrete mix – to hold the new post firmly in place
- Gravel – for better drainage and rot prevention
- Exterior screws or nails – to attach fence panels securely
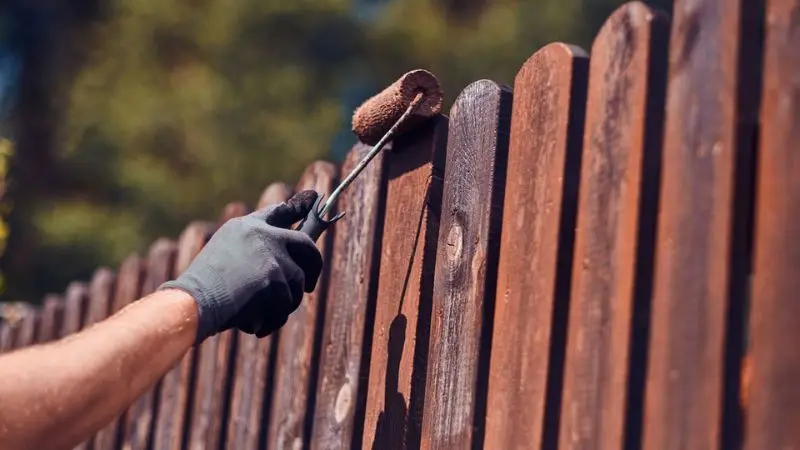
- Wood preservative or stain – to protect the new post from moisture
- Fence brackets or post caps – optional, but helpful for added support and appearance
Now that you’re equipped with everything you need, you’re ready to move forward with confidence in your repair project.
How to Repair a Fence Post the Right Way
Once you know what kind of damage you’re dealing with, it’s time to choose the best repair method. You don’t always have to dig out the entire post—many repairs can be done quickly and effectively with the right tools. This section will guide you through various methods, so you can confidently follow a step-by-step fence post repair guide and get the job done like a pro.
Step 1: Use a Post Mender or Repair Spur
One of the simplest solutions for a loose but solid post is a post mender or metal repair spur. This technique works great when the wood is still in good shape, but the post wobbles at the base. Start by clearing away any dirt or debris from around the post.
Slide the post mender firmly against the wood and drive it into the ground with a sledgehammer. Make sure it stays straight as you work. Once secure, use exterior screws to attach the post to the mender. Add gravel for drainage. This method is ideal for learning how to repair fence post bases quickly and efficiently.
Step 2: Brace and Reinforce a Leaning Post
Bracing is a fast and cost-effective option for posts that are strong but not standing straight. Begin by placing a stake or metal T-post beside the leaning post. Use wire or zip ties to pull the post into position. Check it with a level before tightening the connection.
To make the fix permanent, pour concrete at the base and let it cure fully before removing the brace. This is an excellent technique if you’re exploring DIY fence post repair for beginners. As long as there’s no rot, bracing can restore strength and alignment without full replacement.
Step 3: How to Straighten a Leaning Fence Post
A leaning post makes your whole fence look unstable, but fixing it is easier than it seems. Start by digging around the base to loosen the soil, going down at least six inches. Push or pull the post until it’s upright, using a level to guide you.
Support the post with stakes on both sides, secured tightly with wire. Pour concrete into the hole and slope it away from the post for drainage. After curing for 24 hours, remove the braces. This process shows exactly how to straighten a leaning fence post, making your fence secure again.
How to Replace a Damaged Wooden Fence Post
Sometimes, repairing isn’t enough. If the post is cracked, rotted, or snapped in half, it’s best to remove it and start fresh. Replacing a post might take a bit more effort, but it ensures long-term stability for your fence. This section will guide you through how to repair a fence post base by fully replacing it with a strong, new foundation that will last for years.
Step 1: Remove the Damaged Fence Post
Start by removing any attached fence panels using a screwdriver or drill. Then dig around the base of the post using a shovel. If the post is loose, wiggle and pull it out by hand. If it’s stuck, you may need a pry bar or rope for leverage.
For posts set in concrete, break apart the old footing with a digging bar or sledgehammer. Remove all remaining chunks and debris from the hole. This clean slate is essential for proper installation. If you want to master how to repair fence post issues completely, removing all rotten or weak material is crucial.
Step 2: Set the New Fence Post in the Ground
Now that your hole is ready, it’s time to install the new post. Dig to a depth of at least two feet or below your local frost line. Add four to six inches of gravel to the bottom for drainage. Place the new post in the center of the hole and use a level to keep it perfectly vertical. Have someone hold it in place, or use temporary braces. This method is part of how to fix a fence post in concrete for solid and lasting support. A strong base is key to preventing future leaning or shifting.
Step 3: Secure the Post and Finish the Job
Mix and pour concrete into the hole until it nearly reaches the surface. Slope the top of the concrete away from the post so water can drain easily. Double-check the alignment with your level and adjust before the concrete hardens. Let it cure for at least 24 hours before reattaching rails or panels.
Once everything is secure, brush on wood preservative or stain to prevent moisture damage. This process helps ensure that how to repair fence post replacements remain durable. Add a post cap if desired—it adds protection and a finished look to your new fence post.
How to Prevent Future Fence Repairs
Fixing your fence is only half the job—keeping it in good shape is just as important. With regular care and timely fixes, you can avoid major repairs down the line. Taking a few preventative steps ensures that every DIY fence post repair for beginners lasts longer and stands stronger against weather and wear.
Fence Maintenance for Long-Term Durability
Regular checks help prevent costly fence repairs. Walk along your fence every few months to catch problems early. Quick fixes can stop small issues from becoming big ones.
Look for these common signs of wear:
- Leaning posts – May point to a weak base. Knowing how to repair fence post issues early can prevent full replacements.
- Loose screws or nails – Tighten them to keep panels secure.
- Cracked or missing boards – Replace them to maintain the structure.
- Debris at the base – Clear leaves and dirt to reduce moisture.
- Overgrown grass or plants – Trim to keep posts dry.
- Soft or damaged wood – Check for rot or insect damage.
Inspect after storms to spot fresh damage and keep your fence strong.
Protect Your Fence from Weather Damage
Protective treatments can significantly extend the life of your fence. Use a wood stain or sealant every two years to keep water from seeping into wooden posts. For metal fences, inspect for rust regularly and repaint as needed using rust-resistant paint.
Vinyl fences should be washed with soap and water at least twice a year. You can also add post caps to stop rain from soaking into the top of each post. Using gravel at the base improves drainage. These small measures are crucial if you want to avoid having to straighten a leaning fence post later.
Conclusion
Taking care of your fence doesn’t have to be hard. With regular checks, simple repairs, and the right tools, you can keep your fence strong and looking great. Whether you’re dealing with a leaning post, cracked wood, or full replacement, knowing how to repair fence post problems gives you the confidence to fix them yourself.
From bracing to concrete work, each method helps your fence last longer. Don’t wait for major damage—act early and protect your investment. With this guide, you now have everything you need to handle fence repairs quickly, safely, and like a pro.
FAQ
How do I know if I should repair or replace a fence post?
You should repair a post if it feels solid and only leans or has a small crack. If you see rot, deep cracks, or the post breaks, you need to replace it.
Can I fix a wooden fence gate the same way as a post?
You can use some of the same steps to fix a wooden fence gate. Check the hinges, tighten screws, and make sure the gate swings straight. Replace broken boards or hardware if needed.
What is the best way to replace a wooden fence board?
First, remove the damaged board with a pry bar. Measure and cut a new board to fit. Attach it with exterior screws or nails. Paint or stain the new board to match the rest of your fence.
How do I replace a wooden fence panel?
Take off the old panel by removing the screws or nails. Lift it out of place. Set the new panel in the same spot. Secure it with screws or nails. Check that it lines up with the rest of the fence.
How long should I wait before putting weight on a new post?
Wait at least 24 hours for the concrete to cure before you put weight on a new post. This helps the post stay strong and keeps your fence from leaning.


