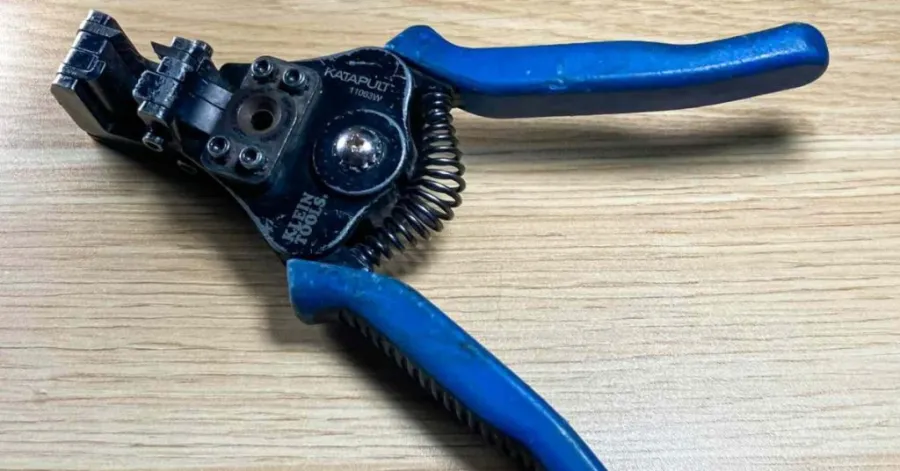
You should learn to use a wire stripper-crimper for your first electrical work. Wire stripping is the removal of a wire’s plastic coating without damaging the underlying metal. Crimping is the process of attaching the wire tightly to a connection or termination. These two stages are important when making strong, safe, and durable electrical connections in DIY, car, or house repair work. With the necessary tools, a little practice, and careful handling, you may soon learn to strip and crimp wires correctly and do electrical work more confidently and accurately.
In this article, we will review how to effectively utilize a wire stripping and crimping tool, home electrical, and DIY tasks. You will learn basic wire stripping and crimping techniques, the gear you need, and recommendations for constructing safe, secure electrical connections.
Safety Tips Before Using a Wire Stripping and Crimping Tool
Safety is an important consideration when using the best wire stripping and crimping tool for electricians to minimize mistakes and injuries. ALWAYS disconnect the power source before working with wires. Wear protective clothing – safety glasses and insulated gloves as needed. Keep your work area clean and dry, and be sure you use the proper wire stripper crimper. Before you begin, inspect your tools and wires for damage, and be careful not to cut or injure the metal wire inside the insulation. If you follow some basic safety principles, your task will go more smoothly, and you’ll end up with safer, more reliable electrical connections.
Turn Off Electrical Power Before Starting
How to use a wire stripping and crimping tool? Make sure the power is always off before touching any cables. You can either unplug the gadget or flip the circuit breaker switch. By doing this step, you will be safe from electric shocks. If you are doubtful, use a voltage tester to confirm the power is off.
Wear Protective Gloves and Safety Glasses
When dealing with wires, it is vital to wear gloves to protect your hands from their sharp edges. Safety glasses are eyewear. When worn, they protect the wearer’s eyes from flying insulation shards. Even a tiny fragment can cause some sort of eye injury. You cannot take chances at any cost.
Choose the Correct Wire Gauge
Wires of varied diameters. Before you strip or crimp your wire, you must know its gauge. Most tools feature spaces for various gauges. Using the improper slot can damage the wire or create weak electrical connections. You can look at the wire packing, or buy a wire gauge tool.
Inspect Your Tools for Damage
If you plan to use your wire stripping and crimping tool for automotive wiring, you should inspect it first. Look for cracks, rust, or loose parts. You can get an accidental injury if you use a broken tool. If you see any damage on the tool, do not use it. Spend money to get it replaced or repaired.
Tools and Materials You Need
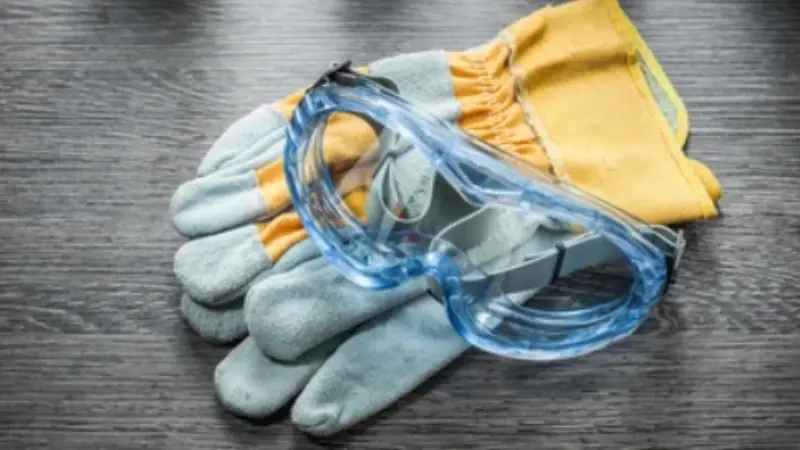
Always make safety your top priority before using any cables or electrical equipment to avoid mistakes and injuries. Don’t play with cables while the power is plugged in. Eye protection and warmed gloves. Safety. Use the proper wire stripper/crimper and operate in a clean, dry spot. Check your best crimping tool for electrical wiring at home tools for damage before you begin. Do not cut the metal wire within the insulation. Good safety procedures also mean that your job goes more easily and your electrical connections are safer and more reliable.
Basic Wire Stripping and Crimping Tool Kit
You need a few essentials to get started. Here’s a simple list:
- A manual wire stripper is a tool used to remove insulation from wires. You control the pressure so that you don’t break the wire.
- Self-adjusting wire stripper: This tool strips. No guesswork, it instantly adjusts itself to the wire size.
- Crimping Tool: To connect connectors to the end of a wire.
- Various connectors: These allow you to join wires together or to other devices.
- Electrical tape: To cover exposed wires and to secure connections.
Recommended Tools for Beginners
You don’t need fancy tools to start. You just need reliable ones. Here’s what works best for beginners:
| Tool | Why You Need It |
| Manual wire stripper | Gives you control and precision |
| Self-adjusting wire stripper | Makes stripping quick and easy |
| Crimping tool | Secures connectors firmly |
How to use a wire stripping and crimping tool? These tools are available at most hardware stores. Choose a set that has both types of removers and a crimping tool. With the correct tools, you’ll feel more confident. If you want to make your project easier, then get a self-adjusting wire stripper. It saves you time and prevents mistakes.
How to Use a Wire Stripping Tool Step by Step
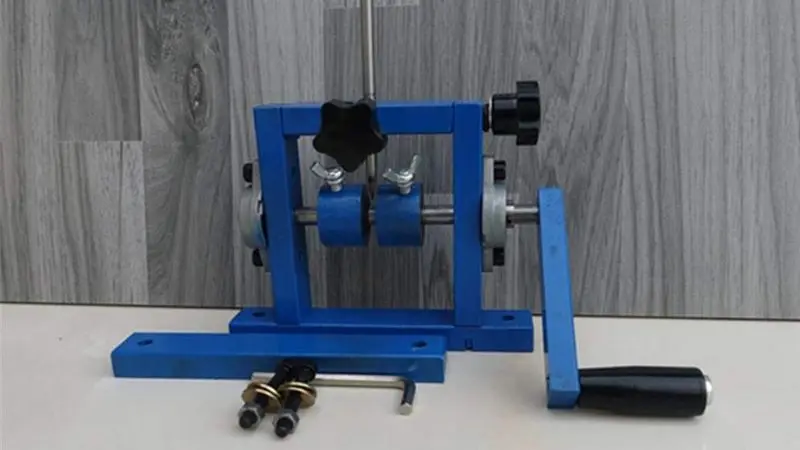
Step 1 – Identify the Correct Wire Gauge
First, you need to know the size of your wire. Check the packing or look for the markings on the insulation. Most of the best wire stripping and crimping tool for electricians will include a chart or markings for the different gauges. If you choose the wrong size, it can cut the wire or leave too much insulation. Match your wire to the proper slot on your stripper. Take a minute.
Step 2 – Position the Wire in the Stripping Slot
In one hand, hold the stripper; in the other, the wire. Insert the wire in the appropriate tool slot. Make sure you line up the location where you want to remove the insulation. For most tasks, you’ll only need to strip approximately half an inch of wire. Hold the tool steady when stripping cable wire to avoid nicking the copper.
Step 3 – Apply Gentle Pressure
How to use a wire stripping and crimping tool? Apply gentle pressure on the stripper’s handles. When you cut through the insulation, make sure you don’t cut the wire itself. Pressing too hard can destroy the copper inside. You can’t break the insulation without enough pressure. The more you do this step, the easier it becomes.
Step 4 – Remove the Insulation Cleanly
Twist the stripper slightly and take it away from the wire. The insulation on the automatic wire stripper and crimping tool should be removable in one piece. If it keeps getting stuck, try to check your tool or try again with a little more pressure. The copper should be shiny and smooth after stripping the wire.
Step 5 – Inspect the Exposed Wire
Check the wire stripping and crimping tool for automotive wiring. The copper should be free from cuts and nicks. If damage is seen, snip off the end and try again. A good wire stripping job leaves the wire robust enough for crimping and safe connections. The same methods can be applied to most wires. Always check your tool. Work slowly.
How to Use a Crimping Tool for Beginners
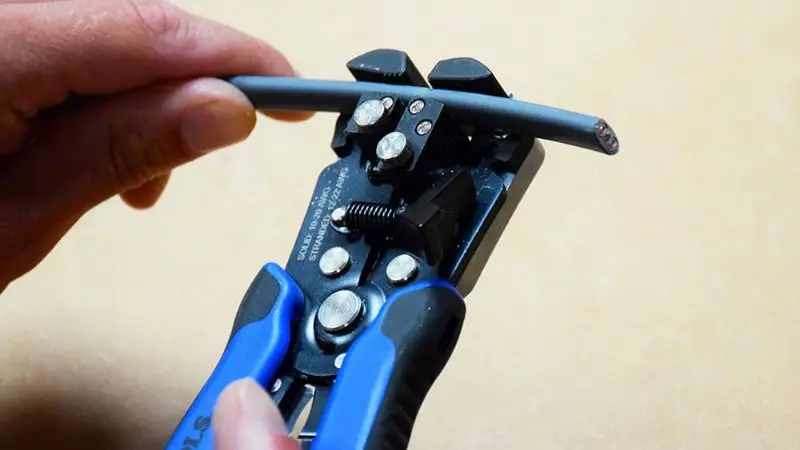
Learning how to use a handheld crimper is simple and easy to understand when broken down into its component bits. With the best crimping tool for electrical wiring at home, you have at your disposal, you can make solid crimp connections. I encourage you to join me as I go through the steps of the surgery.
Step 1 – Select the Correct Connector
You will need to choose the right connector for your wires. See what size and type of wire you have. Choose the correct die or jaw for your crimping tool to ensure a tight fit from the start. Some connections are better suited to solid cables than to stranded wires, and vice versa.
Step 2 – Insert the Stripped Wire into the Connector
When the wire has been removed from its original shape, it should be placed into the crimp connection. Push it in until you see the automatic wire stripper and crimping tool within the connector. When using a handheld crimper, the wire must be tight. Unnecessary are cables that are not secure.
Step 3 – Place the Connector into the Crimping Tool
Using the crimping tool, place the connector or terminal in the correct location. You have to ensure that the connector is lined up right with the best die or jaw. You need to make sure the connector doesn’t move when using a hand crimper. This method can be used to avoid crooked crimp connections.
Step 4 – Crimp the Connector Firmly
To crimp the handles, keep squeezing them. To the point when you sense resistance, press down. If you are using a handheld crimper, apply consistent pressure to the handles to crimp. The connector must form a firm grasp on the wire. If you put too much effort into it, you could damage the connector.
Step 5 – Test the Wire Connection
Gently tug on the best wire stripping and crimping tool for electricians. You’ve done a good job if the connector stays where it is. Check for any gaps or improperly crimped wires. If any faults are found, it is recommended to redo the crimp. If you have enough crimp connections, your wires will be safe and secure.
Common Wire Stripping and Crimping Mistakes to Avoid
You want your project to be successful without problems, yet mistakes are still likely to occur. This is something you should be prepared for. I would like to first look at some of the most common mistakes people make, then explore ways you can avoid them.
Using the Wrong Wire Gauge Slot
If you mistakenly use the wrong slot on the tool, you can cut into the copper or leave insulation on the wires. Either of these may happen. The best crimping tool for electrical wiring at home, the first thing you should do while you are stripping is check the gauge. Most have marks you can identify. You have to make sure the slot is in the right place with the cables you have.
Damaging the Copper Wire
But if you press too hard, you could damage the copper inside the wires. This creates problems directly in the relationship. You may try practicing on scrap metal wires. To begin with, after the copper is stripped, it’s crucial to protect it to keep its sheen and smoothness.
Over-Crimping or Under-Crimping Connectors
How to use a wire stripping and crimping tool? You need some force to crimp things properly. If you press too hard on the connector, it will be crushed. If you don’t apply enough pressure to the wires, they can come loose. An excellent approach to test the quality of your crimping is to pull on the wires lightly. A strong crimp provides a good grasp on the object.
Ignoring Loose Connections
Unstuck cables cause trouble for the system. They have the potential to produce weak signals or even sparks due to their presence. After you finish crimping your connections, inspect them. If the wires move, the crimp will need to be reapplied.
Skipping Safety Precautions
There is a possibility that you will be able to avoid the need to wear gloves or glasses. Make every effort to avoid doing that. Due to flying debris and sharp wires, there is a risk of injury. Taking precautions to protect your hands and eyes is an essential component of safety.
Best Applications for Wire Stripping and Crimping Tools
Automotive Wiring Repairs
A wire stripping and crimping tool can help you fix the electrical system in your car. If you need to replace a cable or connect new lights, this is the tool you turn to. Under the hood, you can have a loose cable. Strip the insulation, slip on a connector over the wire, and crimp it. The automobile shakes, your repairs stand strong.
Home Electrical DIY Projects
If you love doing DIY projects, you will find this automatic wire stripper and crimping tool very useful. You can add outlets, fix a wire, or add lights. Strip the cable, attach a connector, and crimp it. You Create Lasting Secure Connections. You don’t have to call an electrician for easy tasks.
Electronics and Hobby Projects
Using this wire stripping and crimping tool for automotive wiring, you can construct models, robots, and other devices. You need a cable connection to accomplish any project. Strip the cable. Crimp the wires in place. This is how you connect wires to motors or sensors. Your electronics can operate without the need for filthy soldering. Your hobby projects are very well polished and professional, and I’m pleased with them.
Conclusion
That’s all there is to it. This is a step-by-step guide on wire stripping and crimping tool to safely and correctly handle electricity. Start with faulty wiring. Use trash wires to master the skills without any tension and practice to build your confidence. Always double-check your links to ensure they’re safe and secure before using them in a project. Start with simple jobs and move to more complicated ones as you gain experience. You may always come back to this article for a fast refresher or further guidance while you’re working with a wire stripper crimper.
FAQ
How do you know which wire gauge to use with your tool?
You can check the markings on your wire or use a wire gauge tool. Most wire strippers have clear slots for each size.
Can you reuse connectors after crimping?
You should not reuse crimped connectors. They lose strength after removal. Always use a new connector for safe connections.
What if your wire keeps slipping out of the connector?
- Try crimping again with steady pressure.
- Make sure you insert the wire fully.
- Test by gently pulling the wire after crimping.