When working on a water well pump, it is imperative to connect the electrical components properly. If you handle water and electricity incorrectly, you risk losing your life. Just before you get started, take a moment to consider the resources and tools at your disposal. Wearing protective clothing is a great way to shield oneself from potential injury. Make sure you document each stage of the installation process if you are working on something. It is possible that taking some straightforward actions will be of considerable aid in minimizing risks and avoiding electrical hazards.
In this article, we will talk about the electrical safety precautions you should follow when working on a water well pump electrical wiring. You will learn how to handle electrical connections safely, use proper protective equipment, and reduce the risk of electrical hazards during installation, maintenance, or repairs.
- Understanding Water Well Pump Electrical Wiring
- Step-by-Step Water Well Pump Wiring Installation Guide
- Water Well Pump Wiring Diagrams Explained
- Essential Safety Tips for Electrical Wiring of Water Well Pumps
- Troubleshooting Common Water Well Pump Wiring Problems
- Maintenance Tips for Long-Term Electrical Safety
Understanding Water Well Pump Electrical Wiring
Components of a Typical Well Pump Wiring Setup
@dwscustoms deep well pump 115v 1hp vevor #vevor #deepwellpump #1hp #blackfriday #dwscustoms
♬ original sound – King Scoot
How to wire a water well pump? Before you start working with a well pump, you need to know its essential sections. In the electrical wiring system for the water well pump, each component has a job. Here Is What You Will Find Inside:
- Pump Motor: This system component pumps water from the well up into your residence.
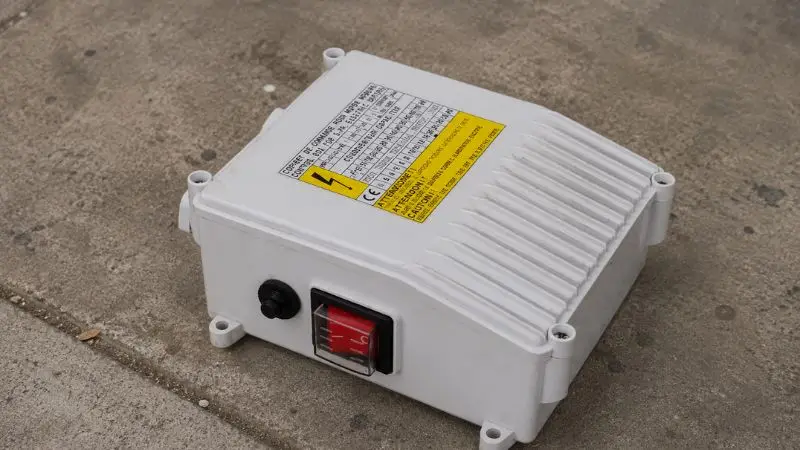
- Control Box: This is the box you will use to control power and protect the pump from damage.
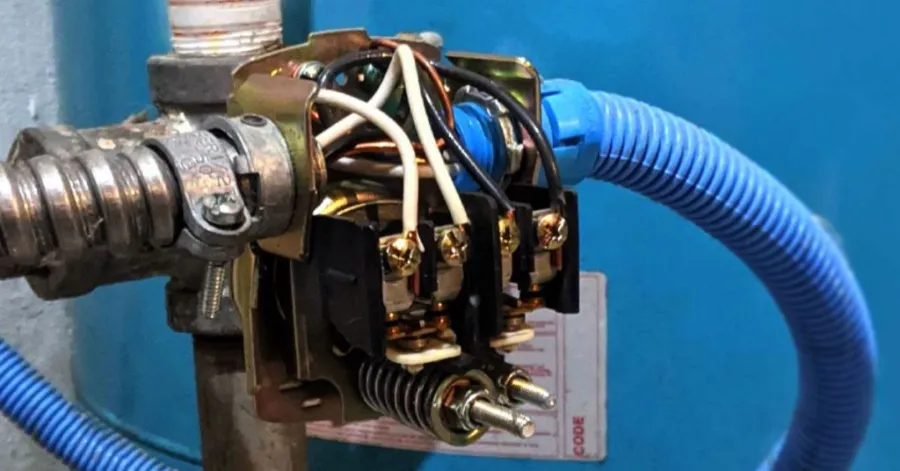
- Pressure Switch: This switch will turn the pump on or off based on water pressure.
- Power Source: You connect the system to your main electrical panel.
- Wiring & Cables: They provide electricity to the pump and other components.
- Grounding wire: This wire protects you from electrocution.
In most well pump systems, you can see how these elements join. All parts must function together to carry water safely and steadily.
Types of Water Well Pumps and Their Wiring Requirements
There are several types of well pumps. All types have specific wiring needs. The two most prevalent types are jet pumps and deep-well pumps. Jet pumps are best used in shallow wells. They tend to have fewer connections and an easy setup. Deep-hole pumps require additional connections and possibly a control box. Refer to the wiring diagram for your pump type.
Mistakes with the water well pump electrical wiring diagram will be avoided with proper steps—wire to match the pump type for safe operation.
Step-by-Step Water Well Pump Wiring Installation Guide
Preparing Tools and Safety Equipment
Tools You Need Before Working on Water Well Pump Electrical Wiring: Collect screwdrivers, wire strippers, pliers, and a voltage tester. Use safety goggles and gloves. Be sure to use insulated tools. Look around your work environment for any hazards. If you work in a dark environment, have a flashlight available.
Turning Off Power and Ensuring Electrical Safety
How to connect a pressure switch to a well pump? You need to cut off the main electricity at the breaker box. Test with a voltage tester to ensure there is no power to the well pump. Lock the breaker panel if you can. Tell others not to switch the power back on. Never touch wires until you make sure electricity is off.
Connecting the Power Supply to the Control Box
Connect power supply wires to the control box. Match the colors of the 2 wire submersible well pump wiring diagram to the terminals. Tighten all connections. Make sure that the wires do not touch each other. The control box controls the electricity to the well pump. Be sure to double-check your connections for safety.
Wiring the Pressure Switch Correctly
The pressure switch is what turns the deep well pump electrical wiring instructions on and off. Connect the wires from the control box to the pressure switch. Follow the diagram for your pump model. Secure the wires so they will not come loose. To test the pressure switch, briefly turn the power on. The water pressure should cause the switch to click.
Connecting the Pump Motor Leads
Connect the pump motor leads to the proper connections in the control box. The connections are secured using wire nuts. These leads supply power to the pump motor. Make sure the cables are snug and not on display. This helps the well pump to work properly.
Grounding the System Properly
With the ground, you are not shocked by electricity. How to wire a water well pump? Connect the grounding wire to the ground terminal inside the control box. The other end is fastened to a metal rod driven into the earth. Make sure the ground wire is tight. Proper grounding is a key part of safe electrical wiring for a water well pump.
Water Well Pump Wiring Diagrams Explained
Single-Phase Pump Wiring Diagram Overview
Single-phase wiring is common in homes and on small farms. Four wires are used in this configuration: two for power and one for ground. The control box and the pressure switch are connected to the power wires that you have connected. The ground wire prevents shocks.
Here is a water well pump electrical wiring diagram for a single-phase well pump:
Main Power —> Pressure Switch —> Control Box —> Well Pump
| | | |
Ground Ground Ground Ground
Tip: Always match the wire colors to the diagram. This helps you avoid mistakes.
You should check your pump’s manual for the exact diagram. Each brand may use different wire colors.
Three-Phase Pump Wiring Diagram Breakdown
For larger pumps or commercial use, 3 wire submersible well pump wiring diagram is most effective. There is one ground wire and three power cables that you use. This configuration delivers greater power and supports the pump’s smooth operation.
A basic three-phase wiring diagram looks like this:
| Wire | Connection Point |
| L1 | Control Box Terminal |
| L2 | Control Box Terminal |
| L3 | Control Box Terminal |
| GND | Ground Rod |
You connect each power wire (L1, L2, L3) to the control box. The ground wire goes to a ground rod. You must follow the diagram for your pump model.
How to Read and Interpret Wiring Symbols
You will see symbols on wiring diagrams. These symbols show you where to connect each wire. Here are some common symbols:
- Lines: Wires
- Dots: Connection points
- Squares: Switches or boxes
- Zigzag lines: Ground
You should always follow 2 wire submersible well pump wiring diagram. This keeps your well pump safe and working well.
Essential Safety Tips for Electrical Wiring of Water Well Pumps
Always Turn Off Main Power Before Starting Work
You must always turn off the main power before you touch any well pump control box wiring diagram. Go to your breaker box and switch off the power for the well pump. Use a voltage tester to confirm that no voltage is present on the wires. This step keeps you safe from electric shock. Remind everyone in your home not to turn the power back on while you work.
Use Properly Rated Wires and Circuit Breakers
You need to use wires and circuit breakers that match your well pump’s power requirements. How to connect a pressure switch to a well pump? Check the pump’s manual for the correct wire size and breaker rating. Using the wrong size can cause wires to overheat or even start a fire. Always choose wires that can handle the load of the pump and the pressure switch.
Table: Example Wire Sizes for Well Pumps
| Pump Horsepower | Wire Gauge (AWG) | Breaker Size (Amps) |
| 1/2 HP | 14 | 15 |
| 1 HP | 12 | 20 |
| 2 HP | 10 | 25 |
Importance of Ground Fault Protection (GFCI)
A ground fault circuit interrupter, or GFCI, can help protect you from potentially hazardous shocks. You need to ensure your water well pump’s electrical cable has a GFCI outlet or breaker placed on it stat. If a fault is detected, this device will cut the power. When water is present, GFCI protection is essential for the pressure switch.
Avoiding Water and Electrical Hazards
Keep all of the electrical components dry. Neither water nor electricity may be combined. See to it that the control box, wiring, and pressure switch are not affected by leaks or puddles. If you operate outdoors, make sure to use waterproof covers and cartons. Ensure that your hands are dry before touching any wires.
When to Call a Licensed Electrician
Some jobs require a professional. If you are unsure about wiring a 240 volt well pump, call a certified electrician. If after checking your wiring you detect sparks or damaged wires, or if the pressure switch doesn’t work, you should also contact. A professional can solve problems and keep your well pump secure.
Troubleshooting Common Water Well Pump Wiring Problems
Pump Not Starting Issues
When your well pump does not come on, there are several things you should check first. Ensure the power switch is on. Test the control box for electricity with a voltage tester. Check for loose 3 wire submersible well pump wiring diagram or blown fuses. Sometimes a tripped breaker causes the pump to stop working. You may also want to check the pressure switch. Dirt or corrosion can cause contacts to fail. If necessary, wipe clean with a dry towel.
Intermittent Power Supply Failures
If your deep well pump electrical wiring instructions work some of the time, but not all of the time, you may have a loose connection. Check all of the wire nuts and terminals. Good. Tighten a loose screw. Check the wires for evidence of wear or damage. Rodents will gnaw on the cables, causing problems. Replace broken wires immediately. You should also check the control box for charred markings or unusual odors.
Tripped Breakers and Overheating Wires
A breaker that trips often means trouble. The pump may draw too much current. Check the wire size and breaker rating. Use the table in the safety section as a guide. Overheating wires feel warm or look discolored. Replace them if you see damage. Do not use the wiring a 240 volt well pump until you fix the problem.
Low Water Pressure Due to Wiring Faults
If the pump is not powerful enough, you will have poor water pressure. Check all 2 wire submersible well pump wiring diagram from the control box to the pump. Loose or broken cables can lead to voltage dips. Tighten and clean all connections. Replace the faulty pressure switch. Proper wiring will ensure your well pump delivers water at a consistent pressure.
Maintenance Tips for Long-Term Electrical Safety
Regular Inspection of Wiring Connections
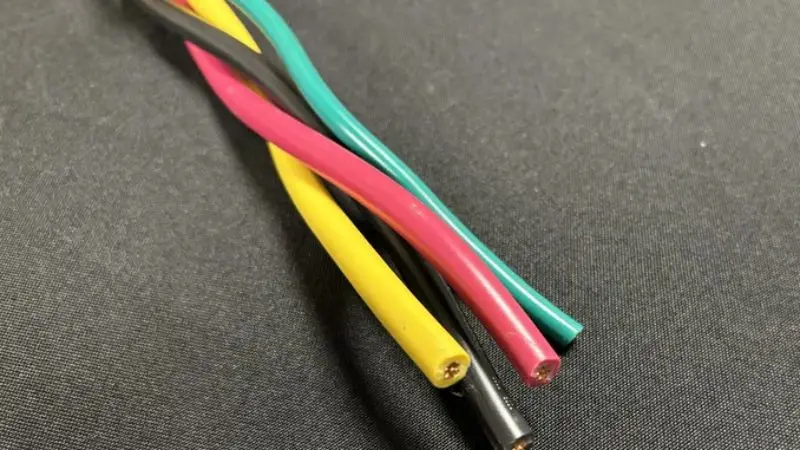
How to connect a pressure switch to a well pump? Ensure all electrical connections are inspected at least twice a year. Verify that there are no loose screws, frayed wires, or other evidence of wear and tear. Tighten any slack connections as quickly as feasible. Any broken wires must be replaced before the power supply is turned on. If you need to illuminate a dark place, you can use a flashlight—a simple way to help you catch problems early.
Checking Control Box and Switch Functionality
Open the control box and check for dust, insects, or dampness. If your control box has a test button, press it. Turn the pressure switch and listen for a click. If you hear weird sounds or notice burn scars, you may need to replace the part. Always switch off the electricity before opening the box.
Preventing Corrosion and Moisture Damage
Water can cause big problems for electrical systems. Keep the control box and switches dry. Use weatherproof covers if your system sits outside. Wipe away any moisture you find. If you use a submersible pump, check the seals and cables for cracks. Good seals keep water out and protect your wiring.
Scheduling Routine Professional Inspections
You should have a licensed electrician come in and do a complete checkup over the course of a couple of years. A specialist can test the system with the right tests and equipment. They can show you things that you might not see. This method will ensure your well pump control box wiring diagram continues to operate safely for many years.
Conclusion
If you want to get started, you need to give some thought to safety. Make sure each connection is correct by checking again. For your water well pump electrical wiring, make sure to use the appropriate materials. Always obey the electrical codes that are in effect in your region. Examine the wiring diagrams for each step that you complete. Get in touch with a qualified electrician for assistance if you are unsure of what steps to take. Furthermore, if you are installing a submersible pump, this is a crucial consideration. When you work carefully, accidents are avoided, and your water is protected.
FAQ
How do you know which wire goes where when wiring a well pump?
You check the pump’s manual and wiring diagram. Match wire colors to the diagram. Use a voltage tester to confirm connections. If you feel unsure, ask a licensed electrician for help.
What safety gear should you wear when working with well pump wiring?
You wear insulated gloves and safety goggles. These protect you from electric shock and flying debris. Always use tools with insulated handles. Keep your workspace dry and clear.
Can you install a submersible pump without a control box?
Most submersible pump models need a control box. The control box helps manage power and protects the pump. Always follow the manufacturer’s instructions for your specific pump.
Why does your well pump keep tripping the breaker?
Your pump may draw too much current or have a wiring problem. Check the wire size and breaker rating. Inspect for loose or damaged wires. Replace faulty parts before restarting the system.