
If you’ve got your hands on a VEVOR Button Maker Machine, you’re in for a treat. This manual is your trusty guide to getting the most out of this fantastic tool. Whether you’re planning to whip up some unique buttons for a special event, or you’re diving into a new hobby, we’ve got you covered. Inside, you’ll find everything from a breakdown of the machine’s parts to easy-to-follow installation steps, and even some handy troubleshooting tips for those rare hiccups.
The VEVOR Button Maker isn’t just another tool; it’s your gateway to creating something truly unique, and this manual is here to ensure your journey is as smooth and enjoyable as possible. Let’s get started!
Table of contents
Safety Reminder
- This badge machine is only applied for the intended purpose. Don’t apply in other applications that exceed safety considerations.
- Children cannot operate this product unless accompanied by an adult.
- Pay attention to safety during operation, and avoid crushing fingers
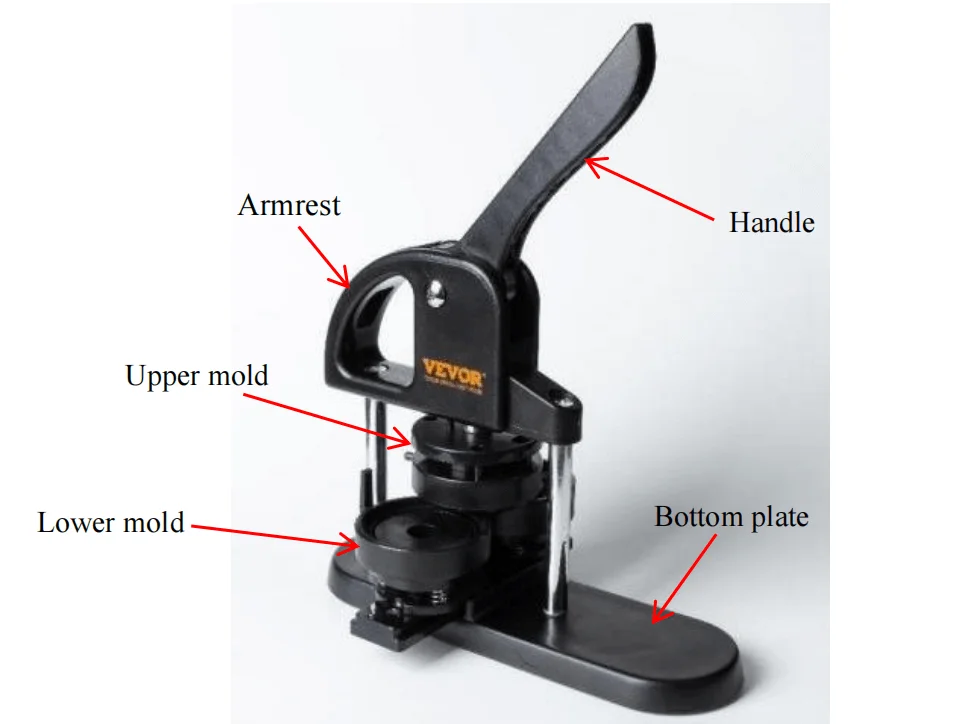
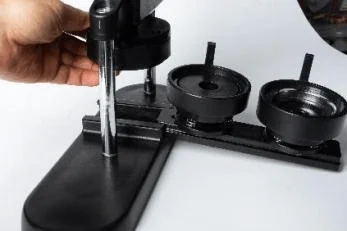
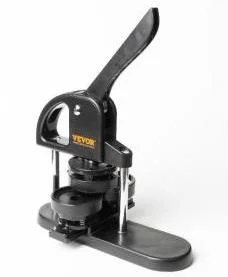
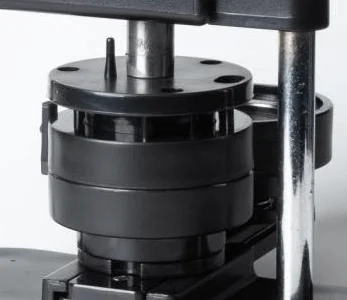
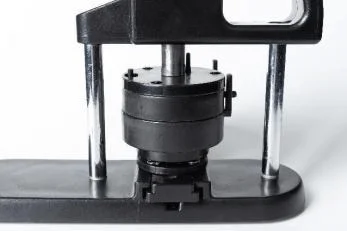
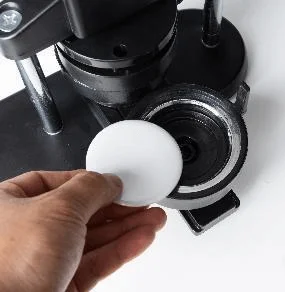
Components

Installation Steps
- Install the up mold on the machine, mold side pin align to back and upward push, the magnetism automatically absorbed.
- Make up mold three holes aligning and lift up, down mold align to sliding rail groove and push to the middle, loosen and put down the up mold.
- Put the pin on the side of the slide rail.
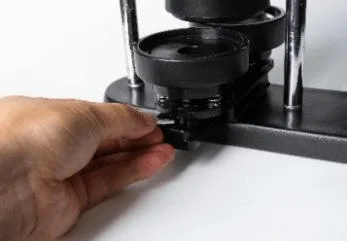
- Installation finished and able to start manufacture.
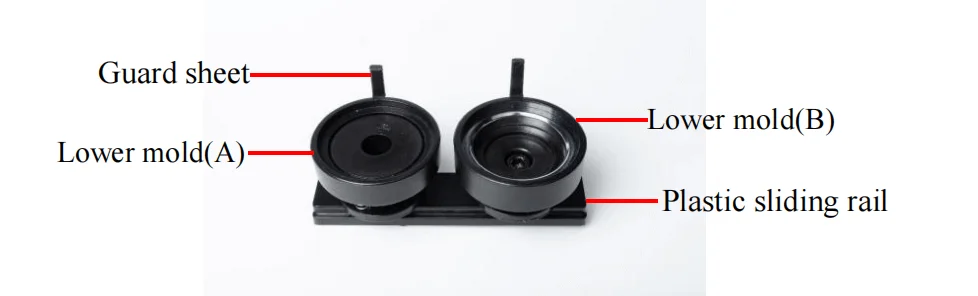
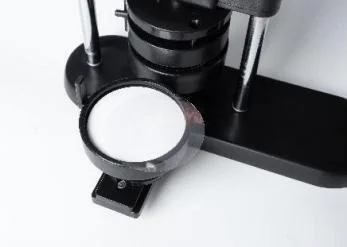
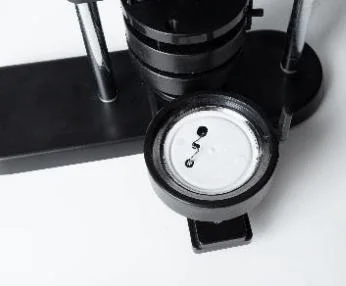
- Put “Tin up cover”–” Paper” (pattern levelly placed)–“Transparent plastic film” into “Lower mold(A)” in sequence, then push the lower mold till up and down mold aligned.
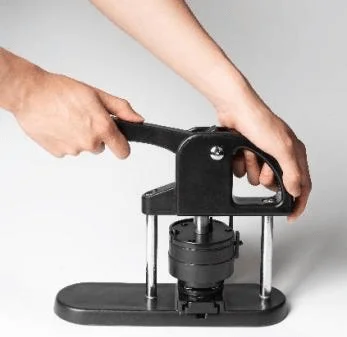
- Use one hand to hold the machine body first, then stabilize the machine body by handle, another hand presses the machine handle till down press to be bottom. (NOTE: this time down pressed mold hinge is open status.)
NOTE: Up mold hing is open status.
- Put the “Back plate” into “Lower mold(B)”. (NOTE: Brooch should be level and not raised. Adjust the level as indicated by the top triangle.)
- Push the lower mold to the bottom from left to right till the up and down mold is aligned.
- Hand hold the machine body, right hand down press the handle till up and down mold merged to bottom.
NOTE: Now the up mold hinge is close status, pin pass through the hole.
- Finish.
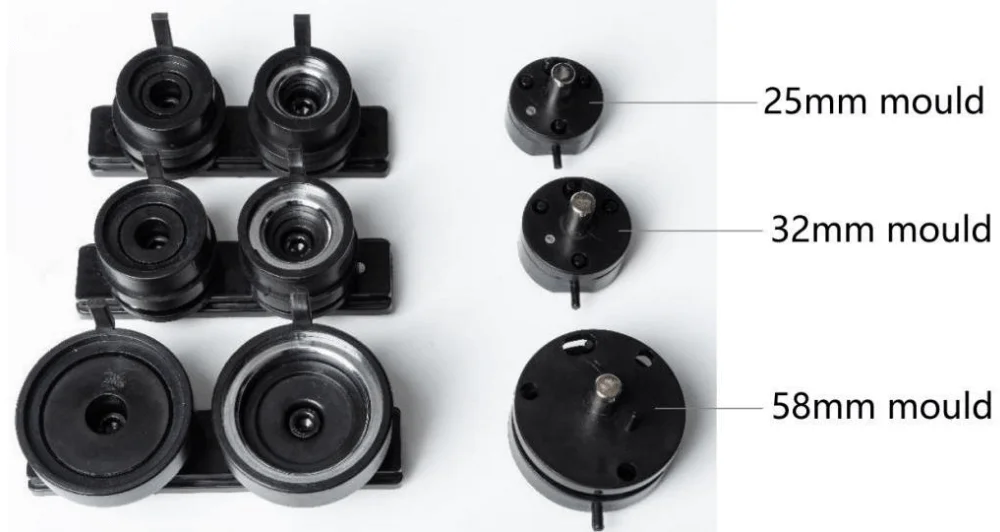
NOTE: If use metal backplate, then the “Lower mold(B)” need place the plastic washer. (Metal backplate thinner, only 58 mm need add washer, 25 mm, and 32 mm needn’t it.)

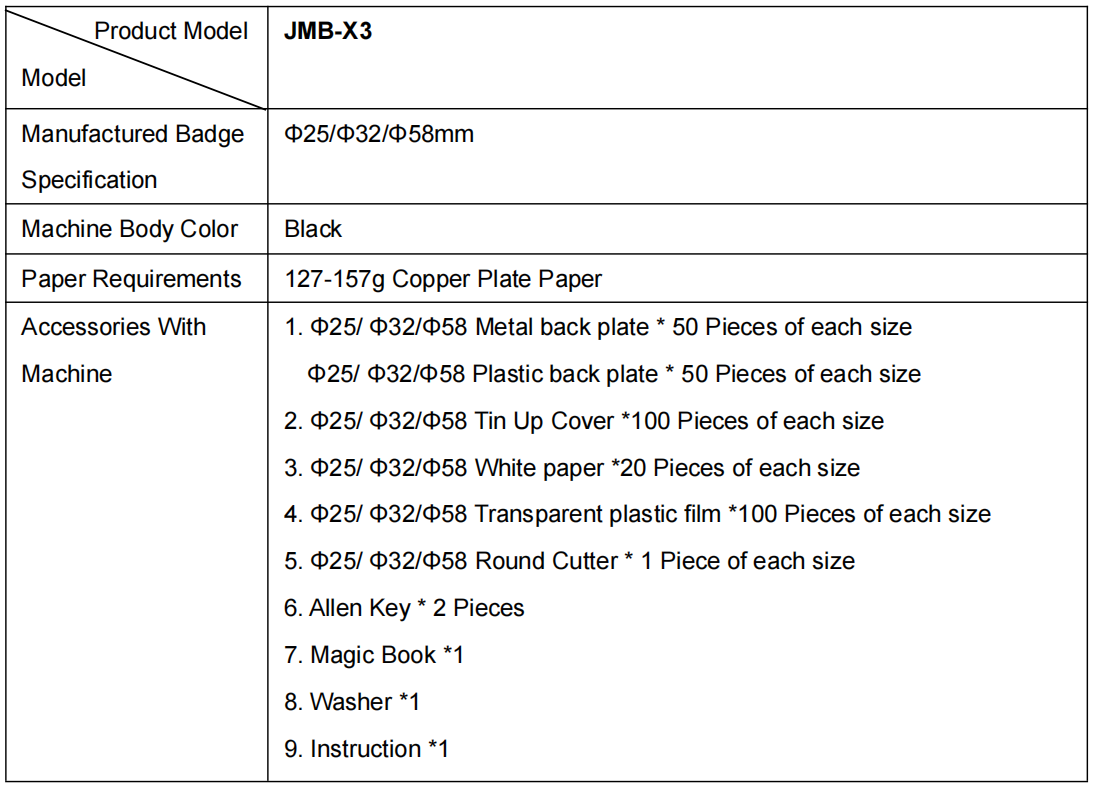
Model and Parameter
Failure and Troubleshooting
| Failure Appearance | Possible Reasons | Troubleshooting |
| First time downward press iron cover and not absorbed to up mold | 1. Unsuitable operating method. 2. Too much lubricating oil in the up mold. |
1. First-time downward press-up mold hinge is in a separate state. 2. Use clean cloth or tissue completely wipe it if found too much lubricating oil on the up mold. 3. The up and down mold must be on the same vertical line when closing. |
| Second downward press part not wrapped in | 1. Unsuitable operating method. 2. Unsuitable paper thickness. 3. Up mold screws loosen. |
1. The up and down mold must be on the same vertical line when closing 2. Use the stipulated thickness paper. 3. Place the up mold on the machine body, the use the complimentary Allen key to fix the screws in the up mold internal hole center. |
| Not tightly press the badge, pressed in but not firm | 1. The downward press is not in place, not press to the bottom. 2. Paper is thinner. 3. (25 mm) Configured metal back consumables, do not place the washer |
1. Need press to the bottom when downward pressing. 2. Change to use a slightly thicker paper. 3. Right side mold place 2 mm thickness washer when using the metal back consumables. |
| Up mold unable to lift up after pressing manufacture, blocked | 1. Up and down mold position deviated. 2. The paper is incorrectly cut round or blocked by a foreign object. |
Use a sharp tool (such as a straight screwdriver) to align to the middle merge position clearance which is between up and down mold, and pry open with the object like a hammer (Attention: Just tap it, generally, it will not be too tightened) |
FAQs about VEVOR Button Maker Machine
Q1: How do I set up my VEVOR Button Maker Machine for the first time?
A: Follow the installation steps in the manual, ensuring each component is securely fitted. Start by assembling the base, handle, and die set according to the diagrams provided.
Q2: What materials can I use with the VEVOR Button Maker?
A: The machine is compatible with a variety of materials, including paper, fabric, and light metal. For best results, use materials recommended in the manual.
Q3: How do I troubleshoot common issues with my button maker?
A: Refer to the troubleshooting section for solutions to common problems like jamming or misalignment. Regular maintenance and proper usage are key to avoiding these issues.
Q4: Can I create different sizes of buttons with this machine?
A: Yes, the VEVOR Button Maker is designed to accommodate various sizes. Ensure you have the correct die set for your desired button size.
Q5: Where can I find replacement parts for my machine?
A: Replacement parts are available through VEVOR’s official website or authorized dealers. Always use genuine parts for optimal performance.
Final Words
As you conclude this manual, you’re now equipped with the knowledge to expertly use your VEVOR Button Maker Machine. From understanding its components to mastering installation and troubleshooting, you’re ready to tackle any button-making project. Remember, this manual is your constant companion in your creative journey. For more information, and inspiration, or to explore our range of products, visit the VEVOR website. Embrace your creativity and start making unique buttons today with VEVOR – where quality meets craftsmanship.


