
Vacuum sealing is about two things—vacuuming and sealing. If your vacuum sealer is not performing either of these two basic functions effectively, the very essence of its purpose is compromised—vacuum sealing might not be able to preserve food effectively.
For instance, if your vacuum sealer is not sealing effectively, it will leave an opening in the seal, causing the loss of the vacuum and eventually leading to dehydration of the stored item and causing freezer burn. If your vacuum sealer won’t seal, it’s a call to action.
In this comprehensive guide, we are going to list the potential reasons for a vacuum sealer not sealing and provide a step-by-step troubleshooting guide and maintenance tips. We will also share a reliable alternative in case your vacuum sealer is beyond repair.
So, let’s get started!
Table of contents
Why is Your Vacuum Sealer Not Sealing?
A vacuum sealer that is not sealing properly can be a source of frustration and wasted food. For effective troubleshooting, you must understand the potential reasons behind sealing issues.
1. Worn-out sealing gaskets
The sealing gaskets, also known as sealing rings, play a critical role in creating a tight seal around the bag after vacuuming. Over time, these gaskets can become worn or damaged, leading to leaks and preventing proper sealing.
2. Improper bag placement
The placement of the bag within the vacuum sealer is essential for successful sealing. For instance, if the bag is not laid flat across the sealing bar, wrinkles or folds can form, preventing proper sealing. A vulnerable opening in the seal would allow air to leak into the bag, robbing it of the vacuum and spoiling the food.
Similarly, if the bag is too close to the sealing bar, the heat from the bar can melt or damage the bag, creating a hole or weak spot in the seal. Not properly centering the bag on the sealing bar may also result in a weak spot in the seal. An overfilled bag may also result in bad sealing.
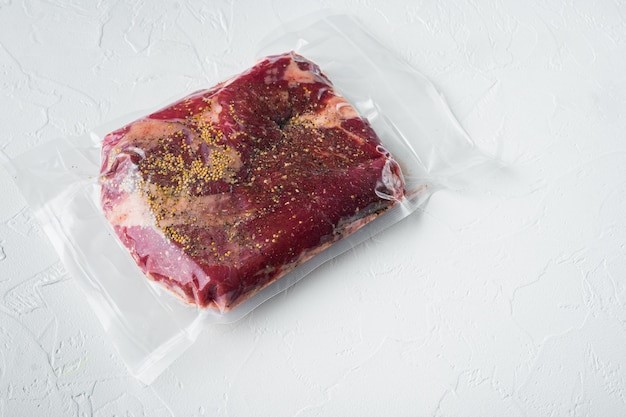
3. Moisture on the bag or inside the chamber
Moisture can hinder the sealing process by acting as a barrier between the bag and the seal bar, preventing the bag from melting and sealing properly. This will result in a weak seal, vulnerable to breach. When moisture is present between the two layers of the bag, there is a chance that some of it is caught within the seal, which later on freezing will expand, increasing the risk of a crack in the seal and making an opening for the air to leak in.
4. Issues with the sealing bar
The sealing bar, responsible for heating and sealing the bag material, can also be a reason why your vacuum sealer won’t seal. If the sealing bar is not heating up sufficiently or if there are inconsistencies in its temperature, it may not create a strong enough seal.
On the other hand, an overheated sealing bar may also lead to ineffective sealing. The sealing bar uses heat to melt the plastic in the sealing ends of your bag and fuse them. In case of excessive heat, there will be excessive melting, which could result in openings in the seal. On top of creating an imperfect sealing, overheating could also damage your vacuum sealer.
5. Vacuum pump malfunction
The vacuum pump is responsible for extracting air from the bag, creating the vacuum that preserves the food. Besides something wrong with the vacuum pump of the sealer, there may be some maintenance issues, such as a full drip tray or an obstruction that is preventing the vacuum pump from effectively removing air from the sealing bag. If the vacuum pump is not vacuuming properly, it may not remove enough air, resulting in an incomplete seal.
6. Electrical power issues
While it may sound funny, oftentimes, the only problem with a vacuum sealer not sealing and vacuuming is that it is not receiving any power—either the power outlet is not working, or the power cord is damaged. Sometimes, it is the surge protector that is problematic and does not let power pass from the outlet to the vacuum sealer.
By learning the potential reasons underlying a vacuum sealer not sealing, you can effectively diagnose and resolve sealing issues with your vacuum sealer.
Troubleshooting a Vacuum Sealer
A vacuum sealer not sealing properly could be frustrating. But if you can identify the reason behind the malfunctioning, you can go ahead and rectify it and get your vacuum sealer back to normal—sealing perfectly. Depending on the underlying causes, try the following fixes to get your vacuum sealer back to work:
1. Inspect the Sealing Gaskets
Inspect the gaskets, and if you notice cracks, tears, or excessive wear, replace them with new ones. When going to get replacement gaskets, consider taking the original ones with you to show as a reference. After replacing, double-check if the gaskets are properly seated in the sealing grooves.
If the gaskets seem alright, but there is some debris buildup, simply wiping the gaskets clean would get your vacuum sealer back to sealing effectively.
2. Verify Proper Bag Placement
If your vacuum sealer is not sealing properly, check if the bag is properly placed. Ensure that the bag is properly aligned and positioned within the sealing chamber, leaving enough space for the sealing bar to make contact with the bag’s edge. Avoid overfilling the bag, as this can interfere with the sealing process. Smooth out any wrinkles or creases in the bag to create a flat surface for perfect sealing.
3. Inspect the Sealing Bar
If your vacuum sealer won’t seal, turn off the vacuum sealer, unplug it from the power source, allow it to cool down, and then closely inspect the sealing bar for any debris, residue buildup, or damage. Clean it up to get rid of the debris, and if it is damaged, consider replacing it with a new sealing bar. Contact the manufacturer to check if they sell replacements.
4. Get Rid of Moisture
Moisture is the arch-nemesis of perfect sealing. Whether it is inside the chamber, on, or in the sealing bag near the sealing ends, it can hinder your vacuum sealer from creating effective seals. So, before initiating the vacuum sealing cycle, wipe the sealing bar and sealing area dry. Also, make sure that there is no moisture on the sealing ends of the sealing bag or between the two layers of the bag. And if the inside of the chamber feels damp, wipe it dry as well.
When vacuum sealing fish or other moist products, consider patting them dry and switching the vacuum sealer to moist mode.
5. Assess the Vacuum Pump
If you suspect a vacuum pump issue—it is making noises and vibrations—consult the manufacturer’s instructions for troubleshooting or seek the assistance of a professional technician. But before going to a technician, you may also want to check if there are any obstructions or debris that could be hindering the vacuum pump’s operation.
6. Verify Electrical Connections
Ensure that the vacuum sealer is plugged into a working outlet and the power cord is securely connected. Check for any damage to the power cord or outlet. If you have a surge protector, try plugging the vacuum sealer directly into a wall outlet to rule out any issues with the surge protector.
Need a New Vacuum Sealer? Opt for This Efficient and Versatile Choice!
If your vacuum sealer won’t seal and you think it is beyond repair or it’s time that you upgrade to a new, more reliable vacuum sealer, check out VEVOR’s vacuum sealer collection. VEVOR is a trusted brand recognized for its durable tools and appliances, offering quality products at half the cost compared to other brands.
Whether you need a chamber vacuum sealer or an external vacuum sealer, we have got you covered.
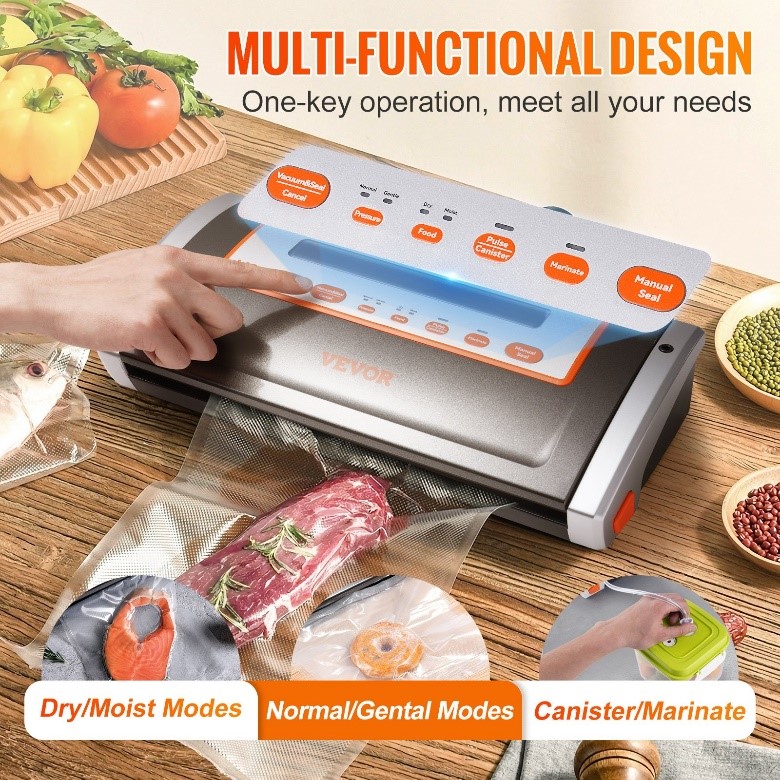
If you are looking for an effective and versatile external vacuum sealer, you should consider this 80Kpa 130W Powerful, Dry, and Moist Food Vacuum Sealer. Besides vacuum sealing both dry and moist foods, it also works for marinating and canister and also features a normal and gentle mode for vacuum sealing dealing with food items.
Maintenance Tips for Extending Your Vacuum Sealer’s Life
Regular maintenance of your vacuum sealer is essential to ensure its longevity and optimal performance.
Here are some practical maintenance tips:
- Clean the sealing bar and gaskets regularly: After each use, wipe down the sealing bar with a soft, damp cloth to remove any debris or residue.
- Regular inspection: Inspect your vacuum sealer regularly for any signs of wear and tear. Pay close attention to the gaskets and the sealing bar.
- Never overfill bags: Overfilled bags lead to weak seals, making them vulnerable to breach.
- Use compatible sealer bags: Using high-quality vacuum sealer bags specifically designed for your vacuum sealer will ensure a strong seal.
- Store the vacuum sealer properly: When not in use, store the vacuum sealer in a cool, dry place, away from direct sunlight and heat sources.
- Follow the manufacturer’s instructions: Always refer to the manufacturer’s manual for detailed guidance on caring for your appliance and troubleshooting.
Conclusion
A vacuum sealer that is not sealing properly can lead to not only frustration but also food waste. But if you know how to troubleshoot a vacuum sealer that won’t seal, you can easily get it working normally without any frustration or food wastage. Consider the potential reasons underlying a vacuum sealer not sealing discussed above to identify what is the problem with your vacuum sealer. Once the problem is identified, apply the relevant fixes provided in the article to get your vacuum sealer to create perfect seals.
If troubleshooting is not working, consider bidding farewell to your old companion and moving on with a new, upgraded vacuum sealer from a reputed brand.


