
If you are wondering whether an orbital sander for walls can make your walls look professional, the answer is yes. You can make your walls look professional with an orbital sander. But it’s important to be patient and use the tool correctly. The right sandpaper for a random orbital can transform the way you prepare surfaces. Electric orbital sanders make it easier to sand and work faster.
Follow this step-by-step guide to achieve professional results. Are you ready for better results with your next sanding project?
Can You Use an Orbital Sander for Walls?
Yes, you can use an orbital sander for walls; it will make your sanding process easier and more efficient. Many beginners ask is orbital sander good for drywall. When you use it corecctly it works well.
When an Orbital Sander Is Ideal for Wall Sanding
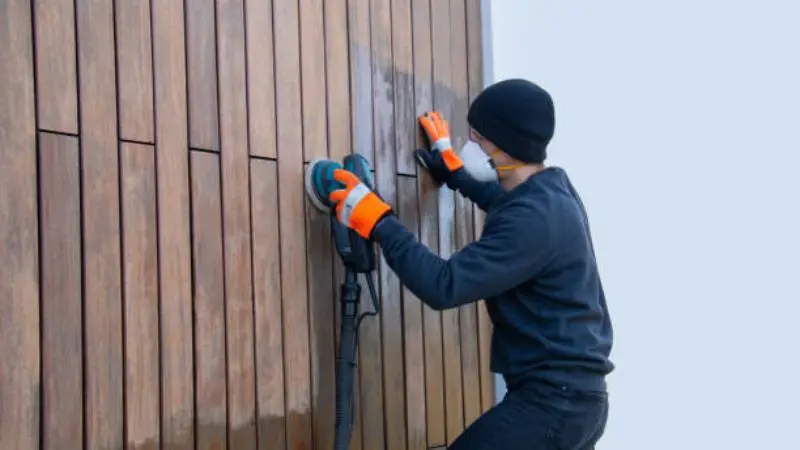
You might wonder if you can use an orbital sander for walls during your next project. Yes, you can use an orbital sander to make surface preparation easier. An orbital sander is ideal for large, flat drywall or plaster surfaces. You can remove old paint or minor imperfections, as well as smooth out the joint compound. You can avoid swirl marks by using a random orbital sander.
This tool is useful in the following situations:
- Sand a freshly finished drywall using an orbital sander for walls before painting to get a smooth and professinal results.
- You need to remove old or light textures from the wall.
- If you have a large area to sand and wish to do so faster than using manual sanding equipment, this is the tool for you.
Tip: Start with a medium-grit sandpaper and then switch to a finer-grit sandpaper for the last pass. You can achieve a smooth surface without damaging the wall.
Situations Where You Should Avoid Using an Orbital Sander
Not all walls are suitable for the use of an orbital sander. You should avoid using the orbital sander if your wall is heavily textured, has deep cracks, or has loose plaster. You could make the damage worse, or create uneven patches. If you want to sand small patches or corners, use hand sanding equipment.
Before you begin, consider the following:
- Avoid using orbital sanders on delicate surfaces such as wallpaper or thin veneer.
- Avoid areas that contain nails, screws, or other metal hardware.
- Use special safety measures or contact a professional if your wall is painted with lead.
If you want to ensure that your sanding project goes smoothly, then choose the correct tool for every job. You will get better results when you choose the right tool for the job.
Benefits of Using an Orbital Sander for Walls
Here are some benefits of using an orbital sander for walls. You can achieve a smooth finish with less effort.
Smooth and Even Wall Finishes
You can achieve a professional look with an orbital sander. This sanding tool is designed to move in a random manner, which helps you avoid swirl marks. It can be used to blend patches or smooth drywall seams. If you want professional outcomes, you need to keep your sander moving. Your sanding will look more consistent and even.
Check for bumps on the wall before you begin. You will get better results when you sand your walls.
Reduced Hand Fatigue Compared to Manual Sanding
Your arms can become tired quickly when you are sanding manually. You might be sore even after a few minutes if you are working on a large project. The orbital sander does most of the work for you. Let the tool do its work. Your project can be completed faster and with less work. You can spend more time doing what you love and less time being tired.
- Reduced strain on wrists and shoulders
- Control is easier for longer periods
- It is best for those who want to prevent aches and pains
Faster Drywall and Paint Prep
When compared to hand sanding, the orbital sander vs drywall sander debate often comes down to. The orbital sander is a great tool for preparing drywall or painted walls. With an orbital sander, you can cover larger areas faster than with a traditional sanding tool. This tool will remove old paint and smooth out rough areas, preparing your wall for the next step. Save time and energy so that you can paint or decorate sooner.
| Task | Manual Sanding | Orbital Sander |
| Small Patch | Slow | Fast |
| Large Wall Area | Very Slow | Very Fast |
| Smoothing | Uneven | Even |
If you want to make sure your next project goes smoothly, try using an orbital wall sander. You’ll get better results in less time.
Best Types of Orbital Sanders for Walls
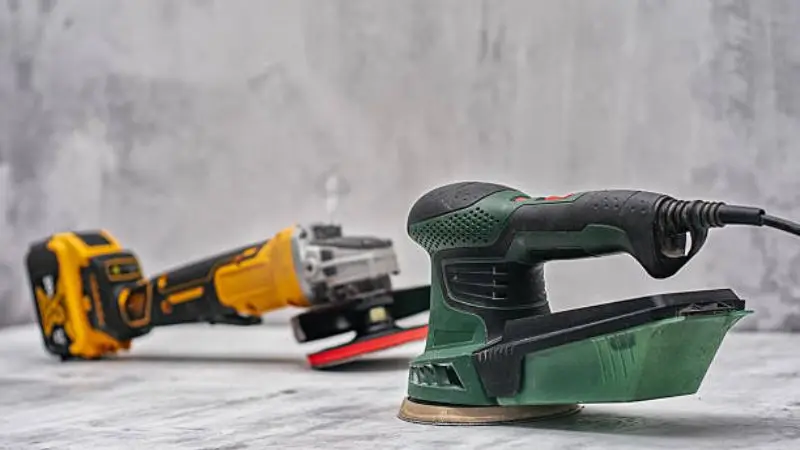
The right orbital sander can make the project easier and give you a smoother finish. There are a few types of orbital sanders, and they all work best for certain jobs. Before you choose your tool, let’s see what you should know.
Standard Orbital Sanders for Light Wall Work
A standard orbital sander will work well for small repairs and touch-ups. It can be used to lightly sand drywall seams or to smooth minor bumps. These sanders work well for beginners and are easy to use. Attach your sanding disks and get started. The sanding discs don’t remove much material, so you won’t accidentally damage your wall.
Tip: When you want to fix a small spot or prepare a wall before painting, use a standard orbital. It’s fast and easy.
Random Orbital Sanders for Drywall and Paint Removal
You can get more power and flexibility with a random orbital sander. It can be used to remove old paint or to sand down joint compound on drywall. You can avoid swirl marks by using a random motion. Look for models that have variable speed settings if you are looking for the best random orbital sanders. You can adjust the power to suit different tasks. Electric random-orbital Sanders are great for larger jobs. They also help you complete them faster.
| Sander Type | Best For | Skill Level |
| Standard Orbital | Light sanding, touch-ups | Beginner |
| Random Orbital | Paint removal, drywall | Intermediate |
Corded vs Cordless Orbital Sanders for Wall Projects
You may wonder whether you should buy a corded sander or a cordless one. The corded orbital sanders are more powerful, and they do not run out of batteries. These sanders are great for longer jobs. The cordless sanders allow you to move easily around, which is great if you have to work in high places or tight spaces. Both can give you a professional look. Before you buy, you can get more information by reading an electric sander’s guide.
It is important to match the sander size with your project. Corded sanders are better for large rooms. A cordless model is best for quick projects.
You now know the best orbital sanders for walls. This guide will help you select the best tool and sanding disks for your next project.
How to Use an Orbital Sander on Walls (Step-by-Step)
This step-by-step guide explains how to use an orbital sander on walls effectively and avoid swirl marks.
Choosing the Right Sandpaper Grit for Walls
The first step to any sanding job is choosing the correct sanding disks. Use medium grit for most drywall to begin prepping the surface. The best sandpaper for creating smooth surfaces and smoothing out joints is fine-grit (around 220-grit). By using the correct grit, you can avoid scratching your wall and achieve a better finish. Check the wall every time you pass. Switch to a finer grain if you notice rough patches. This step will help you prepare the surface before painting, and make your project look more professional.
Replace your sanding disks frequently. The worn-out discs will leave marks on your work and can slow you down.
Proper Sanding Technique to Avoid Swirl Marks
The sander should be moved in even, slow strokes. Do not press hard. Allow the orbital electric sanders to do the job. Never stay too long in any one place. Always move in overlapping motions. This sanding drywall method helps to avoid uneven spots on the wall and keep it smooth. You can get better results if you use a random-orbital sander because it hides the sanding pattern. Sand between coats to get the smoothest finish.
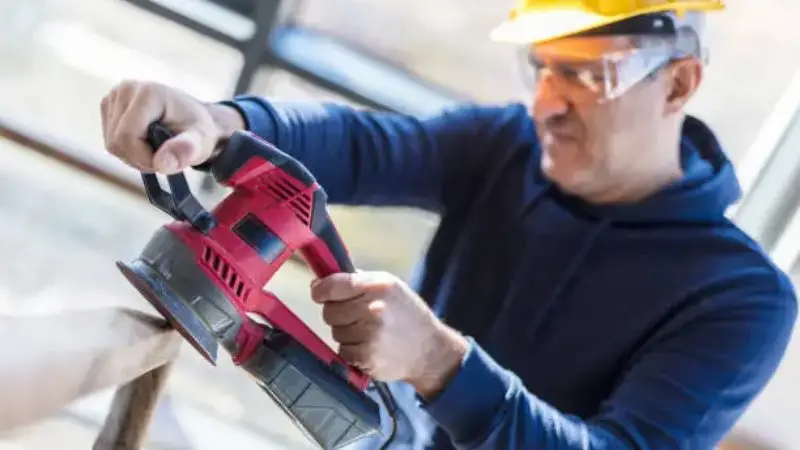
Safety Tips When Sanding Walls Indoors
Every sanding job should be done with safety in mind. Wear a dust mask, goggles, and safety glasses. If you can, connect your sander to a vacuum. Open the windows to let in fresh air. When using an electric random orbital sander, keep cords out of the way. After each step, clean up the dust. These tips will help you to stay safe while sanding and keep your work area clean.
It is important to note that good surface preparation and safe techniques will make your project easier, and you’ll get better results.
Orbital Sander Grit Guide for Wall Sanding
When you begin to prepare surfaces, choosing the right sandpaper grain makes a big difference. Your walls should be smooth and ready to paint. This guide will help you choose the right grit for every job.
Best Grit for Drywall Joint Compound
You want to sand the joint compound of the drywall so that it feels smooth. For rough areas, start with 120-grit paper. For blending seams, move to 150-grit. For the final pass, use fine-grit sandpaper like 220-grit. This will give you a professional-looking surface, ready to be painted.
Tip: For large areas sanding, use a random-orbital sander. This will ensure a uniform finish and avoid any uneven areas.
Best Grit for Painted Walls
Sanding painted surfaces helps prepare the surface before adding a second coat. If the paint is bumpy or feels rough, use 120-grit. Use 180-grit to smooth out the paint. Finish with 220-grit if you want an ultra-smooth surface. This will remove any imperfections from the wall and make it easier for new paint to adhere.
| Wall Condition | Starting Grit | Finishing Grit |
| Minor Bumps | 120 | 180 |
| Smooth Finish | 180 | 220 |
Best Grit for Removing Texture or Old Paint
For removing old wall texture or paint, you need to use a different method. Start with 80-grit if you have a heavy texture or thick paint. As the surface becomes smoother, move to 120-grit. Use 180-grit to prepare surfaces for repainting. Save time and achieve better results.
Remember to always check your progress while sanding. If your sanding disk becomes clogged up with dust or paint, quickly change it.
This guide will make it easier to sand and achieve flawless walls.
Common Mistakes When Using an Orbital Sander on Walls
Your walls should look great, but small mistakes can ruin all your hard work. We’ll discuss the most common mistakes people make when using orbital sanders, and how to avoid them.
Applying Too Much Pressure
It is easy to think that pressing harder will make you finish quicker. This can actually damage the wall and wear down your sanding disks. It is best to let the sander glide across the surface. You can cause unevenness or dips if you press too hard. Let the tool do all the work. You can achieve a better finish by using light pressure. This will also keep your sander running smoothly.
Tip: Use both hands to hold the sander and keep your arms loose. Take a rest if you are feeling tired. Stay patient, and your sanding project will turn out better.
Using the Wrong Grit Sequence
It is important to choose the right grit of sandpaper. You could scratch your wall if you begin with too coarse a grit. You can create rough patches if you skip grits. Start with medium grit and then switch to finer grits for the last pass. The step-by-step method will help you achieve a smooth finish. The right sanding technique will make your job easier and the results more professional.
| Mistake | What Happens | How to Fix It |
| Skipping grits | Rough patches | Use each grit in order |
| Using coarse grit late | Deep scratches | Finish with fine grit |
Skipping Dust Control
When you sand a wall, dust can be everywhere. You could inhale dust particles if you don’t take care of the dust. If your sander offers this option, always use it. Protect yourself by wearing a mask and safety goggles. Keep your workspace clean and safe by cleaning up dust regularly.
Dust control is important to keep your home clean and healthy. You’ll enjoy your sanding project more if you avoid these common mistakes.
Conclusion
Now you know how to use an orbital sander for walls. Follow these steps to master the art of wall sanding using an orbital sander: First, choose the best sander to suit your project. For a professional look, use steady strokes. Keep safety in mind and properly manage dust during the sanding. When you follow the basics, you will get great results.
FAQ
Can I use an orbital sander on freshly painted walls?
You should wait until the paint dries completely. If you sand too soon, you might ruin the finish. Always check the paint label for drying times. A light sanding with fine grit can help smooth out small bumps before adding another coat.
What safety gear do I need when sanding walls?
You need a dust mask, safety goggles, and hearing protection. Gloves help protect your hands. If you use a sander with dust extraction, you will keep your workspace cleaner. Always wear old clothes because sanding creates a lot of dust.
How do I prevent dust from spreading in my home?
Close doors and cover vents with plastic sheets. Open a window for airflow. Use a sander with a dust bag or connect it to a shop vacuum. Clean up dust often with a damp cloth or vacuum.
Can I use the same sander for ceilings?
Yes, you can use an orbital sander for ceilings. Hold the sander overhead and keep your arms steady. Take breaks to avoid fatigue. Use lighter pressure to prevent gouging the surface. A pole attachment can make the job easier.


