
Did you know that over 20% of Americans use self-storage, and almost 40% say they just do not have enough space? Does that also sound like you? Well, we are here to help you. Don’t worry, we won’t tell you to buy expensive stuff, because you can make this on your own!
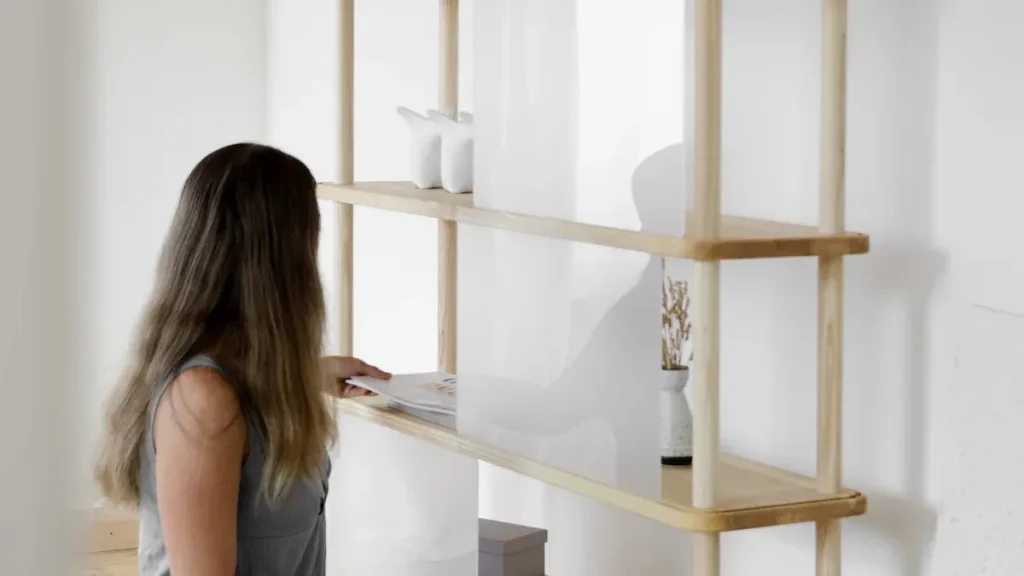
We all have seen those unique storage shelves on Pinterest, stored in our phone’s galleries. Well, it is time for them to become a reality. A DIY storage shelf could solve the storage problem and fit your unique space. All you need are a few basic tools, and turn on your DIYer mode! Excited? Let’s jump right into this project!
Why build a diy storage shelf
You might wonder why so many people choose to build their own shelves instead of buying them. Here are a few reasons you may want to try it:
- You can save money. Buying materials for your DIY storage shelves for the bedroom often costs less than buying a ready-made one.
- You get to design a shelf that fits your space and your stuff: no more awkward gaps or wasted corners.
- You can make it strong. When you pick good materials and a solid design, your shelf can last for years.
- You get to feel proud. There’s something special about using something you built yourself.
Tip: If you have a small room or an odd-shaped space, a DIY storage shelf wall can help you use every inch.
Safety Tips
Safety matters when you work with tools and wood. Here are some things you might want to keep in mind:
- Wear safety gear like goggles, gloves, and a dust mask.
- Keep your workspace tidy. This helps you avoid tripping over tools or slipping on sawdust.
- Watch out for splinters and sharp tools. Cuts are common, so keep a first aid kit nearby.
- Place heavy items on the lower shelves. This keeps your shelf steady.
- You might want to anchor your shelf to the wall for extra safety.
Tools and Materials
You do not need fancy tools to build a DIY storage shelf. Here are some basics you might want to gather:
- Cordless drill
- Framing square
- Tape measure
- Circular saw or miter saw
- Construction screws
- 2×4 lumber and plywood (these are affordable and sturdy)
- Masking tape
- Pocket hole jig
You can also use scrap wood or pallet pieces if you want to save even more money. Choose materials that fit your budget and the weight you plan to store.
How to build your diy storage shelf
Measure and plan
Before you start building, you want to make sure your shelf fits your space and your needs. Grab your tape measure and check these things:
- Measure the width of your space. Look out for windows, doors, or furniture that might get in the way.
- Measure the height from the floor to the ceiling or to the top of any nearby furniture.
- Decide how deep you want your shelves. Think about what you plan to store. Books need at least 10-12 inches. Kitchenware or heavy items do better with 12-16 inches. Decorative items fit on shelves as shallow as 6-8 inches.
Cut materials
Once you have your plan, it’s time to cut your wood. You can use a circular saw, miter saw, or even a table saw. Each saw has its strengths. A circular saw works well for straight cuts. A miter saw helps with angled or crosscuts. If you want to cut curves, a jigsaw is handy.
To get straight, accurate cuts, try these tricks:
- Use a straightedge or a speed square as a guide.
- Clamp a long board or even an extension ladder to your wood for a super-straight edge.
- Mark your lines with masking tape to prevent splinters.
If you want to save money, check your scrap wood pile or ask friends and family for leftover wood. Salvage stores and online marketplaces often have cheap or even free wood. Using reclaimed wood helps the environment by keeping old wood out of landfills and saving trees.
Assemble the frame
Now you may begin assembling your frame. The majority of people use 2×4 lumber in the frame as it is tough and simple to handle. The freestanding shelf can be constructed or fitted to the wall. Wall-mounted shelves are strong and do not occupy the floor space; however, they require a solid wall. Standalone shelves are simple to relocate and reposition.
Wood screws and wood glue should be used when making the strongest frame. To add additional strength, dado or rabbet joints can be used; however, in most projects, simple butt joints can be used with screws. Ensure that the lower shelf is flat. This holds the entire DIY storage shelf in place.
Attach shelves
Once your frame is ready, you can add the shelves. Use plywood or solid wood for the DIY storage shelf wood, depending on your budget and what you have. Thicker plywood (at least 3/4 inch) helps prevent sagging. Attach each shelf with wood glue and screws for a strong hold.
If you want adjustable shelves, drill holes along the sides of your frame and use shelf pins. Painter’s tape helps keep the wood from tearing when you drill. Sand the holes after drilling for a smooth finish.
Sand and finish
Sanding makes your DIY storage shelf cabinet look and feel better. Start with 100-grit sandpaper to smooth rough spots. Move to 150-grit for a finer finish, and finish with 220-grit before painting or staining.
You can protect your shelf with a finish. Polyurethane varnish is tough and water-resistant. Spar varnish works well if your shelf might get wet. Epoxy resin gives a shiny, hard finish but costs more.
If you want your DIY storage shelf to match your room, you can paint it or stain it. Floating wood shelves and stained reclaimed wood look great in many homes. You can also use polished brackets for a modern touch.

Mount or place
Now it’s time to put your shelf in place. If you built a wall-mounted shelf, use the right hardware for your wall type. For drywall, toggle bolts or molly bolts work well. For masonry, use anchors and a hammer drill. Always use washers to spread the load and keep your shelf from bending.
Freestanding shelves can go anywhere. Just check the weight limits for your floor and shelf type. Most light to medium-duty shelves hold 300 to 500 pounds each. Spread the weight evenly and keep heavy things on the bottom.
Diy storage shelf ideas
1. Diy storage shelf with adjustable track system
Create a flexible DIY storage shelf using a wall-mounted track system. It’s perfect for organizing odd-shaped items, letting you adjust shelf heights anytime. This setup works great for garages, closets, or workshops where storage needs frequently change.
2. Portable metal diy storage shelf for renters
If you rent or move often, a metal DIY storage shelf is a smart choice. It’s sturdy, lightweight, and easy to assemble or relocate. Use it in apartments, offices, or garages to maximize space without damaging walls or fixtures.
3. Diy storage shelf with built-in cabinets for hidden storage
Combine open shelving with built-in cabinets for a sleek DIY storage shelf design. Store tools or household items inside the cabinets while keeping décor pieces visible on top. This approach keeps your space tidy and stylish, blending function with design.
4. Overhead and vertical diy storage shelf ideas for garages
Maximize unused space by building an overhead DIY storage shelf in your garage. Use PVC pipes or wood beams for support, and add vertical slats with hooks and bins. This setup helps store seasonal gear, tools, and sports equipment neatly..
FAQ
What is cheaper: building a diy storage shelf or buying a ready-made one?
Building storage shelves is usually cheaper than buying them, especially if you use basic materials like plywood or reclaimed wood. DIY shelves also let you customize size and design, saving money while fitting your exact space and storage needs.
Can I construct a shelf without power tools?
Hand tools such as a handsaw and screwdriver could be used. It is more laborious and time-consuming, but you have a good shelf.
Which wood is the most suitable to use in a storage shelf?
Pine and plywood are suitable for most projects. Oak or maple will be stronger. Reclaimed wood provides a special appearance.
Conclusion
Creating a DIY storage shelf is an easy and satisfying project that can help you to arrange your house and use all the space you have. Moreover, you can decorate it with different items like artificial plants, sculptures, etc.
With the right tools, you can make a shelf that fits your needs. To get high-quality, inexpensive equipment to begin your project, visit the professional line of VEVOR today.


