
Wondering how to use a laser level? To use a laser level, simply set it on a level surface, switch it on, and allow it to level itself. The majority of models simplify things for novices. You can quickly and easily align pictures or shelves with high precision. All the projects become less stressful with laser levels. In this guide, we have provided a step-by-step overview to help you understand the basics of working with.
Preparing to Use a Laser Level Safely and Correctly
Essential Safety Tips Before Using a Laser Level
When using any tool, even something as basic as a laser level, safety comes first. You want to keep your workspace secure and safeguard your eyes. Here are a few brief pointers for novices:
- Avoid staring into the laser beam at all times. The light may harm your eyes.
- Keep kids and animals away from the laser level.
- Verify that the space surrounding you is unobstructed. You don’t want to run into the gadget or trip over cords.
- If you work outside, look for uneven or wet surfaces. You want your tool to be in a stable location.
- If you’re not sure, put on safety glasses. They provide an additional degree of security.
What Tools and Accessories Do You Need
Want to know how to use a laser level for hanging pictures? You do not need much fancy gear to get started. Most laser levels come ready to use, but a few extras can help you get better results. Here is a simple table to show what you might need:
| Tool or Accessory | Why You Need It |
| Laser level | Primary tool for straight lines |
| Tripod or mounting base | Holds the device steady |
| Measuring tape | Checks distances and marks points |
| Pencil or chalk | Marks your reference spots |
| Safety glasses | Protects your eyes from the beam |
| Target plate (optional) | Helps you see the laser in bright light |
How to Set Up Your Workspace for Accurate Measurements
Getting your workspace ready is a big part of using a laser level. You want everything to be clean and organized before you start. Here are the steps you should follow:
- Clear the area where you plan to work. Remove clutter and make sure the floor or ground is flat.
- Place the laser level on a stable surface or attach it to a tripod. This helps you avoid wobbly lines.
- Turn on the device. Most models are self-leveling, so you do not need to make many adjustments. If you have a manual model, use the built-in bubble vials to level it.
- Aim the laser at the spot you want to mark. Check that the beam is straight and lines up with your project.
- Use a pencil or chalk to mark the reference points along the laser line. This step is essential for tasks like hanging pictures or setting the grade with a laser level.
- Double-check your marks with a measuring tape. Make sure everything matches up before you start drilling or nailing.
- When you finish, turn off the laser level and store it in a safe place. Keep it dry and away from dust.
Step-by-Step Guide on How to Use a Laser Level
Step 1: Installing or Setting Up the Laser Level
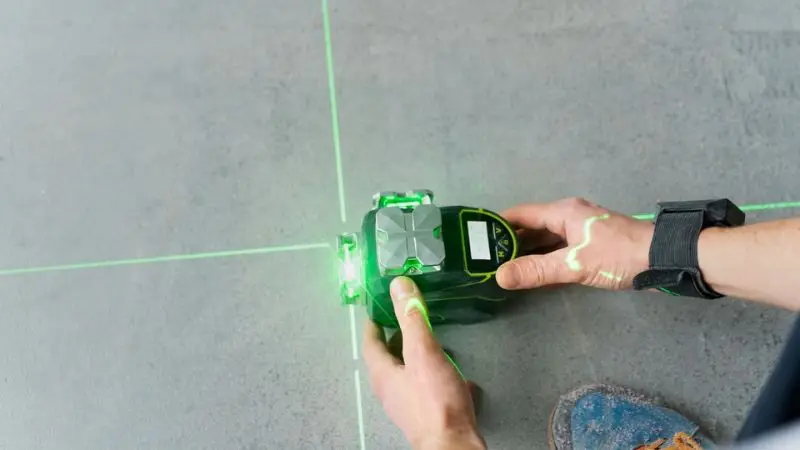
Select a location for your laser level first. You’re looking for a sturdy tripod or a level surface. The device should be positioned where a straight line is required. Choose a location with firm ground if you are working outside. Make sure the laser is facing your project area by adjusting its level. To add stability, novices often use a tripod.
Step 2: Activate and Level the Device (Self-Leveling vs. Manual)
Next, activate the laser level. The majority of models are self-leveling, so all you have to do is turn it on and level them. If you use a manual type, make sure the laser level is level by checking the bubble vials. Before continuing, make sure the beam appears straight.
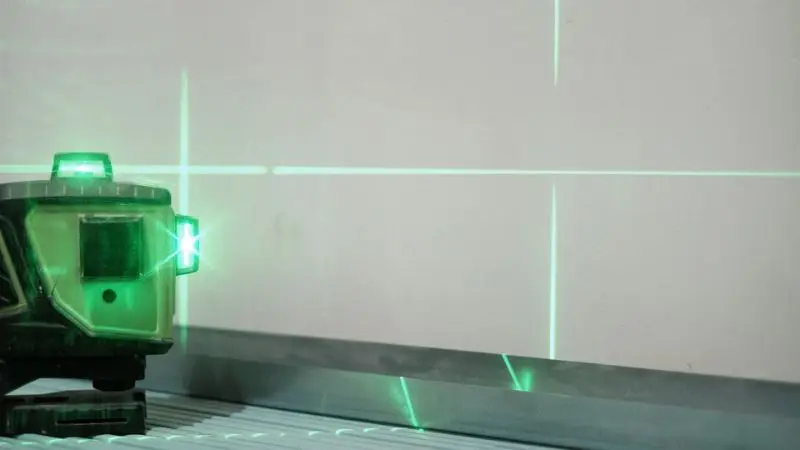
Step 3: Establishing Your Vertical or Horizontal Reference Line
The device should now be configured to project a vertical or horizontal line. To change the laser level to the desired direction, use the controls. This step helps align outdoor posts, tiles, and shelves. For various tasks, you can alternate between horizontal and vertical lines.
Step 4: Marking and Measuring in Step Four: How to Use the Laser Line
Mark the laser line with a pencil or chalk once you can see the beam. To verify your marks, use a measuring tape. This step maintains the accuracy of your project. This part is simple for beginners because the laser indicates precisely where to work.
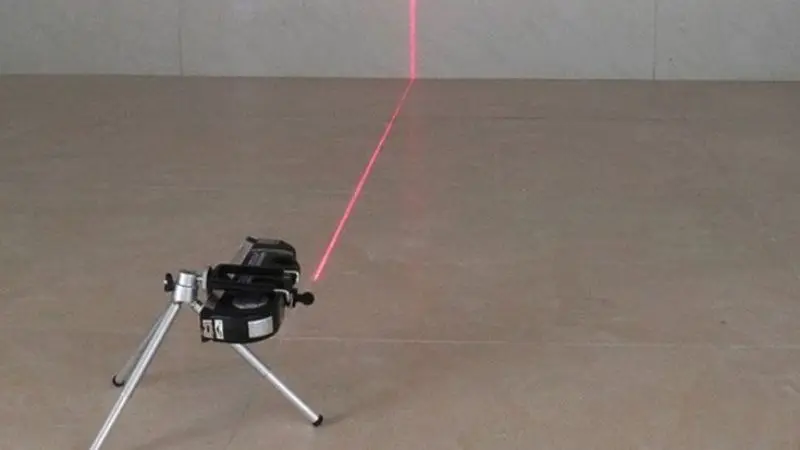
Step 5 – Adjusting for Long Distances or Multiple Reference Points
If your project covers a large area, adjust the laser level to reach farther. Move the device or use a target plate to better see the beam. For multiple points, reposition and turn the laser level back on. This helps you keep everything lined up.
How to Use a Laser Level for Popular Projects
How to Use a Laser Level for Hanging Pictures and Shelves
You want your walls to look neat. When you learn how to use a laser level to hang pictures, you get straight lines every time. Place the laser level on a flat surface. Turn it on and let it self-level. The beam shows you where to mark your spots. Use a pencil to make minor marks along the line. This method works for hanging pictures or shelves. If you have several frames, you can space them evenly. You avoid crooked results.
Using a Laser Level for Installing Tiles and Backsplashes
How to use a laser level for tiling a wall? Tiles need straight lines. Set up your laser level at the starting edge. Turn it on and line up the beam with your first row. Mark the line with chalk. Lay your tiles along the beam. You keep each row even. If you work on a backsplash, use the vertical line feature. You get a clean look.
Using a Laser Level for Framing, Drywall, and Construction Work
You want strong walls. Place the laser level on a tripod. Aim the beam where you need to build. Mark the spots for studs or drywall sheets. You follow the line as you work. This step helps you avoid gaps and uneven edges. If you want to know how to use a laser level for ceilings? It is as simple as using it on walls.
Outdoor Uses: Fencing, Landscaping, and Grading
How to use a laser level outdoors? You can set up the device on solid ground. Turn it on and let it self-level. The beam helps you mark fence posts or garden edges. If you want to know how to use a laser level to level ground, use a target plate to see the beam in sunlight. Move the device as needed. You keep your yard even and neat. Learning how to use a laser level outdoors makes big projects easier.
Common Mistakes When Using a Laser Level (And How to Avoid Them)

Errors in Misalignment
Even though your line appears straight, even small changes can cause your entire project to go awry. The beam will not remain true if you move your tripod or adjust the laser level. Before beginning to mark or drill, always check the line. Reset the device and try again if you notice that the beam does not match your marks.
Inadequate Configuration or Unstable Surfaces
A shaky surface could ruin your results. The line will not remain level if the laser level is placed on uneven or soft carpet. For optimal accuracy, you need a level, stable area. If you are unable to locate a stable surface, use a tripod. Verify that the legs are stable.
- Before you set up, remove any clutter.
- Gently press down to test the surface. Choose a different location if it moves.
Inaccurate Distance Calculations or Incorrect Calibration
The laser level may need to be calibrated occasionally. Your lines might not be accurate if you omit this step. If you use a manual model, check the bubble vials. Allow the device to settle before beginning if it is self-leveling. Measure the distance between your workspace and the laser as well. You might miss your mark if you guess.
Conclusion
Now, you have learned how to mark, check, and set up your lines. You witnessed the laser level’s ease of use for your project. You can start with easy tasks. If you want to get better, keep practicing and look at FAQs or tips.
FAQ
How can you determine the accuracy of your laser level?
Examine the self-leveling indicator or bubble vials. You can be confident in your outcomes if the beam matches your marks. Check the bubble vials or self-leveling indicator. If the beam matches your marks, you can trust your results.
Is it possible to use a laser level outside during the day?
You can, indeed. To see the beam more clearly in direct sunlight, use a target plate or a shaded spot.
If your laser level isn’t self-leveling, what should you do?
Consider setting it on a level surface. See the troubleshooting instructions in the manual if it still won’t level. You can also use a tripod to set it up on the floor and then check the results.


