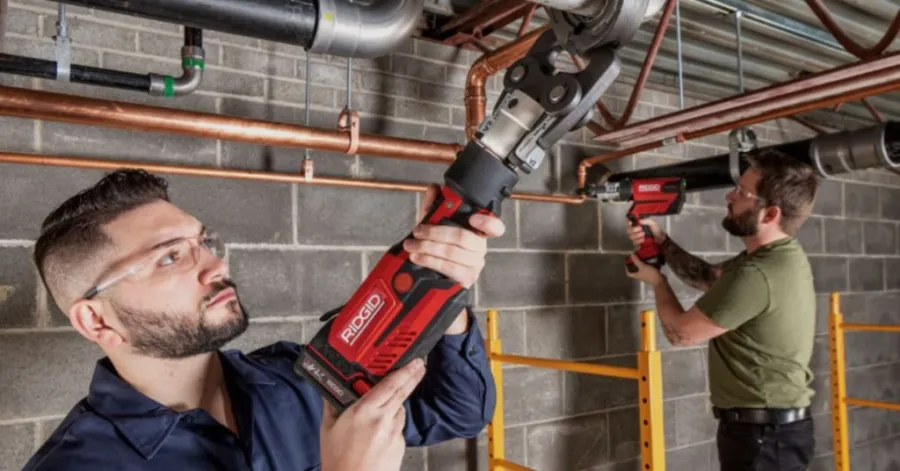
Learning how to operate a pipe crimping tool is important to those who deal with plumbing installation or pipes in homes. A good crimping method will aid in providing a good quality, sound, and leak-free connection of the pipes, which are long-lasting.
Nowadays, plumbing has advanced to more sophisticated electric crimping tools, unlike the manual ones used in the past. Tools like the VEVOR Mini ProPress Tool can make the process a lot easier, quicker, and more reliable, delivering that powerful, even pressure without requiring any manual effort or soldering.
Whether you’re a beginner installing a pipe or a highly advanced DIYer, the right crimping and the right tool can enhance safety, efficiency, and overall results in the plumbing job.
What Tools and Materials Do You Need Before Starting Pipe Crimping
Any pipe crimping work must have all the tools required prepared in advance. Adequate preparation will assist in streamlining the workflow, reducing the number of errors, and improving safety and accuracy. Whether you are plumbing in your home or laying down pipes as a professional, the appropriate tools will make you accomplish the task in a faster manner and with a relatively higher level of reliability.
When using a crimping tool to create leak-proof pipe fittings, you should have easy-to-follow instructions that explain the importance of proper preparation for forming strong, reliable connections.
Basic Tools and Materials Required for Safe Pipe Crimping Work
To accomplish a pipe-crimping project, the right combination of tools and materials is needed. Each of these elements plays an important role in creating strong and non-leaking joints of pipes:
- PEX pipes or any other pipe material (based on the project)
- Pipe fittings or crimp rings.
- Pipe crimping device (manual or electric ProPress system)
- Pipe cutter to cut pipes cleanly and accurately.
- Deburring equipment to lishen the edges of pipes.
- Goggles and gloves.
Each tool has its purpose. The pipe cutter also guarantees clean cuts to fit well, and the deburring tool is applied to eliminate sharp edges that can interfere with sealing. The connection between the pipe and fitting is fixed using crimp rings.
A clean and tidy workspace will increase safety and precision, especially when it comes to training and learning to use a crimping tool safely in plumbing or a DIY project in the home.
How to Choose the Right Pipe Crimping Tool for Your Project
Selecting the right crimping tool is critical, as different pipe systems require specific crimping tools, sizes, and pressure levels. Incorrect tool usage may lead to poor seals, leakages, or broken fittings.
Crimping devices are usually utilized in:
- Residential plumbing systems
- Installation of PEX water lines.
- Light commercial plumbing jobs.
In more recent plumbing applications, electric crimping tools are gaining popularity due to the speed of installation and more stable pressure than manual crimping tools. The VEVOR Mini ProPress Tool has been designed with copper pipe systems and can be used with various jaw sizes, making it suitable for various installation requirements.
@milusos502 En trabajo sacas la inversion #vevor #vevorpresstool #fentysuperbrandday #dealsforyoudays #parati
♬ sonido original – milusos502
Step-by-Step Method for Using a Pipe Crimping Tool for Leak-Proof Connections
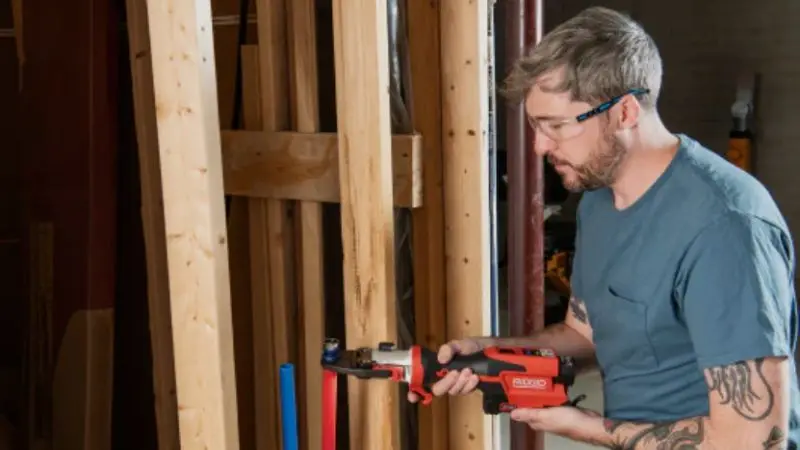
It is the practical part where you are taught how to crimp pipes in reality when doing real plumbing. They need to be carried out in the specified sequence since even the slightest deviation can lead to leakage or bad joints. With the right tool, like an electric ProPress crimping machine, it will be possible to make sure that the pipe connections are as strong, safe, and durable as possible, even when used by a novice.
Good, safe, and durable plumbing work could be done even as an amateur by learning how to properly fit pipes together with a crimping tool.
Prepare and Cut the Pipe Properly Before Crimping
The initial one is to prepare it properly, which has a direct influence on the strength of the final connection. Begin by measuring the pipe and cutting it to the length needed with a pipe cutter. Ensure that the trim is straight.
Then clean up any roughness with a deburring tool so that the pipe will slide into the fitting. This is highly significant when acquiring a step-by-step guide to using a pipe crimping tool with beginners, as improper preparation can cause the joint to fail over time.
Insert the Pipe and Fitting Correctly
Once the pipe is ready, it will be inserted into the fitting. Put the crimp ring on top and then insert the pipe into the fitting until it reaches the appropriate depth.
Make sure that the pipe is in place and straight. Then, put the crimp ring on the area of connection that is to be pressed.
To learn how to work with a crimping tool safely to make DIY plumbing projects at home, the initial step is to ensure that it is fitted properly, since it will directly influence the strength of the joint once made.
Use the Pipe Crimping Tool and Controlled Pressure
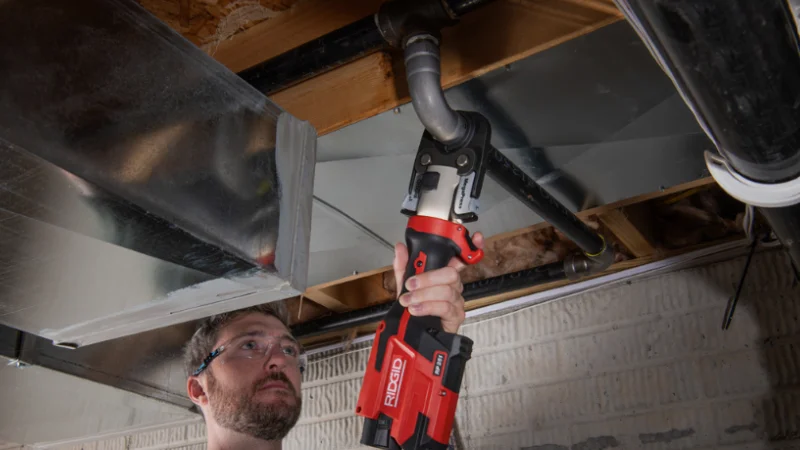
At this point, carry out the crimping. Attach the crimping head to the crimp ring, and align it correctly. When a modern electric ProPress device is used, the tool will automatically apply consistent pressure to achieve a safe connection.
Firmly press the trigger or handles until the tool has crimped. Do not hurry; pressure it evenly and steadily; it will guarantee a consistent seal.
The joint of a properly crimped joint must be tight, stable, and completely sealed, forming a dependable, leak-proof connection that can be used over an extended period.
Test the Pipe Connection for Strength and Leaks
It is important to check the connection after crimping. Ensure that the fitting is not loose. Perform a water or pressure test (where possible) to ensure that there are no leaks.
An appropriately crimped joint must be tight and stable under pressure. In case of any movement or leakage, the joint is to be removed and redone.
This last step will make sure your work is safe, durable, and ready to be used in actual plumbing, particularly with high-performance electric crimping systems.
Common Mistakes to Avoid When Using a Pipe Crimping Tool
Despite doing the right thing, small mistakes can still come into play and affect the quality of pipe connections. Such mistakes frequently result in leakage, loose connections, or damage to fittings. It doesn’t matter whether you are working with a manual tool or an electric ProPress tool; technique is always a factor. Knowing these errors will help you eliminate issues and improve your plumbing results. Leaving no stone unturned will keep your pipe connections strong, safe, and long-lasting in the long run.
Cutting or Preparing the Pipe Incorrectly
Failing to prepare the pipe before crimping is one of the most common errors. In case the pipe is not cut in a straight line or the edges are rough, it will not fit in the fitting. This may lead to leakages or poor joints in the future. Even electric tools cannot cure poor preparation. The pipe should never be bent, dirty, or not well deburred when starting. The proper preparation is crucial when learning how to use a pipe crimping tool step-by-step, especially for a beginner, since even a powerful crimp cannot repair an ill-prepared pipe.
Misplaced Fitting or Crimp Ring
The misplacement of the pipe, fitting, and crimp ring is another common error. When you do not completely insert the pipe in the fitting,g or the crimp ring is not positioned properly, then the connection will not close. This may lead to water leakages or loose joints. Correct alignment is quite important, even with such sophisticated electric tools. After everything is in place, be sure to check again to make certain that all is in place before exerting pressure to make sure of a good bond.
Using the Wrong Tool Size or Uneven Pressure
The pipe connection can be ruined by using the incorrect size of crimping head or unequal pressure. Every pipe size must be fitted with the appropriate tool or jaw to make sure that it is sealed properly. The joint can be weak or unsafe if the size is wrong. Electric devices such as the VEVOR Mini ProPress Tool can be used to keep the pressure constant, although it is essential to select the jaw correctly. Being taught how to use a crimping tool safely in DIY plumbing projects at home helps ensure that every crimp is uniform, tight, and well secured.
Safety Reminders for Using a Pipe Crimping Tool at Home
Working with any plumbing tools is extremely important when it comes to safety. Be it with manual tools or electric ProPress systems, proper handling can help in the prevention of accidents and enhance outcomes. The work is also easier and more accurate following basic safety steps. Work at a slow pace and be focused. Safety habits will ensure your pipe installation is successful as well as safe, reliable, and fit for prolonged use in plumbing projects, both at home and in the workplace.
Always Work in a Clean and Well-Organized Area
Safe and accurate pipe crimping requires a clean and tidy workspace. With a neat and well-lit area, it is easier to measure, cut, and fit pipes properly. This decreases errors and enhances the quality of work. Maintaining tools is also time-saving and enhances efficiency. It helps to be efficient and safe to keep your tools in order and practice the use of a crimping tool safely on plumbing DIY projects at home. Regardless of the tools you use, whether manual or electric, having a clean workspace enables you to work in a safe environment and achieve better, more professional plumbing results.
Always Check System Pressure Before Starting
You must never leave the water supply turned on or the pipe work under pressure before commencing any pipe work. It can be unsafe to work on a pressurized pipe, and tools or fittings can be damaged. This is a necessary safety measure and is also very critical for those new to using a crimping tool to create a leak-proof pipe fitting. Checking pressure will help you work safely and avoid accidents or plumbing failures.
Use Proper Safety Gear and Inspect Your Tools
When starting any work on any pipe crimping, always wear safety gloves and protective eyewear. These cushions cushion you against the edges of pipes and unintentional injuries. Before using your tool, it is also important to check it to ensure that it is in good condition. In the case of electric tools, inspect the battery and working components. The use of properly maintained tools enhances safety and performance, particularly in teaching beginners to use a pipe crimping tool step-by-step in actual DIY work.
Wrap Up
Knowing how to use a pipe crimping tool correctly is a must-have skill for plumbing projects or DIY pipe installation at home. With proper steps, proper pipe preparation, and constant pressure, you can make good, leak-proof connections. By reducing manual effort, modern electric tools such as the VEVOR Mini Propress Tool make the process quicker, simpler, and more precise. By applying the correct methods, tools, and safety measures across all projects, even beginners can achieve professional-quality plumbing work.
FAQ
Which is the strongest pipe crimp?
Lightly check the fitting and test whether it moves. The crimp is hard and secure when the pipe and fitting are firmly sealed, and no leakage is evident during a water or pressure test.
Can pliers, instead of a pipe crimping tool, be used?
No, it should not be ordinary pliers. A pipe crimping tool is applied to give the fitting even pressure to make a good fit. Pliers do not evenly press and may cause weak or leaking joints.
What shall I do when my pipe connection is leaking?
First, find out whether the pipe was fully inserted in the fitting and the crimp ring was not omitted. Ensure you have the appropriate size of tool, as well. In case the problem continues, remove the joint and redo it with correct alignment and equal pressure.