
The VEVOR shower kit consists of several components that are important for setting up and using a shower. It includes shower enclosures that are expertly matched with shower bases and other features which gives you a perfect ensemble and transforms the aesthetics and functionality of your bathroom. The VEVOR shower kit has several exciting features that make it important for your bathroom. The entry has a low step that prevents trips and the shower pan is designed with an anti-slip texture finish which gives it the appearance of a real stone. It also has a scratch and stain-resistant composite.
The shower tray comes with a gray-water-impermeable membrane that has a fluffy texture on its surface, this makes it convenient for mortar brushing, and the durable PVC flange and auxiliary drainage device of the shower curb overlay guarantees that water will flow smoothly in your bathroom.
VEVOR shower kits are designed to save you time and money so you can easily install them yourself. Even if you have no prior experience in installing a shower kit, you will learn how to install a VEVOR shower kit and all the materials you need to make the installation seamless.
Before we delve into the delve into the the main crux of installing the VEVOR shower kit, let’s take a look at the things you need to know about getting started with VEVOR shower kit installation.
Table of contents
Getting Started With VEVOR Shower Kit Installation
The VEVOR shower kit is a full set of showering components that contains everything you need to install in your bathroom. The VEVOR shower kit is a budget-friendly choice for homeowners who intend to save costs by installing their shower kit. The shower kit is complete with all the essential parts needed to make your shower run seamlessly and give you a satisfying experience. Some of the key components in the VEVOR shower kit include the showerhead which is the primary component that delivers water for showering, shower hose, shower arm, shower enclosure, and others.
If you are a lover of DIY, then you’d definitely find VEVOR shower kit installation a satisfying and exciting project. Although installing a shower kit is not as simple as it sounds, it isn’t rocket science either, all you need to do is get the right materials and tools, pay attention to details, and follow this guide.
Aside from the shower kit, you need to get other materials and tools such as nails, screws, fasteners, and other important tools you will need to make your shower kit installation a success. Even if this is your first time installing a shower kit, you will find it relatively easy and satisfying.
Okay, you now understand everything you need to know about getting started with VEVOR shower kit installation. In the next section, we’ll be discussing the step-by-step guide on installing your VEVOR shower kit.

Step By Step Guide On Installing VEVOR Shower Kit
There are 5 important steps when it comes to installing VEVOR shower kit. We’ll start from the very beginning, which is to set the floor.
Step One: Setting the floor
The importance of measuring your floor accurately before placing the stall in it cannot be overemphasized. Measure your floor from upward and from the corners outwards to ensure you get the right measurements. Measuring will help you ascertain where the plumbing apparatus will come through the stall. Using this measurement, draw the locations of the holes on the back of your unit. Use can use a pencil, marker, or chalk.
If your old shower is still in place, now is the time to pull it out and then scrape the entire old caulking off. Do this thoroughly so you can have a smooth surface which will give you the best result after installation. After removing your old shower, ensure the floor is free from dirt and dry. It’s better to use a shop vacuum to carry out the cleaning as it soaks both water and dirt together. Next, examine your pipes to ensure that they do not require repairs or patching. If they need extensive repairs, then you have to contact a plumber to fix them.
Allow your floor to completely dry before you start any work on it. If you work on a wet floor, there’s a high probability of mold and mildew growing in your base and you don’t want that. As soon as your floor is dry, fix a waterproof wallboard to the wall. You can fix this with either screws or nails, then proceed to seal the caulk to prevent water from seeping into your crevices.
Once this is done, it’s time to level the wet area base.
Step Two: Level the wet area base
If your shower will have tiled walls, then apply a dash of silicone sealant to the tiling flange and screw or nail it to both sides of your shower base. Next, check to ascertain that the drain aligns properly with the opening. Also, check for level and make sure that you have at least a 1/8-inch gap between the edge of the base and the stud. Then mark the top of the edge of the base and all the sides with a marker or pen.
For the next step, we’ll set the drain on the base.
Step Three: Set the drain on the base
To set the drain on the base, first apply a dash of sealant under the body of the drain. Then insert the body of the drain into the opening in the shower base. Next, place the rubber gasket on the threaded end directly under the shower base and press down. Place your fiber gasket on top of the rubber gasket and screw in the nut. Ensure you tighten it well so it doesn’t slip out but be careful so you don’t over-tighten it as well.
After properly setting the drain, the next thing to do is install the base.
Step Four: Install the base
The second to the last step is to install the base. To do this, you need to spread out a 1-inch layer of self-compacting concrete which will help to protect the drain area. Then set the base and line firmly up the drain pipe along with the bottom drain. Next, press it down firmly to allow it to have a sturdy contact with the concrete check to make sure the top edge properly aligns with the marks on the studs, and make sure the base is level as well. You can protect the base with a protective sheet and then screw the base into the studs or fasten to the studs with clips.
This then leads us to the last and final step: connecting the drain.
Step Five: Connect the drain
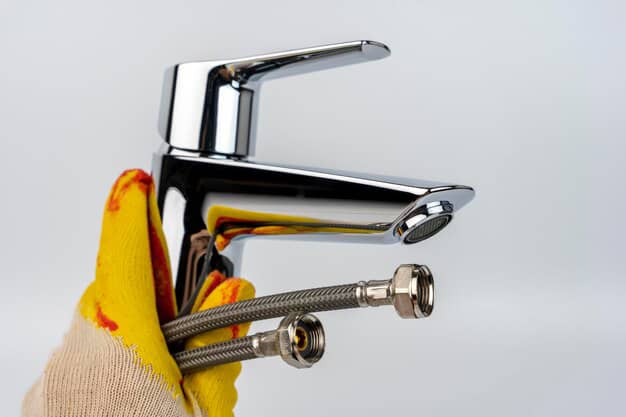
Your shower kit is almost ready and the only thing left is to connect the drain. To begin, coat the neoprene ring with a dash of silicone lubricant before placing it in the upper part of the drain. Then screw in the threaded ring on the drain and tighten it. Ensure you clean the drain to remove any dirt or residue. Now insert the strainer and plug it into the drain. To check for leaks, pour some water in the shower base, if bubbles surround the drain, then that means there is a leak. Unplug your drain and check to make sure the water flows properly and doesn’t accumulate.
Before you start your VEVOR shower kit installation process, you need to have some materials and tools in place. These are discussed below.

Tools and Materials Needed for This Project
- Two- to Four-Foot Level
This tool will play in key role in the successful installation of your shower kit. This is to ensure that the floor under your shower tray is even. You can also use it to check if the slope of the base allows gravity to transfer water down to the drain.
- Electric Drill
You’ll definitely need to drill some pilot holes when installing your shower kit. This is where the electric drill comes in. Electric drills make hole drilling seamless and they can also be used for loosening or inserting screws.
- Two-Inch Hole Saw
This saw is used to prepare fixture holes on your shower kit unit. This tool is a bit technical so be careful and patient when handling it. If it emits a bit of smoke while you’re using it, don’t worry, it’s completely normal.
- Cedar Shims
The Cedar shims are used to prop up the shower pan so that it can create the right slope for water drainage.
- Caulk and Caulking Gun
Caulk is used to waterproof your shower and stop water from reaching the walls or the floor. You can use the caulk to seal the crevices of the waterproof wallboards before you start installing your shower kit.
- Safety Equipment
Last but not least is safety equipment. You need to protect yourself from potential hazards when installing the shower kit by wearing protective gear such as workman’s gloves, face covering, knee pads, and safety glasses.
As we round up this guide, let’s take a brief look at the key takeaways so far.
Key Takeaways
- VEVOR shower kit installation is an exciting adventure for DIY enthusiasts. Even if you have no experience in installing shower kits, you can easily install your VEVOR shower kit by following this guide and having the right tools and materials.
- VEVOR shower kit can give your bathroom a transformed look and give you a satisfying experience every time you use it, but you need to install it right to enjoy the full benefits. So take your to read this VEVOR shower kit installation instructions carefully before you start your installation.
- Without a doubt, The VEVOR shower kit is the best shower kit due to its wide range of benefits. Apart from enhancing the aesthetics of your bathroom, they room smoothly and do not leak or accumulate when installed correctly.
FAQS About Installing the VEVOR Shower Kit
Does a shower pan need to be glued down?
Spread an adhesive in the area where the shower pan will sit, then place the shower pan gently on it and press it down firmly to ensure it sticks properly. Use an adhesive that provides a permanent and watertight seal.
Do you need to put anything under a shower pan?
Yes, Shower pans are specially designed to direct the flow of water into your drain pipe. As a result, a mortar base has to be placed under them. In addition, the mortar base has to be perfectly level in order for the slope to function properly.
What kind of mortar do you use for a shower pan?
The best type of mortar to use for a shower pan is a thin-set mortar. You can mix standard cement with sand and Portland cement to give you the right thin-set mortar to use for your shower pan.
Can you replace a shower pan without replacing the walls?
Yes. You can replace shower pans without having to replace your entire shower unit. They are separate components and are not connected structurally to the rest of your shower.
How much does it cost to have a custom shower pan installed?
There are several factors that affect the cost of installing a custom shower pan. Most times, it depends on the location, the type of shower pan you want to install, and the complexities involved. However, the prices generally range from $250 to as much as $800.


