
Setting up a VEVOR ice machine might seem challenging, but with the right guidance, it is simpler than you might think. Hopping on this journey, you’ll grasp the essentials of positioning your machine perfectly and fine-tuning its operation for the best performance. We’ll cover what tools and supplies are essential for a VEVOR ice machine setup and walk you through each step of installation.
In this article, you’ll perfect the art of connecting your machine to a water source, establishing effective drainage systems, handling the electrical hookups with care, and making sure everything is perfectly balanced for peak efficiency. Additionally, we’ll share expert advice and precautionary steps to streamline the installation process, ensuring everything runs smoothly.
Table of contents
Things to Consider Before Installing VEVOR Ice Machine
Before you jump into setting up your shiny new VEVOR ice machine, there are a few key things you need to check off your list. Skipping these could turn your dream of endless ice into a logistical nightmare.
Location
Picking the right spot is crucial. You want somewhere cool and away from direct sunlight or heat sources. Why? Because keeping it cool means less work for the machine and more efficient ice production.
Moreover, consider the flow of people moving around. A corner in the kitchen might seem great until everyone’s tripping over each other to get their ice fix during parties.
Water Connection
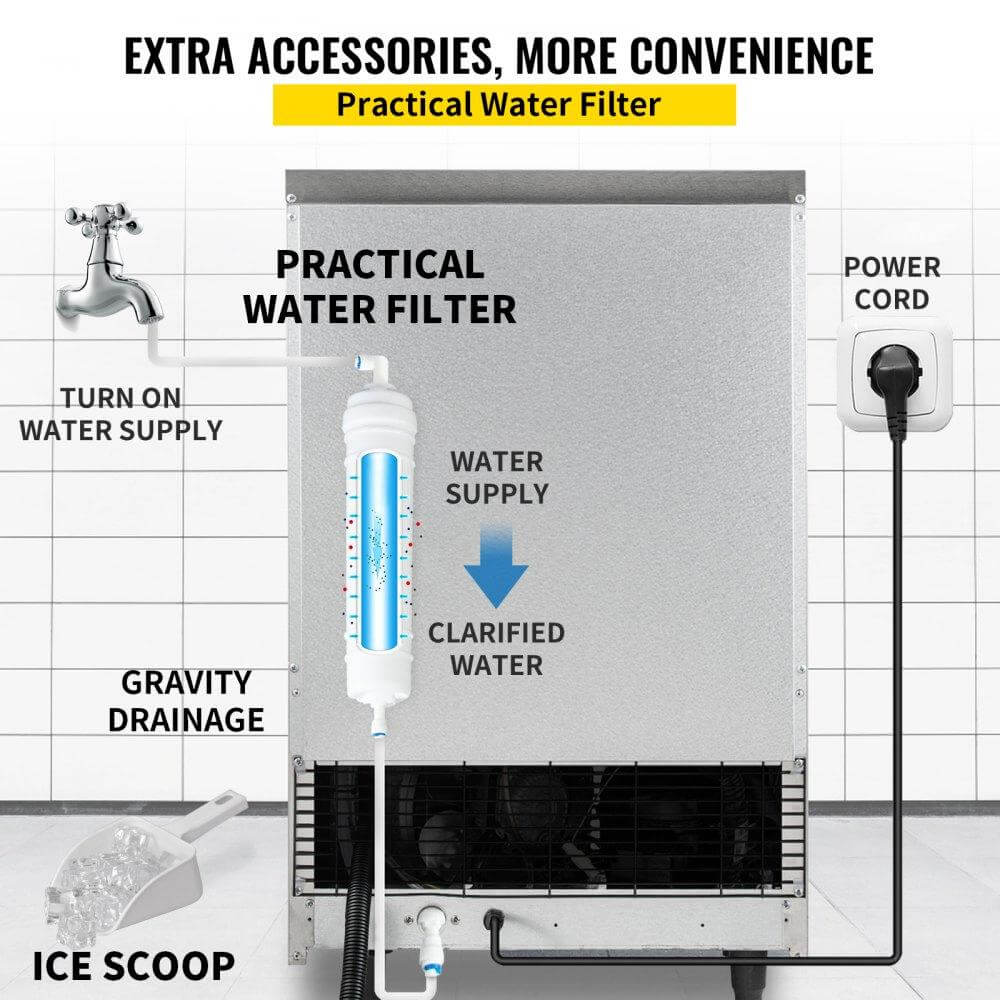
Your ice machine functions on water, so make sure it has easy access to it. But not just any water; it should be provided with clean, filtered water for top-notch quality cubes that won’t taste like last week’s leftovers.
If you’re unsure about your water quality, consider getting it tested or installing a filter system specifically designed for ice makers.
Drainage System
No one likes dealing with leaks or puddles around their brand-new appliance. Make sure there’s an adequate drain nearby that can handle all that meltwater without turning your floor into an indoor pool.
Ventilation
Ice machines need to breathe, too. Proper ventilation prevents overheating and ensures efficient operation. It is beneficial for longevity and energy consumption.
Access to Electricity
This might seem obvious, but double-check that there’s an appropriate power outlet close by. Also, avoid stringing together extension cords across the room as some makeshift solution.
Safety & Compliance
Safety comes first. Make sure you’re always sticking to the rules about electricity and food safety when setting up any kind of business gear.
Tools and Supplies for VEVOR Ice Maker Installation:
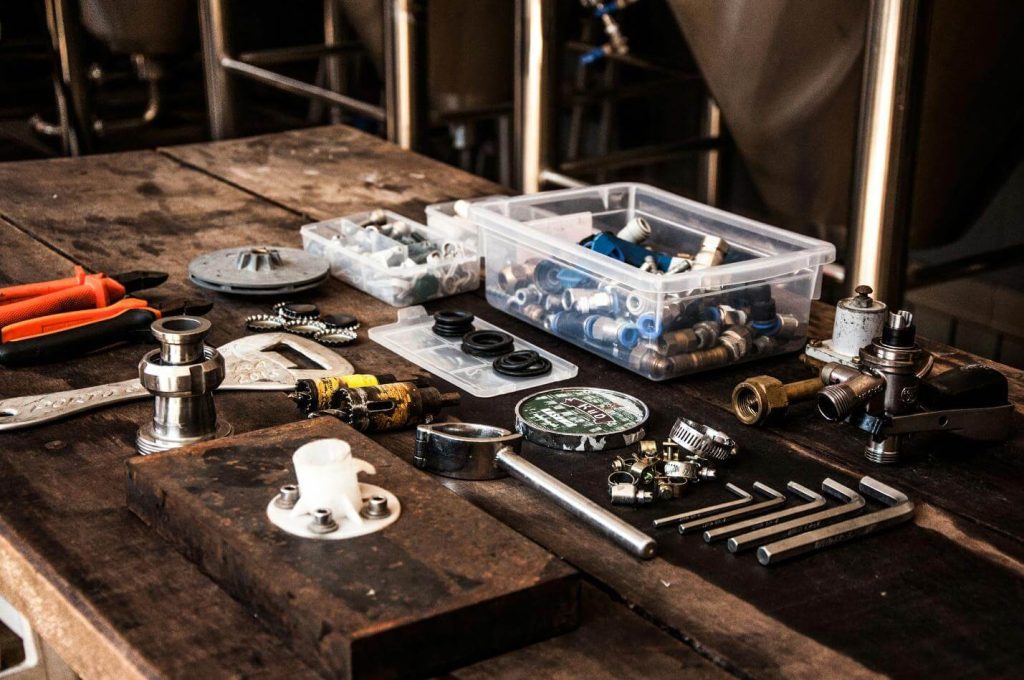
To ensure you successfully complete the VEVOR ice machine setup, you’ll need the right tools in your toolbox. But don’t worry, we’ve got you covered with what’s essential.
Gathering Basic Tools
Starting our journey, let’s get down to the essentials you would need in order to set up your appliance. Installing an ice machine without these basics would be quite the challenge:
- An adjustable wrench for tightening connections.
- A Phillips head screwdriver because screws are everywhere.
- Pliers, because they work like an extension of your hands but are stronger.
Installation-Specific Tools
Moving beyond basics, there are some installation-specific items that will make sure you get your ice maker installed properly:
- Teflon tape: It is a must-have when talking about plumbing. A Teflon tape is a thin tape that helps prevent leaks and is used to seal pipes.
- A water pressure gauge: It is an important tool used to check water pressure. It helps ensure the water pressure is just right so your ice machine can work properly.
- A drill might come in handy if you need to create new spaces or pathways for hoses or lines. Remember, safety comes first, though.
Safety Gear
You also need to get your hands on some safety gear so that you don’t accidentally harm yourself while installing the ice maker. For this purpose, you need;
- Gloves to protect your hands from unexpected scrapes or cuts while installing the appliance.
- Eyewear protection so your eyes don’t get hurt by flying debris during the process of setting up your ice maker.
Step-Wise VEVOR Ice Machine Installation Guide
Have you gathered all the essential tools you would need? Perfect! Now, you might be wondering how to install a VEVOR ice machine. To help you out, we have provided a step-by-step process for installing a VEVOR ice maker. Follow these instructions carefully to ensure a seamless installation of your ice maker.
Foot Installation and Placement
Finding the perfect spot for your VEVOR ice machine isn’t just about convenience. There are other things that need to be kept in consideration, such as access to water, efficient drainage systems, adequate airflow, and electrical connections. Make sure the ice maker is not tucked away in a corner where it can overheat or block airflow. Keep it accessible for maintenance because, let’s face it, nobody wants to move a heavy machine when something goes wrong.
Once you’ve picked out the prime location, adjust those feet. A level machine is a happy machine that runs efficiently and makes perfect ice cubes. You can take help from a spirit level here, which is an instrument used to check whether a surface is properly leveled or not.
If you are confused about which ice maker you need, check them out here. There is a wide variety available from which you can choose one according to your specific needs.
Water Supply Connection
This step might make you feel like a plumber, but fear not. Connecting your ice machine to the water supply is simple and easy if you follow the instructions closely. You’ll need some specific tools, which include tubing cutters and compression fittings. Ensure there are no leaks by double-checking every connection because water damage is no joke.
Ice Machine Drain Set Up
Remember, your new ice maker won’t be so great if it turns your kitchen into an indoor pool area because of improper drainage setup. Gravity drains require careful placement since they rely on gravity to remove water. If you place them too high, they will end up creating a flood situation in your kitchen. Thus, it is always better to ask for professional help when setting up your ice maker’s drainage.
Making Electric Connections
You’re almost there. Making electric connections might sound intimidating, but connecting your VEVOR ice machine is as easy as plugging in any other appliance. You just have to ensure you have an outlet nearby that meets the voltage requirements listed in the manual. Also, make sure this circuit isn’t overloaded because you wouldn’t want any trips during peak hours.
Leveling
The last checks before switching your ice maker on include making sure everything’s perfectly horizontal using that handy spirit level again. This ensures smooth operation, prevents mechanical issues, and guarantees uniform-sized ice cubes.
Final Checks and Testing
All set up? Before hosting the first big event or enjoying a quiet night at home, do a run-through of a few cycles according to the manufacturer’s instructions to ensure everything is functioning correctly. Pay attention to how long it takes to produce a batch of ice cubes. These last-minute checks will give you peace of mind when it is time to use the ice maker.
FAQs about VEVOR Ice Machine Installation
If you’re eyeing a shiny new VEVOR ice machine for your kitchen or outdoor patio, you probably have a lot of questions. Fear not. We’ve got the answers to all the questions you might have.
Can I install an ice machine on a covered patio?
Absolutely, you can. But ensure your covered patio is protected from direct sunlight and rain. Plus, make sure it has access to electricity and water supply.
How much water is needed per cycle?
When filling up your ice maker with water, remember that precision matters here. Generally speaking, most models need about 5 liters per batch of crystal-clear cubes.
Can you turn off the blue light inside?
Fancy mood lighting aside, if bright lights aren’t your style or need during midnight snack raids—you’re in luck. Most models come with an option to dim down or completely shut off interior illumination.
Is it possible to install this machine under cabinets in my kitchen space designated for dishwasher use only?
If compact convenience tops your priority list when designing dream kitchens, then yes, you can place these sleek machines where dishwashers used to go. They fit snugly, but there should be proper ventilation, drainage, and power sources available.
Conclusion
Getting your VEVOR ice machine set up right matters. It starts with picking the perfect spot and ensuring you’ve got water, drainage, and power sorted. After selecting the ideal location, it’s crucial to carefully connect all components, ensuring a seamless setup.
Remember to keep tools handy and follow each step closely for a smooth installation. This process isn’t just about getting things running; it’s about making sure they run well for a long time. Double-check every connection and keep an eye out for anything that seems off during testing. Thus, ensure you take all the safety measures to avoid accidents or electrical hazards.


