| DIY Laundry Basket Type | Difficulty Level | Estimated Cost | Duration |
| Wooden | 6 out of 10 | $20-$50 | 2-4 hours |
| Cardboard | 4 out of 10 | $5-$15 | 1-3 hours |
| Fabric | 3 out of 10 | $10-$25 | 1-2 hours |
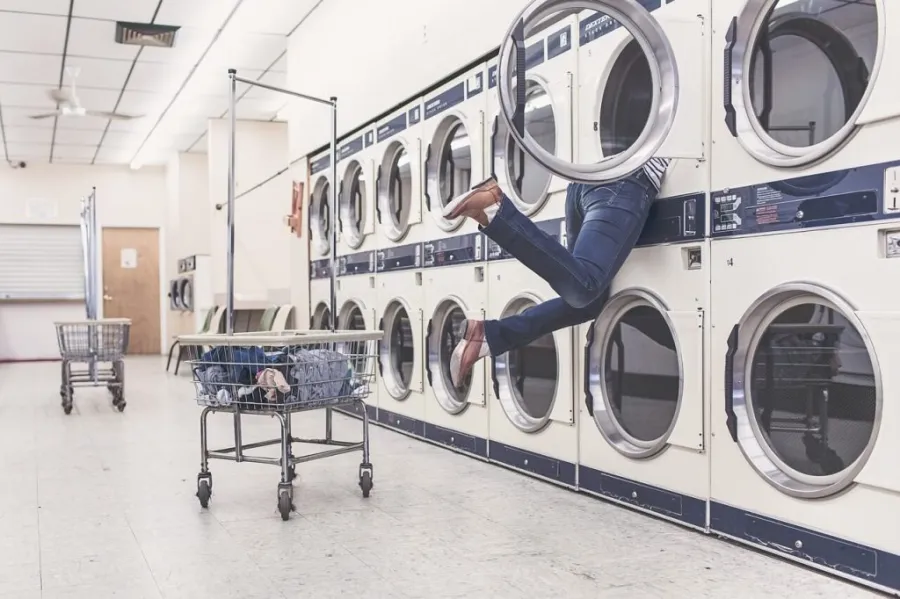
If you’ve ever had a rough day, you know how satisfying it is to simply fling your clothes all around and slump into bed. That satisfying moment quickly turns into a stressful horror when it’s time to clean up and do the laundry. This is why you need a laundry basket.
A laundry basket helps you stay organized, and the best part is that you can make your own DIY laundry basket.
Forget about the boring mass-produced laundry baskets in stores. You can settle into a satisfying experience of building your own DIY laundry basket. By simply upcycling a few items, you’ll have something really creative and functional, for less the cost of buying a new laundry basket.
This article will show you how to make your own DIY laundry basket, whether you have wood, cardboard or just fabric lying around.
But first, let’s talk about why you should build a DIY laundry basket.
Table of contents
- Why Build a DIY Laundry Basket?
- Types of Laundry Baskets that You can Make Yourself
- Choosing the Right DIY Laundry Basket
- Steps for Making a DIY Wooden Laundry Basket
- Making a Laundry Basket Out of Cardboard
- Steps for Making a DIY Fabric Laundry Basket
- Choose VEVOR DIY Laundry Cart for All Your Laundry Needs
- Key Takeaways
- FAQS About Making a DIY Laundry Basket
Why Build a DIY Laundry Basket?
Beyond the satisfaction of creating something yourself, crafting your own laundry basket has a lot more benefits. They are:
1. Cost-Effective: Compared to laundry baskets you buy from the store, DIY laundry baskets can greatly reduce your expenses. In most cases, you only need to upcycle readily available materials such as wood, fabric or even cardboards.
2. Eco-Friendly: Going green is the way, and there’s no better way to do this than to upcycling old materials like clothes, fabric scraps, cardboard boxes, or broken wooden furniture. By upcycling, you’ll be reducing environmental waste while adding a touch of creativity to your laundry routine.
3. Unleash Your Creativity: We’re special because we’re different. You can spice up your individuality by making your own DIY laundry basket. You don’t have to join the crowd to buy tasteless laundry baskets anymore. Create yours based on your unique taste and experience.
4. Fun and Rewarding: DIY is a really fun and rewarding experience. You’re working while enjoying the process as well. It’s great for learning new skills and expressing your creative side. It also helps with being resourceful and learning how to tackle mistakes too.
Let’s look at the types of laundry baskets you can make all by yourself
Types of Laundry Baskets that You can Make Yourself
Are you ready to start your DIY journey? Here are a few types of DIY laundry baskets that you can make on your own:
1. Fabric: Now is the time to unleash your sewing skills. You can create an amazing DIY laundry basket from spare fabric lying around. Do you have old and worn-out clothes that no longer size you? It’s time to rip them apart and create something a beautiful laundry basket with them.
2. Wooden: If you’re looking for something more sturdy, you can craft a wooden laundry basket. To do this though, you need spare wooden structures, and a bit of woodworking skills and tools. You can upcycle old tables and chairs for this.
3. Cardboard: Sometimes, all you need is to let loose your inner-child. You can transform a bunch of cardboard into a really functional DIY laundry basket. All you need is a bit of glue, cardboards, and paint or fabric straps for personal touch. This is a really easy option especially if you’re on a tight budget.
When DIYing, the possibilities are endless. Trust your creative instincts, and you’ll be amazed.
To get started on making your DIY laundry basket, let’s start with choosing the right one.
Choosing the Right DIY Laundry Basket
Before diving in to creating your DIY laundry basket, you have to consider a few things. These factors will help you choose the basket that fits your needs and available resources.
1. Skill Level: DIY may be great, but it’s most fulfilling for people with at least basic DIY skills. If you’re a beginner in DIY, you should stick to simpler designs like upcycling fabrics and cardboard boxes. As your DIY skills improve, you can try creating wooden DIY laundry baskets.
2. Materials: DIY mostly uses what you have to create what you want. Hence, you have to look around and make do with your available materials. Buying new materials will only drive up cost.
3. Laundry Needs: How much laundry do you often need to wash? If you’re living alone, your laundry needs will likely be smaller than that of a family. Hence, you might opt for a fabric laundry bag instead of a wooden DIY laundry basket.
4. Time Commitment: Be realistic about the time you can dedicate to your DIY project. Simple designs like fabric and cardboard laundry baskets are easier and faster to create compared to wooden structures.
5. Style Preference: One of the most satisfying parts of DIY is styling. This is where you get to customize your laundry bag to your taste. Wooden laundry baskets require an advanced level of carving to style, but you can also opt for a simple design. Alternatively, there’s really no limit to your styling options when using fabrics or cardboards.
Once you’ve decided what kind of laundry basket you want to create, it’s time to look at the steps. Let’s start with a DIY wooden laundry basket.
Steps for Making a DIY Wooden Laundry Basket
If you’re ready to transform your wooden bits into functional laundry baskets, here’s what you need to do:
Step 1: Prepare Your Materials and Tools
Gather your supplies! You’ll need:
- Wood: You can either use existing old furniture that is still strong, or buy plywood. Choose plywoods with your preferred thickness.
- Saw: A saw, whether manual or electric would be great for precise cuts.
- Drill and drill bits: You’ll need these to create pilot holes
- Screwdriver with screws: You’ll need these for fastening the wooden bits together.
- Sandpaper: This will be useful for smoothening the edges.
- Paint, stain, or sealant (optional): for finishing touches.
Step 2: Cutting the Wood
To get started, measure and mark the wood pieces based on your laundry basket design. Use a square to draw out precise lines for cutting. Carefully cut the wood using your saw. Work gently to avoid jagged edges. Always double-check to avoid errors and wasting materials.
Step 3: Assembling the Frame
Lay the cut-out wooden pieces flat to form the base and sides of your basket. Mark drill points and carefully drill on both the base and the sides. Advisably use smaller drill bits and give space to prevent the wood from splitting. You can use glue to temporarily fasten the sides to the base to create a stable frame.
Step 4: Attaching the Bottom and Sides
Once you’re done assembling, use your screwdriver to screw in the sides one after the other until you have a sturdy frame. Secure the frame using screws and a screwdriver or power drill, ensuring a sturdy and square structure.
Step 5: Finishing Touches
Although this is optional, it’s great to sand the laundry basket until all rough edges are smooth. You can customize your work by painting, staining, and sealing the laundry basket too. Feel free to play with colors at this point.
Now that you’ve successfully created a DIY wooden laundry basket, let’s try creating a laundry basket out of cardboard.
Making a Laundry Basket Out of Cardboard
Here’s a quick step-by-step guide on how to create a laundry basket out of cardboard.
Step 1: Preparing Materials and Tools
Grab these:
- Cardboard boxes: You’ll need strong cardboard boxes like the ones used to package furniture or home appliances. The bigger the size, the bigger the basket.
- Scissors or knife: For precise and safe cutting.
- Ruler and pencil: For measuring and marking the cardboard.
- Heavy-duty tape: To fasten the cardboard pieces together.
- Optional: Craft glue, paint, fabric scraps, and stencils.
Step 2: Reinforcing the Cardboard
When working with cardboard, durability is key. Cut additional cardboard pieces to create multiple layers for the basket. You can tape or glue them all together to create stronger walls and base for the basket. Focus on strengthening the corners.
Step 3: Cutting and Shaping the Cardboard
Measure and mark the cardboard pieces to fit your preferred size and shape. You can either create a rectangular or circular basket. Rectangular baskets are easier to create and you can easily strengthen the edges. Carefully cut the pieces using your scissors or knife, following the markings you’ve made.
Step 4: Decorating! Decorating! Decorating!
Although this is optional, it’s great for expressing your creativity. You can play with painting different patterns or using gluing stencils to the laundry basket. You can also use fabric scraps, buttons, shells and the likes to improve the beauty of the laundry basket.
Congratulations on creating your DIY laundry basket with cardboard pieces.
Now let’s try with fabric.
Steps for Making a DIY Fabric Laundry Basket
To make a DIY fabric laundry basket, here’s what you need to do:
Step 1: Preparing Materials and Tools
Gather your crafting materials:
- Fabric: Durable materials like denim, cotton, and canvas are strong and washable. Be sure to gather plenty.
- Sewing machine, needle and thread
- Tailor’s chalk: for mapping out patterns
- Scissors: for cutting the fabric into different shapes and sizes
- Measuring tape
- Pins: To hold the fabric pieces together before sewing.
- Optional: Fabric lining, ribbons, buttons, and zip for finishing
Step 2: Choosing the Fabric
Pick a fabric that suits your style and can bear the laundry weight. You could use one strong type of fabric as the main body, and complement it with thinner fabric pieces. For this, you can use old curtains, bedsheets, or denim.
Step 3: Creating the Pattern
If you have sewing experience, you can design your own pattern, or pick one online. Usually, sewing patterns start off as a rectangle which is then marked with a tailor’s chalk. When mapping out a pattern, always give about ½ inch allowance for errors.
Step 4: Cutting and Sewing the Fabric
Following your pattern, use scissors to carefully cut the fabric into pieces. Pin the pieces together, and sew along the pattern. When sewing, ensure that the right side faces inward. Leave a space at the top of your pattern to serve as an opening later.
Step 5: Adding Handles and Reinforcements
To improve your work, you can sew a zip onto the top to serve as the opening. You can also use cut-out fabric strips for handles or opt for drawstring cords instead. For additional reinforcement, you can use fabric liners at the bottom of the basket. This way the basket won’t sag. Turn the basket right-side out, and your work is done.
And there you have it. 3 different types of DIY laundry baskets and how to make them.
Let’s talk about something that can help you with laundry
Choose VEVOR DIY Laundry Cart for All Your Laundry Needs
If you’re looking for something that is really cheap yet gives you amazing value for all your laundry needs, then you should check out VEVOR DIY Laundry Cart. Besides being able to handle up to 25lbs of clothes, it has a solid frame with wheels that makes it mobile. Rather than engaging in heavy laundry lifting, you can simply drag the cart with you to wherever you need. What’s more is that it even helps with sorting your laundry by color.
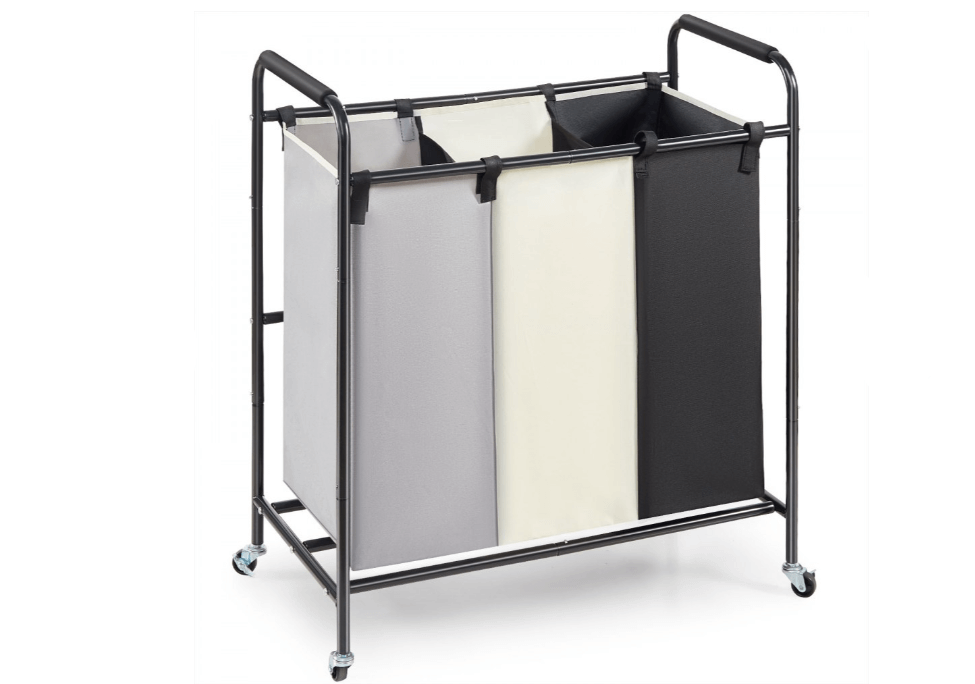
With a VEVOR laundry cart, you’d be spending less money on DIY materials, less time trying to build and make mistakes, and also having the satisfaction of a long-term durable product. It’s your best bet for laundry.
Here’s a video that will show you how to install VEVOR DIY laundry basket. That said, you won’t be spending more than a few minutes doing that. In fact, since the laundry basket comes with pre-measured components with screws and screw holes, the installation is as easy as it comes. Just set up the components, lock them in, and you’re good to go.
With all that’s said, here are the key things to note.
Key Takeaways
- Laundry baskets are essential for organizing and managing your laundry. Remember, cleanliness is healthy.
- There are different types of DIY laundry baskets; fabric, cardboard, and wood. And each one has a unique DIY requirement. The simplest and cheapest to create is a cardboard laundry basket, followed by a DIY fabric laundry basket, and then a wooden DIY laundry basket. For cardboard and fabric, you only need about 1 to 3 hours, while a wooden DIY laundry basket needs a dedicated weekend.
- Sometimes, the best investment needs to be bought. This is why you need VEVOR’s laundry cart. It’s designed to serve all your laundry needs without breaking the bank. It’s easy to use, helps with sorting, and can be taken anywhere.
- While all types of laundry baskets are functional, it’s best to look out for the one that fits your needs – especially if you’re on a budget. No need getting a big laundry basket when you barely have much clothes to wash.
FAQS About Making a DIY Laundry Basket
1. What can I use instead of a DIY laundry basket?
You can easily use a hamper in place of a laundry basket. It’s sizable and easy to move around with.
2. Can I put wheels on a DIY clothes basket?
Yes, you can put wheels on a DIY clothes basket – if it’s made of wood. Wooden clothes baskets have a solid base that can work with wheels compared to fabric and cardboard. VEVOR’s laundry cart has wheels for easy mobility.
3. What do I do with old laundry baskets?
You can either upcycle them into a new laundry basket or properly dispose of them. They can be used to store toys and other items that you don’t actively use.


