
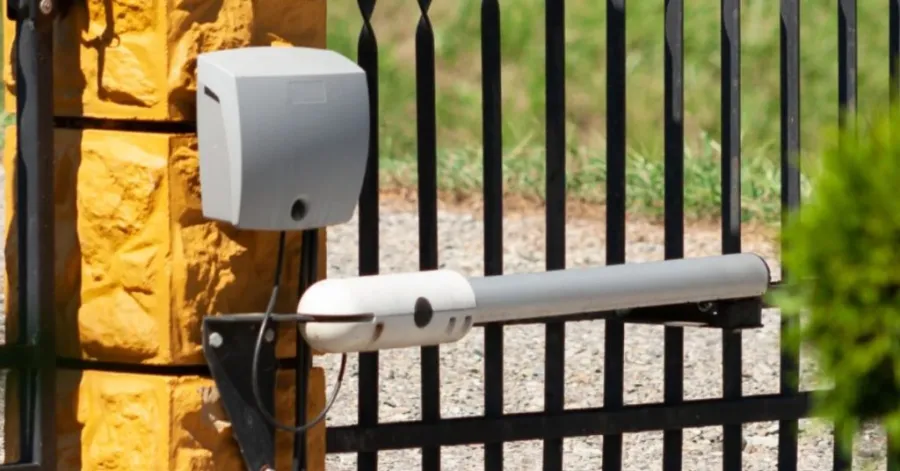
An automatic gate opener is a great solution for enhancing the value, convenience, and security of your property. Regardless of the type of gate to use (sliding or swing), the proper installation procedure will ensure smooth, reliable operation. Learning how to install an automatic gate opener will help you avoid common pitfalls, secure the motor, and ensure the system runs safely. Each stage, be it the preparation of the gate, the installation of the equipment, the wiring, programming, or testing, is significant. This manual covers the entire process of installing an automatic gate opener in easy language and helps you achieve satisfactory outcomes for residential or commercial premises.
Gather the Tools and Materials Before Installation
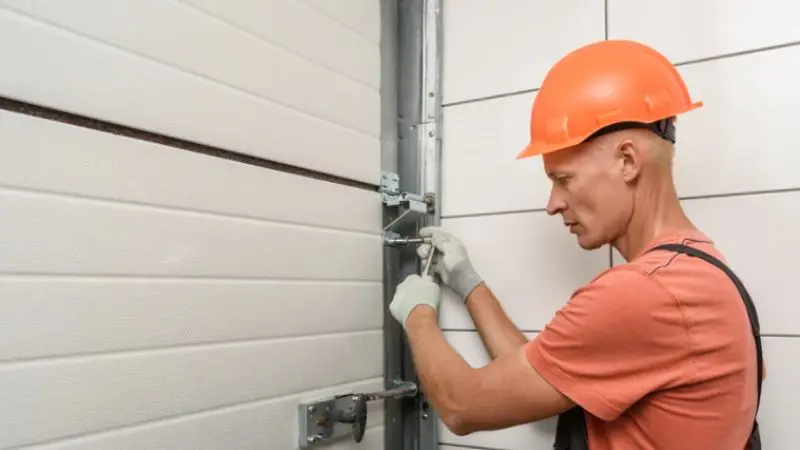
Prior to commencing the installation process, ensure you have all necessary tools and equipment. It will make work easier with everything within your reach and avoid unnecessary interruptions. Whether you are executing a DIY project or considering hiring professional installers to install an automatic gate opener, the right tools and quality components will enhance safety, performance, and the lifespan of your gate opener.
The required tools and materials may differ depending on whether you are installing an automatic sliding gate opener or an automatic swing gate opener. Nevertheless, most installations will require a comparable range of basic tools and hardware.
Essential Tools for Installing an Automatic Gate Opener
The appropriate equipment simplifies and makes the process of installing an automatic gate opener more precise. Before you begin, you will need a power drill, adjustable wrench, socket set, screwdrivers, measuring tape, spirit level, hammer, wire stripper, pliers, and a voltage tester. A masonry drill bit may also be required when attaching the brackets to concrete or brick posts. The project should always use safety equipment like gloves, eye protection, and strong footwear. Installing your automatic gate opener is easier and safer with quality tools that ensure proper mounting, alignment, and electrical connections.
Components Included in a Standard Gate Opener Kit
The majority of automatic gate opener kits come almost complete, with everything needed for a successful installation. A typical standard package includes the motor unit, control board, mounting brackets, actuator arms or sliding gear rack, remote controls, limit switches, installation hardware, and wiring connectors. Additional protection is available in some kits, with safety sensors and warning signs. When installing a kit, always compare the provided parts list with the parts in the kit. Incomplete materials may slow down the project and influence the performance of the complete installation of your automatic gate opener; therefore, checking all the parts prior to installation will assist in a successful setup.
Additional Accessories That Improve Gate Performance
Not all optional accessories are available, but these may greatly enhance the convenience, security, and reliability. The presence of backup batteries ensures the gate remains open even when the power is off, and the photocell sensors prevent the gate from closing when an obstacle is detected. The wireless keypads, smartphone controllers, vehicle exit sensors, and automatic locking systems offer more control and security. Another great choice of places where electricity is not easily available is solar power kits. These accessories add to the total cost of installing an automatic gate opener, but tend to improve the overall functionality and lifetime operation of the gate opener, as well as decrease future service requirements, so they are a valuable investment.
How to Prepare Your Gate Before Installing the Opener
One of the most significant steps prior to installing any gate opener is proper preparation. A high-quality, well-fitting gate minimizes unnecessary tension on the motor and aids the opener in working well over the years. The failure to do this step may result in underperformance, high usage, and high repair expenses, no matter what type of opener you select.
Whether working on a DIY project or looking at the possibility of automatic gate opener installation near me, it is always better to prepare the gate properly to make the whole process of installing the gate much easier and more productive in the long term.
Inspect the Gate, Hinges, and Support Posts
Begin by checking the overall condition of your gate. Open and close it manually to ensure it moves freely without sticking or dragging. Check hinges: Check for rust, wear, or looseness, and tighten or replace them as necessary. Inspect the gate posts and verify that they are not loose, cracked, or moving. Install the opener before repairing any structural weakness, since the motor cannot counterbalance a damaged gate. Having a well-kept gate provides the best basis for a successful installation of an automatic gate opener and helps avoid unwanted strain on the whole system.
Measure the Gate for Correct Opener Positioning
There has to be precision during the learning process on how to install an automatic gate opener. Measure the width, height, weight, and the distance between the hinges and mounting points of the gate. The measurements will be used to determine the appropriate positions of the brackets and the motor unit and to ensure that the opener is operating within its designed range. Poor positioning may reduce opening efficiency, cause asymmetrical movement, and shorten the equipment’s life. Pre-drilling and hardware placement measurements are important steps to ensure the opener provides smooth, balanced, and reliable operation when installed.
Plan the Electrical Supply and Cable Routing
Decide how power will be delivered to the motor safely and efficiently before installing the opener. Trace the closest electrical source and work out a safe path for all wiring. Underground conduits are usually used to protect cables from water, accidental damage, and weather. When you are installing a solar-powered system, you should be able to select the location where the solar panel is fully exposed to sunlight during the day. The installation process would be easier, and future electrical problems would be reduced by planning the wiring beforehand. Regardless of whether installing an automatic sliding gate opener or an automatic swing gate opener, the correct cable routing helps ensure dependable and durable operation.
How to Install the Automatic Gate Opener

After finishing preparing the gate, you may start installing the automatic gate opener. All the parts must be fitted in the appropriate sequence so as to operate smoothly and with high reliability. Adhering to the manufacturer’s instructions can prevent alignment issues, electrical problems, and premature motor wear.
When doing a DIY project or opting to hire an automatic gate opener installer, the more time you take on this step, the more positive outcomes will be realized. A well-fitted system is less noisy, the doors open more often, and the system needs less service in the long run.
Mount the Gate Opener Brackets
Mounting brackets form the support of the complete opener system, and, thus, they have to be fixed in place. Install the brackets as recommended in the manufacturer’s instructions of the manufacturer, check their position with a measuring tape and level, then drill. Install the brackets securely to the gate and posts with the support using the provided hardware or heavy-duty anchor bolts in case it is mounted on masonry. Brackets may be loose or lumpy, resulting in vibration, ineffective gate movement, and unneeded motor strain. This is an important step that you have to be extra careful about so that your automatic gate opener installation can be stable and able to be used on a daily basis over several years.
Attach the Motor and Drive Arm
Once the brackets are in place, place the motor unit on the brackets and secure all the fasteners as per the manufacturer’s instructions. Install the drive arm or actuator between the motor and the gate, making sure that all the pivot points are free to move without any hindrance. Close and open the gate by hand to ensure that the drive arm is moving in a straight line during the entire journey. When properly aligned, it eliminates the unnecessary stress on the motor, and the performance of opening is enhanced. Regardless of whether you are installing an automatic swing gate opener or installing a different type of gate, proper positioning of the motor will contribute to the long life of the whole system.
Install the Control Box
The control box is the main operating unit that controls the operations of the gate opener. Install it in a clean, stable place near the motor but not directly exposed to rain, floods, or overheating. Allow ample room around the enclosure for future maintenance and wiring modifications. Attach the control box securely and ensure that it is readily accessible in case it needs to be programmed or serviced. Proper placement helps safeguard delicate electronic components and facilitates reliable system operation. An automatic gate opener needs to be installed with a properly fitted control box.
Connect the Electrical Wiring
Install all electrical wires carefully, as per the manufacturer’s wiring diagram. Connect the power supply, the motor cables, safety devices, and control accessories to their respective terminals and ensure that all connections are tight. Install route wires in protective conduit where practicable to avoid damage from weather, moisture, or accidental impact. Always verify every connection before switching power back on to prevent electrical faults or equipment damage. Proper wiring will make the opener react appropriately to the commands and safety devices. You may be learning how to install an automatic gate opener, or you may be employing an expert; in any case, proper electrical connections are essential for safe operation.
Install the Battery Backup or Solar Power System
If your opener has a battery backup or a solar charging system, install it after the main electrical connections are complete. Install the battery in the special compartment and fit the terminals as per the manufacturer’s instructions. In the case of solar-powered systems, place the solar panel in the location where the panel gets the maximum amount of sunlight during the day, and place the charging cable safely to the control box. These power options maintain gate operation during electrical outages and enhance overall reliability. They might add to the cost of installing the automatic gate opener, but offer excellent convenience in the long run and continuous operation.
How to Install the Safety and Access Control Components
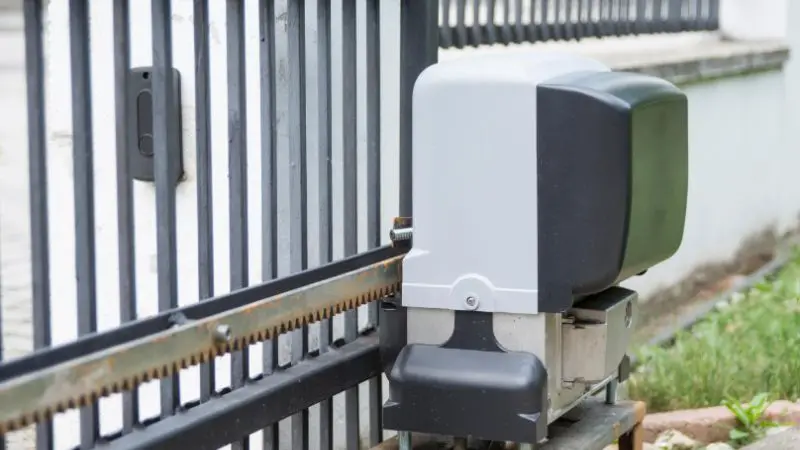
Install the safety and access control devices needed to complete the system after installing the main opener. These features enhance user safety and convenience, and the gate meets the recommended operating standards. They also minimize the chances of accidents since the gate is not allowed to close when there are any obstacles.
These features are requested by many homeowners looking to install automatic gate openers near me, as they enhance security and day-to-day functions. When properly installed, they all work in harmony and reliably with each other.
Install the Photo Eye Safety Sensors
One of the greatest safety measures in an automatic gate system is the photo-eye sensor. Install the sensors on both sides of the gate opening at the desired height, ensuring they face each other. Install the sensor wiring and ensure that it fits the control board. The gate must halt or reverse upon the beam when an object, vehicle, or person gets in the way. Well-operating sensors will eliminate accidents and ensure the safety of individuals and property, and are therefore an indispensable component of any professional installation of an automatic gate opener.
Install the Gate Warning Light
There is a gate warning light that notifies people around when the gate is opening or closing. Install the light in a highly visible place, such as a gatepost or a wall, where it can be seen from both sides of the entrance. Attach it to the assigned output terminal in the control box to ensure that it is automatically activated when the gates are moved. The warning light enhances visibility, particularly during dark hours or in poor weather, and assists drivers and pedestrians in being aware that the gate is now moving. It is an important complement to an automatic gate system.
Connect the Keypad, Remote Controls, and Exit Devices
The last stage is to connect the devices that will enable easy access to the gate. Install the keypad in a readily accessible location and connect it as per the manufacturer’s instructions. Set up the remote controls using the control board and test them all to ensure they work correctly. If your system has vehicle exit sensors, push buttons, or intercoms, install and connect them before completing the installation. Once all the devices have been programmed, go through all the access methods several times to ensure they all communicate well with the gate opener and provide smooth, reliable day-in, day-out operation.
How to Program and Test the Automatic Gate Opener
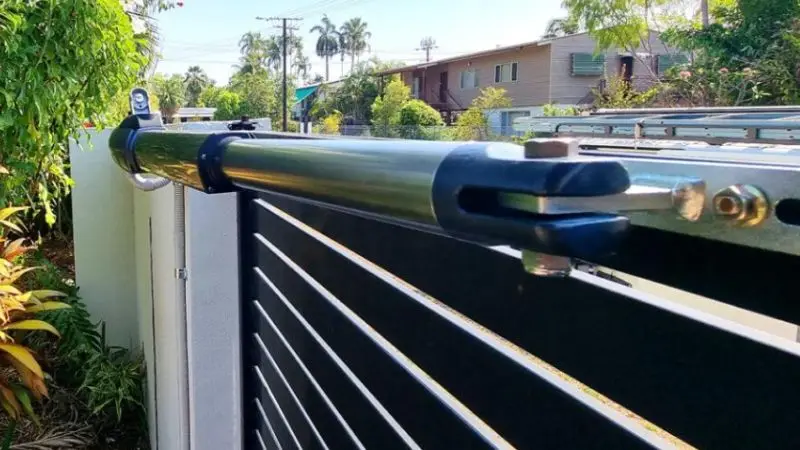
Once all the mechanical and electrical components are installed, programming and testing of the system become the last step. The correct programming causes the gate to open and close without any problems, to react to the commands properly, and to work in a safe manner every time. Having the time to test each function helps detect minor problems before they become costly fixes.
Regardless of whether you have installed a system yourself or employed a professional automatic gate opener installer, a thorough inspection of the system ensures that all parts are functioning correctly. Reliability is also enhanced by careful testing, and your automatic gate opener has a longer life.
Set the Gate Opening and Closing Limits
Start by setting the gate’s opening and closing limits according to the manufacturer’s directions. These settings define the points at which the gate begins, halts, and changes direction during operation. Open and close the gate a few times, making minor adjustments until it moves freely and accurately. Incorrect limit settings may cause the gate to halt prematurely, overtravel, or subject the motor to unwarranted strain. Proper calibration is a key part of installing an automatic gate opener, as it enhances performance, safeguards mechanical components, and ensures the gate is safe and reliable daily.
Pair the Remote Controls and Wireless Access Devices
After setting the travel limits, pair all remote controls and wireless access devices with the control board. Each remote, keypad, smartphone controller, or wireless receiver is registered and programmed as specified by the manufacturer. Check each device separately to ensure it can open and close the gate at the desired distance. Remove any unused or unauthorized remotes to enhance security. When properly programmed, all authorized access devices should communicate effectively with the opener, making your automatic gate installation more convenient and secure in everyday use.
Test the Safety Features and Auto-Reverse System
Before the gate can operate in routine operation, it must undergo safety testing. Test to ensure that the photo-eye sensors are detecting obstacles properly and that the gate avoids or reverses as soon as the safety beam is broken. Check the auto-reverse operation by using the procedure as recommended by the manufacturer to ensure that, when resistance is detected, the gate responds appropriately. Also ensure that emergency release mechanisms operate easily during a power outage. Complete testing is done to ensure that the system safeguards people, vehicles, and property without compromising the reliability of performance once installed.
Complete a Final System Inspection
Conduct a final check, then mark the installation as complete. Ensure that every mounting bolt, bracket, wiring connection, and cover is correctly attached. Pay attention to unfamiliar sounds during the gate work and make sure that the movement is not shaky. Check all cables and make sure that they are securely attached and not exposed to the weather. Lastly, test the gate with all possible access devices to confirm the stability of its performance. A full inspection ensures that the automatic gate opener is installed correctly and is prepared to perform efficiently in the long term.
Common Mistakes to Avoid During Installation
Even high-quality gate opener systems may have issues when installed improperly. Poor planning, mismeasurement, or neglect of safety requirements has led to many installation problems. Knowledge of these typical errors will allow you to complete the project more effectively and minimize the chances of fixing them or causing early equipment malfunction.
Be it the work you are doing yourself or comparing the cost of installing an automatic gate opener with the cost of hiring an expert, by eliminating these mistakes, you will have a safe and reliable functioning of your gate opener for many years.
Installing the Opener in the Wrong Position
Among the most common installation errors is installing the opener in the wrong place. When the motor or brackets are not placed correctly, the drive arm can move at the wrong angle, thus creating uneven movement and overstraining the system. This may cause slowness of operation, wear and tear, and high maintenance. Always take the measurements as suggested by the manufacturer and make sure the hardware is aligned before permanently fitting it. Both automatic sliding gate opener installation and swing gate systems require proper positioning in order to achieve efficient and smooth operation.
Installing an Opener on an Unbalanced Gate
An automatic gate opener does not fix structural issues; it only moves a gate. When the gate slides on the floor, catches when it moves, or has broken hinges, the motor is forced to exert a lot more effort than it should. This extra load can shorten the opener’s life and make it prone to mechanical failure. Prior to commencing installation of automatic swing gate openers or any other type of gate, check that the gate opens and closes easily by hand. When a properly balanced gate is used, automatic operation is most likely to be reliable.
Making Incorrect Electrical Connections
Another common cause of installation failures is improper electrical wiring. Attaching wires to the incorrect terminals, having loose connections, or attaching cables that are not as specified by the manufacturer can cause the system to malfunction or even damage the control board. Consistently refer to the wiring diagram and ensure that all connections are checked before re-energizing. Outdoor wiring shall be sheathed with appropriate conduit to minimize the chances of moisture damage and unintentional abrasion. Proper electrical installation enhances safety and helps ensure your automatic gate opener is installed reliably.
Failing to Install Required Safety Devices
Other installers may disregard the safety elements in order to save time or save money, but this is an unreasonable risk. Photo-eye sensors, warning lights, and emergency release systems are necessary to prevent accidents and safeguard people, pets, and vehicles. The gate can keep closing when an obstacle is present without these devices. All professional automatic gate and door installations include safety equipment, as it enhances security and reliability. By installing all recommended safety devices, your automatic gate system will comply with current safety standards and operate safely on a daily basis.
Wrap Up
An automatic gate opener is a reliable security system, with less effort when entering or leaving and years of reliable service. It is useful to take the time to prepare the gate, install all parts properly, and check all safety features to avoid future issues and expensive repairs. Although most homeowners can do the project themselves, others might feel more reassured having a professional install an automatic gate opener, as they will have the confidence and professional workmanship. Knowing the cost of installing an automatic gate opener and finding the appropriate equipment for the type of gate will also lead to long-term satisfaction. Your automatic gate system will work efficiently, safely, and consistently on a daily basis with caution during installation and regular maintenance.
FAQ
What is the duration of installation of an automatic gate opener?
The average time spent on automatic gate opener installation is 4-8 hours. The installation time will be longer due to bigger gates, intricate wiring, or other extras.
Am I capable of installing an automatic gate opener?
Yes, with a little mechanical and electrical know-how. Nonetheless, complex systems or difficult property setups are better installed by professional automatic gate openers.
What is the average price of an automatic gate opener installation?
The cost of installing the automatic gate opener will vary based on the type of gate, opener, labor, and accessories. Installations that are done by professionals tend to be more expensive than DIY projects.
Does it have an automatic gate opener that can be used in the event of a power outage?
Yes. Most systems have a battery backup or a solar-powered option, so the gate opener can keep working even when the primary electrical power is unavailable.
5. What is the nearest place to install automatic gate openers?
Find automatic gate opener installation in my area, research customer reviews, check certification, and get several quotes before selecting one with good qualifications.




