
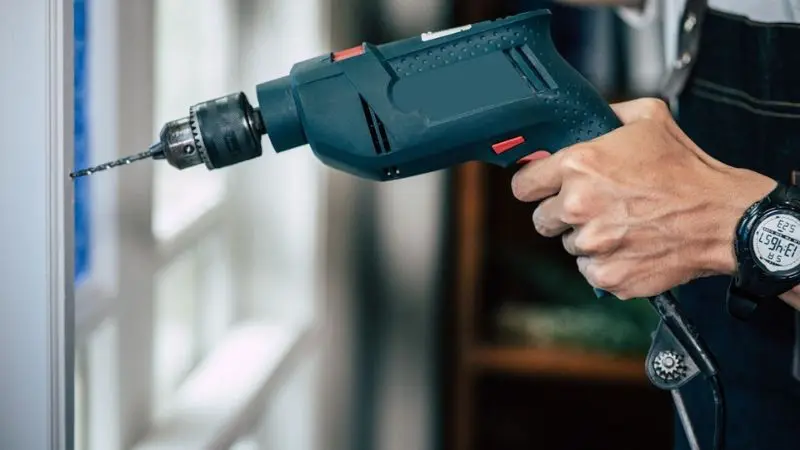
Want to learn how to put a drill bit in a drill machine the easy way? It’s simpler than you think! Start by loosening the chuck, sliding in your drill bit, and tightening it until it’s snug. That’s it — you’re ready to go! Whether you’re a beginner or just need a quick reminder, learning how to use a drill safely takes only a few easy steps. Always double-check that your bit is secure before you start drilling. With the right setup and care, you’ll handle your drill confidently and get clean, precise holes every time.
Safety Steps Before Using a Drill
Safety should be the first thing a beginner should know before learning how to insert a drill bit into a drill. Spending a couple of minutes to get ready will avoid accidents and enable you to work more comfortably. Regardless of whether you are drilling with a cord or cordless, always put safety in the first place. A properly set-up system not only covers you, but also gives you improved longevity and performance of your tools. Following these are the steps that one must follow before proceeding to the actual drilling process.
Step 1: Unplug or Remove the Battery
Before you do anything, make sure your drill is completely off. If it’s a corded drill, unplug it from the wall outlet. For a cordless one, take out the battery. This stops the drill from starting accidentally when you handle the chuck or bit. Knowing how to put a drill bit in a cordless drill properly begins with this essential safety step. Even if you think it’s unnecessary, never skip it. Drills are powerful tools that can start suddenly and cause injury. Taking this simple precaution gives you peace of mind and keeps your workspace safe while preparing your drill.
Step 2: Inspect the Drill and Bit
Once your drill is off, take a closer look at your drill and the bit of choice. Check cracks, rust, or any form of damage that may interfere with safety. Clean dust, dirt, or oil from the chuck and the bit, and then insert it. This is used to aid the grip of the bit and avoid the slipperiness. Learning step-by-step on how to insert a drill bit into a power drill, it is important to remember that the drill bit must be clean and undamaged to increase accuracy. Secondly, ensure the bit is the one that fits into the project type that you have. A brief check-up ensures that your drill machine is running fine and your work is safe and efficient.
How to Put a Drill Bit in a Keyless Drill
Modern drills often come with a keyless chuck, making the process of inserting bits quick and simple. This type of chuck doesn’t require a separate key, which makes it easier for both beginners and professionals. Understanding how to put a drill bit in a drill for beginners becomes effortless once you know the basic hand motions. Let’s go through the easy, step-by-step method to insert your drill bit correctly and securely in a keyless drill.
Step 1: Hold the Drill and Loosen the Chuck
Start by holding your drill firmly in one hand and gripping the chuck—the round part at the front of the drill—with your other hand. Turn the chuck counterclockwise to open it. You’ll notice the jaws moving apart as it loosens, often with a soft clicking sound. This is how you prepare your drill to insert a new bit. When learning how to put a drill bit in a power drill step by step, always focus on balance and control while loosening the chuck. A stable grip ensures accuracy and prevents slipping during this step.
Step 2: Insert the Drill Bit Properly
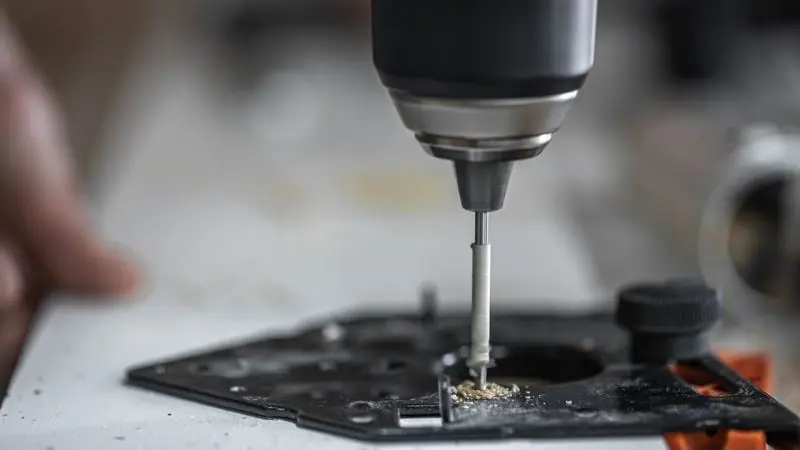
Insert the smooth end of a drill bit, which you intend to use, into the open chuck. Ensure that the sharp point is facing outward and is prepared to be drilled. Grasp the bit straight so it will be in its place. The second step is to turn the chuck clockwise until the bit is captured. To understand how to fit a drill bit in a cordless drill in an appropriate way is to ensure that the chuck is tightened to the point that it will not be loose, but tight. When you have it in place, you should pull down your bit a little to make sure that it is really snurled into the hole. The right insertion of a bit helps to avoid wobbling and make the holes even.
Step 3: Check Alignment and Secure Fit
Before you begin drilling, double-check that the bit is perfectly straight. A crooked bit can lead to uneven or oversized holes. Turn the chuck one last time clockwise if the bit still feels loose. This final check helps keep your drilling precise and safe. When you need to switch bits, simply reverse the process by loosening the chuck again. Learning how to insert a drill bit without a chuck key helps you save time and makes the job more convenient. Once your bit is secure, you’re ready to start your project with confidence.
How to Put a Drill Bit in a Keyed Drill
If you’re using an older drill, it probably has a keyed chuck instead of a keyless one. This type of chuck uses a small tool called a chuck key to open and tighten the jaws that hold the bit. Learning how to put a drill bit in a drill for beginners with a keyed chuck might feel a bit old-fashioned, but it’s still simple and effective once you understand the process. Here’s how to handle it step by step for a secure and accurate fit.
Step 1: Insert the Chuck Key and Loosen the Chuck
Start by finding the chuck key, which looks like a small metal tool with teeth on one end. Insert the key into the hole on the side of the chuck and turn it counterclockwise. You’ll notice the jaws begin to open as you turn. Keep rotating until the opening is wide enough for your bit. When learning how to put a drill bit in a power drill step by step, this movement is crucial for preparing space inside the chuck. Make sure you keep a steady hand and avoid forcing the key while turning.
Step 2: Insert and Center the Drill Bit
Once the jaws are open, take your drill bit and place it carefully in the center of the chuck. Make sure the bit sits straight — not tilted — before tightening. Knowing how to put a drill bit in a cordless drill properly is similar in concept, but with a keyed chuck, the alignment is even more important. A centered bit ensures smooth, even drilling without shaking. Hold the bit gently as you get ready to secure it. Avoid pushing too hard, as this can affect the angle or damage the bit during the tightening process.
Step 3: Tighten and Secure the Bit
Next, insert the chuck key again and turn it clockwise to tighten the jaws around the drill bit. Continue turning until the bit feels snug and stable. It should not move or wiggle when you give it a gentle tug. This step helps you master how to insert a drill bit without a chuck key as well, since the tightening principle remains the same — steady and firm pressure. Once the bit is secure, remove the chuck key immediately to prevent accidents. Your drill machine is now ready for precise, safe drilling.
Common Mistakes to Avoid When Using a Drill
Even after understanding how to put a drill bit in a drill for beginners, mistakes can still happen — especially when you’re just starting out. These errors can cause uneven drilling, damage your tools, or even lead to accidents. Knowing what to avoid is just as important as learning the right steps. Let’s look at the most common mistakes people make when inserting and using a drill bit, and how to prevent them.
Mistake 1: Forgetting to Remove the Chuck Key
One of the most frequent mistakes when using a keyed drill is forgetting to remove the chuck key after tightening the bit. When the drill is switched on with the key still in place, it can fly out and cause injury. Remember, safety comes first. Even if you know how to put a drill bit in a power drill step by step, leaving the chuck key in is dangerous. Always remove it right after tightening and place it somewhere safe. Building this habit ensures you stay protected and your workspace remains accident-free.
Mistake 2: Inserting the Bit Crooked
Another common issue is inserting the bit at an angle instead of straight. A crooked bit causes wobbling, uneven holes, and can even break during drilling. To fix this, hold the drill steady and check that the bit sits in the center of the chuck before tightening. Understanding how to put a drill bit in a cordless drill properly means paying attention to alignment. Once the bit looks straight, tighten the chuck and give it a small spin by hand to test. If it wobbles, readjust before drilling for smoother, more precise results.
Mistake 3: Using the Wrong Drill Bit
Choosing the wrong drill bit for your material can quickly damage both your bit and your work surface. Each bit is made for a specific purpose — wood, metal, concrete, or plastic. Before you start, make sure your bit matches the material you’re working with. Even when you know how to insert a drill bit without a chuck key, selecting the wrong type can ruin your project. Always double-check your drill’s settings and secure your material properly. Taking a few seconds to confirm your setup ensures cleaner results and a safer drilling experience.
Wrap Up
Learning how to put a drill bit in a drill properly makes every DIY task easier and safer. Whether you use a cordless or corded drill, the key is to handle it with care and attention. Always start by checking your drill, choosing the right bit, and securing it tightly before you begin. Avoid rushing or skipping safety steps — small details make a big difference in your results. With regular practice, you’ll quickly gain confidence and precision. Keep your tools clean, follow these simple steps, and you’ll be ready to tackle any home project like a pro.
FAQ
How do I know if the drill bit is tight enough?
Give the bit a gentle tug to check if it’s secure. If it doesn’t move, it’s tight enough. Always double-check before drilling to ensure safety and accuracy during your project.
Can I use any drill bit with my drill?
You can use most drill bits, but always match the size and type to your drill’s chuck and project material. Choosing the correct bit ensures smooth drilling, better results, and prevents damage to both tool and surface.
What should I do if the bit keeps slipping?
Stop drilling immediately and retighten the chuck. Make sure the bit is centered and straight before continuing. If it still slips, clean the chuck or switch to a different bit for a secure fit.


