
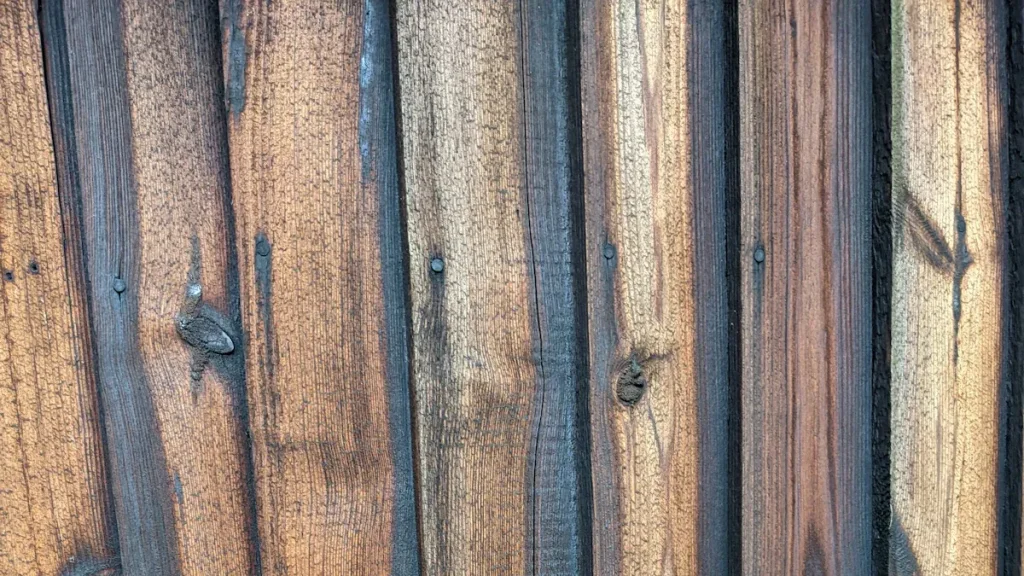
Your fence is your first line to defense and impression. The type of fence you have and the way you do its upkeep tells people a lot about you. So, if you’re trying to stain your old fence to look brand new, it can seem confusing.
And in this blog, we’ll help you learn how to stain a fence yourself at home with all the tools you’ll need to get the job done. First, let’s talk about how to prep to stain a fence:
Tools and Materials You’ll Need
1. Stain Types
Choosing the right stain makes a big difference in your results. You will find two main types: oil-based and water-based. Here’s the main differences between both:
| Aspect | Oil-Based Stains | Water-Based Stains |
| Penetration Depth | Deeply penetrates wood, protects from inside | Forms surface film, limited penetration |
| Durability | Lasts longer, resists moisture | Less durable, may chip or peel |
| Drying Time | Slow (up to 24 hours) | Fast (about 4 hours) |
| VOC Emissions | Higher, stronger smell | Lower, more eco-friendly |
| Cleanup | Needs solvents | Easy with soap and water |
| Effect on Wood Grain | Does not raise grain | Can raise grain |
If you want deep protection and rich color, oil-based stains work best. If you prefer quick drying and easy cleanup, water-based stains are a good choice. Always check the label for outdoor use.
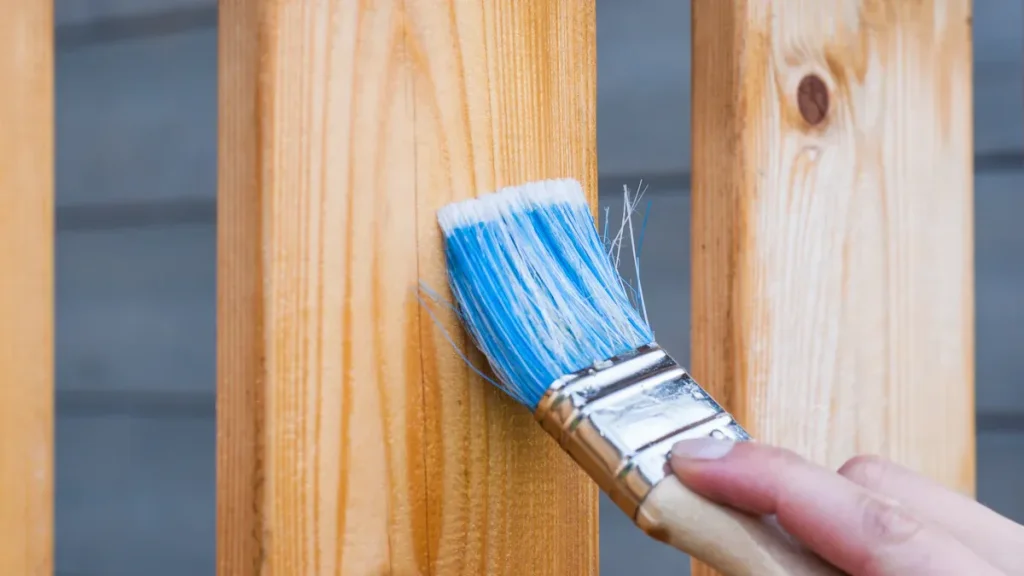
2. Brushes and Rollers
You need the right tools for smooth, even coverage. Brushes let you work stain into the wood grain and reach tight corners. They give you control, but take more time and can leave streaks if you rush.
Rollers cover large areas quickly and help spread stain evenly with less mess. Foam rollers hold more stain and work well for fences. For most fences, a 4-inch roller with a 3/8-inch nap is ideal. Use a brush for corners and gaps.
- Brushes highlight wood details but need careful technique.
- Rollers are lighter and make up-and-down strokes easy.
- Use sturdy trays and pole extensions to avoid splatter.
3. Sprayers
Sprayers can save you time, especially on big fences. They spray stain fast and reach tricky spots. You still need to back-brush after spraying to work the stain into the wood and avoid drips.
Sprayers need practice, so test on a scrap board first. Always wear protective gear and cover nearby plants or surfaces.
Tip: Use a sprayer for speed, then follow up with a brush for the best finish.
4. Protective Gear
Staining can get messy. Protect yourself and your space with these items:
- Gloves to keep stain off your hands
- Safety glasses to shield your eyes
- Old clothes or a work apron
- Dust mask, especially when sanding or spraying
- Drop cloths to cover grass, plants, and patios
With the right tools and gear, you make the job safer and easier. Now you are ready for the next step in how to stain a fence.
Before You Stain, Prep Your Fence
1. Clean your fence
Start by giving your fence a good cleaning. Dirt, mold, and old stain can stop new stain from soaking in. You can use a pressure washer with adjustable settings to blast away grime, but keep the pressure low to avoid damaging the wood.
If you see mold or mildew, try an eco-friendly cleaner or a mild bleach solution (one part bleach to three parts water). Scrub with a stiff-bristle brush for stubborn spots. Always rinse well with a garden hose.
Tip: Pre-wet your plants and grass before cleaning to protect them from any cleaning solution.
Here’s a quick look at common cleaning agents:
| Cleaning Agent | Use Case & Effectiveness | Notes & Precautions |
| Sodium Percarbonate | Removes mold, mildew, and algae; eco-friendly | Good for deep cleaning |
| Bleach Solution | Kills mold and mildew | Dilute properly; rinse thoroughly |
| Mild Detergent | Light cleaning | Safe for most wood |
2. Dry your fence
Let your fence dry completely before moving on. Wet wood won’t absorb stain well and can lead to blotchy results. Most stains need the wood to dry for at least 24 hours, but if it’s humid or has rained, you might need to wait longer.
Note: Warm, dry weather helps speed up drying. If you’re unsure, touch the wood—if it feels cool or damp, give it more time.
3. Sand your fence
Sanding helps the stain soak in and gives you a smooth finish. Start with medium-grit sandpaper (like 120 grit) for rough spots. Always sand in the direction of the wood grain. For best results, work your way up to finer grits, finishing with 220 grit. Wipe away dust between steps.
Try the “water popping” trick. Lightly dampen the wood, let it dry, then sand again. This raises the wood fibers and helps the stain go on evenly.
4. Do any necessary repairs
Check your fence for damage. Look for broken boards, loose nails, or signs of rot. Replace any boards that are too far gone. For small holes or cracks, use a high-quality wood filler. Tighten or replace any loose hardware.
Annual inspections and quick repairs keep your fence strong and looking good for years. Regular cleaning, repairs, and sealing can double the life of your fence and keep it looking fresh.
How to Stain a Fence Like a Pro
Application Methods
You have three main ways to apply stain: brush, roller, or sprayer. Each method has its own strengths and you’ll have to learn how to stain a fence with a sprayer, brush, etc. Picking the right one depends on your fence size, the stain you choose, and how much time you want to spend.
Here’s a quick comparison to help you decide:
| Method | Speed/Time Efficiency | Paint Usage Compared to Roller | Transfer Efficiency | Best Use Case |
| Brush | Slowest method | Baseline (lowest paint usage) | Very high (almost all paint applied) | Small fences, detail work, oil-based stains |
| Roller | Almost twice as fast as brush | Baseline | Very high | Large flat areas, quick coverage |
| Traditional Sprayer | Fastest; 2-5 min per panel | 25-33% more paint used | ~50% | Big fences, speed needed, some overspray |
| HVLP Sprayer | Fastest; 2-5 min per panel | Closer to roller usage | 80-90% | Uniform coverage, less overspray, pro results |
A brush gives you control and helps push stain deep into the wood. It works best for small fences or when you want to highlight wood grain. Rollers cover big areas quickly and waste very little stain. If you want to finish fast, a sprayer is your best friend.
High Volume Low Pressure (HVLP) sprayers can stain a whole panel in just a few minutes. They help if you’re learning how to stain a fence fast because they spray a fine mist for even coverage, but you need to practice first. Sprayers use more stain than rollers or brushes, so cover plants and patios before you start.
Tip: Always test your method on a small spot before you tackle the whole fence.
Back-Brushing
No matter which method you pick, back-brushing is a must for a pro finish. So, naturally you have to learn how to stain a fence with a brush. This step means you go over the wet stain with a brush, working it into the wood. Here’s why you should never skip it:
- Back-brushing helps the stain soak deep into the wood grain.
- It spreads the stain evenly, so you don’t get dark or light patches.
- This step stops lap marks and streaks from forming.
- You get a smooth, even color that looks like a pro did it.
- It helps the stain stick better, so you avoid sticky spots or peeling later.
- After spraying, back-brushing keeps a wet edge and blends the stain for a perfect coat.
If you want to know how to stain a fence like an expert, always keep a brush handy for this step.
Working Top to Bottom
Start at the top of your fence and work your way down. Gravity helps you here. If any stain drips, you can catch and blend it as you move lower. This method keeps your finish smooth and prevents runs or streaks from drying in place.
- Begin with the highest boards or rails.
- Move down one section at a time.
- Overlap each stroke slightly to keep a wet edge.
Note: Working top to bottom also helps you spot missed spots before the stain dries.
Avoiding Lap Marks
Lap marks happen when one section of stain dries before you blend in the next. They look like dark lines or streaks. You can avoid them with a few simple tricks:
- Work in small sections, about 3-4 boards at a time.
- Keep a “wet edge” by overlapping each new stroke with the last while it’s still wet.
- Don’t stop in the middle of a board. Finish each board from top to bottom before moving on.
- If you use a sprayer, follow up right away with back-brushing to blend the stain.
If you want to master how to stain a fence, focus on even coats and blending as you go. Take your time, and you’ll get a smooth, streak-free finish.
Pro Tip: Stain on a cloudy day or in the early morning. Direct sun dries stain too fast and makes lap marks more likely.
Now you know how to stain a fence with the right tools and techniques. The next step is finishing and keeping your fence looking great for years.
Sealing
After you finish staining, you can add a clear sealant for extra protection. A good sealant forms a barrier that keeps water out and blocks UV rays. This helps your fence keep its color and stops mold, mildew, and algae from growing.
Clear sealants also let the natural wood grain show through, so your fence looks fresh and bright. You can test if your sealant works by sprinkling water on the wood. If the water beads up, your fence is protected.
Most clear sealants are easy to apply with a brush, roller, or sprayer. For best results, follow the directions on the label and cover all surfaces, including the edges.
Tip: Sealing the edges of boards helps stop moisture from sneaking in and causing damage.
Drying Time
Letting your stain and sealant dry is very important. If you rush this step, you might get a sticky finish or water spots. Here’s a quick guide to drying times:
| Step | Recommended Time | Why It Matters |
| After washing/cleaning | 24-48 hours (wood must be dry) | Ensures stain sticks properly |
| Between stain coats | 2-12 hours | Prevents tacky or uneven finish |
| After final coat/sealant | 1-3 days | Lets everything cure and harden |
| Before rain exposure | At least 24 hours | Stops water spots and streaks |
Try to stain and seal your fence when the weather is dry and mild. Avoid very hot, cold, or humid days.
Maintenance Tips
Keeping your fence looking great takes a little care. Here’s what you can do:
- Inspect your fence every season. Look for cracks, loose boards, or signs of mold.
- Clean your fence twice a year to remove dirt and mildew.
- If you’re not sure how often to stain a fence, follow this rule: Reapply stain and sealant every 2-3 years, or sooner if you see fading or water soaking in.
- Use quality tools like VEVOR sprayers and brushes for fast, even coverage.
- Sand rough spots before restaining to help the new stain soak in.
Regular cleaning and quick repairs can add years to your fences’ life. A little effort now saves you big repairs later!
FAQ
How often should a fence be stained?
You should stain your fence every two to three years. When you see fading, water absorption (darkened), and/or peeling it’s time to restrain. Regular maintenance preserves the condition of your fence and assists to keep it looking great.
Can you stain a fence that is damp?
No, You will want to wait until the wood is completely dry. Water on damp wood will reduce the ability of the wood to uptake stain. Always feel the wood to see if it is dry. If it feels cool or damp, give it more time to dry.
What if it rains right after you stain?
Rain will wash away stains that are fresh and result in spotting. It’s best to stain when you have a good forecast, ideally 24 hours of dry weather. If it rains too soon, touch-up will probably be needed.
Conclusion
So now you know how to stain a fence, from start to finish. You cleaned and prepped it, you picked the best tools and you even learned the best way to apply stain. With regular care and maintenance, your fence will look good and last longer. You should feel proud of your work, because you took steps to protect your fence and also increase your home value.
If you want to get the best sprayers, brushes, and gear, visit VEVOR. They help make your stain project easier and more efficient. Check out VEVOR for deals, promotions, and help with all of your fence work.


