
Plumbing a washing machine drain pipe correctly keeps your laundry area dry and prevents water damage. The plumbing sounds like a complex method, but it is not at all. If you have the right tools available and you know how to plumb a washing machine drain pipe, you can do it with ease. Below is a detailed and step-by-step procedure for installing or plumbing a drain pipe. Moreover, if you go through this guide, you can prevent leaks and ensure smooth drainage. Let’s get started on this simple process.
- Tools and Materials for Plumbing a Washing Machine Drain Pipe
- Step-by-Step Guide on How to Plumb a Washing Machine Drain Pipe
- Common Mistakes to Avoid When You Plumb a Washing Machine Drain Pipe
- Code Compliance for Plumbing Washing Machine Drain Pipes
- Maintenance Tips for Your Washing Machine Drain Pipe
Tools and Materials for Plumbing a Washing Machine Drain Pipe
Tools You’ll Need
Get your tools ready before starting the job. Being prepared makes things easier and quicker. Here’s a list of tools you’ll need:
- Pipe cutter or hacksaw: Use this to trim the standpipe to size.
- Adjustable wrench: Use this tool to tighten all connections firmly.
- Screwdriver: Required for securely attaching clamps or brackets.
- Level: Check that the standpipe stands straight with this.
- Plumber’s tape: Wrap this on threads to stop any leaks.
Tip: Check your tools before you begin. Missing tools can slow you down.
Materials You’ll Need for the Job
Having the right materials is just as important as having the right tools. Here’s what you’ll need to install the washing machine drain pipe:
- Standpipe: This pipe connects your washer to the drainage system.
- Drain hose: Included with your washer, it attaches to the standpipe.
- Hose clamps: These hold the drain hose in place to stop leaks.
- PVC primer and cement: Use these for strong seals on PVC pipes.
- Vent pipe: Helps prevent clogs and keeps water flowing smoothly.
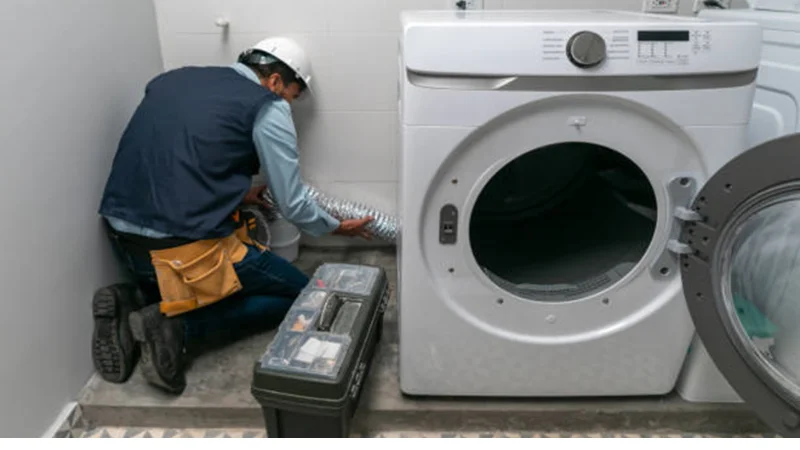
Step-by-Step Guide on How to Plumb a Washing Machine Drain Pipe
Here is a step-by-step guide on how to plumb a washing machine drain pipe. You can follow these steps to plumb your machine by yourself.
Step 1: Choose the Right Location for the Washing Machine
The first step in the installation process is finding the perfect spot for your washing machine. Look for a location near existing water supply lines, a power outlet, and a drain. This will make the process of hooking up a washer much easier. Make sure the floor is level and sturdy enough to support the machine.
Step 2: Prepare the Area and Turn Off the Water Supply
Before you start installing the washing machine’s drain pipe, clear the area of any obstacles. Sweep or vacuum the floor to remove dirt and debris. Then, turn off the water supply to avoid any accidental leaks during the installation.
If you’re replacing an old washer, disconnect the existing washing machine drain hose and water supply lines. Keep a bucket handy to catch any leftover water.
Step 3: Install the Standpipe and Cut to Proper Length
Now it’s time to install the drain standpipe. The question is how to connect a washing machine’s drain hose to a pipe. This vertical pipe connects the washing machine drain hose to your home’s plumbing system. Use a pipe cutter or hacksaw to trim the standpipe to the correct height. The height of 18 to 30 inches is recommended. The securing of the standpipe to the wall can be done by bracelets or clamps that will keep it stable. Stability is important, as a loose standpipe can cause leaks or improper drainage.
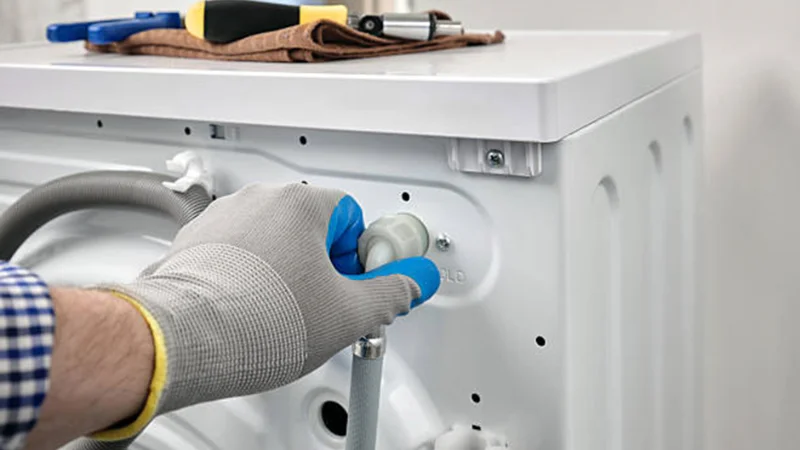
Step 4: Connect the Drain Hose and Standpipe
You can now connect the drain hose from the washing machine to the standpipe. Ensure the end of the hose is inserted into the standpipe and extends approximately 6 to 8 inches. Tighten the connection with a hose clamp. This prevents the hose from slipping out during use. In this way, the drain pipe installation is simple.
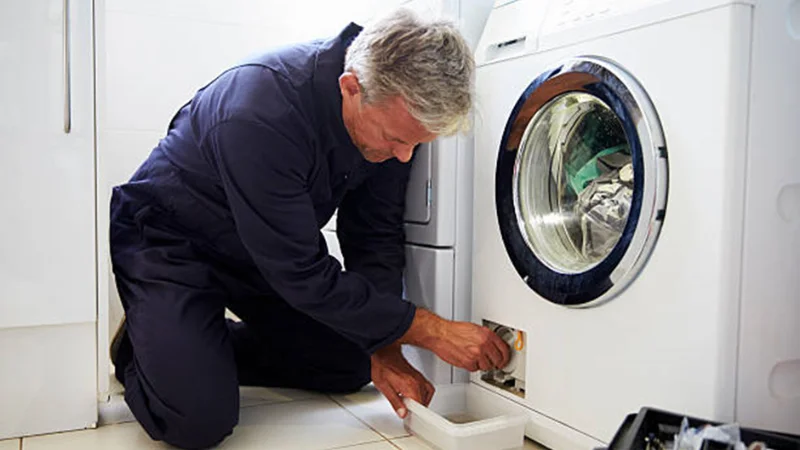
Step 5: Secure Connections and Test for Leaks
Double-check all connections to ensure they’re tight and secure. Turn the water supply back on and run a quick test cycle on your washing machine. Watch for any leaks around the drain hose or standpipe.
If you notice any drips, tighten the hose clamp or reapply plumber’s tape to the threads. Testing is a crucial part of the washer hookup process, so don’t skip this step!
Step 6: Ensure Proper Drainage and Adjust Hose Height
Finally, ensure that the washing machine’s drain hose is positioned at the correct height. If the hose is too low, water may siphon out of the machine. If it’s too high, the washer may struggle to pump water out. Adjust the hose height as needed to ensure smooth drainage.
Run another test cycle to confirm everything is working correctly. If the water drains efficiently and there are no leaks, you’ve successfully completed the installation!
Common Mistakes to Avoid When You Plumb a Washing Machine Drain Pipe
Mistakes can happen when setting up a washing machine’s drain pipe. Never overlook minor errors, as they can lead to permanent damage. Here are some common mistakes that should be prevented:
Mistake 1: Wrong Pipe Size
Choosing the wrong pipe size is a common problem. A narrow standpipe can’t handle the water flow, causing backups. A wide pipe might not seal properly, leading to leaks.
To avoid this, check the washer’s recommended pipe size. Most washers need a 2-inch standpipe. Measure carefully before buying materials. If you’re not sure, get help from a plumber or someone who works at a hardware shop.
Mistake 2: Bad Venting
Venting is necessary for drainage to work well. Air gets stuck without it, which makes things drain slowly or get clogged. If the venting is bad, the drain can also smell bad. Install a vent pipe that connects to your home’s plumbing vent system.
This allows air to flow freely and prevents water from becoming trapped. Suppose you’re unsure about venting, research, or ask a plumber for advice. Skipping this step can cause costly problems later.
Mistake 3: Skipping Testing
Some people forget to test the system after it has been installed. This is a big mistake! Without testing, you might miss leaks or drainage issues until it’s too late. Run a test cycle on your washer after connecting the drain pipe. Look for signs of problems, such as water pooling or slow drainage.
Fix issues right away by tightening connections or adjusting the hose height. By avoiding these mistakes, you’ll have a smooth washer installation. Taking extra care now saves time, money, and stress in the long run.
Code Compliance for Plumbing Washing Machine Drain Pipes
Why Following Plumbing Codes Matters
Plumbing codes are crucial for maintaining the safety of your home. They also help your washing machine drain work properly. Ignoring these rules can cause clogs, water damage, or even fines. By following the codes, you make sure water drains smoothly without causing problems.
These rules also protect your home’s plumbing system. For example, if a p-trap isn’t installed right, sewer gases might leak into your laundry room. This isn’t just smelly—it’s unsafe. Sticking to plumbing codes helps you avoid these dangers and keeps your setup correct.
How to Find Local Rules and Stay Within Code
Finding local plumbing rules is more straightforward than it seems. Start by checking your city or county’s website. Many places offer guides on plumbing, including instructions on how to install washing machine pipes.
You can also call your local building office for help. They can explain what’s needed to meet the rules. If you’re confused, ask a licensed plumber. They are familiar with the codes and can guide you step by step.
Maintenance Tips for Your Washing Machine Drain Pipe
Regular Cleaning to Prevent Clogs
Keeping your washing machine’s drain pipe clean is essential for smooth operation. Regular drain cleaning prevents these issues, and you don’t have to feel overwhelmed every time you do laundry. First of all, inspect the drain pipe every month for any clogs or debris. If you notice any, clean the drain hose and flush it with warm water.
You can also use a flexible pipe brush to scrub the inside of the standpipe. This helps dislodge stubborn debris. For deeper cleaning, mix equal parts of baking soda and vinegar. Pour the mixture into the standpipe and let it sit for 15 minutes. Then, flush it out with hot water.
Signs of Drainage Issues and How to Address Them
Drainage problems can sneak up on you, but catching drainage problems early saves you time and money. Watch for warning signs, such as water pooling around the washing machine or slow drainage during a cycle. All these signs point out the clogging and loose installation.
If there are any signs of water pooling, it refers to the blocking of the drain hose. Maybe its connection with the standpipe is broken. Sometimes, the hose bends; if it does, straighten it with simple holding in your hands. The improper height of the hose can also affect drainage. Check for all these points and fix them to get better results.
To Sum Up:
Plumbing the washing machine drain pipe is simple if you know the right method and the right tools. You can follow the steps in this guide to complete the task efficiently. Moreover, we have compiled a list of common mistakes to avoid and simple maintenance tips that you can follow to identify damage earlier. These tips will help your washing machine run smoothly and make laundry less stressful. I hope now you know where to start and keep your drain flowing.
FAQ
What should the height of the washing machine standpipe be?
The recommended height is 18 to 30 inches. The pipe of this height facilitates straightforward drainage. This also prevents overflow of water.
Can a washing machine drain pipe be installed without professional help?
Yes, the installation is a DIY project. If you have the right tools, then why invest in hiring a professional? But if you are confused at any point, then feel free to ask any pro for help.
What to do in case of clogging in the washing machine’s drain pipe?
You can use a flexible pipe brush to clean the pipe along with a hot water flush. But for tough clogs, try a baking soda and vinegar solution to remove debris.


