
I know you watched 100+ videos on the topic of how to TIG weld, and you’re still not sure where to start. Videos show it fast, skip steps, or use fancy tools you don’t have. You try to copy, but the weld doesn’t stick or leaves a mess. It’s easy to feel lost and think, “Why can’t I get this right?”
The joining of two metal points is very tricky for beginners. TIG welding is a torch-based process that melts the metal quickly. In just a few minutes and with a little patience, you can easily weld your material.
In this article, you will explore a step-by-step guide on how to TIG weld that enables you to finally feel proud of your work.
Preparation for TIG Welding (Tools and Materials)
Before you start the TIG welding process, make sure you get your tools ready. It’s important to pick the right gear, which makes the job easier and safer. The right setup helps you weld better and keeps your hands steady. Let’s look at what you need to begin TIG welding techniques.
Picking the Right TIG Welding Tools
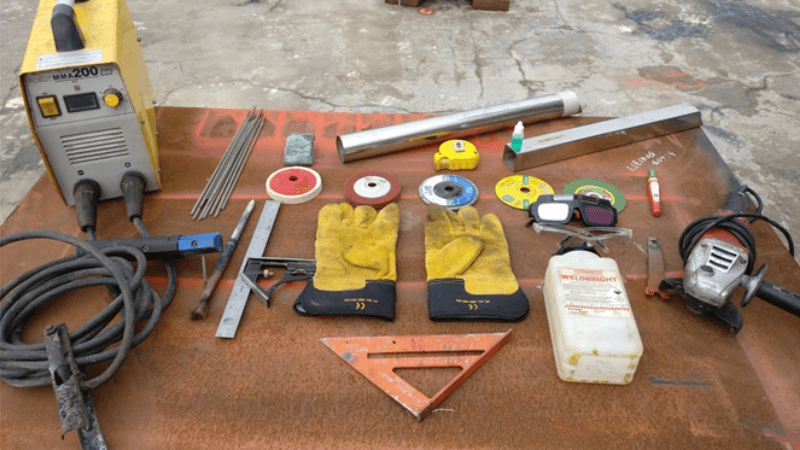
When you start preparing yourself for TIG welding, make sure you collect all the welding tools. You can buy these tools from a reliable online brand like VEVOR. You only need a few main tools to get going.
Tools You’ll Need:
- TIG Welding Machine
- Tungsten Electrode
- Filler Rods
- Gas Supply
Make sure your tools match the metal you’re working with. This helps you get better results and stops the TIG welding process from failing later.
Essential Safety Gear for TIG Welding
Welding tasks involve heat and noise production. You need to stay safe yourself. It’s important to use safety gear to avoid any burning incident. Good safety gear keeps your eyes, skin, and lungs protected.
Here’s a table to show what each piece of safety gear does:
| Safety Gear | Purpose | Benefits |
| Welding Helmet | Protects eyes and face from sparks. | Blocks bright light and UV rays. |
| Welding Gloves or Screen | Shield hands and body from heat and burns. | Keep grip steady and body or hands safe. |
| Flame-Resistant Clothing | Covers skin from sparks and hot metal. | Lowers the chance of burns. |
| Safety Glasses | Extra eye protection under a helmet. | Keeps dust and flying bits out. |
| Welding helmet or Mask | Blocks fumes and bad air. | Helps you breathe clean while welding. |
| Steel-Toe Boots | Protects feet from falling objects. | Keeps toes safe from heavy tools. |
| Ear Protection | Guard your ears from loud sounds. | Stops hearing damage over time. |
Step-by-Step Guide — How to TIG Weld?
The TIG welding needs to follow the proper guide that saves you from the hassle of ruining the work. Each step has a purpose and needs tools or a guide to do it correctly. Let’s explain the step-by-step TIG welding guide together, from setup to the final check.
Step 1: Setting Up the Right TIG Welding Machine
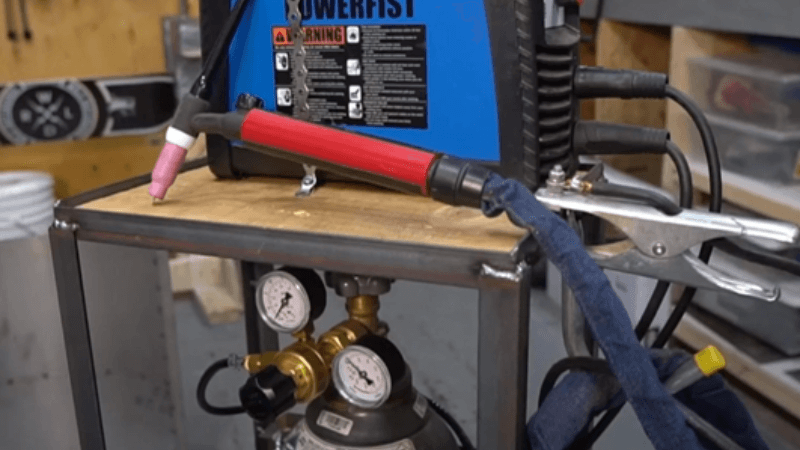
The first step is to make sure your TIG welding machine is ready. First of all, check that your TIG welder is plugged in and powered on. Then, adjust your amperage based on metal thickness. Next, connect your ground clamp to a clean part of the metal so the electricity flows the right way. Set the gas flow, and now you may start working.
Step 2: Getting the Base Material Ready
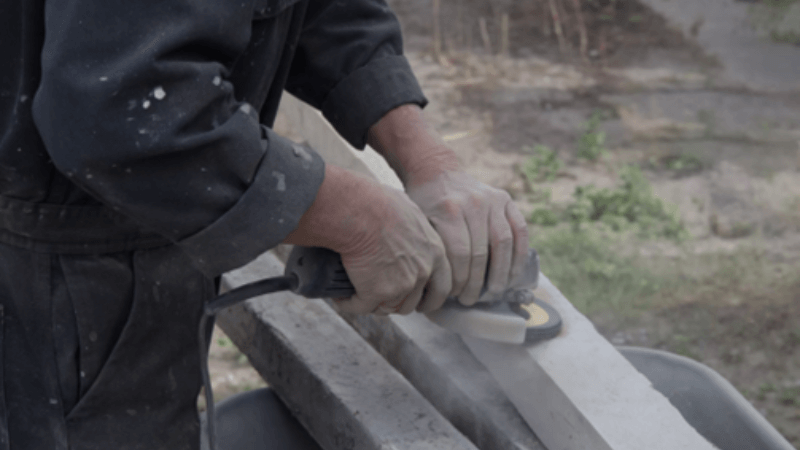
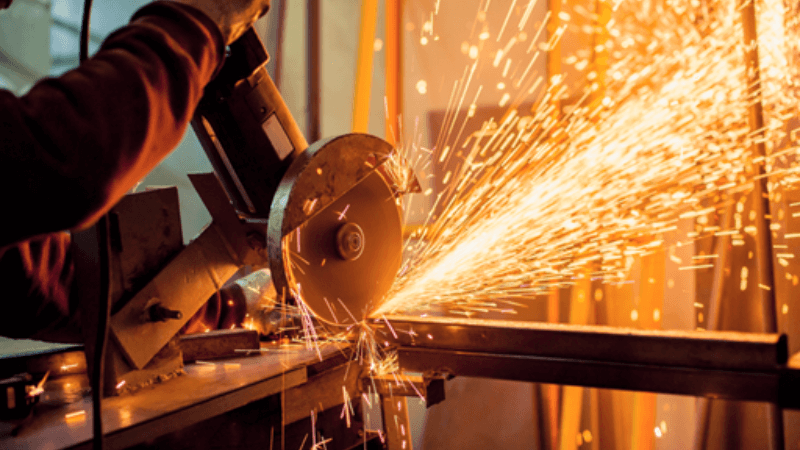
After your machine is ready, prepare your metal. If the metal is dirty, rusty, or greasy, your weld won’t hold. You can use a wire brush or sandpaper to scrub it down. Remove anything that looks rough, old, or dusty. Also, check that the two pieces you want to join fit together tightly. Once it’s clean and lined up, you’re ready to start welding.
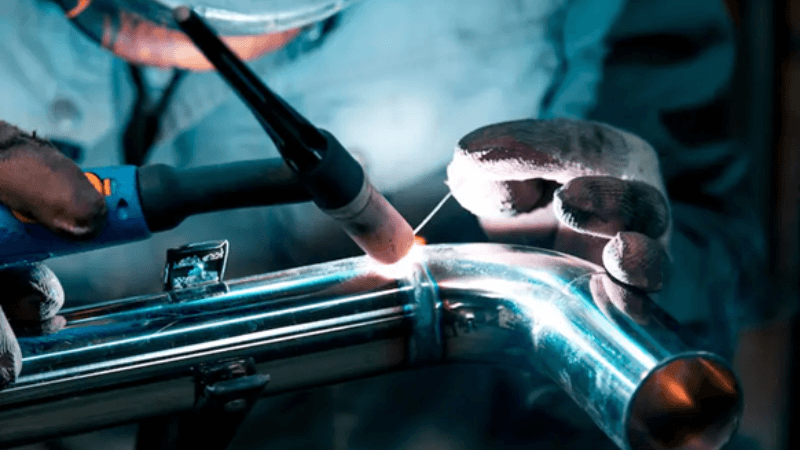
Step 3: Starting and Keeping the Arc by Using the Foot Pedal
In this step, prepare the arc. The arc is the bright flame that melts the metal. To get it going, hold the torch close to the metal without touching it. You can tap the tungsten or use your foot pedal. When it starts, you’ll see a little puddle form. That’s the molten metal. Now your next move is to keep it steady. Keep your hand calm and your eyes on the puddle.
Step 4: Managing Heat and Arc Length to Avoid Skin Burn
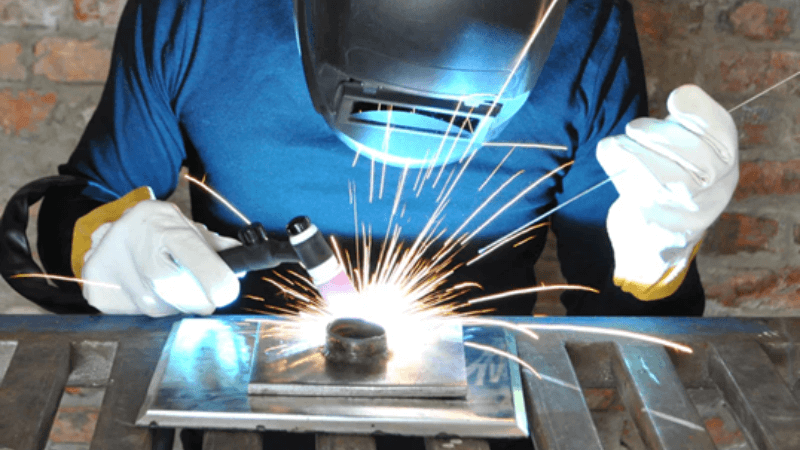
This part is all about control and management. Too much and too little heat damage the welding process. Watch the puddle carefully. You want a soft, smooth pool that doesn’t burn. Keep the arc short and close, but it takes some time.
Step 5: Adding Filler Material Correctly in Metal
During puddling, your weld takes shape. It’s time to add filler material in the part where you want to weld. This part is about timing and rhythm. Hold the filler rod in your free hand and bring it near the puddle. You can do it by just dipping it lightly at the edge and then pulling it back. The heat will melt the rod and blend it into the weld. Keep your torch moving and add filler little by little.
Step 6: Finishing and Checking the Weld Properly
Once you finish welding, give the metal time to cool. When it’s cool, clean the weld with a wire brush so you can see it clearly. Now check your work. Is the weld smooth? Are there any holes or cracks? If it looks strong and even, you did great. If not, that’s okay too. Every weld helps you learn. Just keep practicing. You’ll get better each time, and soon it will all feel easy.
Tips for Clean, Accurate, and Precise TIG Welding
If you want cleaner, tighter welds, it’s all about control and safety measurement. These advanced tips help you fix the problems that often ruin a good weld. From heat control to arc focus, here’s how to weld smarter.
Control Heat with Your Foot
Welds get messy when heat builds up too fast. It’s important for you to monitor the heat with your foot. You can take hot starts to build your puddle, then ease off as the metal warms up. This stops burn-through and keeps the bead even. Don’t floor it the whole way. A light touch gives you better welds and better flow.
Use Backstepping on Thin Metal
Thin metal bends easily from too much heat. If you weld in a long line, it can twist or sag. Backstepping helps fix that. Do a small weld, then stop. Start the next weld just behind it. Keep doing that. This spreads the heat out. It also makes your welds look cleaner and builds them up better.
Sharpen Tungsten the Right Way
Tungsten tips help shape the arc. If you grind it wrong, your arc jumps around. Always grind in a straight line, from tip to end. Don’t go sideways. A sharp point gives you a small, tight arc. That makes your weld easy to control. Use a clean grinder, too. Dirt on the wheel can mess up your tip.
FAQs
What gas should I use for TIG welding?
For TIG welding, pure argon gas is the best choice. It gives a smooth, clean weld and protects the metal from the air. If you’re welding stainless steel or thicker metals, a mix of argon and helium can help. The helium adds more heat.
Why does my tungsten electrode get dirty?
The tungsten electrode gets dirty if it touches the metal or filler rod. It’s important for you to keep the arc steady and about 1/8 inch away. If it gets dirty, stop welding and clean it by proper steps that save you from the hassle of poor welding.
Can TIG welding be done without filler rods?
Yes, you can TIG weld without filler rods. For this, your metal should be thin and tightly joined with the right technique. This is called autogenous welding. It works for some projects, but may not be as strong as using filler rods.
Final Thoughts
To sum up, understanding how to TIG weld stainless steel gives you more control over your work. When you know each step clearly, you avoid mistakes that cost time and materials. TIG welding may feel hard at first, but with practice, it becomes smooth.
Using the right machine and tools makes a big difference. A good TIG welder lets you control heat better and work on thin or tricky metal without burning it. You also get cleaner, stronger welds that last longer. Whether you’re fixing something or creating from scratch, this knowledge of how to TIG weld aluminum helps you do it right.
So take your time, stay safe, and keep learning. With every weld, your hands get steadier, and your results get better.


