
Polishing your car after body repair does more than make it shine—it protects your fresh paint and brings back that flawless, factory-new look. Whether you’ve just fixed a dent or repainted a panel, knowing how to polish a car after body repair the right way is key to long-lasting results.
With a few simple tools and careful steps, you can remove fine scratches, smooth out the surface, and restore a brilliant gloss. This guide will walk you through the process in a simple, beginner-friendly way. Get ready to give your car that just-repaired sparkle—all from your own garage!
Preparation for Polishing
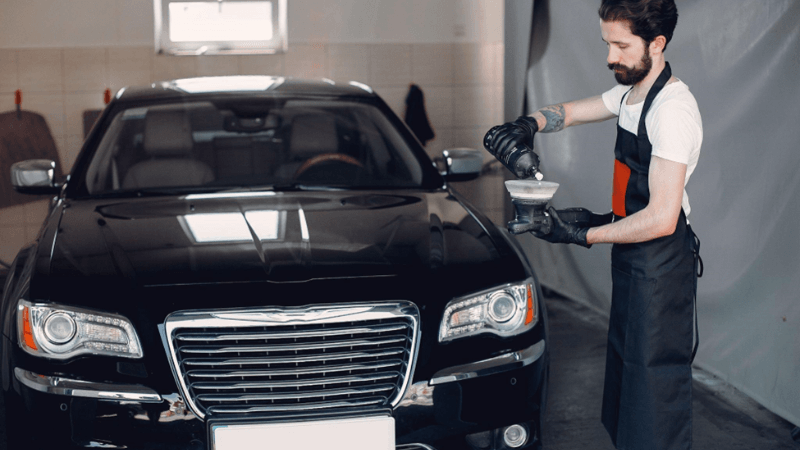
Before polishing your car, it’s essential to prepare properly. A clean setup and the right tools help you work faster and get better results. Getting organized now will make every step of the process more efficient and help you avoid damaging your car’s finish.
Let’s take a closer look at what you’ll need and how to get started the right way.
Tools and Materials Needed
Having the right tools and supplies ready is one of the most important steps to polish a car after paint repair. It helps prevent delays and ensures smoother results.
- Polishing machine (dual-action or rotary)
- Cutting compounds and finishing polish
- Foam or microfiber pads for the polishing machine
- Microfiber towels to wipe off residue gently
- Masking tape to cover sensitive areas like edges and trim
- Spray the surfaces with water to keep them clean during polishing
If you’re doing DIY car polishing after scratch repair, you can work by hand, but expect more time and effort. Starting prepared saves both.
Choosing the Right Polish and Compounds
Picking the right products ensures your work doesn’t go to waste. Different types of polish serve different needs depending on your paint’s condition and age.
Cutting compounds work best for deeper flaws like swirl marks and light scratches. Finishing polishes are made to bring back shine and smoothness. These work great after car buffing, after the repair is complete.
Always check if the polish matches your paint type. Some are made for metallic or matte finishes. For recently painted surfaces, go easy—use mild polish to avoid damage. Using quality buffers supports longer-lasting, glossy results.
Setting Up a Clean Workspace
Where you polish your car is just as important as how you do it. Dirt and debris can scratch your paint during the process, especially when using automotive polishing techniques.
- Choose a shaded area to prevent polish from drying too fast.
- Clean the ground and nearby surfaces to keep dust at bay.
- Organize all tools nearby so you can work efficiently.
Avoid working in windy areas where debris can settle on the car. A clean setup helps you stay focused and achieve a smooth, swirl-free finish every time.
Process: How to Polish a Car After Body Repair

Polishing your car after body repair helps restore the finish and protect the paint. Once you’ve prepped your workspace, it’s time to start the hands-on process. These steps will guide you through a complete polish, from cleaning to adding that final shine.
Step 1: Cleaning the Surface Thoroughly
Before any polishing begins, a clean surface is essential. Dirt or grease can scratch the paint and ruin your efforts. Follow these key steps to clean it right:
- Rinse the car thoroughly using a hose or pressure washer to remove dust, dirt, and loose debris from the paint surface.
- Wash the car using car-safe soap and a microfiber mitt to clean without leaving swirl marks or scratches behind.
- Focus on repaired sections closely, where leftover sanding dust or overspray may still be stuck on the paint surface.
- Dry the surface completely with a clean microfiber towel, ensuring no water spots or streaks are left behind.
A spotless surface makes the next steps smoother and more effective. Don’t rush this part—it’s the foundation of great polishing results.
Step 2: Inspecting for Imperfections
After washing, inspect the car closely. This helps you find areas that may need extra attention during the polishing stage.
- Check for scratches and swirls using a flashlight or strong light source held at different angles on the paint.
- Run your hand over the surface to feel for contaminants like sap, overspray, or rough patches not visible to the eye.
- Examine repaired panels carefully to confirm color match and smooth blending with the rest of the vehicle’s paintwork.
- Use a clay bar if needed to remove stubborn grit or residue that won’t wash off and might scratch during polishing.
This step ensures you know exactly where to focus when using car buffing after repair to get flawless results.
Step 3: Applying Masking Tape for Protection
Protecting non-painted parts of your car is important before you start polishing. Masking helps you avoid unwanted damage or cleanup.
- Tape off rubber trim and seals so polish doesn’t stain or dry into hard-to-clean places around windows and doors.
- Cover plastic trims and badges to stop residue from sticking in grooves or crevices where machines can’t reach.
- Mark off freshly repaired areas if they’re small or isolated, so your polishing efforts stay focused and neat.
- Use automotive-grade masking tape only, which comes off cleanly and won’t leave glue behind on your car’s surface.
Proper masking saves time and effort later and gives you a clean, professional finish without extra mess.
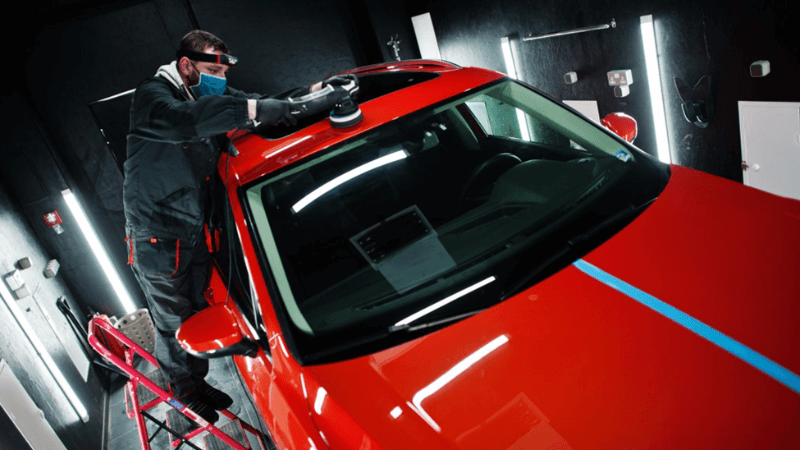
Step 4: Using Cutting Compounds for Initial Buffing
Cutting compounds remove paint imperfections and level the surface. They are key in the early stages of DIY car polishing after scratch repair.
- Attach a foam cutting pad to your machine that can evenly spread the compound and handle heavier correction work.
- Apply a small dab of compound directly onto the pad or panel—just enough to work the section without slinging product.
- Buff using a low-speed setting and work in overlapping lines for even correction and consistent coverage across each panel.
- Concentrate on rough or damaged spots, gently letting the compound and machine do the work without using force.
These early buffing steps set the foundation for smoother, glossier results later in the process.
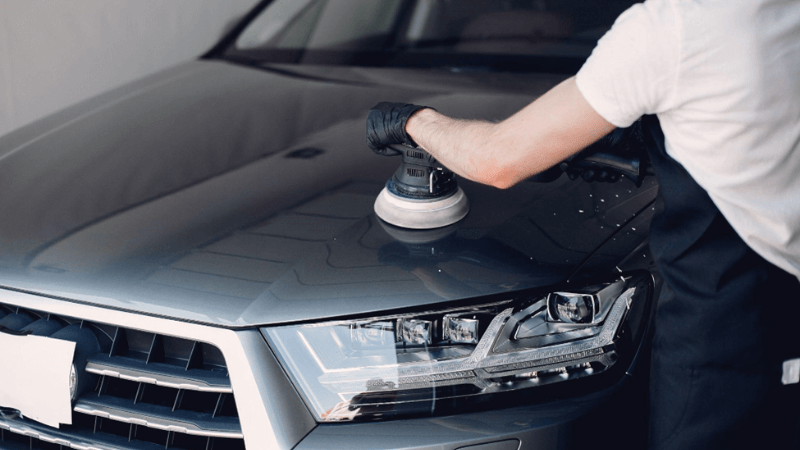
Step 5: Refining with a Polishing Machine
Once the surface is leveled, polishing smooths out fine lines and enhances the gloss. Use the right gear for this delicate step.
- Switch to a soft foam pad that’s designed for refining instead of removing deep damage or heavy oxidation.
- Use a finishing polish lightly, applying a small amount on the pad to avoid streaks and overworking the surface.
- Buff each section evenly, dividing the car into manageable parts like hood, doors, and trunk for consistent results.
- Raise the machine’s speed slightly and keep the pad moving smoothly to prevent buildup or heat damage to the paint.
This is where automotive polishing techniques begin to reveal the car’s final mirror-like finish.
Step 6: Applying Finishing Polish for a Professional Look
This final step enhances depth and gives your paint that showroom-level gloss. It also seals in your work and provides lasting protection.
- Use a clean, fresh pad to apply the finishing polish, ensuring no leftover compound interferes with your final layer.
- Apply polish in small dabs and spread gently; this allows full coverage without gumming up the pad or paint.
- Work slowly and evenly across small panels at a time to ensure a deep, even shine without haze or patchiness.
- Wipe away residue gently using a microfiber towel to reveal the high-gloss finish and check for any missed areas.
Once complete, the car should have a smooth, brilliant look. For extra protection, you can seal the result with wax or sealant.
Common Mistakes to Avoid During Buffing
Even with the best tools and products, simple mistakes can lead to poor results or even paint damage. Understanding what to avoid is just as important as learning the right steps.
Let’s walk through the most common errors made during car buffing after repair so you can sidestep them and achieve a flawless, professional-grade finish.
Using Incorrect Products
Using the wrong polishing products is a fast way to ruin your paint job. DIY car polishing after scratch repair depends on matching the right compound with your car’s needs.
Cutting compounds are powerful and should only be used for heavy imperfections, while finishing polishes are meant to enhance shine.
- Always read the product label to ensure it fits your vehicle’s paint type and damage level.
- Test a small, hidden area before treating the full surface.
- When unsure, ask for help from a professional or an auto parts store expert.
- Use only high-quality, automotive-grade compounds to prevent hazy finishes or residue buildup.
Correct product choice ensures safe, effective results every time.
Applying Excessive Pressure
One of the most common automotive polishing techniques to go wrong involves applying too much pressure. Buffing should be a light, controlled process, not a forceful grind. Excess pressure can create swirl marks, heat spots, and even strip away the clear coat.
- Hold your buffer firmly, but apply only light, even pressure as you move it.
- Never let the pad sit in one spot—it can overheat and damage the paint.
- Use the appropriate speed settings depending on the pad and polish.
- If polishing by hand, stick to soft, circular motions and avoid scrubbing.
Letting the tools do the work ensures a smooth and consistent result.
Skipping Preparation Steps
Skipping the prep might seem harmless, but it often leads to streaks, scratches, and wasted effort. Proper preparation is crucial in the steps to polish a car after paint repair. It gives you a clean, safe surface and better control throughout the process.
- Thoroughly wash the car with a pH-neutral soap before doing anything else.
- Carefully inspect the paint for any leftover grit or imperfections.
- Use masking tape to cover trims, emblems, and sensitive areas.
- Prep time might feel slow, but it speeds up the overall polishing process.
Every great polish job begins with great preparation—don’t overlook it.
Neglecting to Work in Small Sections
When it comes to car buffing after repair, working in large sections can be tempting but often leads to inconsistent results. Focusing on small areas gives you better control and a more even shine. It also prevents polish from drying out or spreading unevenly across the paint.
- Divide the car into manageable zones like hood halves or door panels.
- Outline your sections using masking tape to stay on track and avoid overlaps.
- Fully buff and wipe one section before moving to the next area.
- Taking breaks between sections keeps your focus sharp and results clean.
Small sections help you deliver a consistent, showroom-worthy finish every time.
Maintenance Tips for a Professional Finish
After you’ve invested time in DIY car polishing and scratch repair, proper maintenance helps preserve that flawless look. A good routine keeps your car clean, protected, and shiny long after the buffing is done.
Let’s explore key ways to maintain that professional finish with minimal effort.
Regular Washing and Waxing
Frequent cleaning prevents buildup that can dull your shine. Weekly washes and routine waxing are two essential steps to polish a car after paint repair and maintain the results.
- Use car-safe soap and a microfiber mitt to avoid scratching the clear coat.
- Dry the car completely to prevent water spots that ruin the polished finish.
- Wax every two to three months to protect against UV rays, dirt, and grime.
- Wash in the shade to avoid soap drying too fast and leaving streaks.
Stick to this routine, and your car will continue to look like it just left the body shop.
Avoiding Abrasive Cleaning Tools
Not all cleaning tools are created equal. Using the wrong materials can damage your vehicle’s paint, especially after car buffing after repair, when the surface is more sensitive.
- Microfiber towels are soft, paint-safe, and ideal for washing, drying, or applying polish.
- Avoid stiff brushes that can leave deep swirl marks or visible scratches.
- Clay bars remove embedded dirt and sap gently without harming the finish.
- Never use steel wool or scouring pads—these can permanently scratch automotive paint.
Choose gentle tools, and your car will retain that deep, polished glow far longer.
Protecting the Car from UV Damage
UV rays gradually fade even the best polish job. Long-term exposure to sunlight breaks down the clear coat and weakens your paint. Protecting your finish starts with smart, consistent habits.
- Park under trees, in a garage, or in shaded parking areas whenever possible.
- Use a top-quality cover for your car when you park outdoors to make sure no light enters the vehicle.
- If you use waxes or sealants, select those that give your paint additional UV protection.
- It cuts down heat inside the car and prevents the outside sun from fading the exterior.
Sun protection for your car keeps it attractive and boosts its odds of being resold.
Do Touch-Ups Whenever They Are Required
Little scratches can damage your paint job if you do not take care of them. Removing issues in the first few treatments is an important step to maintaining a brilliant and well-protected finish on your car.
- Gather Supplies: Purchase a paint that looks like your car’s color, a fine brush, sandpaper with a 2000-grit rating, clear coat, and a microfiber cloth.
- Prep the Area: Make sure the area is spotless and that areas with irregularities are smoothed with a bit of sanding.
- Apply Paint: Patiently paint in thin, even brushwork. Every coat should dry before the next one is applied, so there is no risk of clumps forming.
- Finish with Clear Coat: Seal with clear coat, let it cure, then gently buff. Avoid waxing for a week.
Touch-ups ensure that your car’s surface looks clean and shiny for longer.
Wrap Up
Keeping your car looking shiny and new after a body repair takes some effort, but it’s worth it. Knowing how to polish a car after body repair helps protect the paint and keeps the polish bright. Regular washing and waxing maintain the finish, while using the right tools and products prevents damage.
Always work carefully in small sections to avoid mistakes. Protect your car from the sun to stop fading and do touch-ups when needed to fix small scratches. By following these simple steps, you can enjoy a smooth, professional finish that lasts for years.
FAQs
What is the reason to polish a car after repairing the bodywork?
Fixing scratches and giving shine to the paint is what makes your car look better. It makes the paint appear smooth and gives it a lustrous finish.
Is it possible to buff my car without machines?
Polishing can be done without the help of a machine. On the other hand, it takes a lot of effort and time. For fixing larger areas on the body, a machine is the best option as it is faster.
How frequently should I clean my car with a polish?
You don’t have to touch up your car very frequently. Plan your visits once or at most two times a year. Applying thick coats too often may damage the clear coat, so make sure to use them only after doing repairs.
Could polishing my car by myself work, or is hiring a professional worth it?
To guarantee perfect results, trust an experienced decorator. With expertise and quality tools, they sort out any problems and make your car attractive.
How are polishing and waxing different from each other?
Polishing improves the look of the material by making it shine and fixing any small problems. Waxing builds a protective barrier for the shine and paint. Both are important for how your car turns out.


