
Have you damaged your wall while moving furniture? No worries. There is no need to hire an expensive professional. You can fix such damage by yourself. Repairing drywall doesn’t need special skills. Just choose the right tools and have an insight into our guide.
You will handle all your drywall repairs confidently, whether it is a small dent or a large hole. Learn how to repair drywall with this step-by-step guide. Let’s start, and your wall will be the same as before, without even a clue of damage.
Tools & Materials for Drywall Repair
If you have the right tools and materials, you have already got perfect results. Correct tools ensure a smooth process and better results, whether you have to deal with a small hole or significant damage. Here is a complete guide for fixing different sizes of damage:
Tools for Small Holes
It is simple to fix the small holes. Small holes means the holes by screw or nails. You don’t need any special tools to fix them. Here’s what you’ll need:
- You will need a small putty knife for applying the spackle to the hole.
- To fill the hole, you will need spackle or lightweight joint compound.
- To smooth the damaged area, use a fine-grit sandpaper or other sanding tools.
Tools for Medium Holes
Medium holes, like those caused by doorknobs or minor accidents, require more effort. You’ll need:
- Drywall patch kit: These kits usually include a self-adhesive mesh patch.
- Utility knife: Use this to clean up the edges of the hole.
- Joint compound: This helps blend the patch with the rest of the wall.
- Putty knife: A wider one (6 inches) spreads compound over the patch better.
- Sanding block: This helps you achieve a smooth finish.
Tools for Large Holes
Large holes, like those bigger than 6 inches, need more advanced tools. You will need a drywall saw to cut out the damaged area, a replacement drywall piece, drywall screws and screwdrivers. Joint tape covers the seams between the new drywall and the existing wall.
A joint compound is also essential, which you can apply over the tape for a seamless look. A larger putty knife (10-12 inches) helps spread the compound evenly. At the end, you will need a sanding block to smooth the surface before painting.
General Materials for All Repairs
No matter the size of the hole you’re fixing, you’ll always need a few materials for drywall repairs. How to patch a hole in drywall is a common question. The essentials include a drywall compound (spackle or joint compound) that fills holes and blends patches with the wall.
Sandpaper or a sanding block (120-150 grit) smooths the surface after applying the compound. Also, choose a flexible and easy-to-handle putty knife. A 6-inch knife is a versatile option for most repairs. Primer helps the repaired area blend seamlessly with the rest of the wall when you paint.
Safety Tips for Drywall Repair
Safety is essential for any DIY project, including drywall repair. Following simple precautions can prevent injuries and make the process easier.
Staying Safe While Working
Protect yourself before starting the repair. Even minor fixes can create dust and debris that might bother your skin, eyes, or lungs. Here’s how to stay safe:
- Wear safety goggles
- Use a dust mask or respirator
- Put on gloves
- Dress appropriately
Setting Up Your Work Area Safely
Preparing your workspace makes the job easier and lowers the chance of accidents. Here’s how to get your area ready:
- Clear the area: Move furniture and decorations away from the wall you’re fixing. This will give you space and prevent damage.
- Lay down a drop cloth: Cover the floors with a drop cloth or a plastic sheet that protects them from dust and paint.
- Turn off power: If working near outlets or switches, turn off the electricity to avoid shocks.
- Keep tools organised: Place tools nearby but out of the way to avoid tripping.
How to Patch a Small Hole in Drywall
Fixing small holes in drywall is one of the easiest DIY tasks. Whether it’s from a nail, screw, or accidental bump, you don’t need to be a pro to get it done. Let’s have step-by-step guides so you can patch and know how to repair drywall like a pro.
Step 1. Identifying Small Holes
Before patching drywall, you need to determine if the damage qualifies as a small hole. Small holes in drywall are typically less than 1/2 inch in diameter. These include nail holes, screw holes, or tiny dents caused by furniture or decorations.
If the hole is larger than this, you might need a different approach, which we’ll cover later in the blog. To identify the size, grab a ruler or just eyeball it. You’re dealing with a small hole if it’s smaller than a dime. Once you’ve confirmed the size, you can move on to the next step.
Step 2. Filling the Hole with Spackle or Joint Compound
Now that you’ve identified the hole, it’s time to fill it. For this step, you’ll need spackle or lightweight joint compound, a putty knife, and a damp cloth. Wipe out the hole with a wet cloth to remove dust and debris. This helps the compound stick better.
Scoop a small amount of spackle onto your putty knife and press it into the hole, filling it. Now, use the flat edge of the putty knife to scrape off excess compound and smooth it out. Finally, let it dry, and your wall is ready for paint.
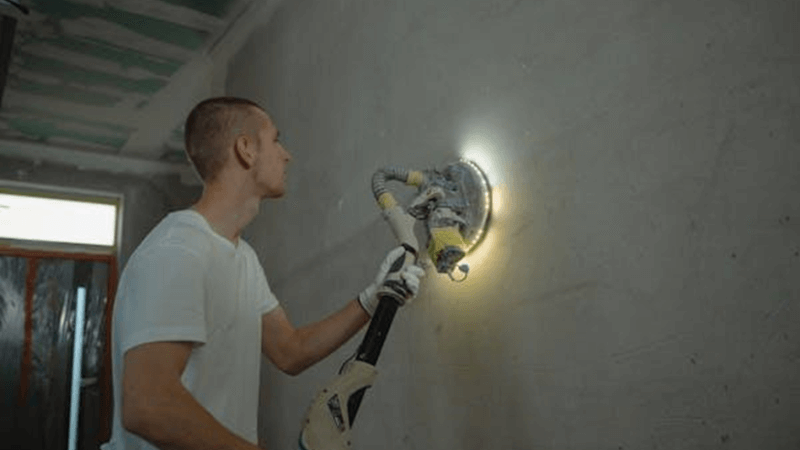
Step 3. Sanding & Smoothing the Surface
Once the compound is dry, it’s time to sand the area. This step ensures the patch blends seamlessly with the rest of the wall. Here’s how to do it:
- Choose the right sanding tool: Use fine-grit sandpaper (120-150 grit) for a smooth finish.
- Sand gently: Rub the sandpaper over the patched area in a circular motion. Apply light pressure to avoid damaging the surrounding drywall.
- Check your progress: Run your hand over the surface to feel for any bumps or uneven spots. Sand until the area feels smooth.
Drywall Repair Techniques for Medium Holes
Medium-sized holes in drywall, like those caused by doorknobs or minor accidents, can seem tricky to fix. But don’t worry—you’ve got this! With the proper drywall repair techniques, you’ll patch and learn how to repair drywall in no time. Let’s break it down step by step.
Step 1. Identifying Medium Holes
First, you need to figure out if the damage qualifies as a medium hole. These holes are typically larger than a nail or screw hole but smaller than 6 inches in diameter.
Think of damage caused by a doorknob hitting the wall or a minor accident. If the hole is bigger than your hand, you’re likely dealing with a large hole instead. Once you’ve identified the size, you’re ready to move on.
Step 2. Using a Patch Kit for Repairs
A drywall patch kit is your best friend for patching medium holes. These kits come with everything you need, including a self-adhesive mesh patch. First, prepare the hole. Use a utility knife to clean up the edges.
Remove any loose drywall or debris. Peel off the backing and stick the mesh patch over the hole. Make sure it’s centred and smooth. Press it firmly to ensure it sticks well to the wall.
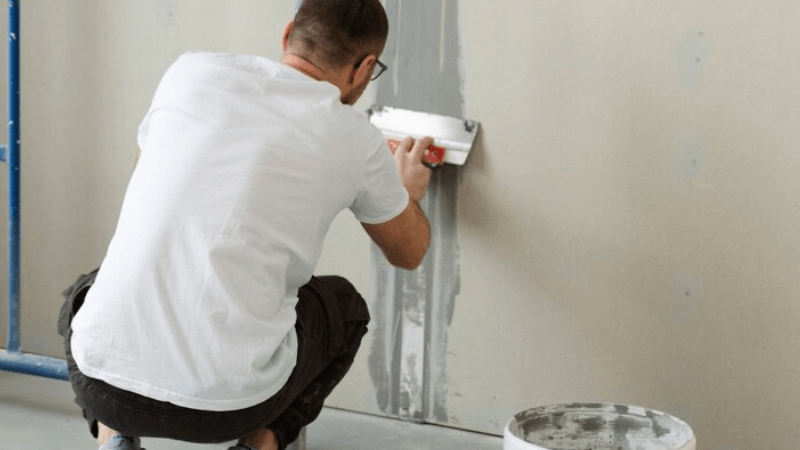
Step 3. Applying Joint Compound and Sanding
Once the patch is in place, blending it with the wall using joint compound takes time. Use a putty knife to spread a first thin layer of joint compound over the patch. Feather the edges to blend them with the surrounding wall.
Let it dry! Once it is dried, apply 1-2 additional layers, letting each dry before adding the next. This ensures a smooth finish. Once the final layer is dry, smooth the area, ideally using fine-grit sandpaper. Be gentle to avoid damaging the patch.
How to Repair Drywall with Large Holes
Large holes in drywall might seem intimidating, but fixing them is easier. With the right tools and steps, you can tackle even the biggest damage and make your wall look brand new. Let’s break it down:
Step 1. Identifying Large Holes
Before you start, you need to confirm that the damage qualifies as a large hole. Large holes in drywall are typically bigger than 6 inches in diameter. These might be caused by accidents, plumbing repairs, or other major impacts.
If the hole is smaller than this, check out the earlier sections of this blog for guidance on repairing more minor damage. Measure the hole with a ruler or tape measure to identify the size. If it’s larger than your hand, you’re dealing with a large hole.
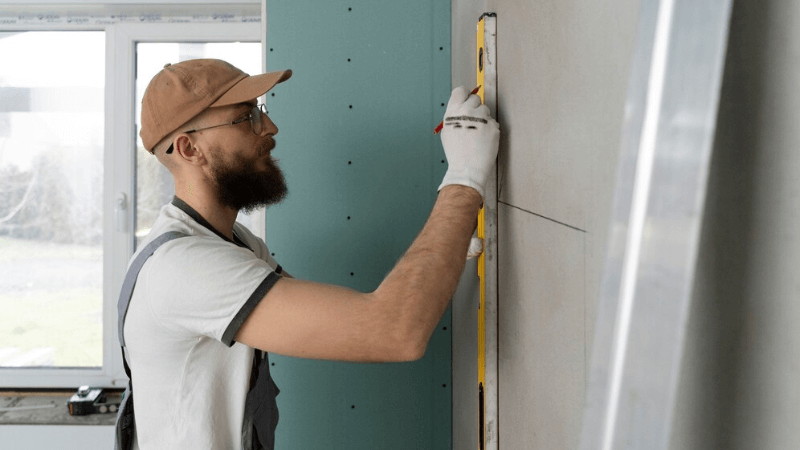
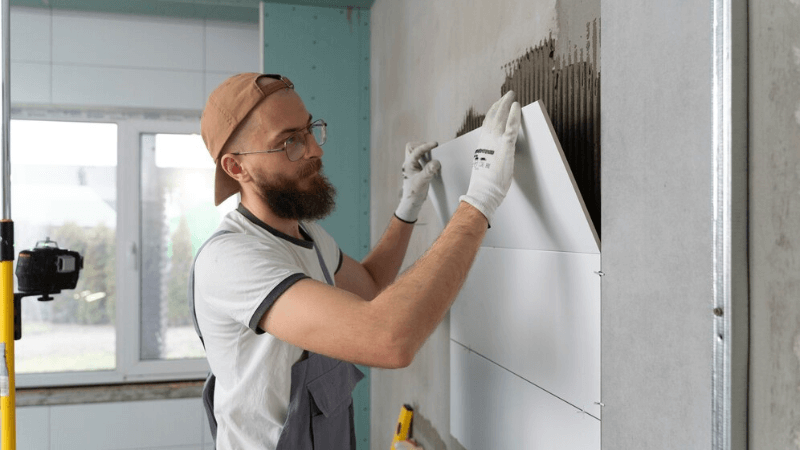
Step 2. Cutting and Installing a Drywall Patch
How to repair drywall cracks and holes? For larger holes, you will need a drywall patch. This involves cutting out the damaged area and replacing it with new drywall. Here’s how to do it:
- Mark the area: Use a pencil and ruler to draw a square or rectangle around the hole.
- Cut out the damaged drywall: Grab a drywall saw and carefully cut along the lines you marked.
- Prepare the patch: Cut a new piece of drywall to match the size of the hole.
- Secure the patch: Attach the new drywall piece to the wall using drywall screws. If there’s no stud behind the hole, install a wooden support inside the wall first.
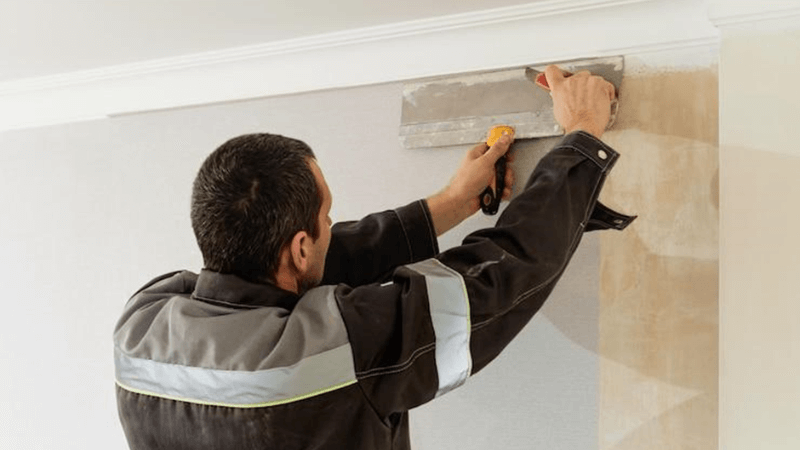
Step 3. Taping, Applying Compound, and Sanding
Once the patch is in place, it’s time to blend it with the rest of the wall. This step ensures a smooth and professional finish.
- Apply joint tape: Place joint tape over the seams where the patch meets the existing drywall. Press it down firmly to avoid bubbles.
- Spread drywall compound: Use a putty knife to apply a thin layer of drywall compound over the tape.
- Let it dry: Allow the compound to dry completely. Check the product instructions for drying times.
- Sand the area perfectly: Use fine-grit sandpaper to smooth out the compound.
Tips for a Professional Finish
Blending the Repair with the Wall
Blending the repaired area with the rest of the wall is key to achieving a seamless look. If you skip this step, the patch might stand out, making your hard work less effective. Spread the joint compound slightly beyond the patch’s edges when applying it.
After the compound dries, sand the area carefully. Run your hand over the surface to check for uneven spots. Apply a coat of primer over the patched section. This step ensures the paint adheres evenly and is the best way to repair drywall damage.
Painting Over the Repaired Area
Painting is the final step to make your wall look flawless. A good paint job will hide the repair completely and restore the wall’s original appearance. Follow these tips for the best results:
- Match the paint: Use the same colour and finish as the rest of the wall.
- Use a roller: A roller helps better blend the paint for larger areas, but a brush works fine for smaller patches.
- Apply thin coats: Start with a light coat of paint over the repaired area. Let it dry completely before adding another layer. This prevents streaks and ensures even coverage.
Common Mistakes to Avoid in Drywall Repair

Even with the best intentions, mistakes can happen during drywall repair. Knowing what to avoid can save you time and effort while ensuring a smooth finish. How to fix drywall yourself and avoid mistakes? Let’s look at some common pitfalls and how you can avoid them.
Using the Wrong Tools or Materials
Using the wrong tools or materials can make your drywall repair harder than it needs to be. For example, filling a large hole with spackle instead of a proper drywall patch will lead to a weak and uneven fix.
Similarly, using a dull utility knife or the wrong sandpaper can result in messy results. Always choose tools and materials that match the size of the hole. Having the right supplies ensures your repair is strong and blends seamlessly with the wall.
Skipping Essential Steps
Skipping steps might seem like a time-saver, but often leads to poor results. For instance, skipping sanding can leave the surface bumpy, making the repair noticeable. It means sanding the drywall is an essential step. Forgetting to clean the area before applying joint compound can cause it to peel or crack later.
Take your time and follow each step carefully. Clean the area, apply the compound evenly, and sand it smooth. These small efforts make a big difference in the final look of your wall.
Rushing the Drying Process
Patience is key when repairing drywall. Rushing the drying process can ruin your hard work. If you paint over wet joint compound, it won’t adhere properly and may crack or bubble. Similarly, sanding too soon can pull up the compound, forcing you to start over.
Always let the compound dry completely before moving to the next step. Most products dry within a few hours, but waiting overnight is even better. Check the instructions on your materials for the recommended drying time.
Conclusion
In conclusion, how to repair drywall is not difficult at all. With our guide, you have learned how to do it step by step. I hope now you can tackle any damage with confidence. If you are a beginner, you can also achieve a perfect finish. Don’t forget that every mistake is a way of learning. Each repair you complete will boost your skills and make future projects easier.
So, don’t hesitate—grab your tools and try it. Whether it’s a small hole or a larger repair, you’ve got this!
FAQ
How to fix a small hole in drywall easily?
Small holes are simple to fill and fix. You only need spackle and a putty knife. Smooth the spackle after applying, and after drying, you can paint it, and that’s all!
How much time does a drywall compound need to dry completely?
A typical drywall compound will be dry in 2 to 4 hours, but it is recommended to wait overnight to ensure it is dry. The drying interval also depends on the type of material you use.
Are special tools essential for repairing drywall?
Yes, there is no need for special tools, but some basic tools are necessary to get a perfect finish. You will need spackle, a putty knife, and sandpaper. You can easily find these essentials in your local hardware shop.
How to match paint with the other parts of the wall after repairing drywall?
You can visit your local store for a perfect match. Don’t forget to take a sample of paint with you for a colour match. You can also use the leftover paint if you have.
Why does my drywall patch look uneven?
Uneven patches usually happen when you skip sanding or apply too much compound. Sand the area gently and add thin layers of compound if needed. Take your time to achieve a smooth surface.


