
Starting spray painting may seem a little hard at first, but with the right approach, anyone can do it. If you are new, it is normal to feel unsure, but learning a few simple techniques makes the process much easier. Spray painting helps you cover surfaces quickly and gives a smooth, even finish that looks professional. The key is knowing how to hold the paint sprayer, choosing the right paint, and practicing on small projects first. With these steps and tricks, you will avoid common mistakes, save time, and gain confidence. Soon, you can enjoy spray painting with better, cleaner results every time.
Spray Painting Prep for Beginners
Getting ready is the most important step for any spray painting project. With the right setup, tools, and safety gear, you can enjoy smooth results and fewer mistakes. Whether you’re trying spray painting ideas, working on spray painting walls, or doing spray painting at home, good prep makes the job easier.
Set Up Your Workspace
Before you start spraying, make sure your workspace is safe and ready. A clean and open space helps you avoid problems while painting.
- Choose a spot with good airflow. Outdoors is best, but you can also use a garage with the door open.
- Cover your surroundings with old sheets or plastic to protect from paint mist.
- If working indoors, open windows and use a fan for fresh air.
Good airflow keeps you safe and helps paint dry faster. This step is key if you want to learn how to spray paint without streaks or how to spray paint evenly.
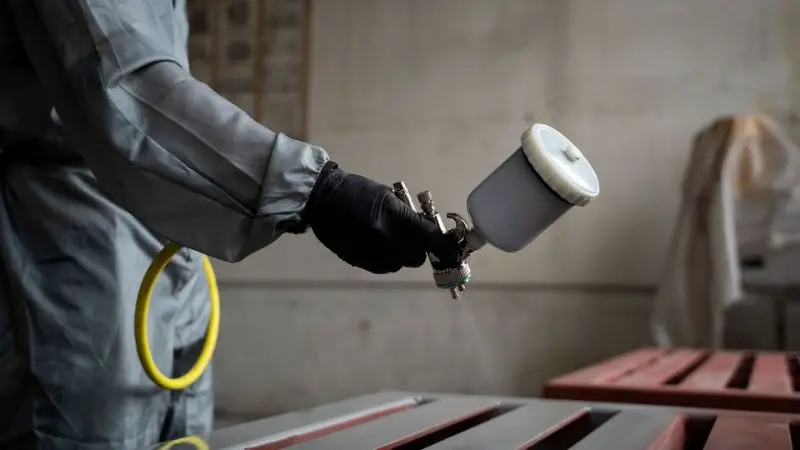
Wear Your Safety Gear
Safety should always come first, even for small projects or DIY tricks. Spray paint contains fumes and mist that you don’t want to breathe in or get on your skin.
Here’s what you need:
- A proper mask that blocks fumes (not just dust).
- Goggles to protect your eyes.
- Gloves to keep paint off your hands.
- Old clothes that you don’t mind getting stained.
Safety gear is not just for pros. Whether you’re trying new spray painting ideas or doing a quick home fix, always stay protected.
Get Your Supplies Ready
Having all your supplies in one place saves time and keeps your project running smoothly. Preparing well also helps you achieve an even and clean look.
Here’s a checklist for beginners:
- Spray paint cans (pick the right color and finish for your project).
- Primer (use it if your surface needs extra grip).
- Mask, goggles, and gloves.
- Drop cloths or plastic sheets to protect your area.
- Sandpaper for smoothing rough spots.
- Painter’s tape for sharp and neat edges.
When everything is ready, you can focus on spray painting at home without stopping in between. Good prep leads to fewer mistakes and better results.
Spray Paint Tips: Materials and Primer
For a smooth and long-lasting finish, the materials you choose are just as important as your painting skills. Picking the right paint, paint sprayer, using primer, and doing test sprays all help you avoid mistakes. These steps also make it easier to get a professional look, even if you are trying spray painting at home for the first time.
Choosing the Right Spray Paint
The paint you choose depends on the surface you are working with. Each material needs the right type of paint to stick well and last longer.
- Metal needs paint that protects against rust.
- Wood works well with paints that highlight natural texture or give solid coverage.
- Plastic requires special paint that bonds to smooth surfaces.
Always read the label on the spray can. It tells you which surfaces the paint works on, whether it dries fast, and what type of finish you’ll get (glossy, matte, or satin). Think about where your project will go. Outdoor pieces need paint that can handle sun, rain, and rough weather.
Shake the can well before spraying. This mixes the paint and helps you get an even layer without clumps. If you’re unsure, ask the staff at the store for help. They can give you beginner-friendly spray painting tips to match your project style.
Why You Should Use Primer
Primer is the secret to strong, smooth, and even color. Without primer, paint may chip, peel, or fade quickly. It also helps colors look brighter. For anyone learning how to spray paint evenly, primer is a must.
Here’s a quick guide:
- Metal → Always use primer. It blocks rust and helps paint stick.
- Plastic → Needs a special plastic primer to bond well.
- Wood → Often needs primer if it’s bare or stained.
- Already painted surfaces → Sand lightly first, then apply primer.
When spraying primer, apply thin and even coats instead of heavy layers. Let each coat dry before adding the next. A good primer base makes your paint job last longer and gives a professional finish for all kinds of spray painting ideas.
Do Test Sprays Before Painting
Before working on your main project, always test your spray paint. This simple step saves you from streaks, clogs, or uneven results.
- Use scrap wood, cardboard, or an old piece of metal to practice.
- Spray a little paint to check the color and flow.
- Practice smooth hand movements by spraying in steady lines.
Testing helps you see if the nozzle is working right. If it clogs or drips, shake the can again or clean the nozzle. Doing test sprays builds your confidence and helps you master how to spray paint without streaks. With practice, your projects will start looking clean, polished, and professional every time.
Tricks for Smooth Application
Even the application is what makes your project look professional. Beginners often worry about drips, streaks, or patchy colors, but with the right tricks, you can fix those issues. Whether you’re trying spray painting at home or exploring creative spray painting ideas, smooth spraying comes down to shaking, pressure, distance, and movement.
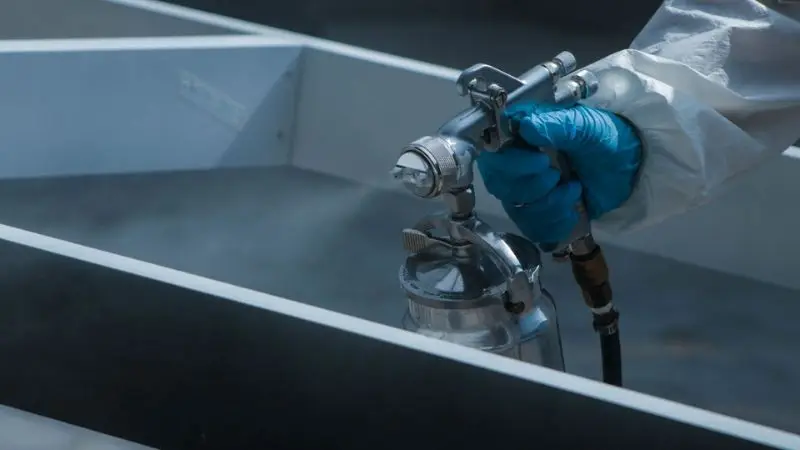
Shake and Control Pressure
Shaking the can properly is the first step to spraying paint evenly. Always shake for at least a full minute until you hear the mixing ball rattle. This blends the paint and prevents clogs that cause uneven patches. If you skip this, your color might spray out weak or blotchy.
When spraying, press the nozzle with steady pressure. Don’t push too hard or too soft. Gentle, even pressure helps you build up color slowly without making a mess. You can spray light layers instead of one heavy coat. This keeps drips away and gives your project a polished look. Take short breaks if your hand gets tired, and give the can another shake to keep the paint mixed.
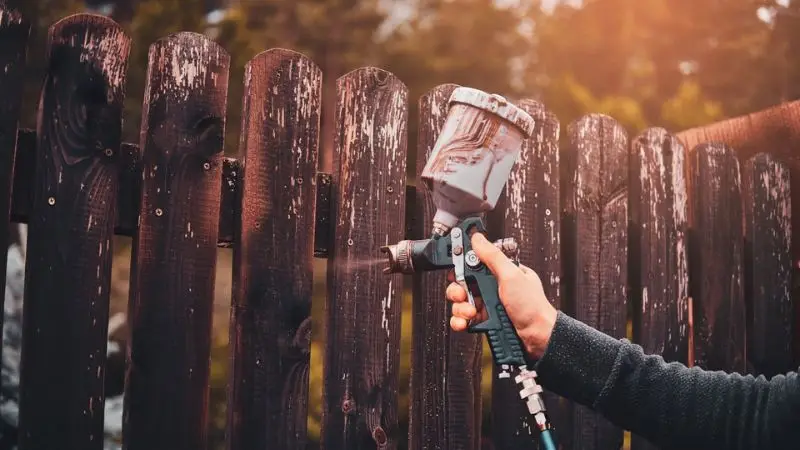
Keep the Right Distance and Angle
Distance plays a big role in smooth results. Hold the paint sprayer about 12 inches (30 cm) away from your surface. If you spray too close, the paint will run and leave messy drips. If you hold it too far, the paint might dry mid-air and land as dust, leaving a rough texture.
Always keep the can or spray gun pointed straight at the surface. Avoid spraying at an angle, because that leads to uneven coverage. Move your entire arm while spraying, not just your wrist, to keep a steady angle. These steps are key if you want to master how to spray paint without streaks and achieve a smooth, even coat.
Use Overlap and Steady Movement
Movement is another secret to a pro finish. Spray in a steady back-and-forth motion. Start spraying just before your project’s edge and stop only after you’ve passed the other side. This avoids thick spots at the start and end.
Overlap each pass by about 50%. That means your next line of spray should cover half of the previous one. Overlapping makes sure you don’t leave stripes or missed areas. Keep your pace steady—not too fast and not too slow. Going too slow causes drips, while going too fast makes the color look thin. Practicing on scrap material helps you find the perfect speed.
With these spray painting tips, you’ll see that smooth spraying isn’t difficult. Just stay steady, overlap well, and use light layers. Soon, your projects will look like they were done by a pro.
Drying and Recoat Tips
Drying and recoating are just as important as spraying itself. Many beginners rush this part, but patience makes all the difference. If you want your projects to look clean and professional, follow these simple steps. Whether you are doing spray painting at home or testing new spray painting ideas, proper drying and recoating help you get smooth, lasting results.
Allow the Right Drying Time
Drying time can vary depending on the paint and your environment. Some paints dry in as little as 15 minutes, while others need an hour or more. Always read the label on your spray can for exact instructions. Temperature and humidity also play a role. In hot, dry weather, paint cures faster. In damp or cold weather, it takes longer.
If you touch the surface too early, you risk smudges or fingerprints. That can ruin an otherwise smooth coat. To avoid rushing, set a timer on your phone. Waiting a little longer ensures that each layer is solid and ready for the next step in your spray painting at home project.
Apply Thin, Even Coats
In spraying, less is more. Spray multiple thin coats instead of a single coat. Paint a base with a light color and let it dry, then paint another one. This makes sure you have no drips, thick spots, or uneven finishes. Two to three coats are sufficient to cover most projects.
Keep your hand stable and make painless back-and-forth movements. Pass each one over, about half its length, to make the color even. This one is a trick to learn how to roll a coated spray paint. The accumulation of the thin coat will provide a professional finish that appears well-polished and will last.
Sand Between Coats for Smoothness
Sanding between coats is an extra step, but it makes a big difference in your final result. Use fine-grit sandpaper (around 400-grit) to lightly smooth the surface. This removes small bumps, dust, or rough spots. Always wipe away the sanding dust before spraying again.
Gentle sanding helps the next coat stick better and gives your project a flawless finish. Don’t press too hard—light pressure is enough. Skipping this step can leave your project looking uneven. If you want to master how to spray paint without streaks, sanding is a helpful technique to include in your process.
Final Touches and Clean-Up Tricks
The last steps are just as important as spraying. Taking time to check your work, clean your tools, and store your supplies properly helps you keep everything ready for the future. Whether you are doing spray painting at home or testing new spray painting ideas, these finishing touches ensure your project looks professional and your supplies last longer.
Inspect Your Work and Fix Mistakes
After your final coat dries, take a close look at your project. Good lighting makes it easier to spot drips, streaks, or small bubbles. Don’t panic if you notice flaws—most are easy to fix. Lightly sand rough spots with fine sandpaper, then wipe off the dust. Spray a quick touch-up coat where needed.
These simple fixes make your project look smooth and even. Careful inspection also teaches you how to notice problem areas faster next time. If you want to master how to spray paint without streaks, checking and correcting your work is an important step.
Keep the Nozzle Clean
A clean nozzle is the key to smooth spraying. When you’re done, turn the can upside down and spray until only clear gas comes out. This clears leftover paint from the nozzle and prevents clogs. If the nozzle feels sticky, remove it and soak it in warm water for a few minutes. Dry it well before putting it back.
Clean nozzles give you an even spray the next time you paint. This simple habit makes it easier to achieve how to spray paint evenly and saves you from wasting paint or replacing cans too early.
Store Your Spray Paint Safely
When your spray paint is properly stored, it will last a long time. Cans should always be kept in a cool place, not directly in the sunlight or a source of heat. Screen the cap back to ensure that the nozzle is clean. To use the paint again, label the can with a marker and date it with the color.
It becomes easy to grab the correct can for your next project. Your workspace is also tidy with safe storage. These habits will ensure your spray painting at home is always a smooth project, with ready-to-go supplies.
Wrap Up
Spray painting can be fun and rewarding when you follow the right steps. With good prep, safe gear, and the right paint, your projects can look clean and professional. Remember to spray light coats, keep steady movement, and allow proper drying time. Always check your work, clean the nozzle, and store your supplies well. These simple habits make a big difference for anyone doing spray painting at home. Whether you want new décor, smooth spray painting walls, or creative spray painting ideas, knowing how to spray paint evenly and how to spray paint without streaks gives perfect results.
FAQ
What can I do to prevent drip spray paint?
Hold the can 12 inches away. Move your arm at a steady pace. Spray light coats. Allow one coat to dry, then apply another. Drips are what result when you overspray. Train at first on cardboard!
Can I spray paint indoors?
You can, but open up the windows and the fan. Always wear a mask. Cover everything nearby. You get airflow, and this is good and helps the paint to dry quickly.
So, what will I do against the clogging noise of the nozzle?
Remove the nozzle. Soak it in warm water. Dry it well. Put it back on the can. Shake inverted to remove traces of paint.


